Reign of Chaos
Authors: Agnes Website Oliver Mausch (Karlo 002) Nadine L. (Horus) Website Christoph Summerer ([christoph]) Website
Download: Here 235 MB,Full: Here 363 MB
Walkthrough:
1.Airport:
 Secret 1:
CS = Crawlspace - MS = Monkey Swing - L = Left - R = Right - N, S, E,
W = Cardinal Points - UW = Underwater
SJ = Standing Jump - SJ+G = Standing Jump + Grab - RJ = Running Jump - RJ+G
= Running Jump + Grab
-- General Notes --
* Items in Bold are necessary to complete the levels or get the secrets,
either by using them, picking them up or both.
* You'll find a summary at the end of each part when needed.
Although it may look so, you can't choose the order in which you'll play the chapters of the adventure. All the doors barring the way to the other destinations will remain closed no matter what. The order is as follows: Mexico, Venice, China, Córdoba and Alnwick.
You'll be back at the airport each time you'll change chapter. Don't take the place for granted, though. Like real places do, it will change at each visit so make sure to explore it again.
== Take 1: to Mexico ==
Map of the Airport on the way to Mexico 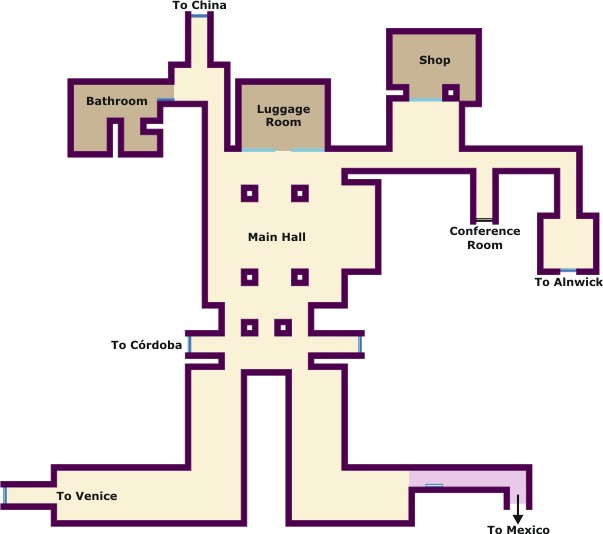
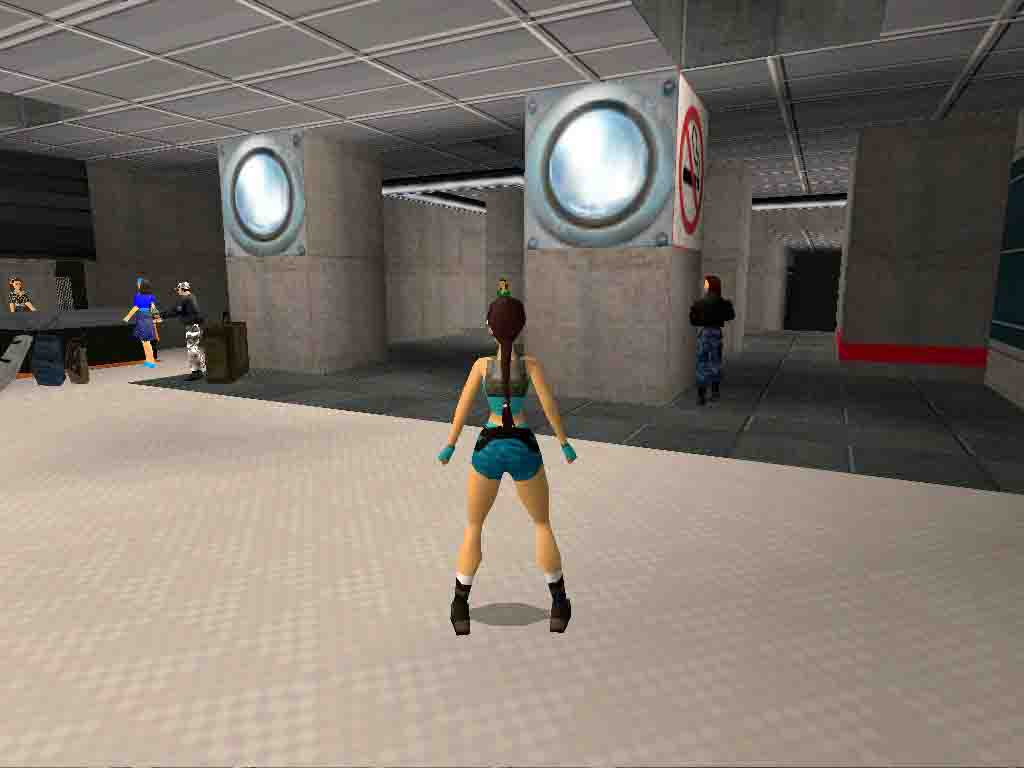
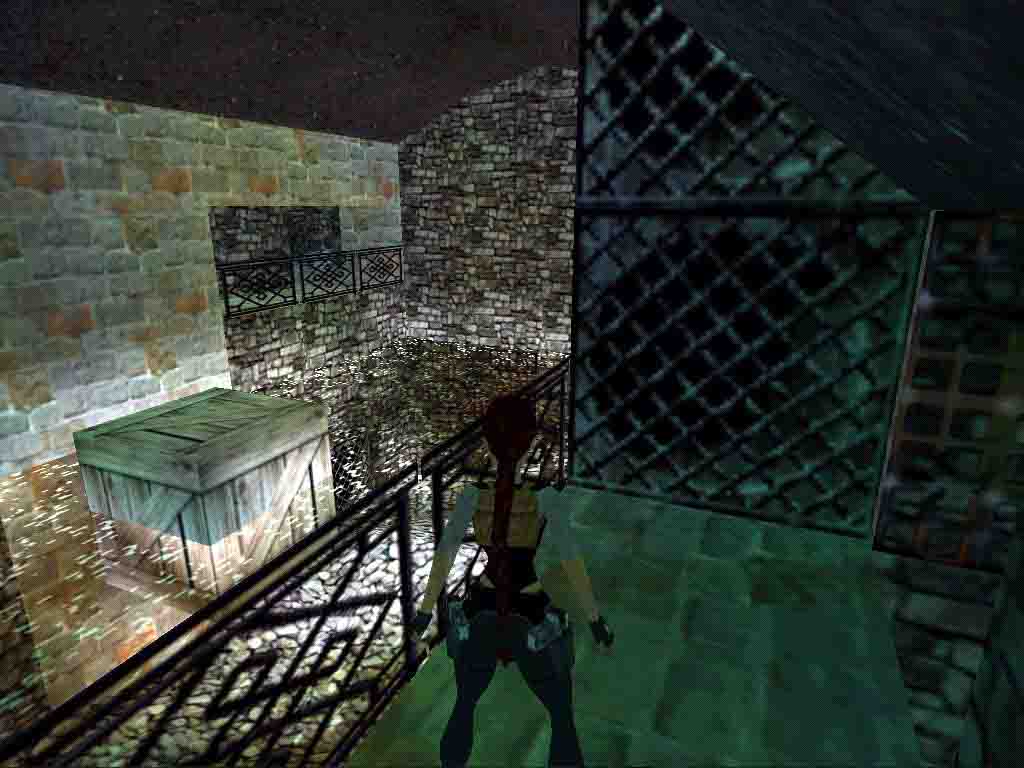
So you're at the airport, ready to get aboard. But don't rush. There is more to this place that meets the eye. Including goodies and... secretive goodies.
Turn L (N) and run into the Luggage Room. Go L (W) at the fire extinguisher sign, shoot the low grey crate that's on your way, climb on the blue one ahead, crawl a bit, drop down and pick up the small medipack.
Return to the Main Hall. You're now heading for the very first secret of the adventure. It's located in the Shop, but you can't get there yet since a window is barring the way.
Turn R (W) upon exiting the Luggage Room, R (N) following the "China" sign, then L (W). The Bathroom is ahead. Run to the door which opens as you approach and enter. Go into the dark recess on your L (S). The bathroom sink here is shatterable (as are all others, but you don't really need to break all the furniture's, so leave them alone). Shoot it then go where it was and turn to the wall. Look up, using the binoculars if needed to spot a high CS. Climb in it.
Crawl then run ahead. Turn L (N) at the junction then R (E) at the next one. Drop down the hole at the end. You're in the Shop. Collect the goodies on the wooden counter: shotgun normal ammo, shotgun wideshot ammo, revolver ammo, a small medipack and flares. Now go pick up the Golden Rose in the center of the room which is indeed Secret #1. Return to the Bathroom the way you came, then to the Main Hall.
Nothing more to do here, so time to take off. Run diagonally L (SE) across the Main Hall to locate the "Mexico" sign. Climb down the stairs and simply follow the signs leading you to a corridor with an open blue door. Run into it to be transported to Mexico.
==== In this part, you should have found...
1 Secret
== Take 2: to Venice ==
Map of the Airport on the way to Venice 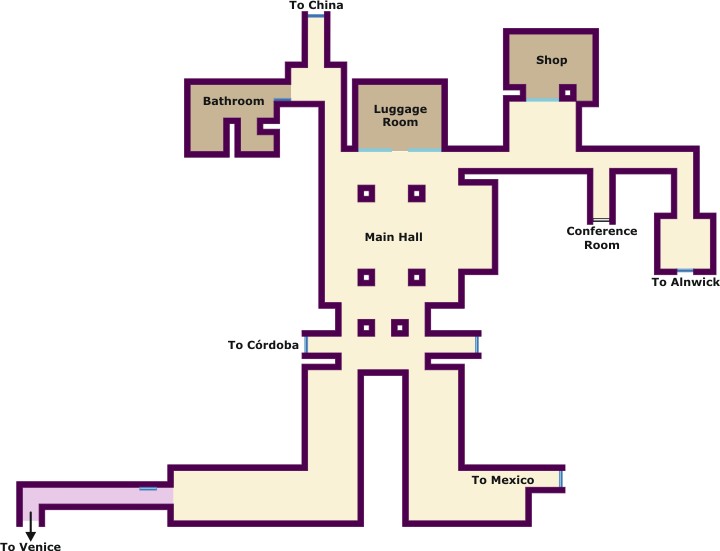
It will be a short stay in the airport this time. Simply go to the Luggage Room, turn L at the fire extinguisher sign and climb on the blue block. Crawl and drop down to pick up a large medipack.
Return to the Main Hall and run across it diagonally to the R (SW). Follow the "Venice" signs until you reach a corridor. Run across it. Off to Venice now.
== Take 3: to China ==
Map of the Airport on the way to China 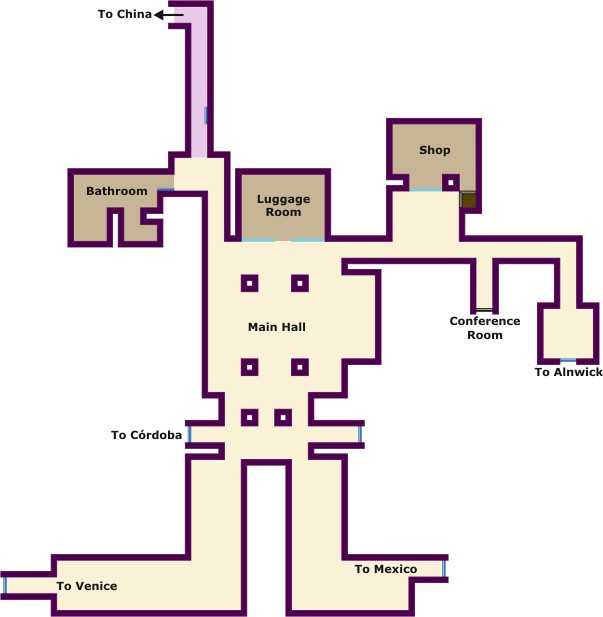
This time you're going to stay a bit longer than the previous one, but not that much, though.
A little something is waiting for you at the Shop, but you won't get there like you did the first time. Cross the Main Hall diagonally to the L (NE) and run past the Luggage Room. The Shop is there to your L, but that window still prevents you from entering it. Something has changed, though: the desk in the corner has been moved, revealing a low grate that's perfectly shatterable.
Shoot it, enter the CS and shoot another grate to your L. You can now access the Shop. Enter then run L to the donuts poster. A small medipack is there on the floor. Pick it up and return to the Main Hall via the CS.
Run ahead (W) past the Luggage Room then into the corridor to your R (N). Follow the "China" sign to the next corridor and take off for China.
== Take 4: to Córdoba ==
Map of the Airport on the way to Córdoba 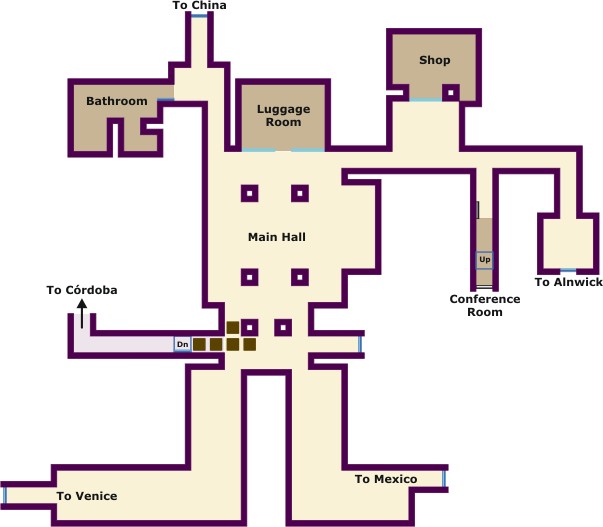
Okay. This is a bit different. Looks like you're locked in the Bathroom. To escape this predicament, shoot the leftmost bathroom sink in the NW corner to open the door and grant you access to the Airport.
Go to the Main Hall then the Luggage Room. Go over the wooden counter to your L to pick up some revolver ammo hidden behind on the floor.
Now you've got another problem: apparently, the staff of the Airport has decided you won't go to Córdoba and has left lots of luggage at the entrance of the corridor, preventing you from accessing it. But you're Lara Croft and you won't be stopped by some petty suitcases, are you?
From the Main Hall, run to the corridor in the NE corner past the Luggage Room then the Shop into the next corridor. Go R (S) at the junction: the door after the "Conference Room" sign ("Konferenzraum") is now opened and you can enter a dark corridor beyond. Light a flare or use the binocs and look up. There's a passage up there to your R. It seems a bit high, but the wall is climbable, so climb and pull up in it.
Follow the air shaft past the first junction (you'll go there in a minute, but you've got some errand to do first). Turn R at the end and pick up the large medipack in the middle of the passage. Return to the main corridor and turn at the junction (now on your L). Follow the passage to the end. The grate ahead is shatterable so shoot it, crawl in the CS and drop down in the corridor to Córdoba, in the good side of the luggage. Follow the corridor and fly to Spain.
== Take 5: to Alnwick ==
Map of the Airport on the way to Alnwick 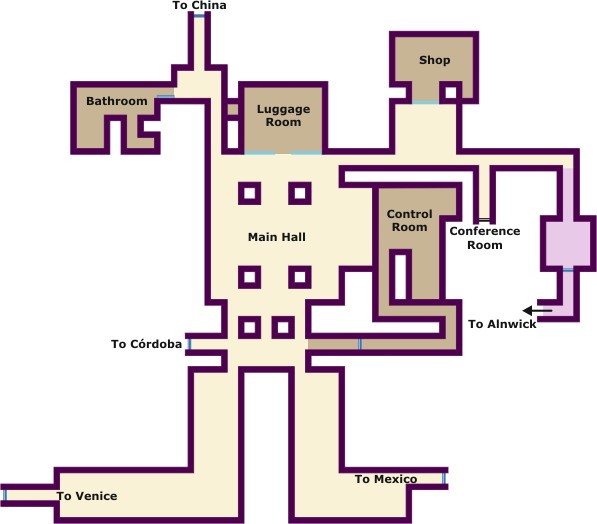
Now the Airport is closed for the night, and you're alone in there. Before leaving for your last destination, you have an important thing to collect. You've only found four Chaos Gems so far, and you need a fifth to accomplish your goal. Luckily, it happens to be somewhere around.
Since you're now in the Luggage Room and people have left things there as usual, pick up the flares and the large medipack on the wooden counter to your R (N). You'll probably notice a jumpswitch through a gap in the wall while doing so. That's your next goal.
Go to the Bathroom (you should know the way by now) and into the dark recess. The bathroom sink is now on the other wall so you don't even need to shoot it. Turn to the L wall and pull up into the passage above.
First, run to the end past the first junction and turn R at the second. There's a small medipack on a grate at the end. Turn around then L (W) at the junction to return to the previous corridor. Go R (N) at the one just before the CS whence you came. The jumpswitch is accessible from here. Stand on the edge of the hole facing the jumpswitch and do a SJ with Action pressed to grab it, opening a door elsewhere in the Airport. Turn around and climb back up in the high passage. Return to the Main Hall via the Bathroom.
Run across the Hall diagonally to the L (SE) as you did when you went to Mexico, but stop just before the first "Mexico" sign and turn into the corridor to your L (E). The door there is now open. Run through the corridor and down the stairs to enter what looks like an abandoned Control Room. Go R around the wall and go shoot the low grey crate in the far R corner (SW) to pick up the Orange Chaos Gem it contained. The door to Alnwick is now open.
Return to the Main Hall and go R (E) at the Luggage Room. Pass the shop and enter the next corridor. Turn R (S) at the junction to pick up some revolver ammo before the Conference Room door (which is now closed again), return to the previous corridor going R (E) to eventually enter a square room. The door you just opened is just ahead. Pass through the doorway and head for Alnwick.
==== In this part, you should have found...
Items of note: The Orange Chaos Gem
Authorized walkthrough by Sutekh
Chapter 1: Mexico
== Part 1: Mexico ==
Story:
After being victorious in the fight against Natla in Atlantis in 1996, Lara went back to England and startet her daily work. For a long time everything appeared peaceful and quiet. But what Lara couldn't know was that Natlas dark followers gathered and carried her leader's dead remnants to a secret hideout in the middle of nowhere to help her regain a new, destructive life. The same time Natla's thugs hid five mysterious gems in Mexico, Spain, China, Italy. Those powerful artifacts absorb any life in their direct environment and leave behind darkness, pain and emptiness. By every life they suck up, Natla's power grows and grows. Alarmed by news and newspapers, reporting about mysterious conditions all over the world, especially in those five areas, Lara grabs her backpack and sets off to find the five gems, free the countries and to eliminate Natla before she becomes too powerful again...


Secret 2-3: 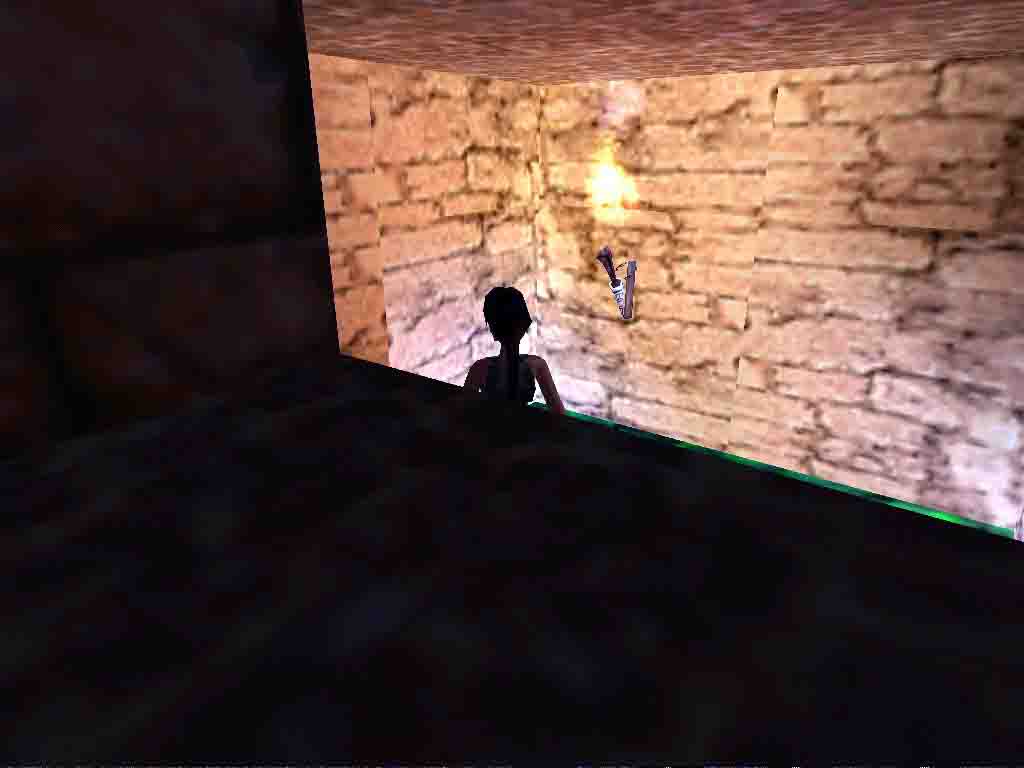
CS = Crawlspace - MS = Monkey Swing - L = Left - R = Right
- N, S, E, W = Cardinal Points - UW = Underwater
SJ = Standing Jump - SJ+G = Standing Jump + Grab - RJ = Running Jump - RJ+G
= Running Jump + Grab
-- General Notes --
* Items in bold and blue are necessary to complete the levels or get the
secrets, either by using them, picking them up or both.
* You'll find a Combat Strategies Section at the end of this walkthrough as
well as a summary at the end of each level.
== Part 1: Mexico ==
First, watch the opening sequence with attention. It shows you some interesting things including some white vases on the roofs. Try to remember their locations.
Once Upon a Time in Mexico
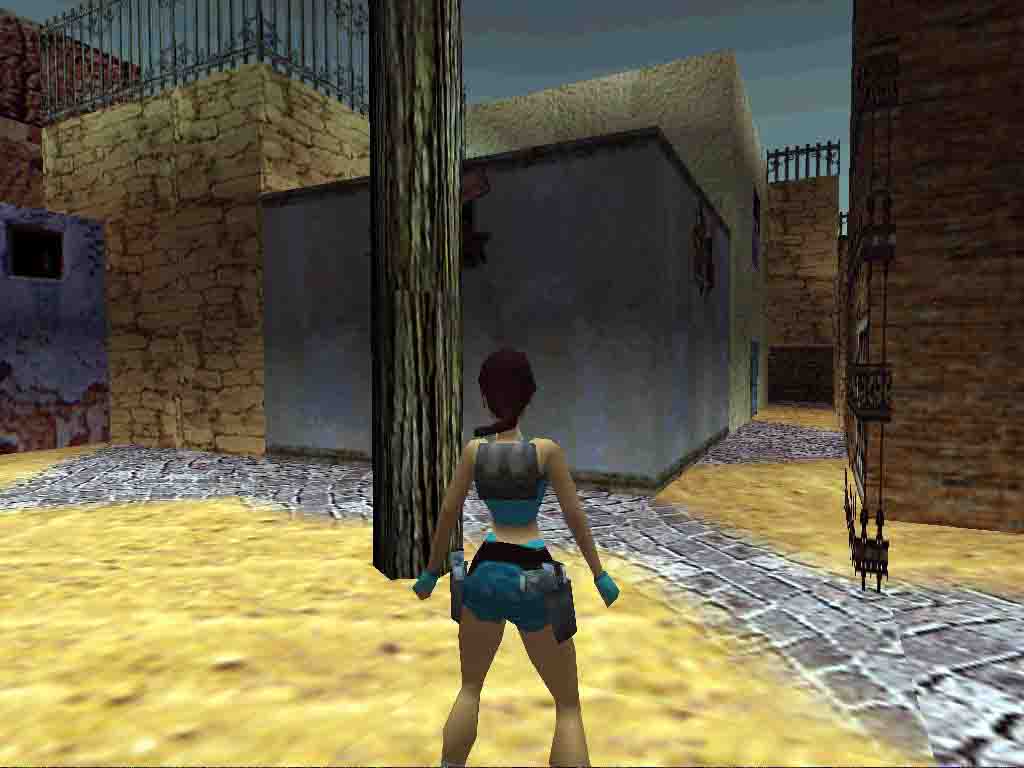
What a charming place, isn't it? Something bad has happened here indeed, as you can guess by the numerous skeletal remains scattered around and the blood writings on the walls. No time to waste, you've got work.
Start by drawing your pistols and run ahead a bit. Very soon, 2 black scorpions will come to sting you from the L alley. Take them down.
Ignore the alleys on the sides for now. You'll only find a closed door in the L one (N) and the house in the R one (S) contains a nasty surprise so wait until you get a better weapon to get rid of it properly.
Notice the wooden door to your R after the alley. You don't need a key to open it, so go to it and hit Action. Enter the house, go L and locate an empty rusty barrel in a recess to your L. It's shatterable. Shoot it and pick up the shotgun normal ammo it contained. Leave the house.
Go R (E) and run to the Plaza, again drawing your pistols on your way. You'll be greeted there by a skeletal harpy. Take advantage of all that room you have to move and jump to dispatch it without too much damage, but be careful not to fall in the central pool or you'd lose said advantage.
Once it's down, locate the mutilated corpse near the pool to the E. Drag it aside (hit Action while standing near his head) and pick up the small medipack it was hiding. Look R (E). That gate ahead is the very one you need to open the access to the other part of the town. Now the real thing begins.
-- Finding The Sniper Handy Tools --
Objective: Find a way to break all the vases needed to open a gate blocking the access to the other part of the town.
Important: Make sure you shoot the vase in the Zombies Den or you're in for one helluva backtracking.
Well it's One for the Revolver...
Turn around (S) and look for a decorated tile on the ground near the S house. Now, see that statue near the pool? It's movable and needs to be placed on the decorated tile. Push/pull it there to open a door in a nearby alley, said nearby alley being the one whence the two black scorpions came. But before going there, draw your pistols to kill one more black scorpion that attacks you as soon as you've put the statue where it belonged.
Return to the starting point (W) and go into the R (N) alley. The newly opened door is there to your R (E). Enter the short passage beyond. There's a floor trapdoor there. Open it by standing near its handle and hitting Action. Turn around, drop down in the hole and climb down the ladder there to eventually reach Mexico Sewers.
Turn around, draw your pistols and run ahead (E). Soon 2 bats will come flying at you. Take them down but don't sheath yet, there are other bats waiting in ambush ahead. Advance cautiously, turning L (W) at the junction.
Look through the grate. The Revolver is teasing you from the other side, as unreachable as possible. Now that you've seen it, turn R (E) and run toward the other end (again, mind the bats).
Stop after the skeletal remains where the floor is slightly raised, kill another bat, turn L (N), and use your binoculars to locate a ladder on the wall. Climb up, pull up in the room above and immediately backflip and draw your pistols to take down 2 bats. Run ahead in the room (mind the hole you came from), kill 2 other bats and spot the white vase in a recess to your L. Shoot it if a stray bullet hasn't done so already. You'll get a camera shot of the gate, but it's still very closed.
By the way, and in case you haven't noticed, you've got company in the form of 3 zombies. Since you have absolutely no way to get rid of them, better hurry now. And first, a short detour for a secret.
Go to the center of the room and turn R (E). Run to the wall ahead and pull up in the CS located R of the metal bars. Crawl through it and drop down in the next room which is Secret #2. Pick up the large medipack and return to the previous room.
Go to the hole you came from and wait a bit to lure the zombies there. Once they're close enough, return to the center of the room and locate the jumpswitch in a recess ahead and to your L. Go grab it to raise a block in the nearby room.
Turn L (E) once out of the recess and run to the corner ahead. Pass through the opening to your L (N), turn L (W) and go climb on the block in the corner to pick up some uzi ammo. Turn around. The newly raised block is ahead and to your L. Climb on it and walk to the other edge. The zombies can climb on the block, so don't think you're safe there. Jump up and grab the edge of a slope above. Now, they can't reach you.
Since you're not going to spend the rest of your life hanging, pull up, backflip, roll in mid-air and hit Action to grab the climbable side of a flat block. Walk to the "edge" (in fact there's a slope beyond, so watch your step) and do a SJ to the ledge above. Run ahead into the passage.
There's a ladder in the hole there, and you're in fact in for an interesting ladders maze. Which is why we'll go step by step (or rather ladder by ladder) now.
- Drop down in the hole and grab the ladder. There are spikes at the bottom of the shaft so don't climb down all the way. Stop midway instead and backflip into an opening behind. Turn around.
- Now you've got a hole ahead (S) and another to your R (W). Go there first and climb down the ladder to pick up a small medipack at the bottom. Climb back up.
- Go to the S hole now to your R. The ladder of interest is on the wall to your R so walk to the edge. Turn to face the ladder, step back to the wall, turn slightly L and do a SJ hitting Action to grab it (alternatively, you can drop down from the wall, climb down the ladder a bit then shimmy L to the other one). Nothing down there so climb up and pull up at the top.
- Ignore the first hole which leads to a dead end. Drop down in it and shimmy around the corner to pull up. Drop down in the next hole. Now comes the really interesting part.
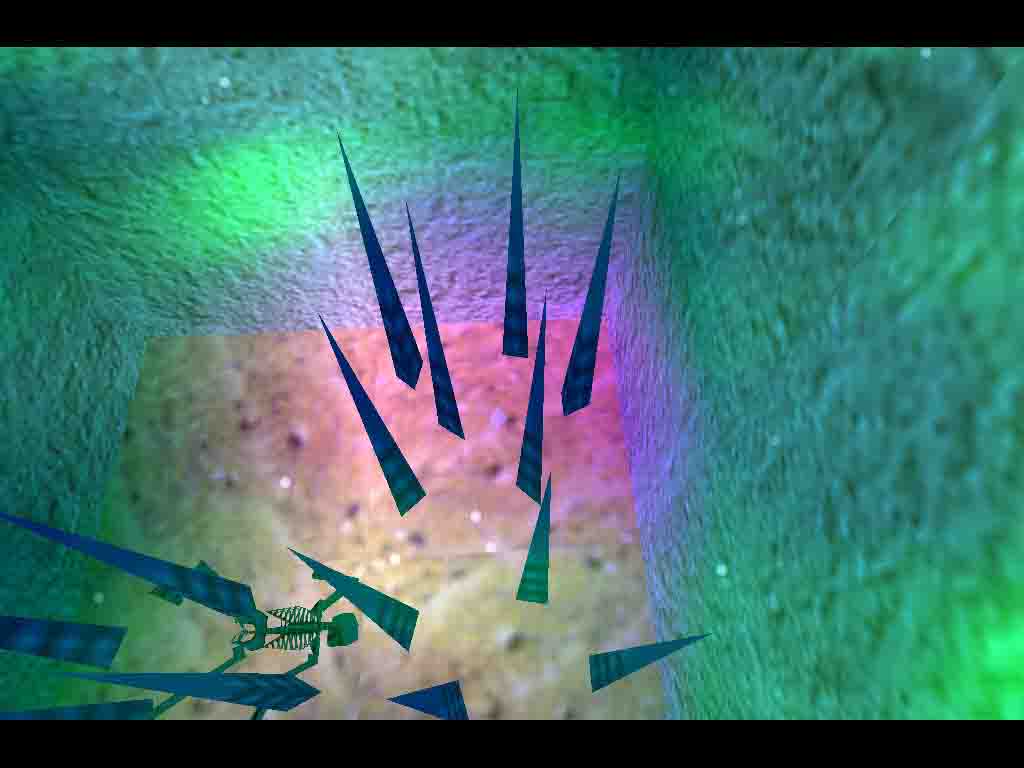
- Climb down the ladder. You'll notice spikes at the bottom and an opening to your L at mid-height. Ignore this one for now. Make sure Lara's at full health and save. Go as R as possible and climb down as much as you can. You'll start losing health as soon as you touch the spikes. Backflip.
Turn around. Ahead of you in all its shiny glory lies the Revolver. Go pick it up. There's also a large medipack in a hole near the E wall. Pick it up as well and take some medicine: you're going to go through those spikes again.
Go to face the ladder you jumped from, going as close to the spikes as you can without touching them (and losing health). Do a SJ+G to the ladder and quickly climb up to clear the spikes. Once you're safe, shimmy L to the other ladder, climb up and pull up into the opening.
Drop down in the next hole and again climb down the ladder. Turn R (S) and go push the lever at the end of the passage to open a trapdoor above you. Turn around, jump up to grab a last ladder and climb up to the top. Backflip and draw your pistols as a bat comes to annoy you. You're out of the sewers.
... Two for the Laser-Sight...
Turn toward the Plaza (S) and locate the recess to your L. There's a white vase to shoot there, so proceed. This said, this part of the alley happens to be the territory of a particularly stubborn fire spirit. Rush for the pool in the Plaza and dive to get rid of it (only temporarily, as it will appear each time you walk down the alley where you shot the vase, so avoid it for now).
While in the pool, you'll notice another white vase. But you can't shoot this one yet. You need the Laser-Sight. Let's go for it, but first a small detour for some goodies and meet a new enemy.
Exit the pool from its northern side and go pick up the revolver ammo in a dark recess ahead. Now that you've got a decent weapon (and ammo), return toward the starting point (W) and go in the L alley (S). The blue door there doesn't need a key. Go to it and hit Action to open it. Enter the house.
Locate the flares on the stove to your L. Go toward them but don't go on the stove yet. Stand by its R side (the N one) and turn R (N). Draw your revolver and backflip on the stove. Immediately, a giant fly will attack so quickly take it down with two bullets. Now pick up those flares. (Important: as fun as it is to kill flies with a revolver, try using as less ammo as possible when doing so, you need them to shoot those vases. Would you run out of ammo before having opened the gate, you'd be stuck and have to reload. No more than two bullets per fly, and try using the pistols if you got room enough to move and jump).
OK. Let's head for this Laser-Sight now. Return to the Plaza, go L (N) into Fire Spirit Alley but don't run to its end or you'll meet that pesky spirit again. Turn L (W) at the junction instead then R (N) at the next. Continue ahead to the end and turn L (W) to enter a small backyard.
Draw your revolver to take down a giant fly that comes buzzing as soon as you step in then locate the blue door to your L. Open it using Action, light a flare and enter the house.
Guess what? It's occupied. By a zombie. Who's probably climbing up the stairs and coming at you right now. Jump over him and run down the stairs into the basement. Draw your pistols to take down 3 bats then locate a movable crate against the middle of the wall L of the entrance (S). Pull it once, climb on the crate to its R then down behind the movable one to pick up the Laser-Sight.
Return to the basement and push the movable crate back where it were. Turn L (E). There's another movable crate ahead. Pull it twice (hopefully, the zombie should be back in the stairway) , go where it were and climb on the R crate to pick up a small medipack. Now leave the house.
... Three to Shoot Vases, now Go, Cat, Go!
You've already shot two vases, and you need a total of five to open that gate which makes three left. Let's locate them.
Leave the backyard and go R (S - by the way, don't dally or the zombie will follow you). Run ahead while looking up. You'll soon locate the third vase on a roof. Combine your Laser-Sight with your Revolver, aim at the vase (hit "Look") and shoot.
Return to the Plaza, run L (E) past the pool, turn around (W) and look down in the water. The fourth vase is there. Again aim and shoot.
Now turn around, run a bit ahead, turn L (N) and look up. The fifth and last vase is up there on a roof. Aim and shoot for the last time. The nearby gate opens.
One last thing before passing through it. Locate the blue door to its R and go open it by using Action. Enter the house and pick up some flares behind a table to your R. Now go pass through that gate.
-- The Violet Chaos Gem --
Objective: Find a way to the gem and set off the spikes protecting it.
Opening the Way
First, run all the way to the end of the alley. There's a dark passage to the L (N). Draw your pistols as you step in it to dispatch 2 black scorpions. Shoot the rusty barrel at the end and pick up the small medipack it was hiding.
Return to the alley and go L (S) at the junction. There's a blue door to your L. Use Action to open it. Enter the house and climb while crouching on the block L of the entrance (SW) to pick up some shotgun normal ammo. Get down and turn around.
There's a hole in the ceiling ahead, but it looks too high. Go under it, turn around toward the entrance and look up. The side up there is climbable. So position Lara right under it, jump up, grab and pull up on the roof above. There's a small courtyard accessible from there to your R (E), but let's first go for a secret.
Walk to the far L corner of the roof (NW) and turn 45° L to aim at a low grey roof ahead and do a RJ to it over the alley. Locate the goodies in the far R corner (NE). Go to them: the chimes of Secret #3 resound. Pick up the uzi ammo and the small medipack. Jump back on the previous roof.
Run E and run off from the roof into the courtyard. The house ahead is open, so enter and climb while crouching on the block in the far R corner (SE) to pick up some uzi ammo. Return to the courtyard.
Locate the opening to your L (S) and run through it. Turn R (W), run to the end, turn R again (W again) and pull up in the short passage above. Run to its end to find a lever to push. A fly-by shows you a block has lowered at the end of the alley granting access to a pool with spikes and... the Violet Chaos Gem!
Drop down in the street below, go R (S) then E around the corner and run into Spiked Pool Plaza ahead.
Nasty Creatures and Mean Traps
As soon as you step in, the dreadful sound of skeletal wings resound. A skeletal harpy is indeed after you. Lure it back in the alley and fight it here (don't try to fight it in the Plaza, there are other nasty things there and you don't want to fight them all together).
Once it's down, ready your Revolver, return to Spiked Pool Plaza and go R (SE). 2 giant flies are waiting in ambush (hence the advice above). Take them down cleanly.
Go to the eastern side of the plaza (facing the entrance) and locate the blue door in a recess to your R (S - leave that rusty barrel alone, it's empty). Open it with Action and enter the house.
Go L (E) then L again around the wall (N). The wood panel ahead is shatterable so shoot it, revealing a hole and a ladder. SJ+G to the latter and climb down. Run E into the passage, drawing your gun to take down 2 bats.
Go in the water ahead and turn R (S) before the wall corner. Look up using a flare or the binoculars. There's a CS above so jump up and pull up in it to pick up flares. Turn around and run off into the shallow water.
One tile ahead and turn L (W). The wall here is climbable. Climb up until Lara's hands are one tile away from the ceiling then backflip, roll in mid-air and press Action to grab the edge of a high CS. Pull up in it.
Crawl to the other end and stand up in a gloomy cave where you'll find 2 zombies growling around. There's a mutilated corpse in the center. Drag it to reveal some shotgun normal ammo. Pick them up. (you might want to do this in several steps, first luring the zombies away).
Now head for the SW corner of the cave. You'll find a slightly higher flat triangular block there. Climb on it, turn to face E and do a SJ+G to catch a hard-to-spot MS above. Swing to the end carefully looking at the texture on the ceiling so you don't fall back in the cave accidentally. You'll eventually reach a high CS. Let go, grab and pull up (note: you may "fall" from the MS into the CS ending up standing and stuck in the ceiling. In this case, simply crouch).
Crawl through the CS then run to the end of the passage but don't go into the next, sloping one. Look up. There's another MS above the slope and it's there for a reason. SJ+G to catch it, turn L and start swinging. Soon, a heavy boulder will come rolling down on the slope (it would have crushed you without that MS). Once it has stopped, let go and slide down.
There's an opening to your L (S). Go there but don't rush into the next room. Two hammers are there to crush you as well. Wait for them to be fully "open" to pass, they'll stop swinging once you've passed them. Again stop. There's another trap ahead.
Turn R to face the next tile then run with a hard R curve to rush to the
entrance: a boulder will soon follow you, and
the hammers will start swinging again so be quick to avoid all of them 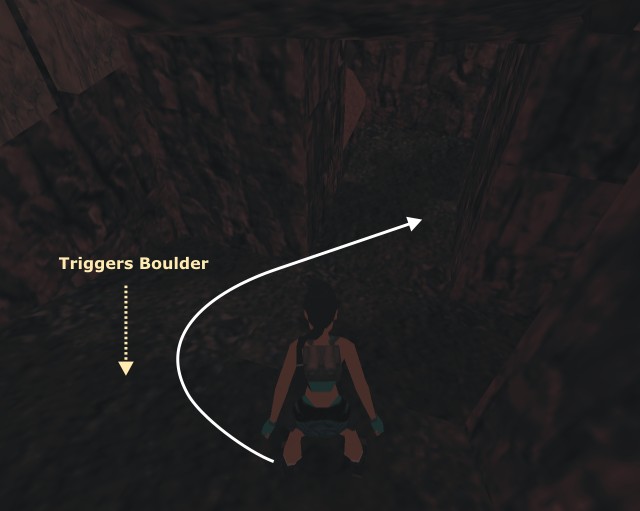
Pass the hammers like you did the first time to return to the previous room. There's a passage to your R. Go there but stop before entering the next room, turn around and look up: there's a jumpswitch above. stand on the highest part of the ground and do a SJ+G to grab it and flip it down, opening a door nearby.
Turn around and enter the next room where you'll find a lever. Push it. The spikes that were protecting the Chaos Gem retract, meaning you now can go get it.
Seizing Your Prize
The newly opened door is to your L (W). Go through it and climb up the climbable wall at the end to pull up on a roof overlooking Spiked Pool Plaza. Go R and run off from it, then run diagonally R (SW) to the pool.
Carefully dive on the gem side (i.e. the L one) to avoid the spikes and pick up the Violet Chaos Gem to be transported into the next part.
==== In this part, you should have found...
Enemies: Black Scorpions, Skeletal Harpies,
Bats, Zombies, Fire Spirit, Giant Flies
Items of note: Revolver, Laser-Sight, Violet
Chaos Gem
2 Secrets
some Traps
== Part 2: Free Mexico! ==


 Secret 4:
Now that you've put your hands on the Violet Chaos Gem, time to find a way to leave this charming - albeit ghostly - city. You're still in Spiked Pool Plaza, but since there aren't any spikes anymore in said pool, we'll call it Pool Plaza from now on. Now let's start with some breaking and entering.
-- Breaking, Entering, Rushing and Shooting --
Objective: Find something to shoot to open a gate
Exit the pool by its E side and locate the white house on your R and ahead (NE). You see that window near the wall? Go shoot it to break it. Enter the house and run to the wall ahead (N). Turn L into the dark alcove and pick some shotgun normal ammo on the floor before the beautiful decorated chest.
Now turn around and look up. There's a jumpswitch up there. Jump up while under it and flip it to open the door of another house on Pool Plaza. Return there via the broken window (the wood door in the white house won't open, so ignore it).
Run across the plaza diagonally L (SW). The house is there in front of you but don't go in yet. It is the starting point of an upcoming timed-run (sorry to spoil the surprise), and you first need to make some preparations in order to save time when it will be most precious.
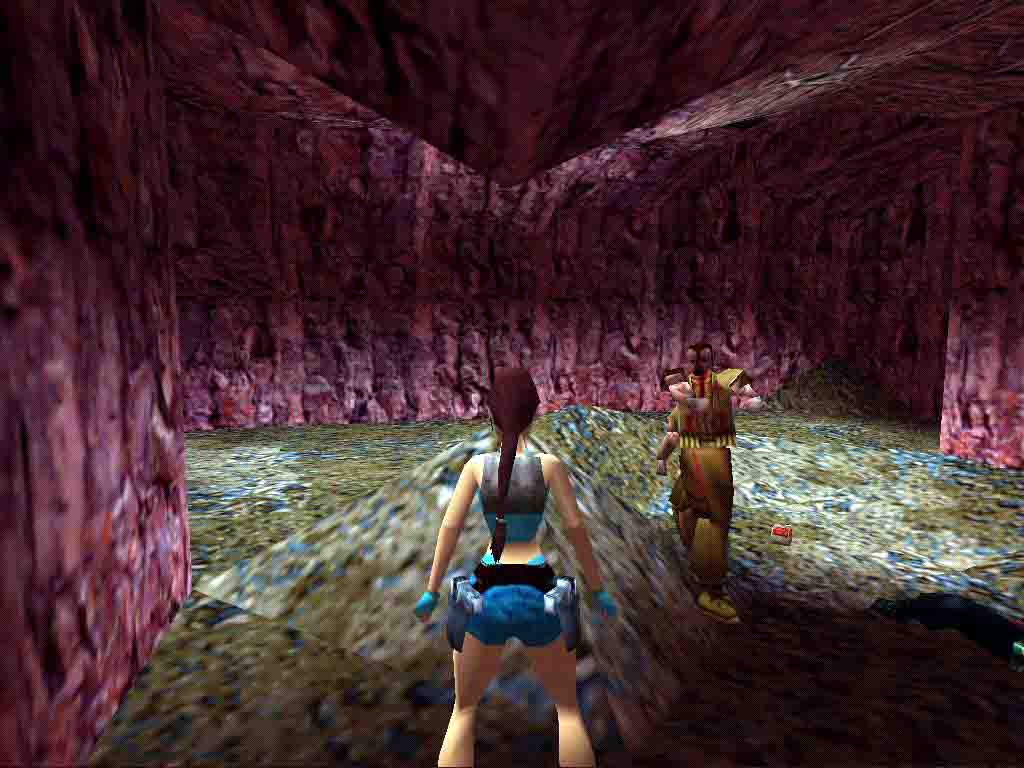
Run into the alley ahead (S) and continue around a first corner then a second one and forward a bit. Draw your pistols at this point as a new enemy runs at you to beat you up with his nasty staff: a mariachi bandit (nothing like Antonio Banderas, though).
Once he's down, continue E down the alley and turn L at the corner to enter a rather dark passage with recesses (note: the gate at the W end of the alley gives onto the previous part of Mexico you already visited and won't open). The wood panel in the first recess is shatterable. Shoot it to open a way to a passage beyond but don't go there yet. It's timed-run time.
Return to Pool Plaza and enter the house on your R (W). First pick up the small medipack on the counter near the stove to your L (don't go on the stove, though, you'd be torched).
See that decorated tile on the floor? It's the timed-run starting point so go near it turn toward the entrance and hop back on it. A camera shows you a door opening in a place you haven't visited yet which is located beyond the passage you opened by shooting the wall panel. Hit "Look" to save time and let's go.
Sprint into Pool Plaza and carefully deal with the L turn into the S alley. Continue sprinting down the alley, jumping when you're out of energy and again minding the curves around corners until you reach the dark passage with recesses. Turn L into the next passage then R, sprint across the corridor. Turn L at the end then L again and jump up the stairway to eventually pass the timed-door.
Now that you're in, locate the revolver ammo on the raised wood floor in the far L corner (SE) and go pick it up (you're going to need it, as it will soon show). Now go to the crack in the wall opposite the entrance (S) and turn 45° L (SE) to spot a lantern through another crack in the wall across the alley. Draw your revolver, aim and shoot it. It opens a gate located near Pool Plaza so return there.
Run diagonally R (SE) across Pool Plaza past the timed-run house. There's another alley in the far L corner. Head for it but draw your pistols on the way as another mariachi bandit comes to knock you out.
When he's out of the way, run down the alley to eventually pass the gate you opened a moment ago and enter a new part of Mexico City.
-- Lighting the Way Out --
Objective: Find a torch and where to use it.
Watch the fly-by with attention, it gives you solid hints on your upcoming tasks and destinations. Run ahead. The gate will close behind you and it's permanent, but your immediate problems are the 2 fire spirits that are now chasing you. Keep ahead (S) and turn into the L alley (E). You'll soon spot salvation in the form of a small rectangular pool to your R (SE). Dive to get rid of the pesky (but affectionate) spirits.
Once they have conveniently extinguished, turn around and pick up the flares at the bottom of the pool. Exit the water and draw your pistols to dispatch 2 black scorpions that come to greet you (or more probably sting you to death). You're now in Church Plaza, named after the beautiful little church you can see to the W.
Turn E (church on your back) and spot the lantern at the end of the pool. Aim and shoot it to open a floor trapdoor nearby, but which isn't accessible yet. Notice the raised white block against the wall to your L and ahead, we'll come to it in a minute.
Turn around and go L of the Church (SW), past a first cactus on your R then a second one in a dark corner on your L to enter a small courtyard. There's a jumpswitch there in the far R corner (NW) on the R wall (N). Go grab it to lower the white raised block you just spotted.
While you're here, turn around (S). The blue door ahead can be opened using Action so proceed and enter the house. Go pick up the small medipack under the lit torch in a recess to your L (E). This only for saving a couple of drop/pick up later. Return to Church Plaza.
The white block was hiding a CS in the far L corner (NE) of the plaza. Crawl through it to eventually reach a hole above that was previously closed by the trapdoor you opened a while ago. Pull up in a new house.
Locate the ladder in the far L corner (SW) and climb up stopping when Lara's hands are one tile away from the ceiling. Backflip in the upper floor.
The object ahead looks very much like a shatterable lantern, but is not. It's a movable lantern (besides, it's bigger). There's a tile in a recess in the far L corner (NE) that's different from the others. That's were the lantern belongs so push/pull it there to open a wood door by a cactus in a dark corner (which should remind you of something). However, you've got something to find before going there.
Return to Church Plaza via the ladder then the hole and the CS. Go to the Church then on its R side and turn L (S) before the wall. Run a bit then go around the low stone fence. A torch is waiting for you there. Pick it up.
Since an unlit torch isn't that useful, return to the house where you found the small medipack under a lit wall torch by going SE on the R side of the Church then SW around the first cactus. Enter the house and go light your torch on the lit fixed one in the L recess.
Now leave the house and go to the cactus in the dark corner. The door you opened with the movable lantern is just behind. Pass through it.
Run through the passage. You'll soon find yourself at the top of a hole. Drop the torch in it then turn around and drop down from the edge, hitting Action to grab the ladder there. Once in the lower passage, pick up your torch back. There's an unlit fixed one on the wall to your L. Light it, lowering a block at the end of the passage. You can now drop the torch, you won't need it anymore.
Run through the passage and enter a brand new area.
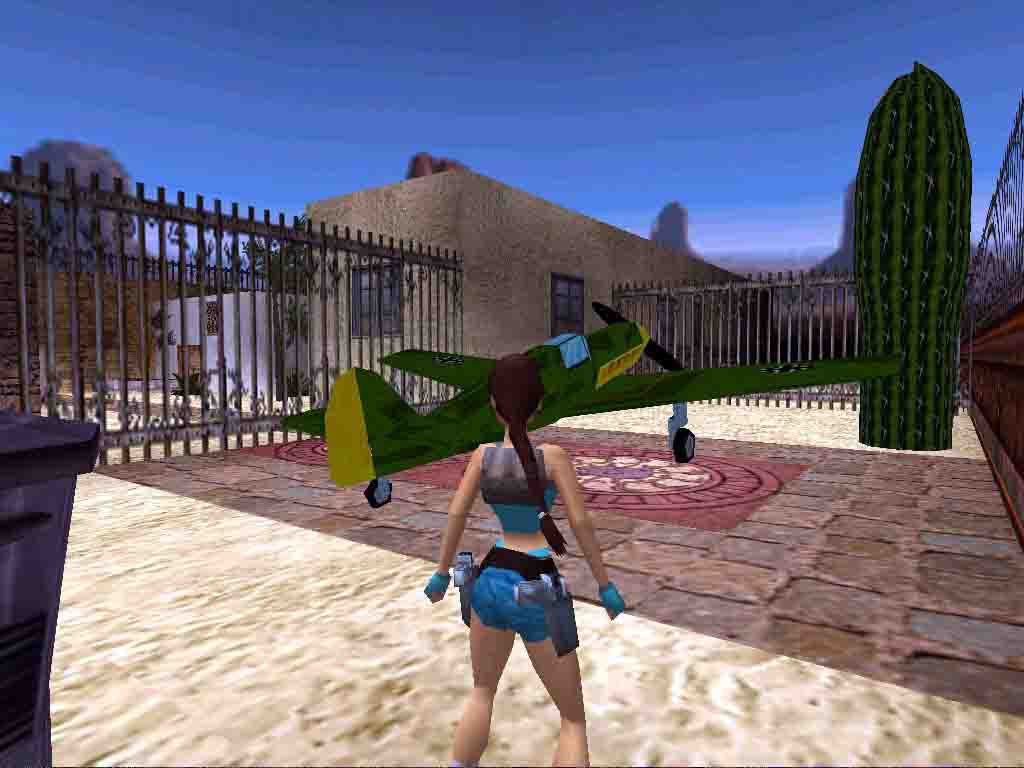
-- Asta La Vista, Mexico! --
Objective: Find a way to get to the plane and fly away!
What's a Key without its Keyhole?
Okay. Don't lose time marveling at the plane ahead which is very much inaccessible right now. Draw your pistols and prepare to fight a mariachi bandit and his pet black scorpion that rush to attack you (they do have weird pets around, that's for sure).
Once they're permanently out of your way, locate the brown house to the S. First go pick the revolver ammo near what looks like an entrance door (but isn't and won't ever open) then turn around (N). There's a trashcan ahead behind a tree. Shoot it to reveal a CS and crawl through the latter. You'll find a Key at its end. Pick it up and return to the Brown House Area.
Cross it diagonally L (SE) then turn around to face the house (W). The keyhole matching your newly found key is right there. But it's behind a high fence and absolutely unreachable from where you are. Go to the very corner of the area with the fence separating you from the plane against your back and look up: there's a shatterable lantern on the Brown House roof. Aim and shoot it, opening a grate in the passage where you lit the torch on the wall.
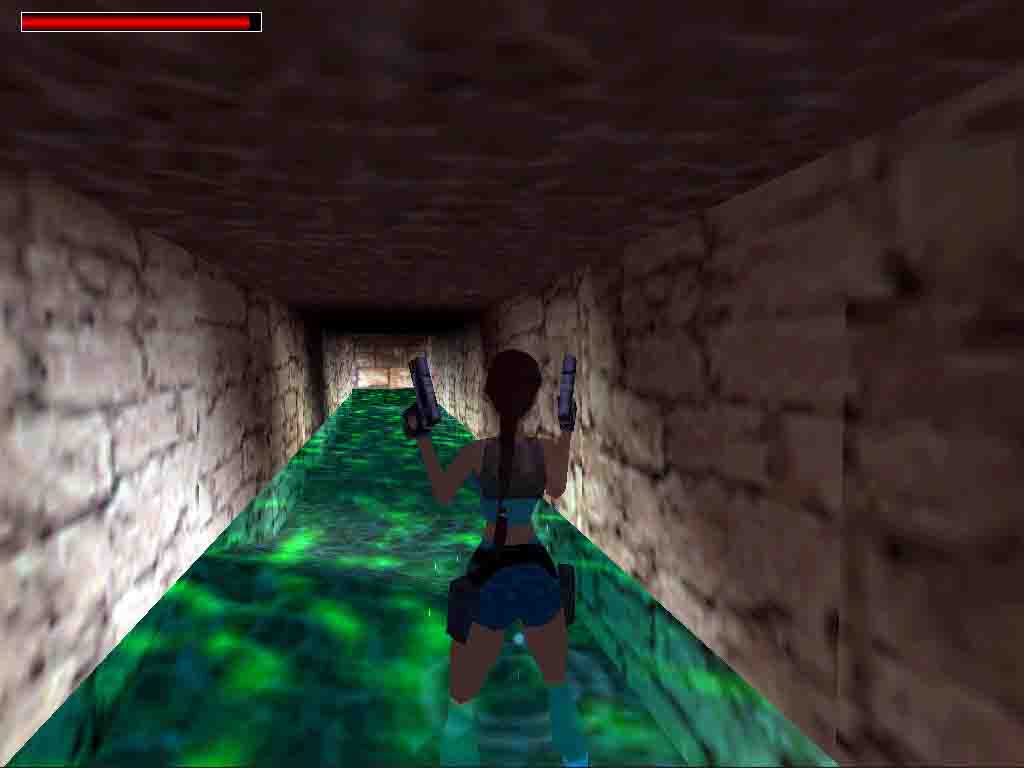
Go there and run to the middle. The grate has indeed disappeared and there now is a hole giving access to an UW tunnel. Dive. By the way, you're in an UW maze
Swim R (N) first then R again in the low passage to pick up some uzi ammo. Return to the previous tunnel and take a good breath in the air hole you came from before going on.
Now dive again and swim ahead (S) then L (E) around the corner. Turn R (S) at the junction then L (E) at the next one and R (S) around the corner. Don't swim too far are there's a set of nasty spikes ahead. Swim when the first ones are still up (you won't take damage) then quickly with a hard L curve to enter a recess to your L. Swim up and breath.
Turn around and pull up from the water. You're now inside the Brown House, and thus can access that Keyhole. Run into the passage the R and go use the Key on it, opening a door nearby.
Slipping and Sliding and Rolling and Swimming
Run through the newly opened door and open the floor trapdoor at the end of the short corridor. Run into the passage but draw your pistols on the way: a mariachi bandit is hiding there. Take him down. Continue S through the long passage and stop at the opening.
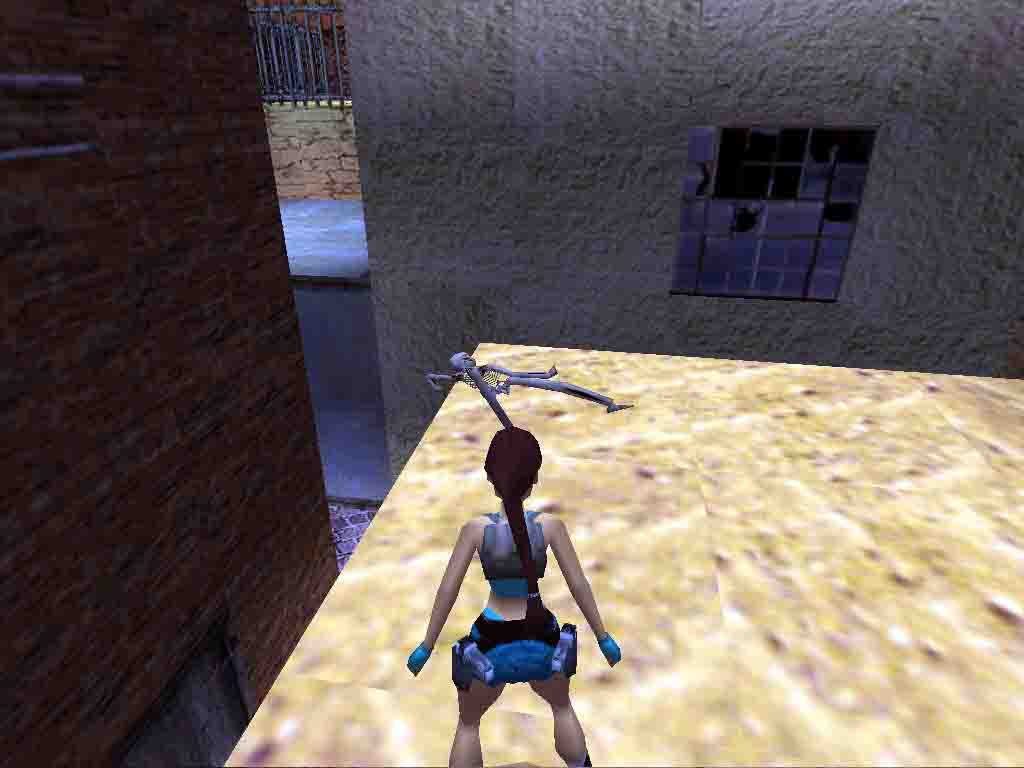
Impressive, isn't it? Hope you aren't afraid of heights. The opening in the R wall (NE) is where you need to go, but first let's go for a secret.
(Note: If you decide not to go for the secret, slimply drop down from the opening to a slope below, slide and grab the edge. Shimmy to the R until Lara puts her legs on a ladder and resume after the green paragraphs.)
You're going there via the closest slope on your R
against the wall. The tricky part being that you need to make sure you'll
slide backward. Position Lara as in  then backflip on the slope. Immediately hit Action to grab the edge. Climb
down the ladder then let go and immediately hit Action again to grab
the edge of the alcove below. You've reached Secret #4. Pick up the
revolver ammo.
then backflip on the slope. Immediately hit Action to grab the edge. Climb
down the ladder then let go and immediately hit Action again to grab
the edge of the alcove below. You've reached Secret #4. Pick up the
revolver ammo.
Now you've got to get out of here. Turn around to face the huge room. There's a ladder on the wall to your R (E). Either do a diagonal L SJ+G to it or access it by dropping down from the alcove and shimmy L on the climbable wall below then around the corner. Shimmy to the left part of the ladder then up until Lara's feet are where the brown wall turns beige and backflip. You'll land on a slope behind. Slide and hit Action to grab the edge.
Pull up, backflip on another slope, slide and jump. You'll land on a slope below against the S wall (the entrance one) which is where you would be if you hadn't gone for the secret first. Grab the edge.
There's another set of ladders here as well so shimmy R to reach the rightmost one and climb up. Pull up at the top and drop down again, grabbing the edge. Immediately shimmy R before Lara puts her legs on the ladder to reach the middle of the next slope which doesn't have a ladder under.
Pull up, backflip and roll in mid-air, hitting Action to grab the top edge of the next slope. Shimmy as R as you can, pull up, slide and jump with a R mid-air curve to land on a flatter pillar. Congrats. You've done the hardest.
Turn 135° R (SEE) to face the opening. There's a flat pillar on the way, so do a RJ to it. From there, either do a RJ into the opening or a SJ+G and pull up.
Run into the passage then R (S) at the junction and continue until you spot the entrance to a new room. Save before entering. There's a nasty surprise in it (eight nasty surprises, to be accurate.)
Look R and L: yep, that's it, boulders. They won't be triggered at the same moment, though, and that's your chance to make it through. Note that your goal is not to reach the barred opening ahead (which will remain as barred as can be), but a CS in the far L corner of the Boulders Room (NE). Now that you've got a better idea of the situation, save and let's roll!
Run into the room: the door closes behind you, cutting off the way out. Continue until the six first boulders have rolled then go up the L slope just after the third L boulder. Trigger the fourth L one by running in front of it (but not too close) then up the slope again. You've made it.
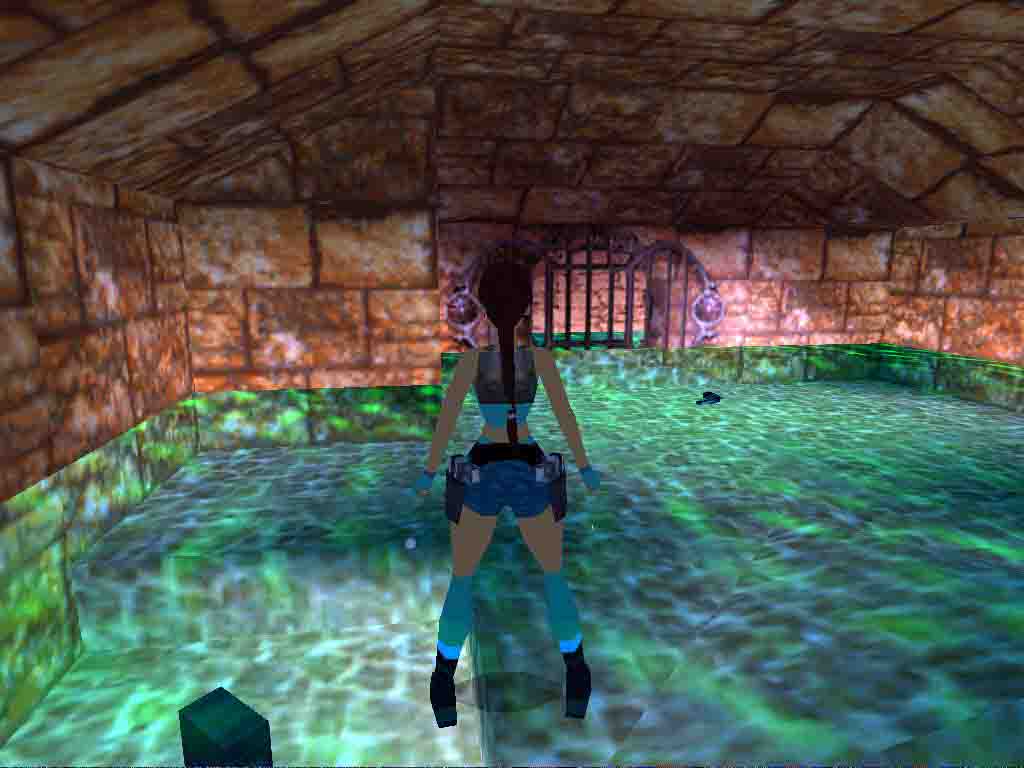
Light a flare or use the binoculars to locate the high CS on the E wall in the NE corner and pull up in it. Crawl a bit then drop down in a water hole.
Swim R in a first flooded room then diagonally L (NW) into a second one. Go to the L of the central wall (SW) and pick up the Key on the floor. Go L (S) to find a crack in the R wall (W) and swim through it into the third flooded room. Continue ahead and across to eventually find an air hole against the middle of the W opposite wall. Surface and pull up.
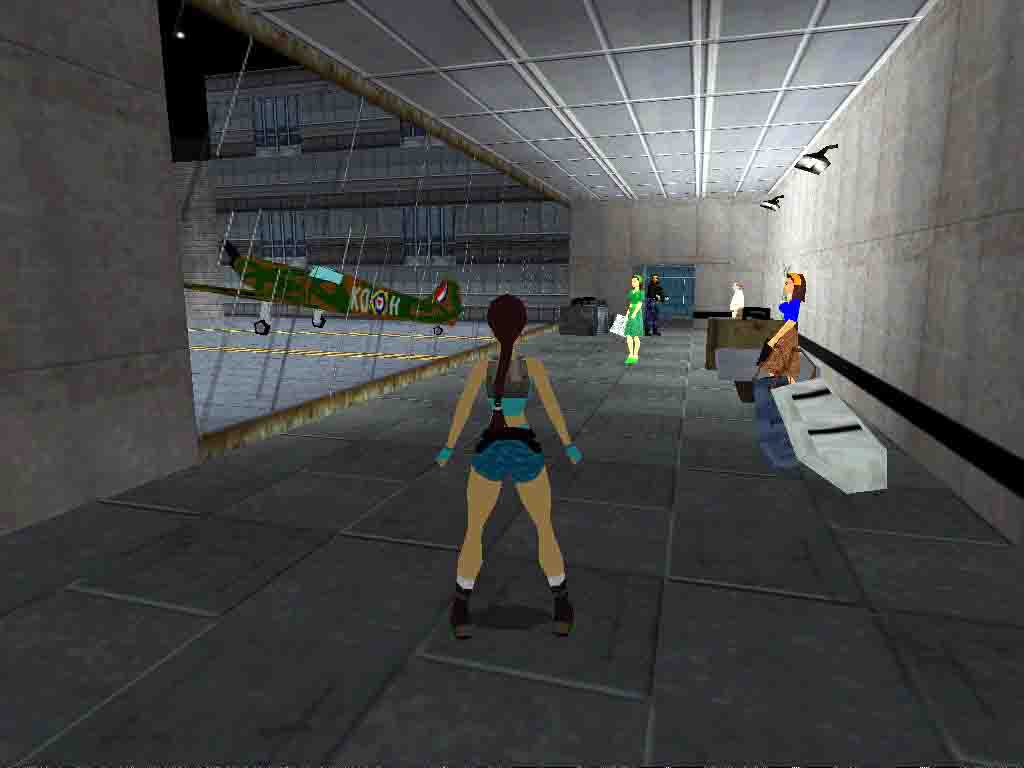
Wow! You've made it by the plane, meaning you're almost outta here. Run to the fence then R (N) along it to avoid being blocked by the plane. The Keyhole for your new Key is on the wall in the far L corner (NW). Use your Key on it to fly away from Mexico and be back at the Airport.
==== In this part, you should have found...
Enemies: Mariachi Bandits, Fire Spirits, Black
Scorpions
Items of note: Torch, 1st Key, 2nd Key
1 Secret
some Traps - 1 timed-run
==== MEXICO WHAT'S WHAT (Combat Strategies)
- Bats: Tiny and hard-to-spot. Keep shooting until Lara doesn't aim at anything anymore, spotting them thanks to the flapping sound they make.
- Black Scorpions: They aren't very dangerous, not being of the venomous type. They don't do much damage and are rather fragile. A few pistol bullets should take them down quickly.
- Fire Spirits: Once they're after you, those pesky fire wraiths just won't let you be and will follow you wherever you go. Run in zig zag to send them against the walls in which case they disappear for a second or two. Don't let them touch you too often or they'll set you on fire. Your only chance is to find some water. They can't resist it and will soon dive, extinguishing themselves.
- Giant Flies: They can deal much damage would they sting you and they're quick. The best policy here is to use the revolver. Two bullets are enough to take them down before they can reach you.
- Mariachi Bandits: Their colorful costume doesn't make them a bit less dangerous. They are quick and strike hard. Make sure to fight them where there's enough room for you to move and jump to avoid being hit.
- Skeletal Harpies: Very dangerous, those ones. They cast harmful green rays and even sometimes come close to slash you with their sharp claws. Keep moving at all costs.
- Zombies: They're very very slow, which is the only advantage you have on them given that you won't find any shotgun to knock them down (let alone explosive ammo). So try to lure them away from your next task then quickly go accomplish it while they're still heading your way.
Authorized walkthrough by Sutekh
Airport 2.
Chapter 2: Venice
Story:
Part of a series...Five mysterious gemstones are disperced all over the world to bring back the reign of chaos. Lara has to find them all and take them to a secret place, where an old enemy already is waiting for her...
CS = Crawlspace - MS = Monkey Swing - L = Left - R = Right - N, S, E,
W = Cardinal Points - UW = Underwater
SJ = Standing Jump - SJ+G = Standing Jump + Grab - RJ = Running Jump - RJ+G
= Running Jump + Grab
-- General Notes --
* Items in bold and blue are necessary to complete the levels or get the
secrets, either by using them, picking them up or both.
* You'll find a Combat Strategies Section at the end of this walkthrough as
well as a summary at the end of each level.
Note from the Author: Make sure you kill the mummies quickly. There can be a bug causing the game to crash to desktop if you save/reload near them.
== Part 1: Sewer System ==

Rude arrival, isn't it? Don't you think you'll be visiting monuments, have romance on a gondola or attend the Carnival. That's not what you're here for and to make things crystal clear, you've landed right in the sewers.
You're in a partially flooded room with a crate floating in the middle. Neither it or the ledges around are low enough for you to pull up, and there's a closed door on the eastern side of the room preventing you from going out. Don't panic. Go to the side opposite the door (W), dive and go pull the UW lever there on the wall, slightly to the L. The door is now open and you can start your explorations.
Surface for air if needed then swim through the door. Don't go L in the tunnel, you'll only find troubles there (namely a deadly fan and a dead end served with a spooky foe). Go R (S) instead and enter a new room with two floating crates.
Swim L (E) then L again (N) into another tunnel at the end of which you'll find a small medipack to pick up. Return to the Two Crates Room and swim diagonally R this time (SW) to find a low ledge. Pull up.
The low crate on your L is shatterable but leave it alone: it only contains a rat (or shoot it and kill the pest, it's not very dangerous anyway). Turn to face the first floating crate (NE) and SJ on it then do another SJ on the second one.
You now can spot a CS ahead (E) with a burning pillar beyond. Don't go there yet. Turn L (N) to face the fence instead and do a RJ over it to land on the ledge. Pick up the flares in a recess to your L then backflip over the fence in the water. Return to the second floating crate via the low ledge. Serious business starts here and now.
-- Lara Croft and the Very Hard To Reach Floating Crate --
Objective: Find a way to reach the floating crate in the Starting Room to access the rest of the place.
Once on the second crate, turn R (E) to face the CS, walk to the edge and do a SJ+G to the CS. Pull up, crawl a bit and drop down in a long spooky room. You'll land on a slope and slide down in more or less shallow water. Meaning there's no way out.
Don't worry about those burning pillars (yet). Swim/wade toward the first pillar on your R (N) and look up. There's a jumpswitch on its side that you must activate now, which is sort of tricky, given the depth of the water you're in.
Don't try to access it from the slope. Go to the R side of the pillar (i.e.
its S side) and go on the slightly raised floor there. Turn 45° R so the slope
facing the jumpswitch is diagonally on your back  and backflip. You'll just jump up so immediately backflip again to land on
the slope and jump with Action pressed to grab the jumpswitch and flip it,
opening an UW trapdoor nearby.
and backflip. You'll just jump up so immediately backflip again to land on
the slope and jump with Action pressed to grab the jumpswitch and flip it,
opening an UW trapdoor nearby.
Said trapdoor being in the S side of the room, turn R and swim/wade there to enter the now accessible UW tunnel. Go L (E) first then around the corner, ahead a bit and L into a recess to pick up some uzi ammo. Now return toward the hole you came from then ahead and turn L (S) at the junction. Swim through the tunnel to reach a large room. Surface and pull up on the L (S) ledge.
There's a recess in the middle of the wall with some furnitures. Look at the bottom of the wall and notice that the R part is slightly different (well, not slightly, totally different). It looks shatterable, but isn't. It's in fact kickable so go to it and hit Action to kick it open revealing a low CS.
Crawl through it then stand up in a dark corridor. Don't rush in: there's steam leaking from the pipes and it's pretty harmful. Walk as close as possible of the first pipe without touching the steam, sidestep L and wait for the steam to briefly stop to run to the other side of the pipe. Repeat for the second, this time staying R.
Now that you've cleared them steamy things, run through the corridor and reach a new large room with a small pool of perfectly safe water (no matter the not really inviting color of it) at the entrance. A rat will soon come to chew at your ankles so kill it before swimming to the other side of the pool.
Exit the water and run ahead (N). There's a deep pit on the other side of the room, and it's currently empty (most unfortunately, as you'll soon discover). Walk to the edge and look down and to the R. You see that CS? That's where you're going now.
Down and Up and Down and Up
Go to the R side of the pit (E) and drop down from the edge before the pipes, hitting Action to grab it. Shimmy L until you're above the CS, let go and immediately hit Action again to grab the edge of the CS. Pull up, get the large medipack and make sure Lara's at full health (or at least 9/10th healthy) because, yep, you're now going to drop down into that pit.
Proceed, losing a good deal of health upon landing, turn around then run diagonally L (NW) to reach the low CS in the N wall. Crawl through it.
You're now in a room with a high balcony on your R (E) and a broken ladder on the wall behind you (S). Since it's broken (and will very much remain so), ignore it and go L (W) into a small room bathed in shallow water.
There are high slopes here and two ladders. If you look closely at the R high slope (N), you'll see a crack in it. There's indeed something interesting there but it's absolutely inaccessible in the current state of things. Go to the L ladder (S) and jump up to grab it.
What you need to do now is make your way up and you first have to reach the
N high slope from the ladder. It requires perfect positioning. Climb up to
reach the next to last tile until Lara's hand are just under the second stone
"frieze" on the wall  .
Backflip, jump and hit Action to grab the edge of the S high slope ahead.
Pull up and backflip on a ledge behind you.
.
Backflip, jump and hit Action to grab the edge of the S high slope ahead.
Pull up and backflip on a ledge behind you.
There's a CS to your R (W), but go L (E) first into the corridor and to its end to find a small switch on the R (W) wall. Flip it to open a door on the high balcony in the Broken Ladder Room (for later). Return toward the High Slopes Room but look up before entering. See that closed door up there? Let's open it.
Enter the room and face the CS with a slight diagonal L angle standing one tile away from the wall. Do a SJ+G to the edge of the CS and pull up. Crawl a bit then climb up the stairs. A camera will show you a key lying on a grate above. It's important indeed, but for a bit later.
Resume climbing the stairs until you reach a small room with a water hole to your R. There's a jumpswitch ahead, but go in the water hole first to pick up some uzi ammo. Return on the stairs and climb to the top to face the jumpswitch.
Save. If you miss the jumpswitch you'll have to do a rather harmful backtracking. SJ+G to flip the jumpswitch, landing in a corridor below. Run ahead (E) but turn around once you've passed the corner and draw your pistols to rid the Venice sewers of another rat. Once it's out, turn L (S) to run through the corridor, stopping in the middle.
I'm sure you recognize that low CS to your R. It's the one overlooking the pit where you found a large medipack a while ago. And indeed, you now have to drop down in that pit again.
Use a medipack if you haven't done so already to make sure Lara's healthy enough, crawl in the CS then drop down from it into the pit. From there, return to the High Slopes Room via the Broken Ladder Room and make your way up to the high ledge like you did the first time. Go L once there and stop at the corner. The door you've just opened with the jumpswitch is up there. Turn L (N) to face the wall which is in fact a ladder and climb to the top to pull up through the doorway.
You're now back in the Starting Room, standing on one of the four balconies lining it. The floating crate which is your current goal is there on your R, but you can't jump to it because of the fence.
Turn R (E). The wall ahead is climbable (as its look hints). Jump up and grab it then shimmy L around the corner. Don't climb up or down and simply backflip on the crate. First objective reached.
-- The Big Flood --
Objective: Flood some parts of the sewers.
Turn around. There are two ledges ahead on your L and R which you now can reach. You can indeed reach them both from there, but it's shorter starting by the L (NW) one so walk to the L corner of the crate, turn 45° L and do a SJ over the fence to land on the ledge.
Run into the passage and deal with the steams there like you did with the first ones before the Pit Room. Enter the next room, drawing you pistols to kill yet another rat (well, you are in the sewers, what did you expect?).
Moving the Furnitures
The room you're in is rather large with a pit in the middle preventing you from accessing the other side. If you look up at the ceiling, you'll see a long and quite high MS crossing the room from E to W, which is why we'll call this room the Monkeyswing Room. Last but not least, there's an opening right in front of you (N).
Run through it to find yourself in a corridor with a lot of crates to your R (E). All those crates can be moved, which is what you have to do now to open an access to the other side of the previous room as well as another one to the room you can spot through the grates ahead. Since it is indeed a puzzle, you'll find the solution in the Spoilers Section at the end of this walkthrough.
Now that both accesses are open, let start by the one leading to a new room (E).
Hungry Dogs, Bandages and Swinging
Run through the opening then into the new room until you reach some wood fences placed there to prevent people to accidentally step on the hot floor beyond. Since they are shatterable, crouch and shoot the leftmost one then do a RJ over the deadly floor. Do another RJ over the next hot floor and draw your weapon of choice. After the rats, here comes your first stray dog. Shoot it down quickly (mind the nearby deadly floor when fighting).
Pick up some shotgun normal ammo waiting for you in the second recess to your L. Continue W to the other side of the room then L (S). After a flight of stairs, you'll find yourself before a long (and very empty) basin, in the Basin Room. There are inaccessible high ledges overlooking the room, but since they're inaccessible, go into the basin.
Run ahead (S) until you reach a low CS to your L. Crawl into it and pick up a Sewer Control Security Plug that someone has carelessly forgotten there. Return to the basin and notice the UW lever on the wall to your R. Obviously, you can't activate it yet so resume running S. You'll also spot some ammo in a hole to your R on your way, not reachable at the moment.
When you've reached the other end of the basin, pull up on the southern ledge and shoot the low crate there, revealing the Iron Key. Pick it up. Now let's find the Iron Keyhole.
Cross the basin again until you find a raised floor to your R and pull up on the ledge. Go L (N) and SJ over the corner to be back in the Hot Floors Room. From there, return to the Crates Corridor (mind the hot floors) then enter the eastern side of the Monkeyswing Room via the opening to your L (S).
Ignore the small switch on the wall for now (or flip it if you so wish) and run ahead (S) past the crate. You'll soon find yourself by the closed door of a small hut. The Iron Keyhole is there to your R. Use your Iron Key on it to open the nearby door but immediately draw your weapon as a stray dog affectionately jumps at your throat. Maybe it's famished after having been locked in here for a while, but still, get rid of it.
Enter the hut and locate the button on the R wall (N). Push it, opening a door in a darkroom somewhere. Turn toward the entrance, shoot the crate in the L corner and pick up the uzi ammo it contained. Now, where to go?
Leave the hut and shoot the crate on your L. It doesn't contain anything, but reveals a kickable low panel on the S wall. Go to it and kick it, crawl into the CS and drop down in the dark room you just spotted when using the button.
There's a closed door to your R, but it requires a key you don't have yet. The newly opened door is up in the wall ahead, to your L (NE), above some slopes. Go to it by SJ over the slopes when needed and pull up into the passage. Now it's time to meet the most macabre foe of the place.
Run ahead (S) through the passage then up the stairs. Stop before the corner: there's a pipe leaking steam there. Carefully deal with it then run into the next room and get your pistols ready. You've got company in the form of a Blood Mummy (how charming). Quickly kill it with a few pistols bullets then go fetch the small medipack. Leave the room, again dealing with the steam, run down the stairs and return to the doorway.
Look up. The starting point of the long MS is right above your head. Jump up, grab it and swing past the first opening and all the way over the Monkeyswing Room to its very end. Let go and immediately hit Action to grab the edge below. Pull up. You're now on one of the high ledges overlooking the Basin Room.
Watering the Situation
Leave the small crate ahead alone: it only contains a rat. The ledge to your L (S) is currently inaccessible due to the cage on it. Turn R (N) and do a RJ+G to the ledge ahead. Shoot the crate there and pick up the Old Key it contained. Return to the previous ledge with a RJ+G and drop down in the Monkeyswing Room from the CS to your L.
Return to the Dark Room via the Crates Corridor and the eastern side of the Monkeyswing Room and use the Old Key on the Old Keyhole to your R to open the nearby door.
Pass the doorway. There's a movable crate ahead. Pull it once. You don't know it yet (unless you've done some explorations at the start of the level), but you've just opened a way to the Sewers Control Room. Now let's find it.
Return to the Monkeyswing Room and run R (E) to the edge of the pit. Flip the small switch on the wall to your L if you haven't done so already, opening a trapdoor in the pit floor. Run off into the pit then go down in the water hole the trapdoor was blocking.
Swim ahead (W), down then turn L (S). A cage is blocking the tunnel ahead. Go L (E) then R (S) in the recess to pull the UW lever there on your R and lower the cage. Do not continue E, there's a strong stream that will send you right on a deadly fan and you'd meet a rather painful slicing death. Leave the recess and go L (W) then L (S) again and swim through the tunnel where was the cage. Swim around the corner then straight ahead (E - at this point, the stream and the fan are to your L). Swim up then ahead again to surface in an air hole.
You're now on the other side of the crate you pulled a moment ago. Pull up from the R edge and draw your pistols: there's a blood mummy around. Kill it (or rather destroy it, since it's already dead) then turn around and SJ over the water hole into a passage that was previously blocked by the crate. Follow the corridor to your R then crawl through the CS to eventually find yourself in a small, well-lit room. You can see the mummy through a hole in the wall so say hi then turn around and run to the wooden door.
Push the button on its L to open it and (finally!) enter the Sewer Control Room. Locate the Sewer Control Security Plug Hole to your L and on the R of a raised cage. Insert the Sewer Control Security Plug in it to lower the cage and access the small switch on the wall. Flip it. That's it: you've flooded the sewers!
[Note: If you've reached the Sewer Control Room via the Starting Room and not the water hole in the pit in the Monkeyswing Room, you'll have to make a detour to return to said MS Room and get the Shiny Key. In this case, see "A Detour" below, and follow the instructions as if the door in the Broken Ladder Room balcony were closed. Once on the high ledge in the High Slopes Room, go R to the corner, climb the ladder to the balcony and reach the floating crate in the Starting Room. You can then return to the MS room from that floating crate like you did the first time.]
-- The Way Out --
Objective: Find your way out of the sewers
A Shiny Key
You remember that UW lever you spotted a while ago in the basin? Now is time to go pull it.
Return to the water hole you came from and from there to the pit in the Monkeyswing Room via the Flooded Fan Room (again, mind the stream and the fan). Exit the water by the western edge of the hole, run ahead on a raised floor and pull up in the western side of the Monkeyswing Room. Now go to the Basin Room via the Crates Corridor and the Hot Floors Room.
Dive in the now filled basin and swim ahead (S) until you reach the UW Lever to your R (roughly in the middle of the basin). Pull it, lowering the cage that blocked the middle high ledge above. Continue swimming S a bit to pick up the revolver ammo in the next hole to your R then turn around and return to the start of the basin. Locate the raised floor to your R and go on it to be able to pull up on the ledge.
Now you have to go on the high ledges again. Return to the eastern side of the Monkeyswing Room (you should know the way by now), then into the Dark Room, up into the passage and swing across the MS to reach the high ledges.
Once there, turn L (S). Your next destination is the very last ledge in the opposite side of the room. Go there with a series of SJ+G from ledge to ledge.
There's a passage to your R (SW). Run into it, drawing your weapon: another stray dog will burst out from the corner. Kill it, run down the stairs but stop at the bottom before turning L: there's steam over there. Deal with it then run down the passage and drop down in the hole: the Shiny Key is here. Pick it up. Return to the high ledge you came from and from there to the Monkeyswing Room.
You now need to go back to the Starting Room, in the water. You can go there either from where you are (the western side) and dealing again with the two steam pipes on your way to the balcony, then jumping over the fence OR from the eastern side via the Crates Corridor then ahead to the balcony. Backflip over the fence there. Whatever path you choose, you'll find yourself back to square 1 (so to speak).
A Detour for Firepower
Swim through the door to your L (E) then R (S) to return to the Two Crates Room, and from there to the Burning Pillars Room via the floating crates and the high CS. Turn L (S) once you've slid in the water. The Shiny Keyhole is over there above a ledge, but before using it, a detour for an interesting pick up.
Swim/wade ahead (S) then down the hole you opened with that hard-to-reach jumpswitch at the beginning of the level. Return to the Pit Room (again dealing with the steam on your way) then jump into the Pit itself, which is now filled with water as well, and so perfectly safe. Swim through the CS to the Broken Ladder Room, now flooded too. The high balcony there is now accessible, but that's not why you're there. You're there for that "interesting thing" in the crack in the High Slopes Room nearby.
Swim there (L after the CS), go R (N), swim to the wall and surface. There's an alcove to your R (E). Pull up in it and turn around. Do a SJ+G to grab that famous crack ahead, pull up and pick up the Uzi (see? That was worth the detour).
Now your problem is going back to the Starting Room and from there to the Burning Pillars Room and its Shiny Keyhole. Don't try to use the slopes. Return to the Broken Ladder Room, swim up and pull up on the balcony from the R side of the edge.
[Note: If you didn't flip the small switch in the passage R and above
the High Slopes Room upon your first visit, the door on the balcony will be
closed, meaning no way out. In this case, after taking the Uzi and going back
into the water, return to the alcove from where you just jumped. Position
Lara in the L corner with a slight L angle to aim at the top of the slope.
SJ then jump again and hit Action to grab the edge of the higher slope 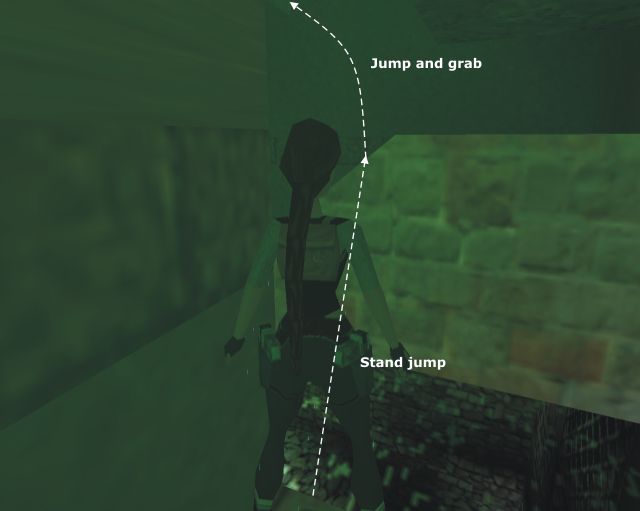 . Backflip on the ledge, go R in the passage and to its end and flip the switch
on your R to open the door. From there you can return to the High Slope Room
and jump in the water.
. Backflip on the ledge, go R in the passage and to its end and flip the switch
on your R to open the door. From there you can return to the High Slope Room
and jump in the water.
This is also an alternate way to return to the Starting Room, but you'd miss a goodie.]
No time to waste here, though. That's not one, but two blood mummies stumbling in your direction right now. Put an end to their miserable existences then run diagonally L to the opening and climb the ladder there on your L. Pull at the top to find yourself on the only balcony in the Starting Room you haven't visited yet.
Shoot the small crate ahead, pick up the shotgun normal ammo it contained then backflip over the fence to dive in the Starting Room again. Return to the Burning Pillars Room via the Two Crates Room and swim/wade S to pull up on the ledge and finally use the Shiny Key in its Shiny Keyhole, opening a door above.
Time to deal with the burning pillars. Lucky you.
A Race Against Fire
Climb the ladder L of the keyhole then go L around the corner and let go. Draw your pistols to take care of 2 bats flapping at you. Enter the room, locate the small switch on the R wall (N), go to it and save. Timed-run ahead.
Flip the switch and immediately do 2 R sidejumps then
a RJ to the first pillar. Run with a L curve and jump to the 2nd pillar with
a R mid-air curve, so you don't land too far and have enough room for your
next RJ. Run with a R curve then jump with a L mid-air curve and hit Action
to grab the edge of the 3rd pillar 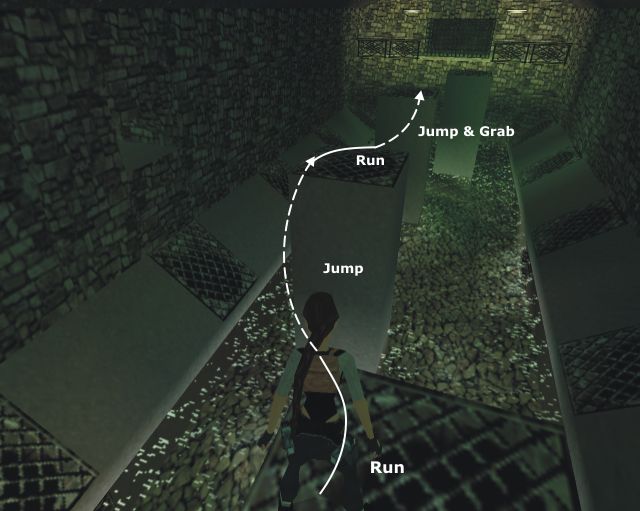 . Pull up and run with a R curve. Jump to the
4th pillar with a L mid-air curve again to gain some room for your next run-up,
keep running with a L curve and jump to the ledge
. Pull up and run with a R curve. Jump to the
4th pillar with a L mid-air curve again to gain some room for your next run-up,
keep running with a L curve and jump to the ledge 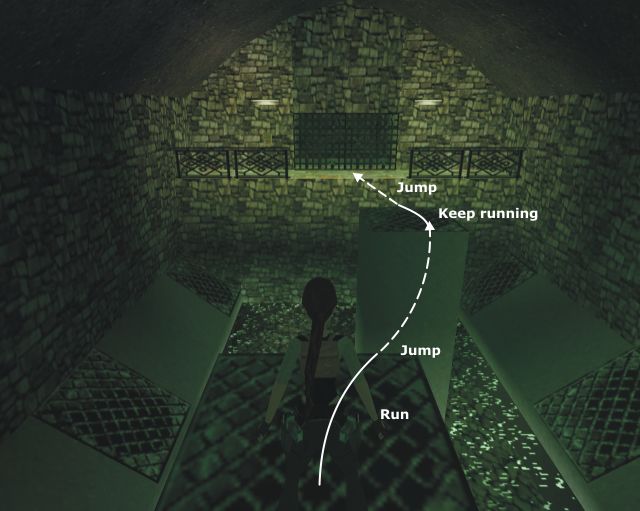 .
.
Blowing Up the Way
Flip the small switch to your L to open the nearby grate doors and enter the passage beyond. Ignore the first corridor and go ahead (N) past the smoking tiles into the second one. Go L (W) and pick up the large medipack at the end.
Now turn around (E) and run to the very end of the corridor where you'll find a ladder. Climb up until Lara's hand are one tile away from the ceiling and backflip over a slope into a new room.
Leave the crates in the corner, they're empty. Turn around (W) and run through the opening ahead while doors shut down behind you, permanently cutting off the way back.
You're now in a wide passage with a campfire to your L (S) and an opening to your R (N) very much closed by solid metal bars. There are some barrels before the bars, apparently full of a volatile substance and, closer to you, an unlit stack of wood. Run toward them and jump over the fence to your L. Shoot the small crate there and pick up the Torch it contained. I guess you've found out what you now have to do.
Return to the entrance of the passage and go light your torch on the campfire (don't go too close to it, though, it can burn you as well). Go to the stack of wood but make sure Lara's health isn't too low before lighting it: a nasty surprise awaits you after the show. Light the wood with your torch and enjoy!
As soon as the fly-by is over, drop the torch and crouch to lower the upcoming damage: a swarm of locusts have been disturbed by the explosion and they're flying at you (the aforementioned nasty surprise). Once they're gone, run through the passage you just created.
Escaping the Sewers. Almost.
Draw your weapon upon entering the next room to get rid of a stray dog. Shoot the small crate in the closest L corner and pick up some revolver ammo. Cross the room diagonally (NE), find the hole in the corner and pick up some uzi ammo there.
Now that you're done shopping, turn around and climb on the crate ahead and to your L and pull up from there in the room above. There are two closed wood doors here, a closed trapdoor in a hole in the center of the ceiling and a keyhole. Since you don't have any key available at the moment, let's find another way to open one of these doors.
Go to the darker corner with pipes extending from the wall (NE - you can pass through the pipes, no need to crouch) and use a flare or the binoculars to locate a jumpswitch on the L (N) wall. Activate it to open the closest door.
Turn around and pass that door (L - you'll need to crawl under the pipes this time). Run L (N). There are 3 small switches on the wall ahead. You'll find the solution to this mini-puzzle in the Spoilers Section at the end of this walkthrough. Once it's solved, you'll have opened the other wood door in the previous room.
Return to the previous room and go pass that door, drawing your pistols to kill a rat as soon as you've done so. There's a trapdoor near the far R corner (NW), but it's currently closed. Cross the room, turn around (E) and look up to locate a jumpswitch. Activate it to open the nearby trapdoor.
Jump down the newly opened hole, turn around and run under the catwalk to the opposite side. There's a Copper Key to your L. Pick it up, return to the previous room and use it on the Copper Keyhole there to eventually open the trapdoor in the ceiling. You're almost there.
Go to the center of the room under the hole and locate the ladder to the N. Walk to the edge of the "bridge" you're on, jump up, climb and pull up at the top... to realize you're not quite out of the sewers yet (surprise!)
==== In this part, you should have found...
Enemies: Rats, Stray Dogs, Blood Mummies, Locusts
Items of note: Sewer Control Security Plug, Iron
Key, Old Key, Shiny Key, Torch, Copper Key
some Traps - 1 timed-run
== Part 2: Hereafter Holiday ==

For Starters...
Alright. Now you really have no time to waste with those 3 blood mummies after you. Rush ahead to get away from the hole (you don't want to fall in it and lose all advantage, plus you'd take damage), jumping over your foes if needed. Once you've got enough room, turn around and shoot them down.
Run down the passage to the R. Activate the small switch on the wall to you R to open the nearby door. Enter the room. Leave the small crates alone. Most of them are empty and one of them only contains locusts. Run to the far L corner, climb on one of the two crates there, crawl on it and drop down in the hole behind. Pick up the flares and leave the room.
Continue a bit down the passage, flip the second small switch this time on your L and pass through the door you've just opened. Enter and notice the movable crate against the L wall, in the middle. Pull it once then push it from its R side against the wall. Pick up the shotgun normal ammo it was hiding then return to the passage. Run to its end to enter a small room.
If you think what you've done so far in this adventure was difficult, you ain't seen nothing yet. Here's the situation. You have to activate all four jumpswitches here in order to finally escape the sewers and make your way to the surface. As you have noticed, there are spikes under each of them and no way to deactivate them beforehand. However, once you've flipped a given jumpswitch, the spikes under will be deactivated, but with a very slight delay. And this is this delay that makes the whole task tricky. You need to perfectly time the moment when you do your SJ+G to the switch or you'll be impaled. It requires patience and accuracy.
Choose your first jumpswitch (the order doesn't count), face it and stand two steps away from the spikes. Jump when the spikes start to raise i.e. when you hear them. Grab the jumpswitch. If your timing is good, you'll land safely. Repeat for the three other jumpswitches.
When you flip the fourth jumpswitch, a cage raises in the center of the room, granting you access to the surface. Climb on the cage, jump up and pull up. Aaahh... fresh air.
-- Ruby Sphere Pieces Beyond a Pool of Blood --
Objective: Find the two pieces of the Ruby Sphere
Well, maybe not that fresh, as you'll soon find out. To be honest, the sewers almost look homely compared to this desolation of a city you're about to discover.
You are currently standing in "Middle Street". Turn W and look up. There's a balcony up there but it's currently on fire and not really accessible from where you stand. Regardless, there lies you next goal.
Turn R (N) and run across the street to another one ahead. Ignore the jumpswitch to your R, it's way too high for you to grab it. Once in the northern street (we'll most creatively call "North Street"), turn L (W). There's a trashcan ahead in a recess which is shatterable. Shoot it and pick up the small medipack it contained.
Turn around (E) and run along the street. You'll soon reach a creepy pool filled with blood-like water. You can also spot corpses floating around (mercifully not decomposed yet). It might be the less inviting water you've ever seen but dive. Swim R (S) all the way to the opposite side. You'll pass a hole to your L then a closed door to your R. Ignore them both, they're for later. Once you've reached the other side, turn R (W), swim a bit and pull out of the water.
Risky Jumping
You can hear the sweet sound of spikes (they're just above you). Looking up and R, you'll see a high, inaccessible jumpswitch. Turn L (S). There's another very accessible jumpswitch hidden behind the column. Go grab it to raise a platform above a slope near the burning area you can spot to your R.
Go R (W) to the other side of the area then turn R (N) at the wall and carefully walk to the edge of the safe floor. There's an on/off burning platform ahead. Position Lara so her right leg is against the fence, aiming at the far R corner of the platform. Hop back and RJ as soon as the fire turns off to land in the very corner. As long as you stay in that corner, the fire can't burn you.
Wait for the fire to turn off again, jump up, grab the crack above and shimmy to the R until you can pull up on the platform you just raised. Turn 135° L (SW) to aim at the closest balcony and do a RJ to it. Quickly turn around to face the courtyard and draw your weapon (possibly your revolver) to take down a giant wasp that's coming buzzing at you right now.
Notice the closed wood door ahead up in the wall, then go R and do another diagonal RJ to the next balcony over both fences. Take a deep breath, the next part is quite tricky.
What you need to do is reach the high jumpswitch that's L and ahead via the spiked ledge, which not only requires good timing but a very accurate path too.
Position Lara in the L corner of the balcony, against the fence, turn slightly
L to aim at the middle of the ledge, hop back and wait for the rightmost spikes
to be up to do a RJ. Run with a L curve then jump to the switch with a L mid-air
curve, hitting Action to grab it only at the very last moment or you won't
do that mid-air curve 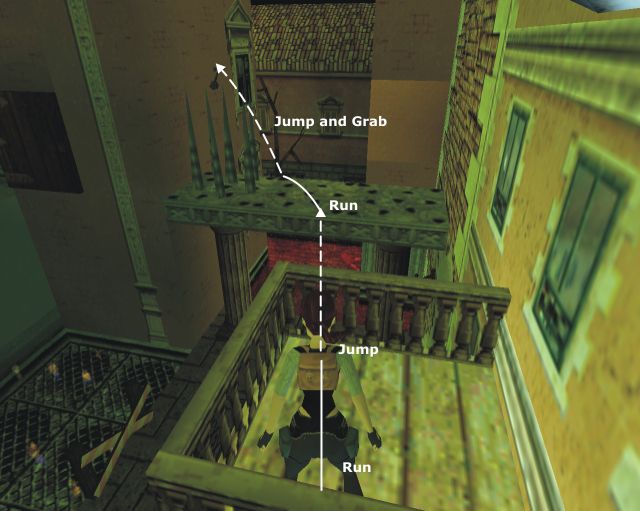 . Flip it to open the nearby wood door we spotted from the first balcony.
Since you're back in the water, leave it by the L (W) edge and return to the burning platform. Proceed to the high platform like you did the first time but don't pull up. Keep on shimmying R to pull in an alcove a bit further. Flip the small switch there on your R to lower a block in a pillar beyond the spiked ledge.
Drop down and shimmy L to the platform. Pull up this time and return to the second balcony (the one facing the spikes - and yes, you'll have to deal with them again). No giant wasps on your way this time, though.
You can now see the opening in the pillar created by lowering the block. Position Lara in the middle of the balcony, hop back, wait for the rightmost spikes to be up and do a RJ to the spiked ledge then another one to the opening (you don't have time to stop for a SJ), pressing Action to avoid hitting the pillar.
Walk to the edge ahead and do a SJ to the next balcony. Pick up the Copper Key at your feet. Run to the fence ahead, hop back and do a RJ over it. Hit Action to grab the edge of the sloping roof and shimmy L all the way to its other side. Pull up on its flat part and push the button ahead. This opens a grate door in the Blood Pool, but you'll get there only later. For now, drop down in the street below.
A Trip on the Venetian Roofs
Leave the trashcan alone, there are locusts in it and nothing else. Go R (S) and run to the plant surrounded by black fences (the last one). SJ over the fence and pick up the revolver ammo hidden there.
Turn around (N), SJ over the fence and run along the Pool until you find yourself under an arch. Dive in the pool and swim ahead (W). Exit the water. You're now at the other side of Middle Street.
Run ahead then turn L (S) at the first crossing. There's a trashcan in Middle Street a bit further on the L but don't go shoot it, you'd free a venomous spider trapped in it. Continue S then R (W) at the corner (you're in South Street, by the way). Turn L (S) at the end. The Copper Keyhole is there to your L. Use the Copper Key in it to open the nearby tall door and give you access to the rest of South Street.
Draw your weapon as soon as you pass the newly opened door to take down a giant wasp then run further into South Street. You'll see a trashcan in a recess on your R (E). Shoot it to reveal an empty pedestal. It is for later, but at least now you know where it is.
Since you're obviously not here only to shoot at trashcans, continue to the end of South Street. SJ over the fence and go to the left of the low wall ahead (N), where the ground is slightly raised. Pull up on the wall.
The burning balcony is on your L and ahead, but it's still very burning so go R (E) instead and run to the other end of the wall. Turn 45° R (SE) to face a sloping red roof on the other side of the street and do a SJ to it. Slide and grab the edge. Shimmy L a bit to reach the next tile, pull up and backflip to land on a balcony behind.
Turn around. The brown door on your R can be kicked open using Action so proceed and enter the house. That scratching sound you're now hearing is produced by a venomous spider coming from the R. Quickly kill it with your faithful pistols.
Once it's dead, re-enter the house if needed and go L to pick up some uzi ammo. Turn around (E) and pass the opening ahead, crawling under the hanging laundry if necessary, to find yourself on an arch overlooking South Street on the R and Middle Street on the L. Turn 135° L (NW) to face a balcony extending from the house you just left and do a SJ to it. Immediately turn L to shoot the giant wasp that's flying at you.
Run to the far R corner of the balcony (NW) and turn 45° R to face another one on the other side of the street. Hop back and do a RJ with a L mid-air curve to clear the fence and land on it. Run to its far R corner, turn 45° R to face a red roof ahead and do a RJ+G to the roof. Shimmy L until you're in the middle of the next tile, pull up, backflip, roll in mid-air and hit Action to grab a jumpswitch. Congrats! You've turned off the fire on the Fire Balcony.
Now you must reach said Balcony. Return to the end of South Street by going R from the jumpswitch then L into Middle Street and R into South Street. Climb on the low wall again and go L (W) this time. Run to the end past the now safe Balcony to pick up the Rusty Key.
Don't drop down yet. Since we're up there, let's take another trip through the Venetian roofs to fetch another needful thing.
Return to the house where you met the venomous spider by running to the other end of the wall and via the sloping red roof. Go to the arch to your R then on the balcony to your L (where you were savagely attacked by a giant wasp).
Now that you're back there, turn R (NE) to face a flat red roof and do a RJ+G to it. Pull up, draw your pistols and quickly dispatch the venomous spider that comes to bite you. Go R (E) to the wall, staying close to the edge, then turn around so the nearby sloping roof is on your back and backflip on it. Slide and grab the edge.
Shimmy to the R and stop after the corner. Pull up and backflip on a flatter ledge then turn L and draw to face another giant wasp. Once it's down, sidejump L over the fence and pick up the Copper Key there on the floor. Backflip over the fence to get back on the ledge and drop down in the Blood Pool below.
Lara on Fire
Locate the hole just ahead and swim through it then the tunnel beyond. You'll soon reach a flooded room with a closed door in the opposite side. Turn R (E) upon entering and pull the UW lever to you R to open the door. Swim through said door, turn R and pull a second UW lever ahead, closing the door, but granting access to a third UW lever. Go pull it, opening a trapdoor nearby, turn around, return to the 2nd UW lever and swim up to surface (you can reopen the door to the previous room by pulling the 2nd UW lever again).
Pull out of the water into what looks like a Bathroom and shoot both Ming Vases. The R one contains a large medipack and the L one a small medipack and you're going to need them badly very soon. Once you've picked them up both, go to the E side of the room and kick the brown door open.
Enter the next room and locate the Rusty Keyhole near a wood door on your L (N). Use your Rusty Key on it to open the nearby door and go through the latter. Shoot the trashcan ahead to pick up another large medipack (if you're starting to think that large supply of medipacks hints of an upcoming danger, you're right).
You're in a small passage with a closed door and a campfire in a recess next to a button. You do need to push that button now, and you can't turn off the fire. Not now. Not tomorrow. Not in a million years. Not even when Hell has frozen. So prepare yourself for a medipacks swallow party. Oh. And save.
Push the button as fast as you can and start using medipacks, keeping an eye on your health bar (the "0" shortcut is your friend here) while rushing R into the next room then R into the Bathroom then jump in the water to extinguish the fire.
Leave the water and return to the campfire passage. The door is now open so go through it, cross the small courtyard and pull up in the high CS. Crawl a bit then drop down. There's a jumpswitch to your R, but it's currently very unsafe, considering the spikes under, so turn around (W) and go dive in the small pool ahead. Turn around and go pull the UW lever in the middle of the E wall to raise a platform above the spikes.
Leave the water and go flip the now safe jumpswitch to open a double tall door in the other side of the courtyard, beyond the pool. Go there and enter a new house.
Slicers and a New Friend
The door closes as you enter, cutting the way back, and you can hear a rather unsettling mechanical sound. Before you are two cages: the L one holds the first part of the Ruby Sphere (which is why you're here), the R one holds a key. Since you don't have any mean to open the cages here, let's go up.
Go to the L cage which is climbable (as is the R one) and climb it to pull up on the upper floor. You now can see the sources of the noise: two Chinese Swordman Statues. Shoot the Ming Vase ahead (S) to reveal some uzi ammo and go pick it up. There's another Ming Vase in the other side of the room but it only contains a venomous spider, so leave it alone. Now turn to the closest statue and notice the button to its R. The other statue has one as well and you now have to push them both (the buttons, not the statues).
Return to the transversal "bridge" you pulled up on and run to its end. Turn L, drop down, grab the edge and shimmy R to pull up on the statue ledge. Sidestep R to the statue as close as possible, wait for the blade to be up and sidejump. You shoudn't take any damage. Go push the button to lower the L cage below, turn L and sidejump to the other side of the statue. Proceed with the other statue and the other button the same way then drop down into the room below.
[Important: at the end of the following sequence, there is a risk that your upcoming foe dies on one of the fire and you won't be able to pick up the item he leaves behind - and thus will be stuck. So save before picking up the Ruby Sphere Piece]
You're now in for a rather funny sequence. First, pick up the Iron Key. A giant spider runs into the room and goes next to the Ruby Sphere Piece pedestal. Don't shoot her. She won't attack and in fact will even help you. No go get the Ruby Sphere Piece 1. A very aggressive Dead Swordman appears. Lure him to the spider. She'll soon and cleanly take care of the swordman (mind the fires).
Pick up the 2nd Iron Key he left behind. If the spider is on the key preventing you from picking it up, you might have to kill her after all. In this case use your pistols and take your time, she won't retaliate. Go use both keys on the Iron Keyholes near the doors to reopen them.
Moving Practice
Return to the Bathroom and dive in the water. Pull the closest UW lever again to reopen the door and swim back to the Blood Pool. Once there, turn L (S) and swim until you find a tunnel to your R (W - you opened the door to that tunnel a while ago. If you didn't, see "Risky Jumping", last §). Swim through it to the end then up and exit the water.
There's a closed door ahead, preventing you from seizing the second Ruby Sphere Piece. Look down: to your L is a decorated tile. The crate to your R being of the movable type, push/pull it on the decorated tile to open the door and go get the Ruby Sphere Piece 2 (that one was easy).
Swim back to the Blood Pool and from there go to South Street by swimming L (N) after the tunnel then L (W) at the arch, exiting the water into Middle Street and L (S) at the crossing.
-- The Red Chaos Gem --
Objective: Find the Red Chaos Gem
Run down South Street until you find the recess with the empty pedestal (you shot a trashcan there). Combine both Ruby Sphere Piece to obtain the Ruby Sphere and put the latter on the pedestal. It raises a couple of block nearby, allowing you to access the roof above.
[Note: If you haven't found the 2nd Copper Key yet, go to the end of South Street and climb on the low wall. From there, refer to "A Trip on the Venetian Roofs", three last § for the path to the 2nd Copper Key]
Go to the newly raised blocks and SJ on them (the fence prevents you from pulling up). Pull up on the roof, turn around (S) and do a SJ to the small balcony ahead. Kick the brown door open and enter the house.
The keyhole to your R near the closed door is a Copper Keyhole. Use the 2nd Copper Key on it to open the nearby door, pass through the latter and drop down the hole.
Swim through the tunnel then into the first room staying close to the walls to avoid triggering the spikes in the center. Swim into the second room staying L and activate the UW lever there in the middle of the E wall to open a door at the end of the third room. Swim through the latter then the doorway into a large pool and surface.
Exit the water and immediately draw your weapon to get rid of the giant wasp that's flying at you from the L. Once it's down, take a look around. You're at a Church Square, said Church being flanked by two cemetary lanes on the L and R, which you're both going to visit for some goodies and insect extermination.
Go to the R cemetary lane (NW), draw your pistols and run ahead (W). Soon a giant wasp will make an apparition. Lure it to the Church Square to easily shoot it down with the pistols. Return to the R cemetary lane and run into it to the other end. Another giant wasp will come buzzing at you. Kill it like the first one and go back to the R lane. Run to its other side and pick up some uzi ammo behind the last grave. Return to the Church Square.
Now go to the L cemetary lane (SW) and proceed there like you did in the R one to kill 2 giant wasps that will attack together. Once they're both down, return to the L lane and get the shotgun normal ammo there behind the last grave. Return to the Church Square.
Go to the church doors and push them open to enter the Church. Go R (N) in the NE corner and pick up the small medipack. Turn around (S) and run to the other corner (SE) to get some uzi ammo.
Now run W to the altar and the crucifix. There's a hole behind them. Drop down in it and pick up the Red Chaos Gem. A trapdoor will give way under your feet and you'll slide down to a nicer, warmer and prettier part of Venice.
==== In this part, you should have found...
Enemies: Blood Mummies, Locusts (you can
avoid them), Giant Wasps, Venomous Spiders, Giant Spider (doesn't attack),
Dead Swordman
Items of note: 1st Copper Key, Rusty Key, 2nd
Copper Key, 1st Iron Key, Ruby Sphere Piece 1, 2nd Iron Key, Ruby Sphere Piece
2, Red Chaos Gem
some Traps
== Part 3: Say Cheese! ==
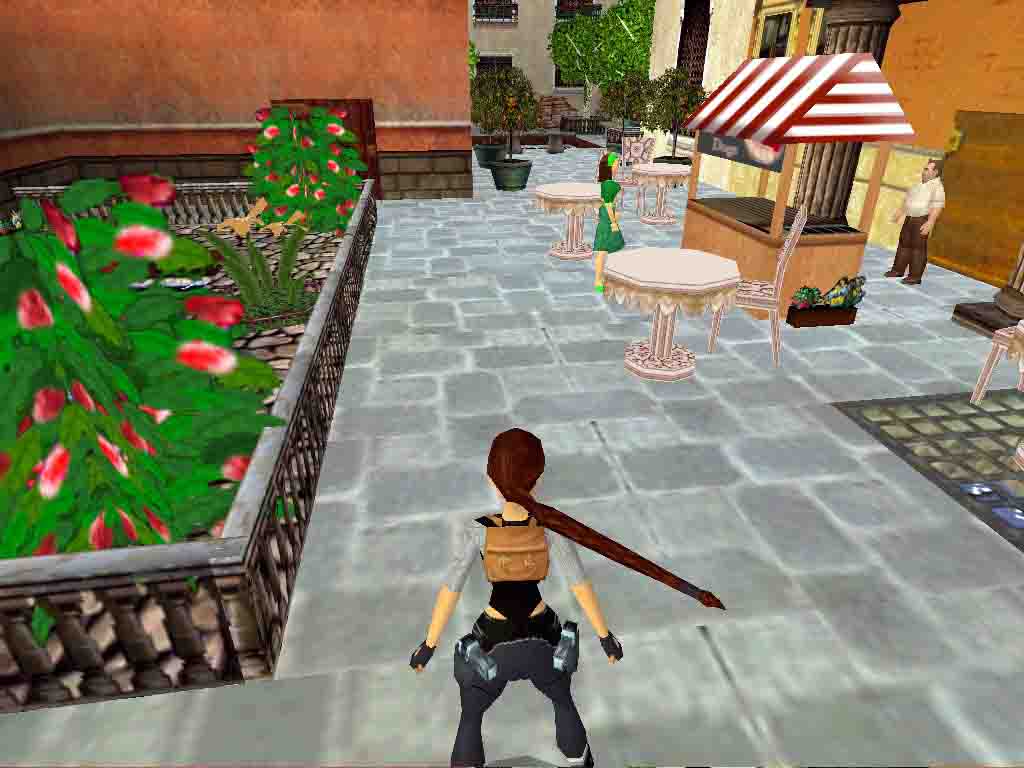
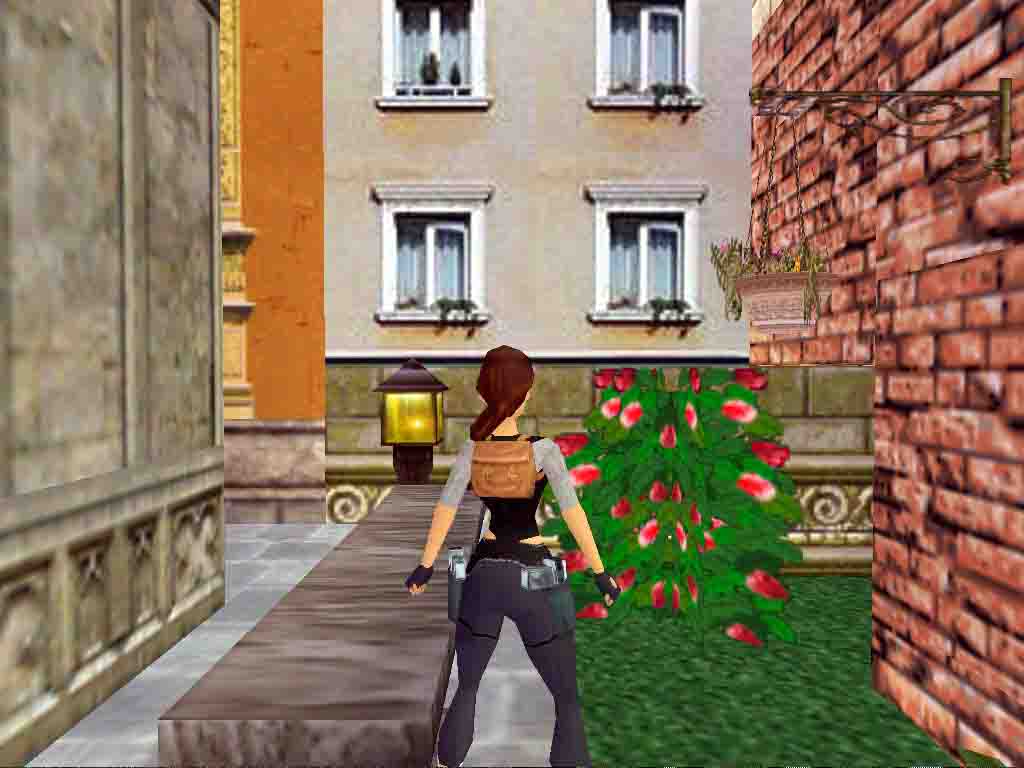
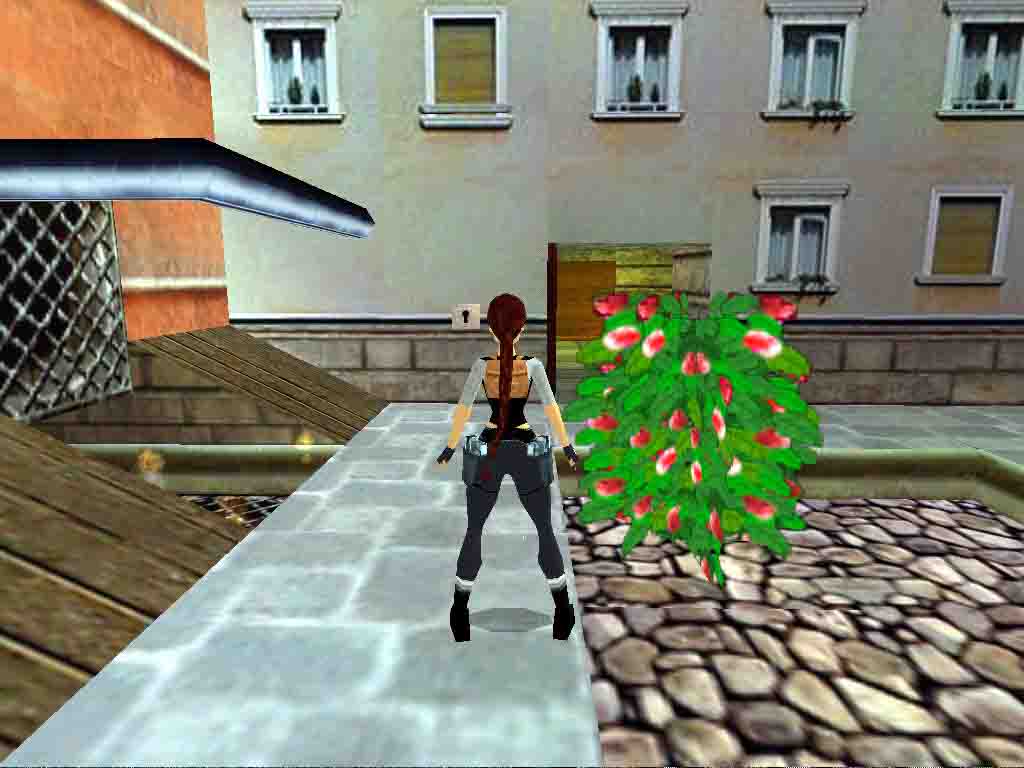
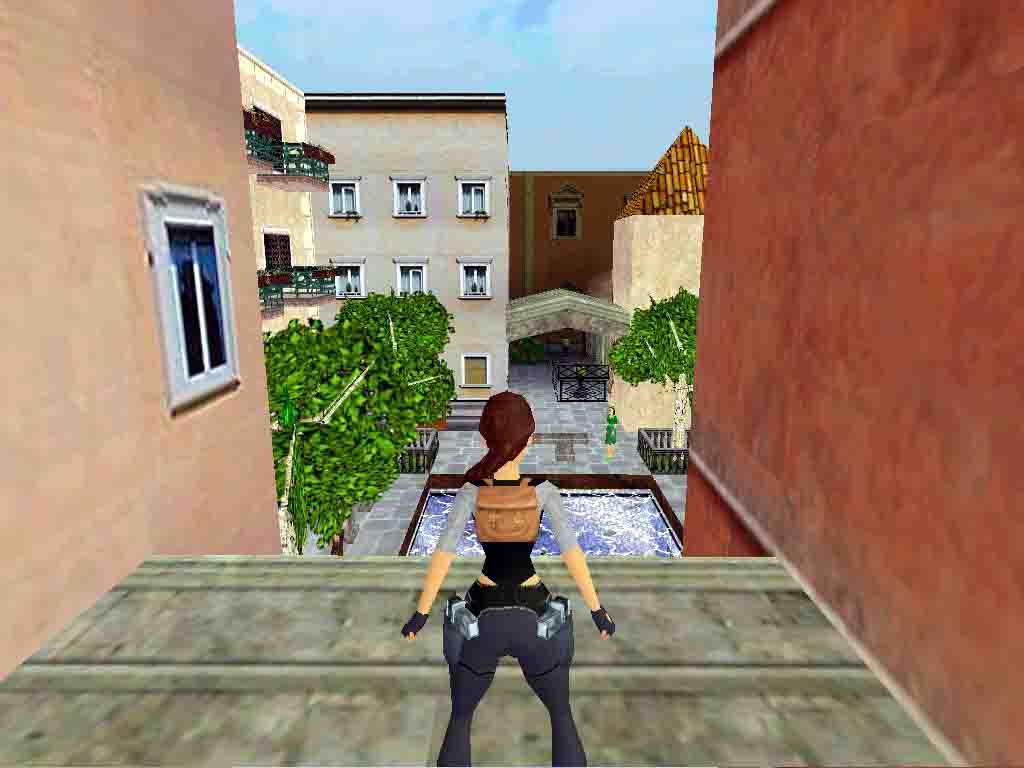
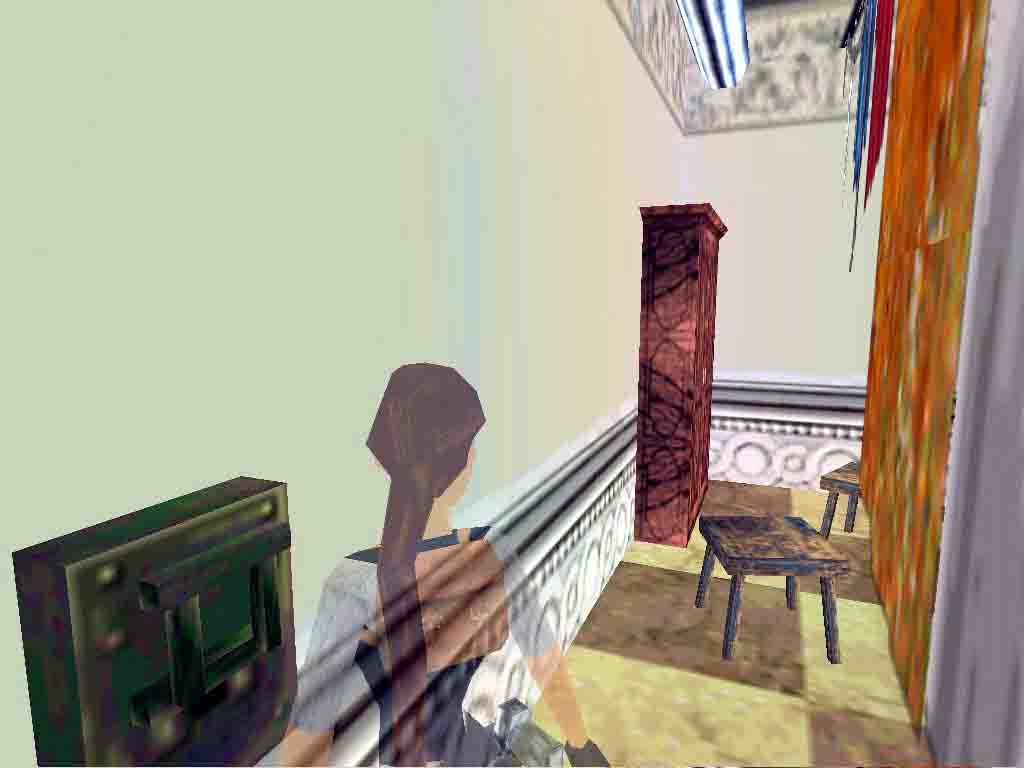
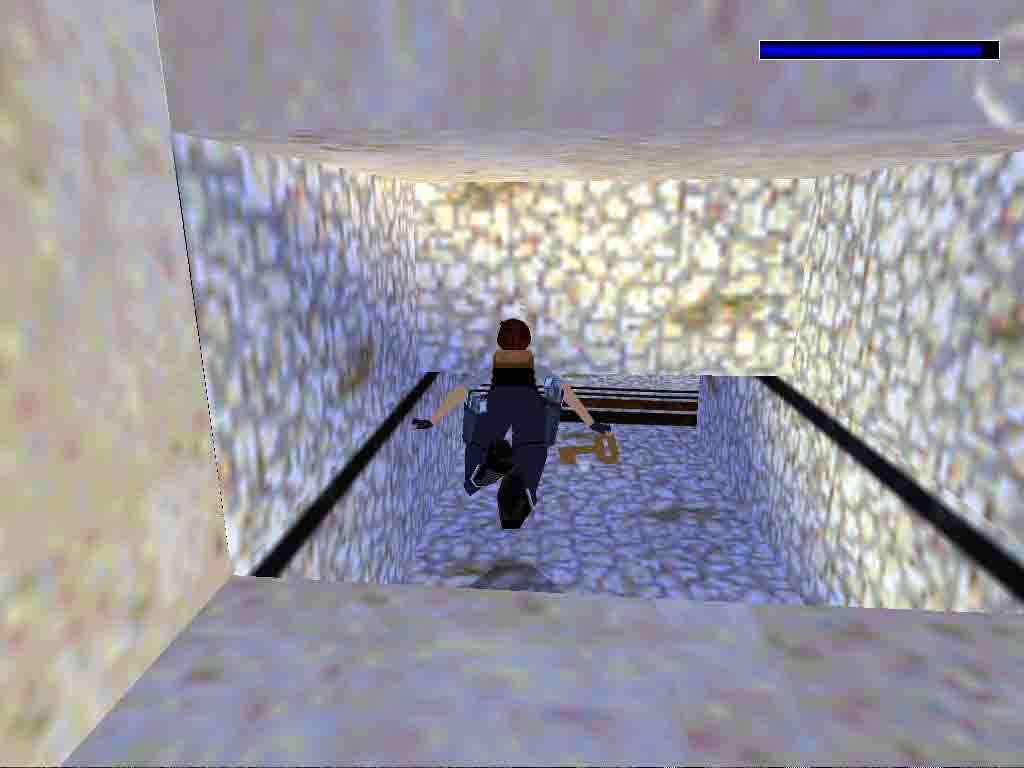
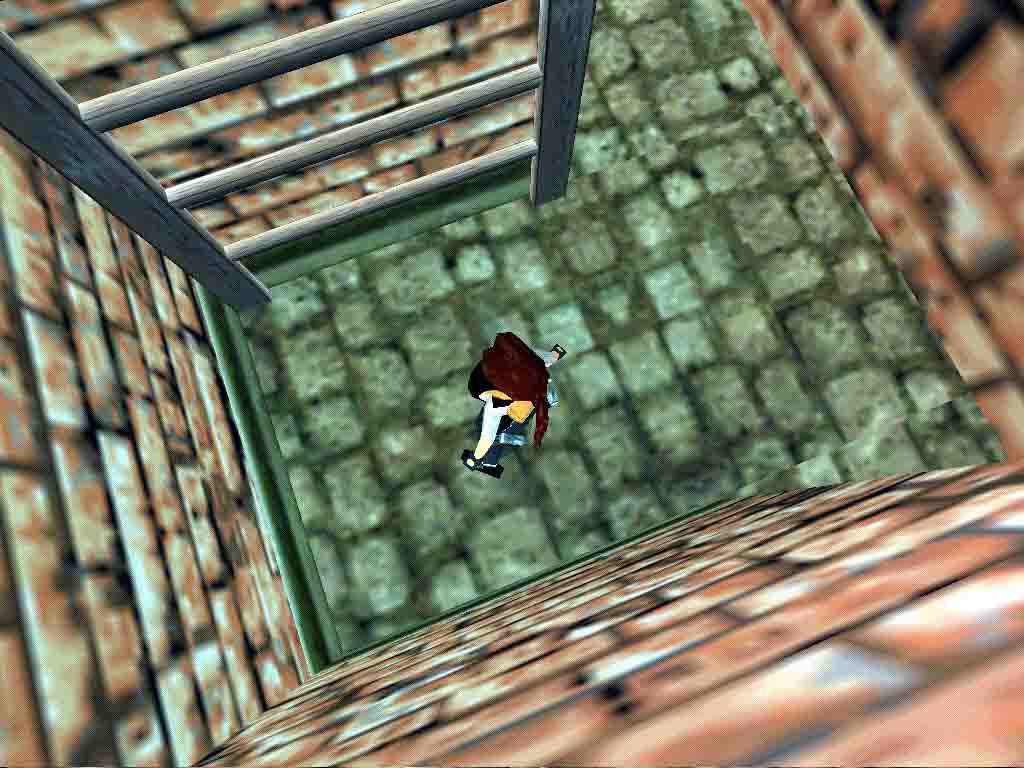
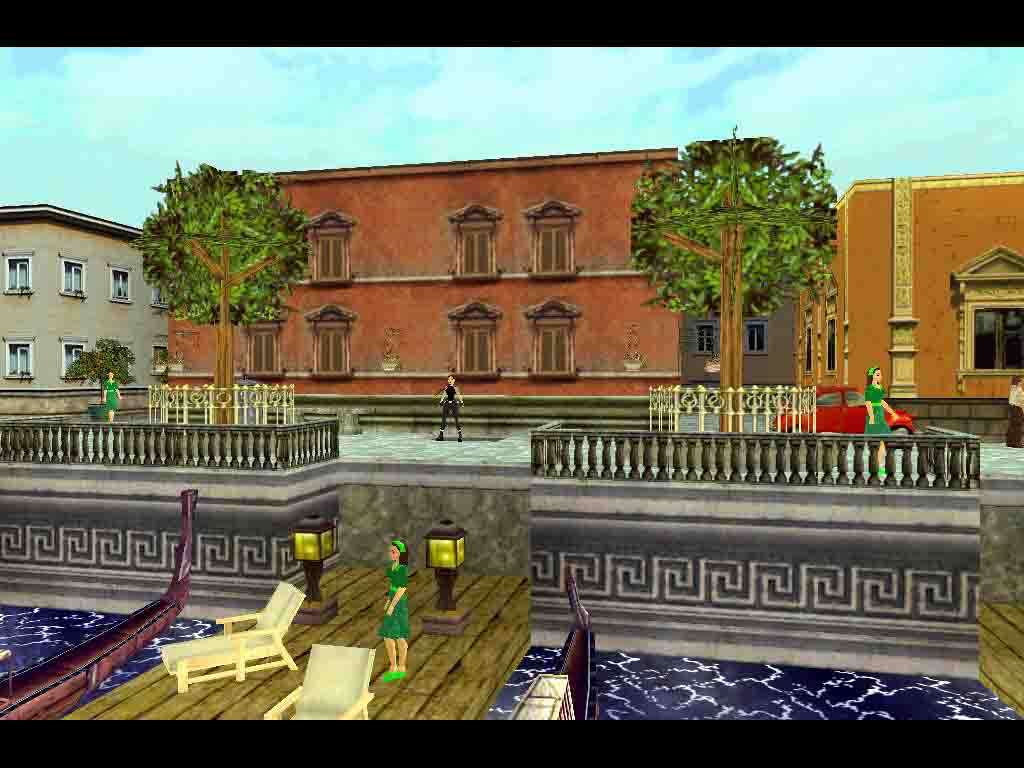
Objective: Sail away from Venice
Ah! This feels like Venice. Charming, peaceful and riddled with tourists. But as nice as it is, you still got three Chaos Gems to find and a world to save so you do have to find your way out.
You're now at Pool Plaza. Turn L to the pool and take a look. You can spot a key lying in a CS. Don't try to get it, you won't be able to crouch in the water. Another thing of interest is the jumpswitch high in the wall on your L, behind some pipes. Too high indeed for you to grab, but take note of its location nonetheless. Now let's go and tour the place.
Turn R (N) and run ahead until you reach another (bigger) pool. You're at Central Plaza. Turn R (E) and run under the arch to enter yet another plaza with a monument-like structure in the center (Monument Plaza). There's a water hole in the center of the monument, but it's currently closed by a grate door.
Go E to the other side then R (S) at the corner. Run straight ahead until you reach the wall. This part is movable. Push it twice to reveal a small courtyard. There's a ladder here to your R. Climb up to the top and pull up on the wall separating the courtyard from the plaza.
Ignore the roof to your L and do a RJ to the top of the monument ahead. Run in the central hole and turn around. There's a button here. Push it to open the grate door in the water hole below. Backflip on the roof and drop down in the plaza.
A Key in a Maze
Click for a map of the maze 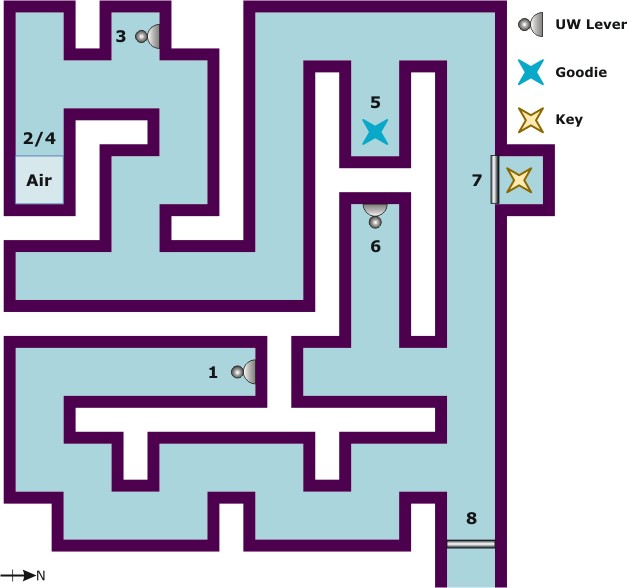
Jump in the water hole and pass the newly opened door. It closes behind you trapping you in what very much looks like an UW Maze (and is, by the way). Here, you must find and pull 3 UW levers to open the closed door you can spot ahead and to your R, pick up what's beyond then exit the maze whence you entered. You'll also find some goodie on your way.
- Go L (S) at the first junction and swim through the tunnel to its end to pull a 1st UW lever.
- Turn around and swim through the tunnel back to the entrance tunnel. Swim L (W) through the tunnel. Ignore the first and the second junction and turn R (W) at the third. Swim ahead then L around the corner. Ignore the alcove and go L (E) at the junction. You'll find an air hole there. Surface for air.
- Turn around, swim R (N) at the junction then L (W) into the alcove. Pull the 2nd UW lever. Return to the air hole.
- Turn around, R at the junction then ahead (N) past the alcove through the tunnel. Turn L (N) at the junction then R (E) at the next one. Pick up the revolver ammo there.
- Leave the alcove, turn R (N), swim through the tunnel past the closed door then R (S) at the junction and R (W) again. Pull the 3rd UW lever.
- Turn around, L (N) at the junction then L (W) again at the next. Swim R (N) through the newly opened door and pick up the Key there.
- Leave the alcove. The entrance door is open again so swim L (E) and pass the door to be back in the monument water hole.
Sneaking into Houses and Traveling on Roofs
Turn L to leave the hole by its N edge and return to Central Plaza by going L after the monument. Run W past the pool then under two arches ahead. Climb a flight of stairs and go L (S) to enter a courtyard. There's a low CS to your L, currently riddled with burning floors, and a Keyhole ahead. Go use your newly found Key on it to open the nearby wood door.
Pass the latter. You're in a small room with no apparent way out. Notice the grates on you L: they're all shatterable. Shoot at least the left "column" of them so you may enter the other side of the room (or shoot them all if you feel like vandalizing the place). Flip the small switch on the wall to your L, turning off the burning floors in the nearby CS.
Return to the previous courtyard and crawl through the now safe CS (now to your R). Turn around as soon as you stand up and pull up on the wooden ledge. The trapdoor above you can be opened by pulling it, so jump up and hit Action. Turn around and pull up in the room above.
There's a wood door in front of you, but it's very much closed and you don't have the key to open it. The two other doors can be pulled open, but ignore the R one for now and open the L one. Enter the next room. Ignore the door to your L, it only gives onto a broom cupboard holding nothing of interest (unless you're into stools and stepladders). Notice the grate ahead and to your R (NE) and shoot it.
Crawl through the now open CS to reach a roof. Turn L (W) and do a RJ to the low wall ahead. Turn L (S), hop back with Action pressed and drop down into a closed courtyard.
The trashcan to your L is shatterable. Shoot it to get the Copper Key it contained. Turn L to locate the ladder in the far R corner (NE). Go climb it and pull up on the wall, go R, do a RJ to the previous roof and crawl through the CS to be back in the house.
Return to the Entrance Room and go use the Copper Key on the Copper Keyhole near the door to open the latter. It gives onto a balcony, but don't go there yet. Go R and kick open the brown door there to enter a bathroom. Ignore the bathtub for now. Shoot the decorated vase near the window on your L and pick up the small medipack it contained.
Turn R (S) and run past the hanging laundry that hides a small switch. Save before flipping it: you're in for a rather tight timed-run.
Flip the switch: a block raises in the street below.
Hit "look" to stop the camera, roll to turn around and sprint into the entrance
room. Turn R to pass the open wood door and go on the balcony. Run with a
R curve and do a RJ over the fence with a hard R mid-air curve to land on
the block. Turn L a bit and sidejump L on the next balcony 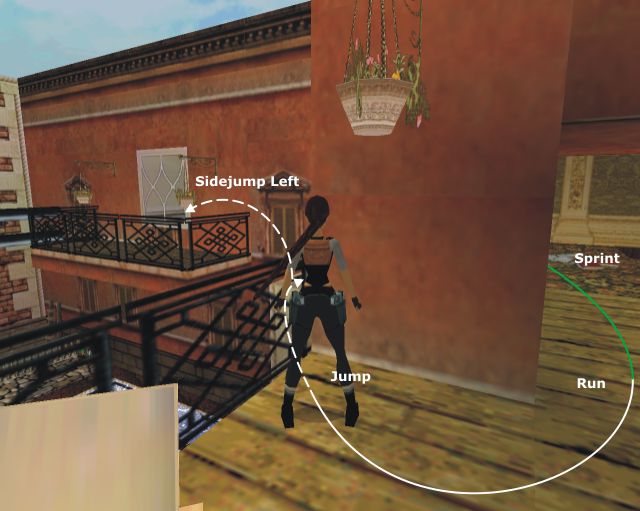 .
.
Turn L (S) and run to the other end of the balcony. The jumpswitch we spotted at the beginning is ahead, but jumping to it is complicated by the flowerpot which prevents you from doing a simple straight RJ from the middle. Go against the fence, standing L of the flowerpot, turn slightly R to aim at the jumpswitch, hop back and do a RJ+G to flip the jumpswitch and lower a part of the bathtub in the bathroom you just visited.
Return there via the Western Courtyard, the burning floor CS and the house itself. Jump in the bathtub and swim down the hole. The Rusty Key in the UW CS you already spotted is there. Swim to it, careful not to swim too far or you'll have to backtrack in the bathroom again, and pick it up. Swim ahead in the small pool where you'll stand up and pull out to be back at Pool Plaza.
Addio, Venezia!
There's still one place in the neighborhood you haven't visited. Go L (N) to Central Plaza then run along the L side of the pool there. Continue N to pass an arch and a flight of stairs and reach another small courtyard.
There's a closed wood door ahead and to your R (NE). Use the nearby small switch to open it and enter the next room. Ignore the passage to your left: it leads to a dead end and go R instead.
There's a block there with four buttons (one per cardinal point). Beyond it is a set of four doors. You now must push the right buttons in the correct order so all four doors are open at the same time. You'll find the solution to this puzzle in the Spoilers Section at the end of this walkthrough.
Pass through the four opened doors and go L (W). The Rusty Keyhole is there on the L of a closed door. Use the Rusty Key in it to open the door and pass through the latter to enter a corridor.
You can spot a ladder to your R (N) but don't go there yet. Go L (S) instead then R (W) into a recess to pick up some shotgun normal ammo. Return to the corridor, turn L (N) and go climb that ladder. Pull up at the top to reach the Port of Venice and sail away.
==== In this part, you should have found...
Enemies: None
Items of note: Key, Copper Key. Rusty Key
a few Traps - 1 timed-run
==== VENICE WHAT'S WHAT (Combat Strategies)
- Bats: Tiny and hard-to-spot. Keep shooting until Lara doesn't aim at anything anymore, spotting them thanks to the flapping sound they make.
- Blood Mummies: They're very very slow, like their Mexico Zombies counterpart, but there's one major difference here: they can be killed with a few pistols bullets. So don't hesitate: eliminate them!
- Dead Swordman: Let your giant spider friend take care of this one.
- Giant Spider: This one's friendly. Let her live. You could even give her a name.
- Giant Wasps: They can deal much damage would they sting you but they're rather slow. This said, they tend to attack when you're in a position where you can't really move and jump. The best policy here is to use the revolver. Two bullets are enough to take them down before they can reach you if you wait for them to be close enough. If you can spot them from far, start with the pistols and finish them off with a single revolver bullet when they're close.
- Rats: They aren't very dangerous. They don't do much damage and are rather fragile. A few pistol bullets should take them down quickly.
- Stray Dogs: Fragile but very quick and tend to stick to you or push you. Try killing them while hoping back when possible or use your revolver. One single bullet is enough.
- Venomous Spiders: Those wouldn't be much of a problem if they weren't venomous. Shoot them with the pistols before they can bite you. They die quickly.
==== SPOILERS SECTION
-- Part 1: Sewer System --
Solution to the Blocks Puzzle
-- Quick solution:
Map of the room and initial positions ![]()
-- Detailed solution:
- Go to the first L crate and pull it as far as you can. Go around it then
push it in the corner of the room.
- Go to the second L crate and pull/push it against the first one.
- Go to the third L crate and pull/push it against the second one.
Map of current positions ![]()
Now let's take care of the R crates.
- Go to the first R crate and pull it twice against the sloping floor.
- Go to the second R crate and pull/push it against the first one.
- GO to the third R crate and pull/push it against the second one.
Map of current positions ![]()
The only crates left are the one blocking the accesses.
- Go to the closest blocking the access of the E part of the previous room.
Pull it once into the corridor then push it against the third R crate.
- Now go to the last crate and push it twice into the next room.
Map of final positions ![]()
Solution to the Switches Puzzle
-- Quick solution:
Look closely at the black tiles before the switches.
-- Detailed solution:
Only one switch is safe. The two others will turn on a burning floor under your feet. Notice the smoke coming from the two rightmost ones and go flip the leftmost one.
-- Part 3: Say Cheese! --
Solution to the Four Doors Puzzle
-- Hints:
Map of the room and initial positions ![]()
- Button A acts on Door 2 and Door 3
- Button B acts on Door 2
- Button C acts on Door 1 and Door 2
- Button D acts on Door 3 and Door 4
Doors 1 and 3 are closed, Doors 2 and 4 are open.
-- Solution:
- Press button C (S) which opens Door 1 and closes Door 2
- Press button A (N) which opens Doors 2 and 3.
Authorized walkthrough by Sutekh
Airport 3:
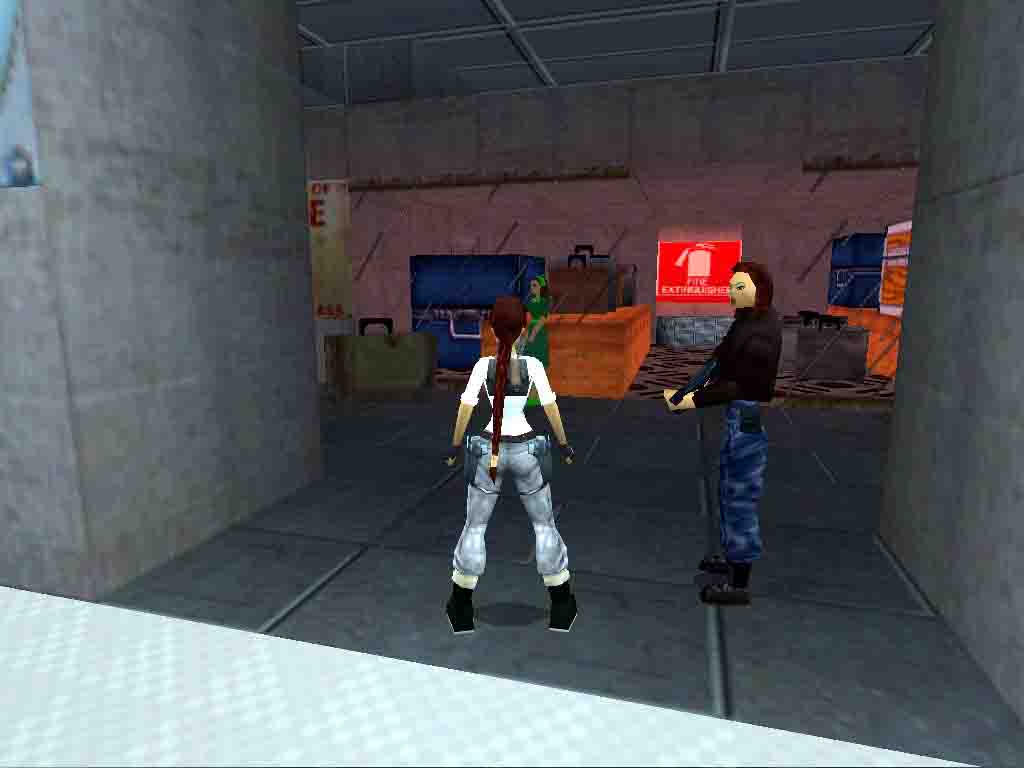
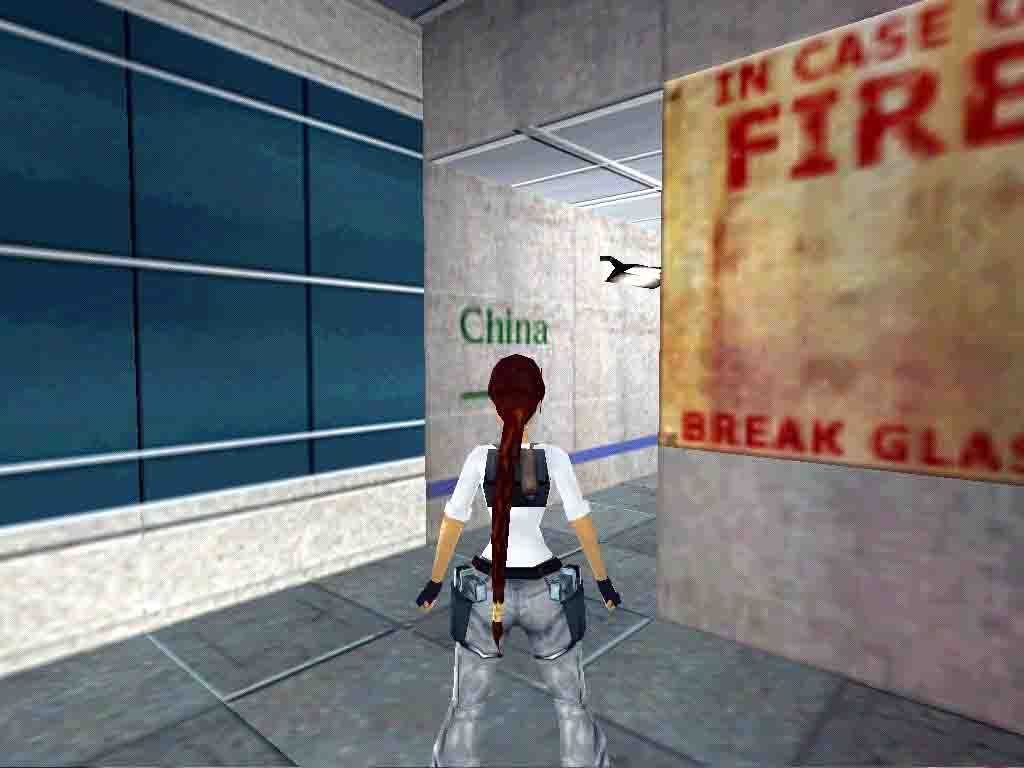
Chapter 3: China
Story:
Five mysterious gemstones are disperced all over the world to bring back the reign of chaos. Lara has to find them all and take them to a secret place, where an old enemy already is waiting for her...
CS = Crawlspace - MS = Monkey Swing - L = Left - R = Right - N, S, E,
W = Cardinal Points - UW = Underwater
SJ = Standing Jump - SJ+G = Standing Jump + Grab - RJ = Running Jump - RJ+G
= Running Jump + Grab
-- General Notes --
* Items in bold and blue are necessary to complete the levels or get the
secrets, either by using them, picking them up or both.
* You'll find a Combat Strategies Section at the end of this walkthrough as
well as a summary at the end of each level.
== Part 1: Rotten Underground Temple ==
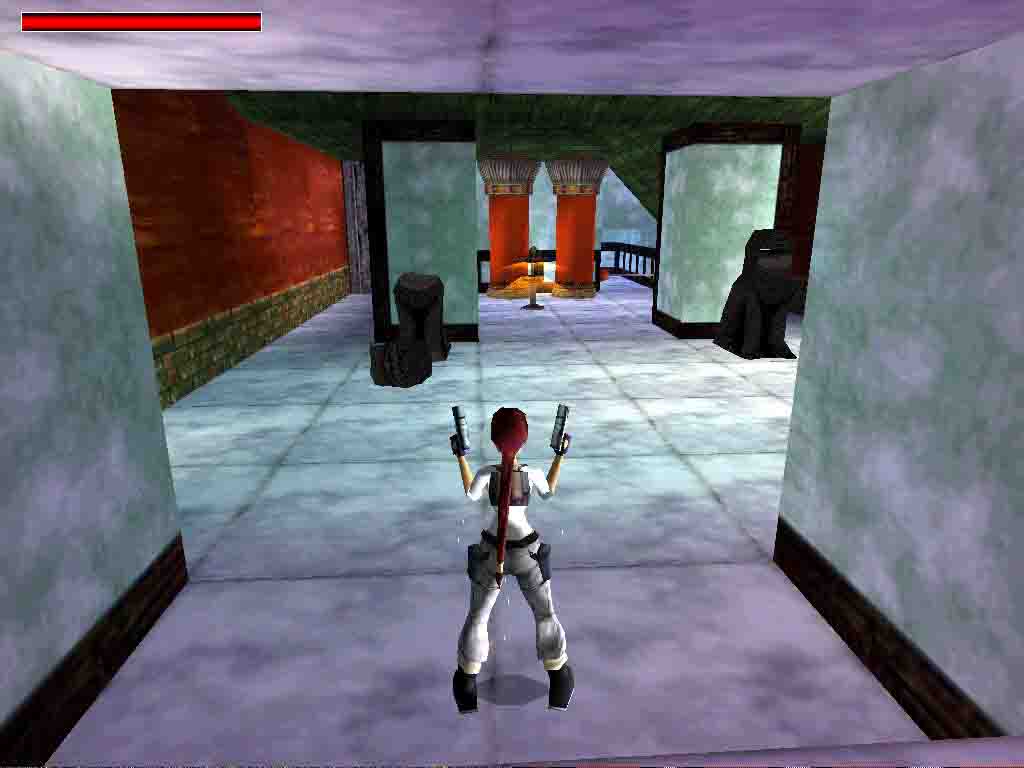
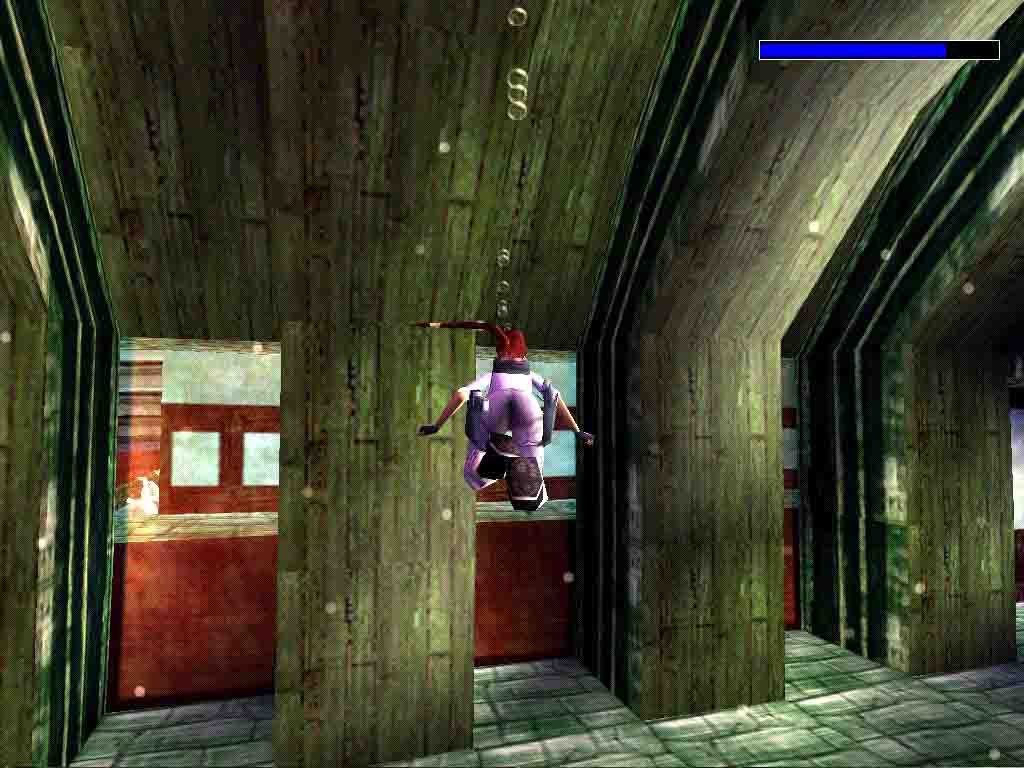
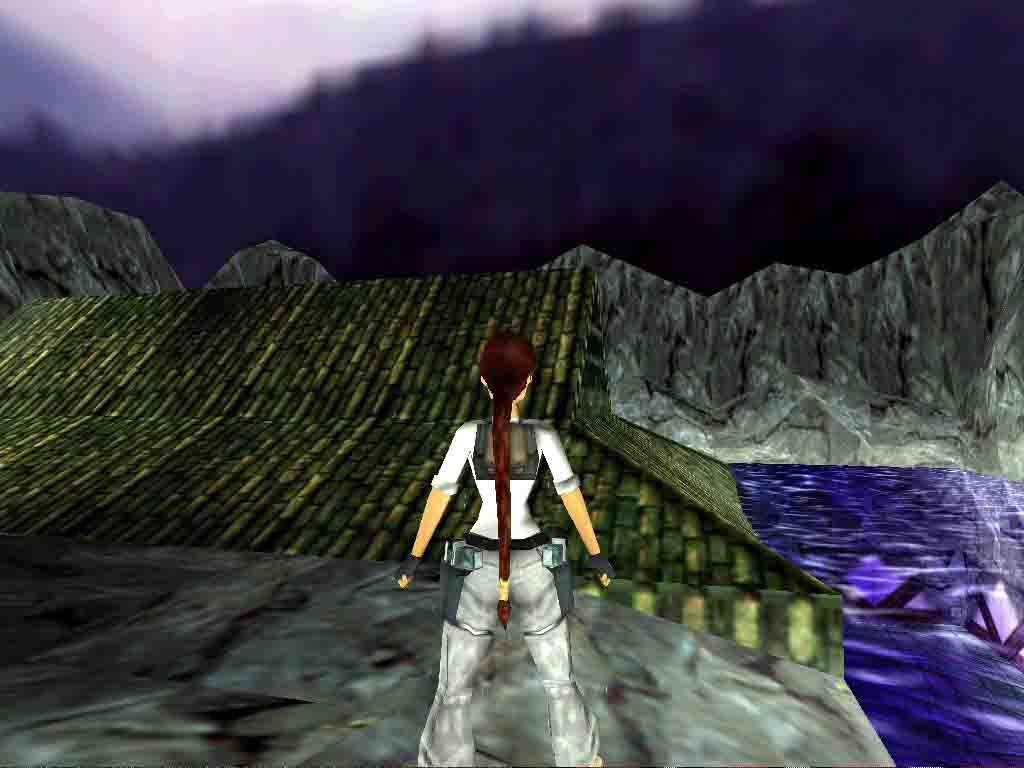

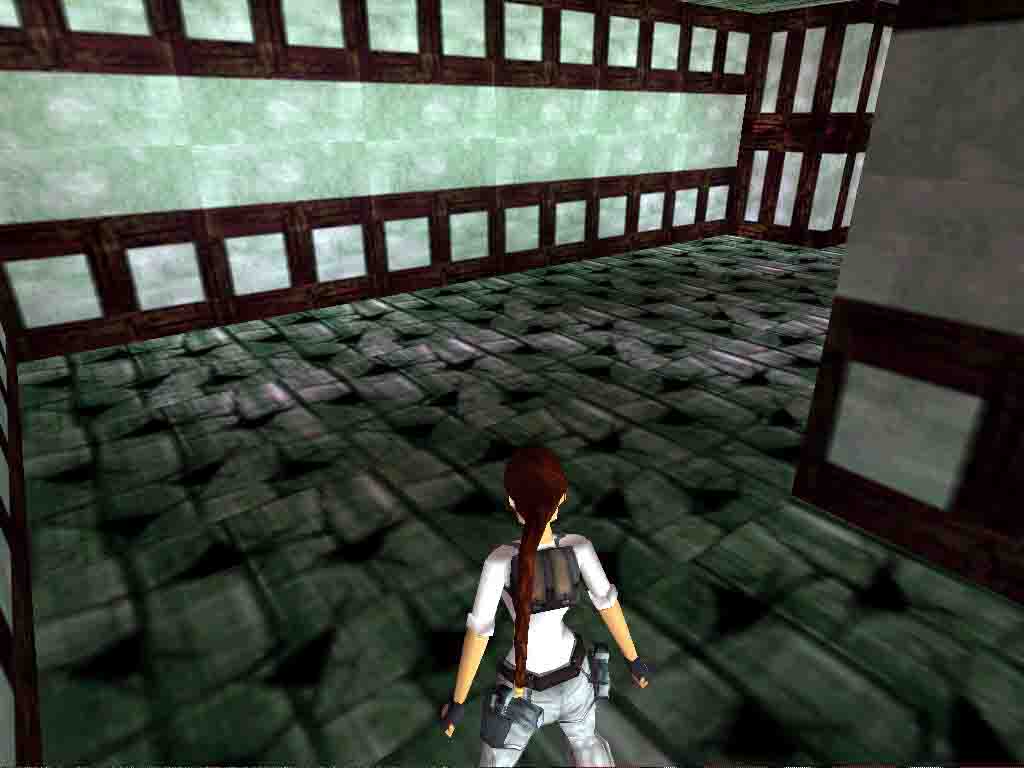
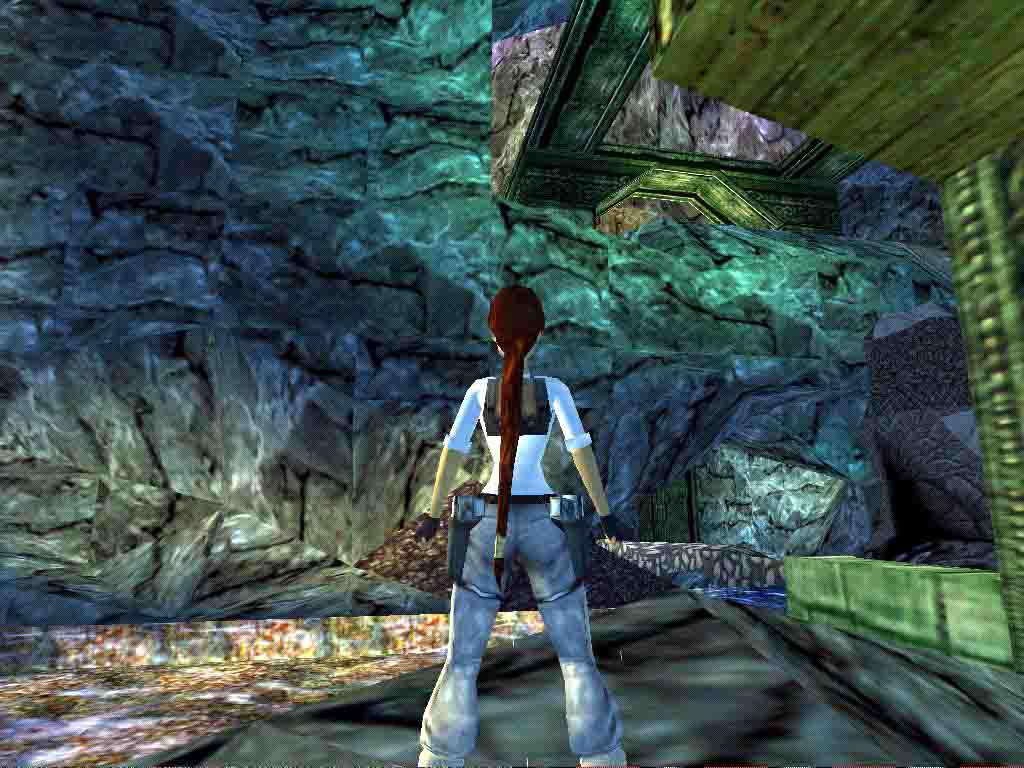
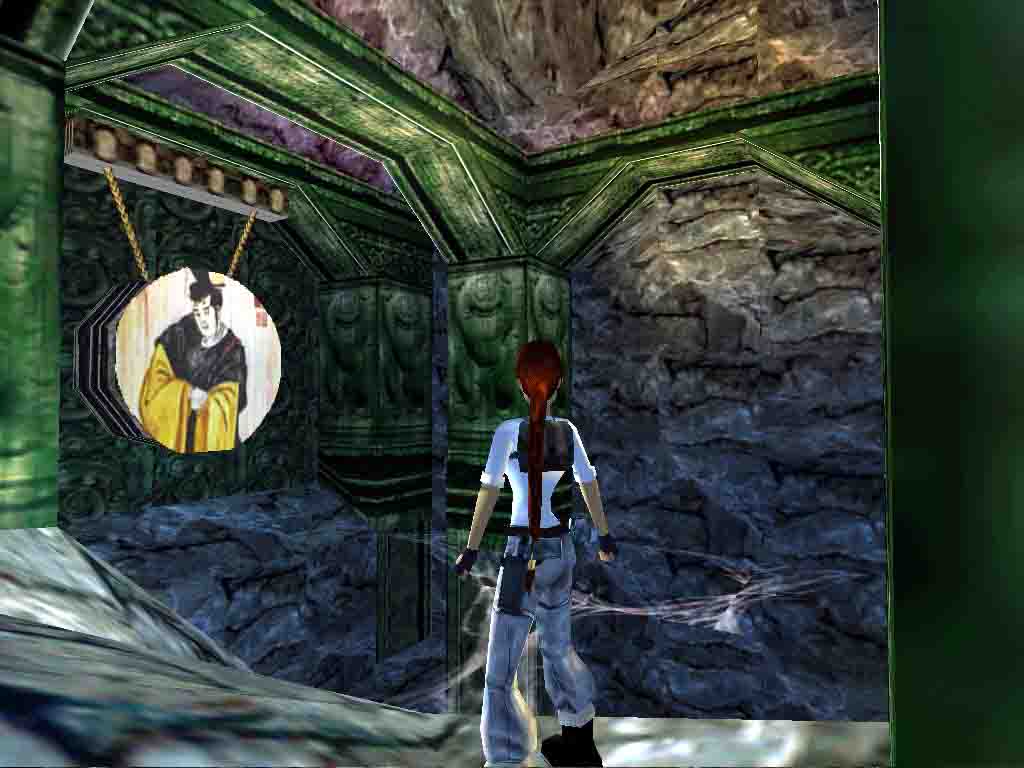
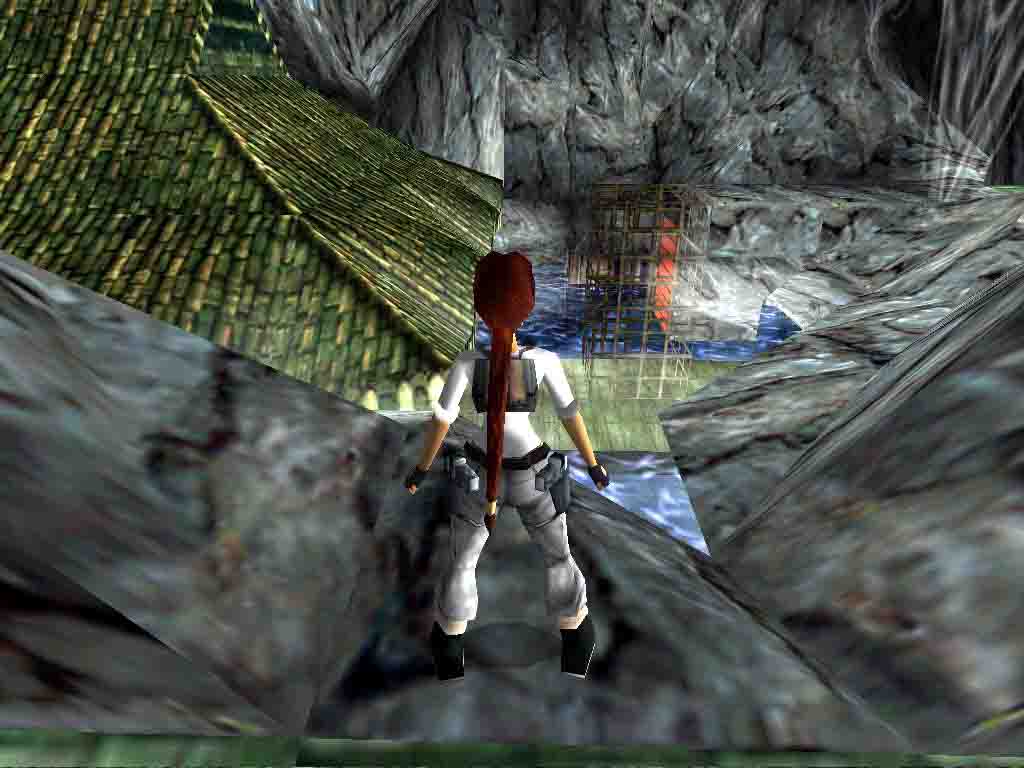
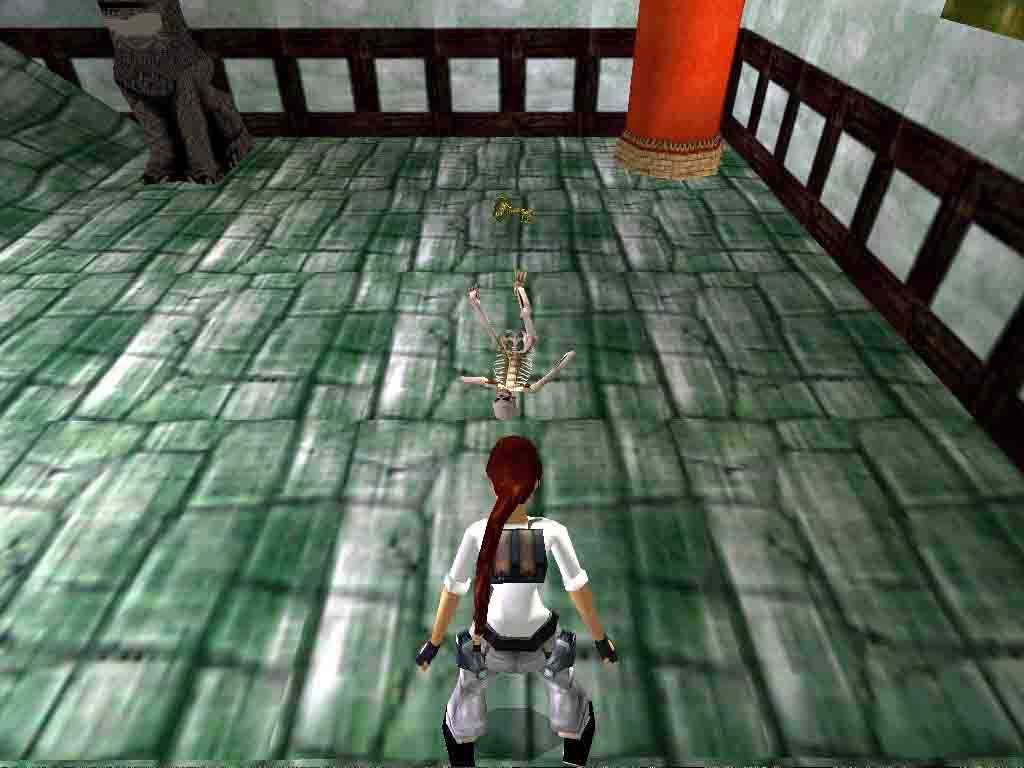

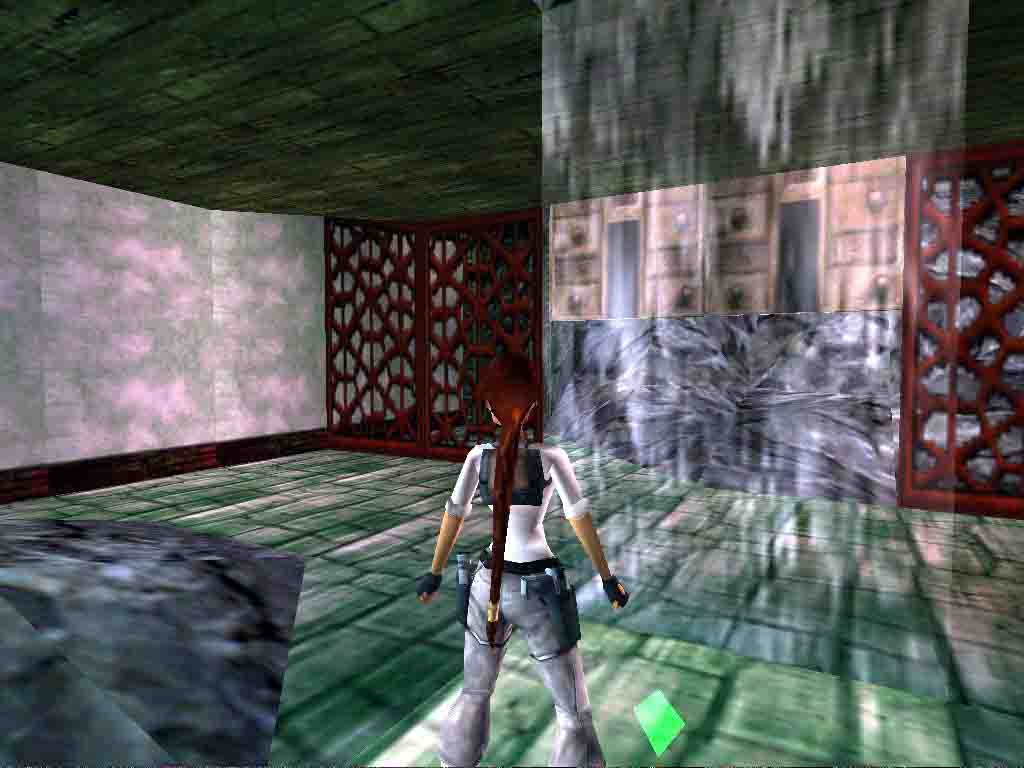 Secret 5:
As soon as the level starts, jump with a hard R curve to land on a flat ledge and pick up the small medipack there. Now you can slide down into the Rotten Underground Temple.
Don't be fooled by the apparent peacefulness of the place. Peaceful it is not, as you'll soon discover, despite the soothing music. You're in a very large, high-ceilinged, empty room. Not much to do here at the moment so run ahead (N) to the other side and turn R (E). Run up the ramp to reach the edge of a long puddle of scalding water. Peacefulness ends here and now.
-- The Path to the Huge Cave --
Objective: Make your way to a huge cave hidden in the bowels of the temple
Venom, Water and Sharp Things
Go to the L extended edge, standing in the very L of it to aim at the tip of the triangular edge in the other side of the puddle. Hop back and do a RJ over the puddle. Draw your revolver (you'll see why in a second) and step in the room. Immediately shoot the giant venomous spider that comes at you from the ceiling. Those spiders have nothing in common with the friendly one you met in Venice. They are utterly dangerous and, above all, venomous. So kill the monster without hesitation.
You're now in a small room with closed doors ahead (E) and to your left (N), the latter having a keyhole nearby. If you look up at the hole whence the spider came, you'll see a jumpswitch there, obviously too high for you to grab. Run through the opening to your R (S) and run ahead to reach a switch under a cascade. Activate it: the high-ceilinged room whence you came is now flooded.
Go there via the Spider Room, RJing over the scalding water again. Swim into the High-Ceilinged Room, staying close to the ceiling so you don't miss the hole in the center. Pull out of the water by the W edge.
Run to the opening ahead, turn around, drop down and hit Action to grab the edge. You're now on a ladder so climb down to the bottom and let go, finding yourself in a corridor near the High-Ceilinged Room (which you can see through the transparent window). Go R (S) then R (W) through the large opening and run into the next room. See those blades ahead? Yep, you now have to deal with them.
Go to the R one and stand as close to it as possible without taking damage. Sidestep R so Lara's shoulder is against the wall, wait for the blade to be fully extended (i.e. when you hear it) and sprint through it as it retracts to "follow" it and minimize damage.
Go get the Key in the high recess then go to the other blade (now on your R). Proceed here like you did the first time. Run into the room but stop near the dog statues: 2 Stone Dragons will fall in the room and miss you (just a warning, as it seems).
Return to the Spider Room via the ladder and the flooded High-Ceilinged Room, dealing with the scalding water once more. Use your newly acquired Key on the Keyhole near the L (N) door to open it and enter the room beyond.
Sniping, Lighting the Way and some Spikies for Good Measure
Run across the room then crawl through the low CS until you can stand up in a hole. Turn to pull out of the hole from its L side. You'll find yourself on a slope so backflip on another one and jump. Keep bouncing with the Right key pressed to swerve in mid-air and eventually land on a flatter, triangular legde in the NE corner. You're now in for a very tricky jump.
Turn L (S) and hit Look if needed to spot the ladder ahead. Most unfortunately, the part you're facing is "blocked" by a slope preventing you from grabbing it and the upcoming jump will be rather complicated.
Go to the very corner and face the ladder as though you'd do a simple RJ
to it. Run straight, jump and first do a R mid-air curve to clear the
highest part of the slope then a L one to more or less align with the ladder.
Hit Action to grab only at the very last moment or you won't be able to do
those curves 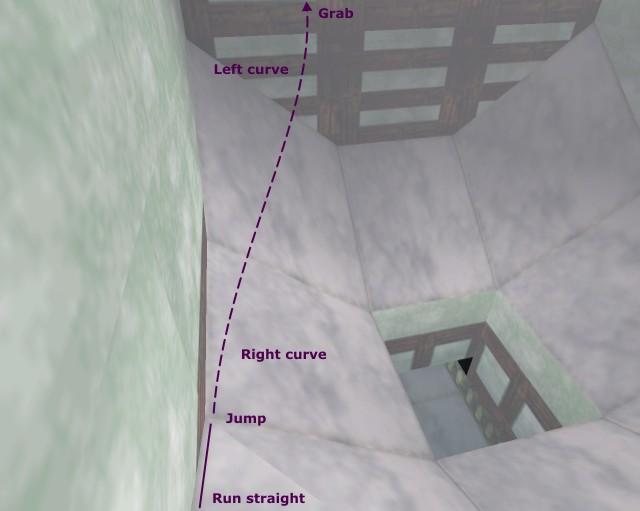 .
.
Now that you've finally grabbed that ladder, climb up to the top and pull up. You're on the top of a wall separating the slopes area from another darker (and flatter) one. Drop down but grab the edge and pull back up: you've attracted a giant venomous spider and the place down there isn't very favorable to fight. Use your revolver combined with the laser-sight to aim at it from up there and safely kill it.
Once it's properly eliminated, drop down, this time for good, and run across the room until you reach a hole located just above the Spider Room (this is from there the first spider attacked). Look down to locate the jumpswitch, turn around and drop down while holding Action to grab and flip it, opening the double doors in the E side of the Spider Room.
Run through the latter and ahead to soon reach an opening overlooking a room with a closed door to your R (S) and a keyhole, a water hole ahead (E), a brazier below and a passage to the L (N). Drop down into the room (you can get back up via a ladder) then jump in the water hole.
Swim ahead (E) to enter a large rocky partially flooded area under a large roof. Continue to the wall and go R (S) to pick up some shotgun normal ammo. Turn R (W) again and go get the flares ahead. Now go L (S) then R (W) and swim along the roof to the wall. Turn R (N) there and pull up on a flat rock by the roof. Run ahead (still N) and pick up the Key in the corner near the wall. Return to the Brazier Room via the water.
Go open the door to your L (S) by using the Key in the Keyhole but don't enter the room beyond yet. Turn around and run in the short passage in the opposite side of the room (N). Turn around again once there and look up: there's a ladder here. Jump up, grab it and immediately backflip on a ledge behind. Turn around and pick up the Torch in the L corner.
Now you've got a Torch and have located a lit brazier so I suppose you know what to do next. Run off from the ledge with your torch in hand and go light it on the brazier (now to your R), careful not to go too close to the flame. Enter the room you just opened with the lit torch.
There's a raised cage to your L in the passage to the room then four unlit braziers in the room itself and, if you look up, a chain that's currently wound up. There's also a closed door at the other side. Light all four braziers to lower the cage, drop the torch (you won't need it anymore) and go in the alcove where was the cage.
Turn around and look up. Another ladder here so jump up, grab it and climb up. Pull up at the top and go activate the switch ahead, unwinding the chain and gaining access to the upper part of the nearby room.
Return to said nearby room and run to the chain. Grab it while facing E and climb up. Stop when Lara's waist is approximatively at the same height than the ledge behind and backflip. Turn around (W). There's another switch there. Activate it to open the door in the room below. Return there by running off the ledge to the chain, grabbing it and sliding down.
Run through the newly opened door but stop before entering the next room. There's a very nasty surprise there: the room is riddled with spikes (OK. Now it's not a surprise anymore). And it's difficult to tell the safe tiles since they all look the same. Or do they? Look more closely. Some have hard-to-spot smoke raising from them. Those are the safe ones.
The 1st safe tile is the one on your R against the opposite wall 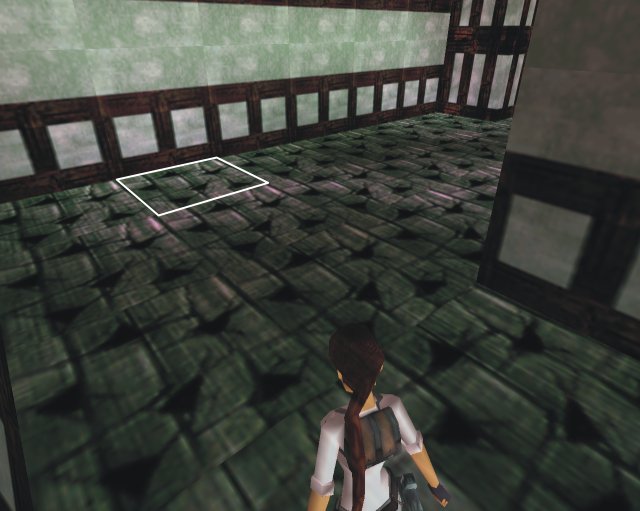 . Stand one step away from the closest spiked tile, turn slightly R to aim
at the safe one, hop back and do a RJ to it. Turn around.
. Stand one step away from the closest spiked tile, turn slightly R to aim
at the safe one, hop back and do a RJ to it. Turn around.
The 2nd safe tile is diagonally to your L against the opposite wall
 . A SJ won't be enough so align with the corner of the safe tile, standing
one step away from the corner of the tile you're on, hop back and do a RJ.
Turn L.
. A SJ won't be enough so align with the corner of the safe tile, standing
one step away from the corner of the tile you're on, hop back and do a RJ.
Turn L.
The 3rd and last safe tile is diagonally to your R, in the corner
 . Proceed to this one like you just did. Once there, turn R and do a simple
SJ to the safe part of the room.
. Proceed to this one like you just did. Once there, turn R and do a simple
SJ to the safe part of the room.
Run ahead (N) then turn L (W) into a room with two upward ramps and a large double golden door. A giant spider is desperately trying to go through (proof if needed that they might be scary and tough, but they sure ain't very bright). Ignore that fact for now (you'll worry about it later) and run to the closed doors then climb into the opening to their R (N).
You're now in a rather chaotic room half marble, half rocks. There's a hole ahead and to your R (NW), but ignore it for now, it currently leads to a block obstructed dead end (your whole next raiding will be dedicated to removing that block, by the way). Locate the sloping rocks L of the entrance. Go to them, turn W and do a SJ over the slope to the flatter part at the top to see there's a hole there. Drop down in it.
Run along the marble passage, ignoring the spider noises on your way, R (SW) across a small room then through an opening. Ignore the water hole, it leads to a dead end as well and continue W past a small building. Congratulations, you've reached the Huge Cave.
-- Roller-Coaster --
Objective: Open the doors to an UW tunnel and pull the UW lever there to remove a block obstructing a passage.
Alright. The place is huge indeed and quite confusing so don't get lost here. Run R (N) around the building and look R (E). There's a lever there - which happens to be your next goal - but there are also spikes between you and it that will rise if you approach it from this side, so you've got to find another way. Turn L (W) and run to the end of the broken natural bridge that overlooks a pool. We're going up.
Turn L (S) at the end of the bridge and do a RJ to the ledge ahead. There's another one below with a keyhole, but since you don't have any key to use there, let's continue up. Pull up on the ledge above (you'll see a big chinese round painting up there), turn L (E) then 45° L (NE) at the end to do a SJ over a slope to an upper part of the cave. Go L (N) to the wall, turn R (E) and SJ over the slope to a flatter part above. Turn L (N) and pull up.
Turn R (E). Your immediate destination is the switch you can spot in the upper floor of the building ahead. Run over the cascade to the other end, turn R and do a SJ to the floor. Go activate the switch, opening a trapdoor right above the lever. We're now going back down, but we'll do something useful on the way.
Turn R (S) and locate the jumpswitch ahead. Walk to the edge, align with the jumpswitch then hop back and do a RJ+G to flip it, lowering a block above. You'll land near the bottom floor of the building.
Turn R (W) and run along the building then R (N) around the corner. Pass the building and turn R (E) at the second dog statue. Run to the last one against the wall, turn R (S) and go pick up a small medipack behind. Now step back to the L of the statue and look up. There's a ledge above low enough for you to pull up on it. Proceed.
Run on the roof along the wall and past the column. SJ over the slope in the hole ahead, the lever is there to your R. Push it to lower a block elsewhere in the cave, revealing a switch. Go climb up the ladder to your R. Stop when Lara's hands are one tile away from the top and backflip on the roof. Drop down from there in the cave. We're going back up.
Return to the broken bridge and from there make your way to the top of the cascade. Now a short detour for some goodies. Return to the switch you activated a moment ago, on the upper floor of the building then to the edge from where you jumped to the jumpswitch. Do a RJ+G to the now accessible ledge and go pick up some shotgun normal ammo, revolver ammo, a small medipack and a large medipack (mind the spikes, though). Now return to the upper floor of the building with another RJ+G and from there to the top of the cascade. We're going higher.
Turn S, walk to the edge and sidestep R until you're on the highest part of the floor. Pull up on the wood bridge above. You now can see a switch in the far L corner (SE), but first a short detour for a secret.
Do a RJ+G to pull up on the other bridge ahead and turn R (W). Run to the junction, where you'll find a decorated tile, turn L (S) and do a SJ to the ledge against the wall. Turn R (W), crawl under the low ceiling then across the CS to your L (S). You'll find Secret #5 at the end: a Golden Rose. Return to the ledge via the CS and to the bridge with a SJ.
Go E to the roof of the building and R (S) once there. Do a RJ to the high platform ahead and go activate that switch in the far L corner, lowering a block in the very opposite corner at the top of the cascade.
Return there via the roof and the furthest bridge, dropping down from the latter. Turn around (N) and run to the wall staying roughly in the middle of the area. Turn L (W) and do a RJ+G to the now accessible block. Pick up the Key there. We're going down.
Turn 135° L (SE) and SJ to the top of the cascade. Return to the ledge with the big chinese round painting via the R side of the area, SJing over the corner. Run past the painting, turn L (S) and drop down on the ledge below. Hop back and fall to an even lower ledge. There's a Keyhole there to your R (W) in a recess. Go use the Key in it. Congrats, you've opened the first of two doors barring the way to your current objective.
Now let's go lower for the second one. Turn around, go L then run off the ledge to fall in the water below. Go to the L side of the low ledge ahead (i.e. facing S) and pull up. Turn 135° L (NE) to face another low ledge (yet too high for you to pull up on it from the water) and do a RJ to it. Turn around (S) and sidestep to the L corner.
The ceiling above the ledge in front of you is too low, and you won't be able to jump there. Turn slightly L (SSE) instead to aim at the further, lower ledge on its L and do a SJ+G with a slight R mid-air curve to pull up on it. Turn L (E), walk to the edge and do a SJ on the block with the switch. Activate the latter to open the second door. You're almost there.
Turn around, swim ahead then R (E) to pass through the two open doors into an UW tunnel. Swim through it until you find an UW lever to your L. Pull it to lower the block obstructing the passage back in the marble/rocks room as well as the door right behind you. Go to the end of the tunnel, pick up the small medipack there then turn around and go swim through the newly opened door. Let the stream carry you then swim through the rest of the tunnel to eventually reach the water hole you spotted upon entering the Huge Cave.
Objective fulfilled.
-- Lara Croft and the Urn that Had to Be Lifted --
Objective: Find the Urn and send it all the way up to place it on a special tile and open the golden doors.
Leave the water by the R side of the hole (E) and run across the opening ahead then the small room to be back into the marble corridor, with the spiders being as noisy as possible (but still invisible). Run to the end and pull out of the hole (if you're having trouble doing so, try hitting Action+Forward instead of jumping up. You'll go a bit higher).
Turn L (NW) and run to the hole. Run off into it, turn R (N) and run through the now accessible passage. Pull up at the end to pick up a small medipack then turn around and SJ over the passage on the green floor. Go R (N) and run to the other end, then a bit L (W) on the rocks. A fly-by shows you - among other things - an urn in a house below, over the water, and a decorated tile. Obviously you need to place that urn on the tile. Problem being: the urn is down below and the tile way up above.
If you look down into the water and to the L, you'll see a cage. It's blocking the access to an UW lever that will be instrumental for your upcoming success, so your first task is to get rid of that cage.
Meet the Arachnids Family (and Lower a Cage)
Turn 45° R (NW) and SJ to the rocky area. Run along the ledge and go R into a small cave. Draw your pistols upon entering as 2 baby venomous spiders will jump down from the ceiling. Kill them quickly before they can bite you (they're venomous, remember?).
Run further into the cave and go to the bluish tile under a square ledge ahead and R (NE). Don't pull up. You've killed the babies, and mommy isn't pleased: a giant venomous spider is up there to bite you to death. Stay below where it's safe and shoot it from there (jump up while shooting).
Pull up, go R (E) then L (N). Run to the slopes, turn around and look up. There's a ladder up there which you need to grab. Doing so won't be that easy, but since you'll have to do this more than a couple of times, you'd better get used to it.
Starting one step away from the slope behind, sidestep R until Lara's shoulder
is against the column  . Backflip, jump to bounce on the slope then hit Action to grab the
ladder.
. Backflip, jump to bounce on the slope then hit Action to grab the
ladder.
Climb and pull up at the top. There's another giant venomous spider up there (daddy, perhaps?). Stay where you are and take it down with your pistols. It won't go close to you.
Now run ahead (S) and climb on the higher stone ledge. Draw your pistols and run to the end. There are 2 others giant venomous spiders (Uncle Leggy and Aunt Shaggy) ahead which you can safely shoot from here. Proceed and enjoy the silence.
Get down the ledge you're on and follow the green path. There's a raised block ahead. Climb on it, turn 135° R (NW) and do a SJ on the flat triangular top of the slope. Turn L (N). You now can clearly see a switch against the wall. Go to the R corner, turn very sligthly L, step back three times to take a run up (don't hop back, you'd slide down the slope) and do a RJ with a hard L curve to the rocks before the switch.
SJ over the slope (careful not to slide) and activate the switch, raising a cage near the ladder and lowering the cage in the water down below and another one on the jetty. Now time to bring that urn up there.
The Long Ascent
Slide down to the green path and go down by the pool. You can do so either by going down the way you came or going to the R part of the hole by the green path, facing E, and doing a RJ into it, clearing the jetty and landing right into the water by the now accessible UW lever. Turn around and pull up on the jetty.
The lowered cage to your R is Cage 1. Go L (S) into the house, grab the Urn and pull it on Cage 1 (you'll see a raised block in the house L of the Urn which you'll lower a tad later). The ascent begins. Dive L into the water, go to the UW lever and pull it to raise Cage 1 (among other things). Pull up back on the jetty.
Locate the ladder L of the cage. Walk to the opposite edge of the jetty, turn R (NNW) to face the ladder and do a SJ to it with a slight R curve. Grab it, climb and pull up. The next Urn destination is the bluish raised block ahead (Block 2). Push/pull the Urn on it.
Return into the water and pull the UW lever to lower block 2. Return to the small cave where you left the urn and pull it away from block 2. Next step is the other bluish block (Block 3), but it's currently raised so back into the water and pull the UW lever to lower block 3. Return to the small cave, place the Urn on block 3 then go pull the UW lever to raise block 3 so you can move the urn to the next area.
Return to said area. Next step is Cage 4 on the L, but it's currently raised. Push the urn away from block 3 (go to the edge of block 3 behind the urn) and go pull the UW lever to lower cage 4. Return to the urn and push it on cage 4. Back to the UW lever and pull it to raise cage 4.
Let's go a bit higher. Return to cage 4 and use the nearby ladder to pull up in the upper cave. Once there, turn L and drop down from the ladder column on the currently lowered Cage 5. Go on cage 4 behind the urn and push it on cage 5. Drop down into the area below.
You have the choice: either you go pull the UW lever again or you return to the upper area via the ladder and flip the nearby switch back up to raise cage 5. (doing so won't raise the cage around the UW lever). Either way, return to the urn and push/pull it on the green path and all the way next to the raised bluish block in the other side of the upper area (Block 6).
Now you have no choice but using the UW lever again to lower block 6. RJ into the water from the R of the hole and proceed. Return to the urn and push it on block 6. When you do so, the block in the house below lowers, revealing a switch. Make your way there via the pool and the jetty and activate the switch to raise block 6 (you can also use the UW lever).
Make your way back up to the Urn and push/pull it on the decorated tile, opening the golden door that kept the giant spider at bay and completing the Urn trip.
-- The Green Chaos Gem --
Objective: Find the Green Chaos Gem
Return to the lower cave and from there go L (E) on the rocky ledge and go back on the green path by the red wall. Follow the path to the hole, jump down in the lower passage and run through it to pull up at the end into the marble/rocks room. Pass through the opening ahead and R to be back near the now open golden doors.
Pass through them. The spider isn't there anymore (but it isn't far, though). Ignore the opening to your L (S) for now and go the edge of the wider opening ahead (W). It overlooks a room with sloping rocks and a building to your L (S). Don't go down yet. Kill the giant venomous spider that's frolicking around there first with your pistols from this (currently) safe location.
Now that you have secured the area, pass the smaller opening. You'll soon spot not one but 2 giant venomous spiders there. Lure them back in the passage you came from, drop down on the rocks from the W edge and safely shoot them while jumping up. If the second one hasn't followed (which seems to happen most of the time), go through the small opening again and lure it in turn. If you're lucky and don't go too close to it, it'll even stay stuck in the room and you can simply shoot it there from the top of the stairs (I told you they're not very bright).
Pass through the small opening again if needed and this time enter the room. Go L (E) after the stairway. Lara will insist on looking at some skeletal remains near the far L corner (NE). Go there and drag them (hit Action while standing near the head) to reveal a Key. Pick up the latter and return to the passage upstairs then drop down on the rocks in the W room.
Don't slide down. Turn L (S) instead and run to the column. Turn R (W) there, go to the tip of a triangular rock, turn L to face the roof and do a RJ to it. Run ahead then R around the corner to find a Keyhole hidden behind the house. Use the Key in it, opening the golden doors below and unleashing the rather nervous giant venomous spider you've been hearing for some time now.
Since you can't shoot the spider from the roof (it will stays in the house), return to the R (eastern) part of the roof where you landed and do a RJ to the high rocks ahead. Turn around and shoot the spider to death. It may take some time, as it's quite the elusive type, but better safe than sorry. Once it's been properly exterminated, slide down the rocks and enter the house.
You're prize is lying there in all its green glory but first run to the other side, SJ on the rocks and pick up the small medipack. Now go seize the Green Chaos Gem to free China from its evil influence. A trapdoor will open under your feet and you will slide down to the China Garden.
==== In this part, you should have found...
Enemies: Giant Venomous Spiders, Baby Venomous
Spiders
Items of note: 1st Key, 2nd Key, Torch, 3rd Key,
4th Key, Green Chaos Gem
1 Secret
some Traps
== Part 2: China Garden I ==
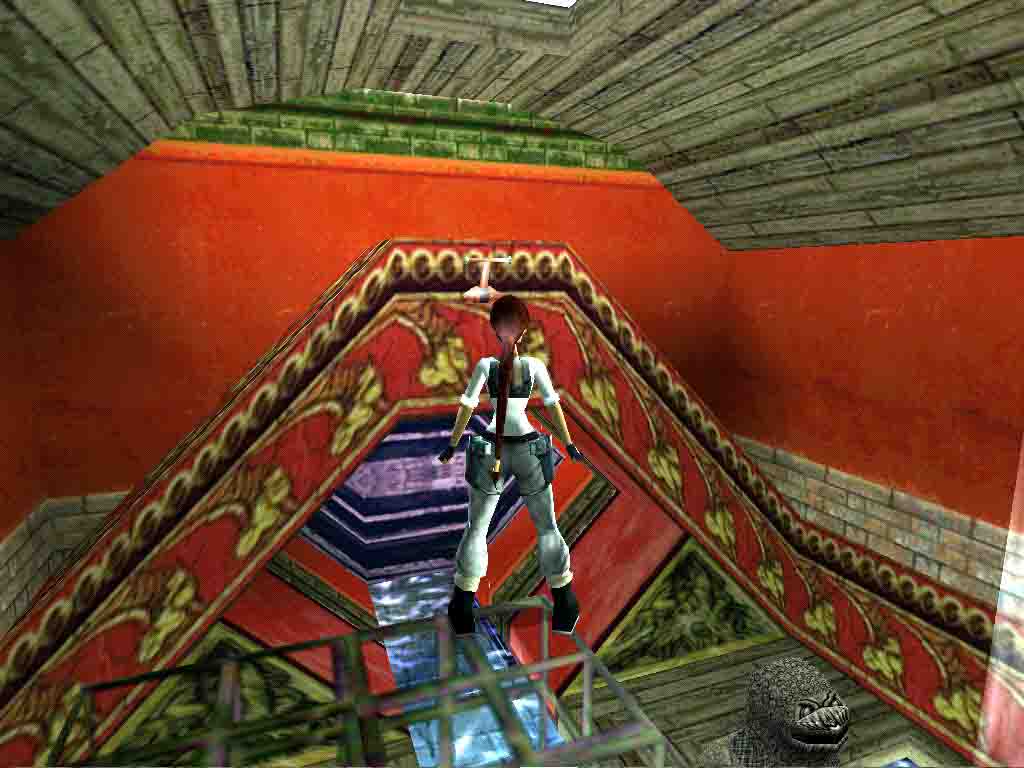
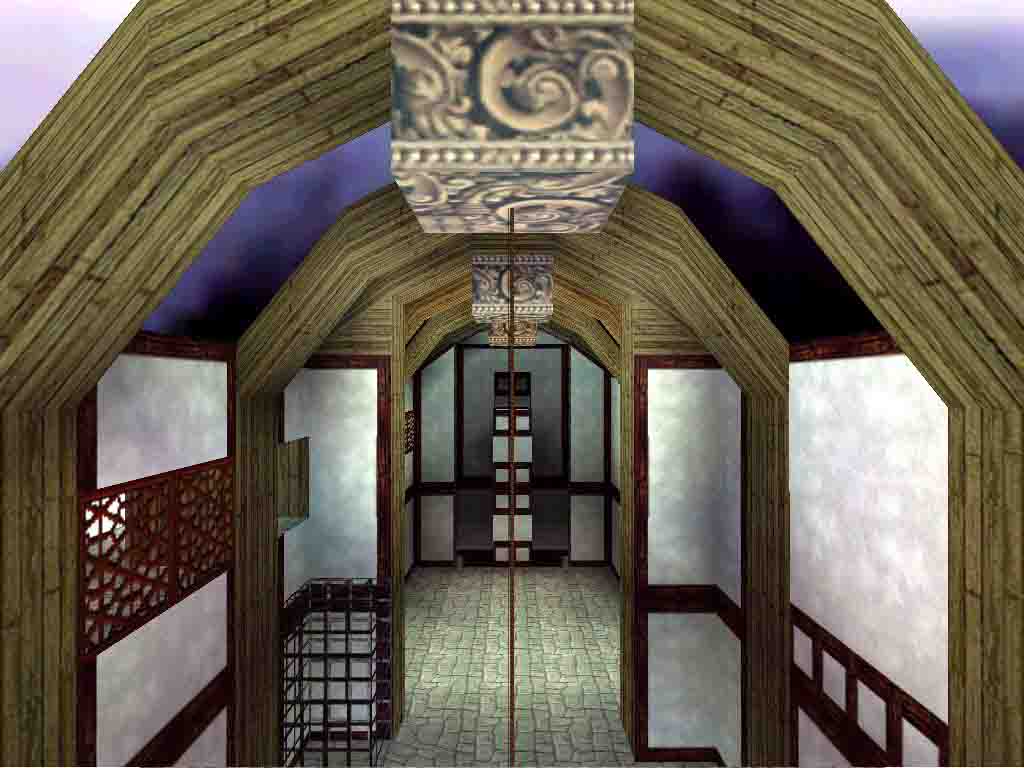
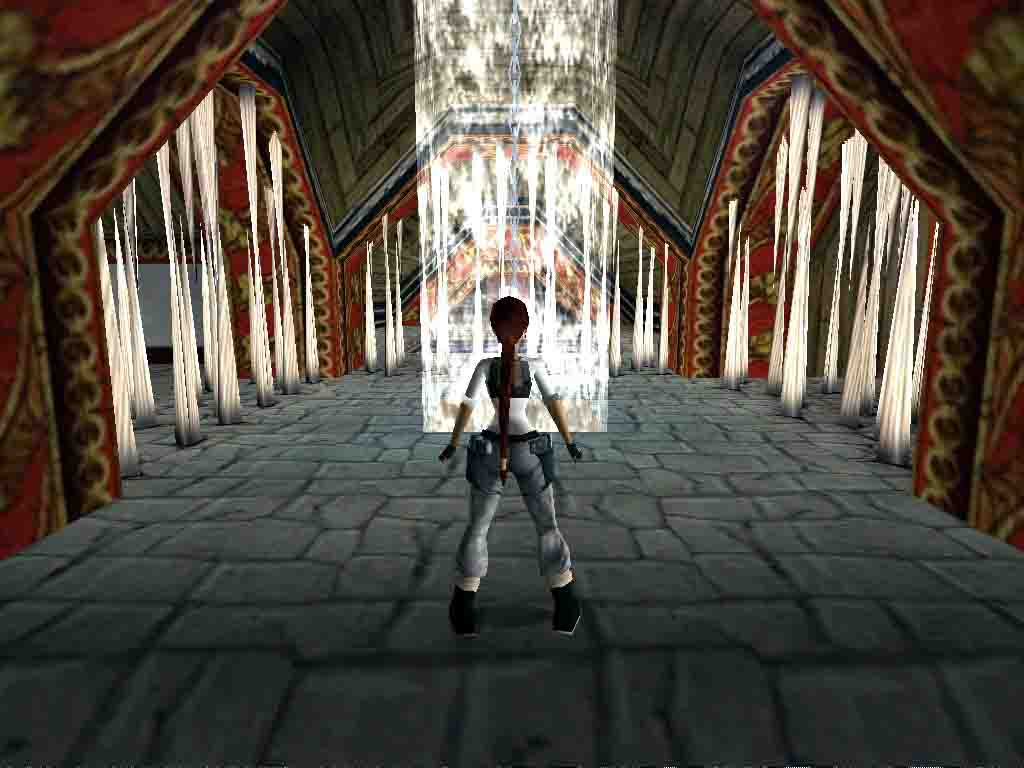
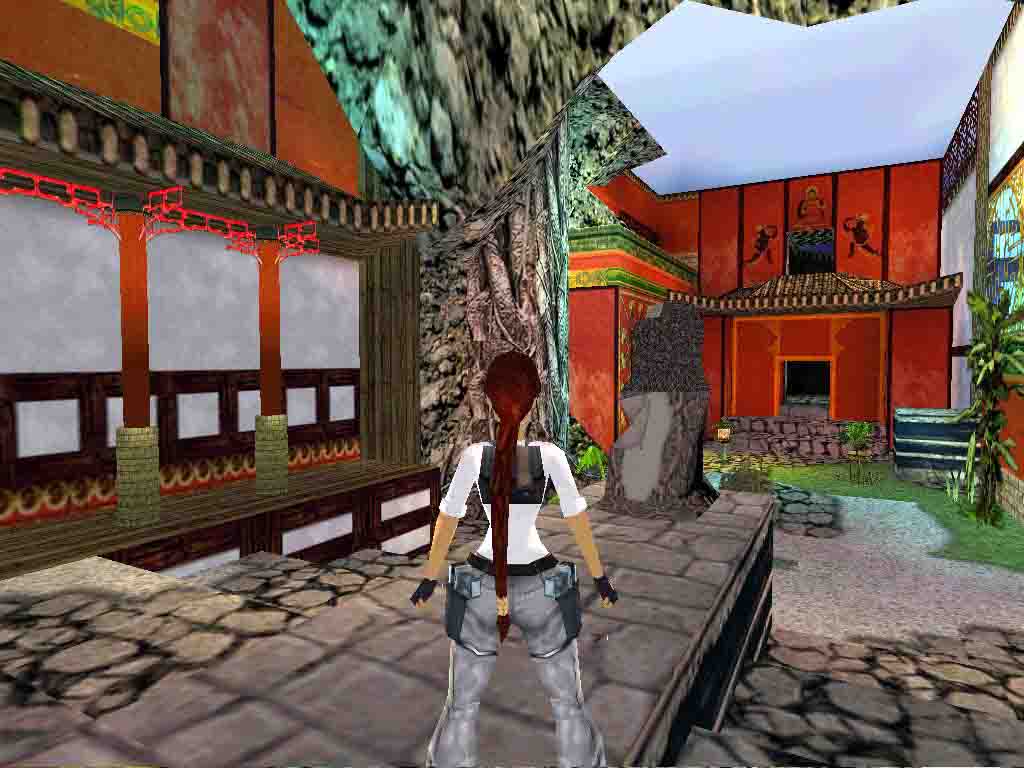
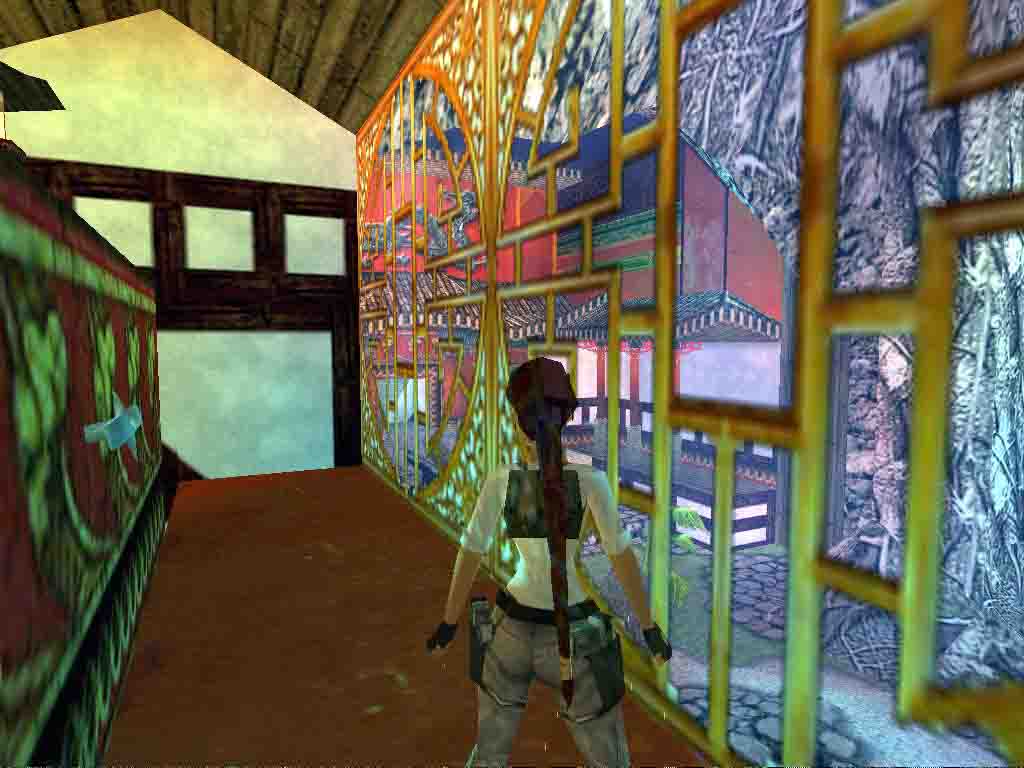
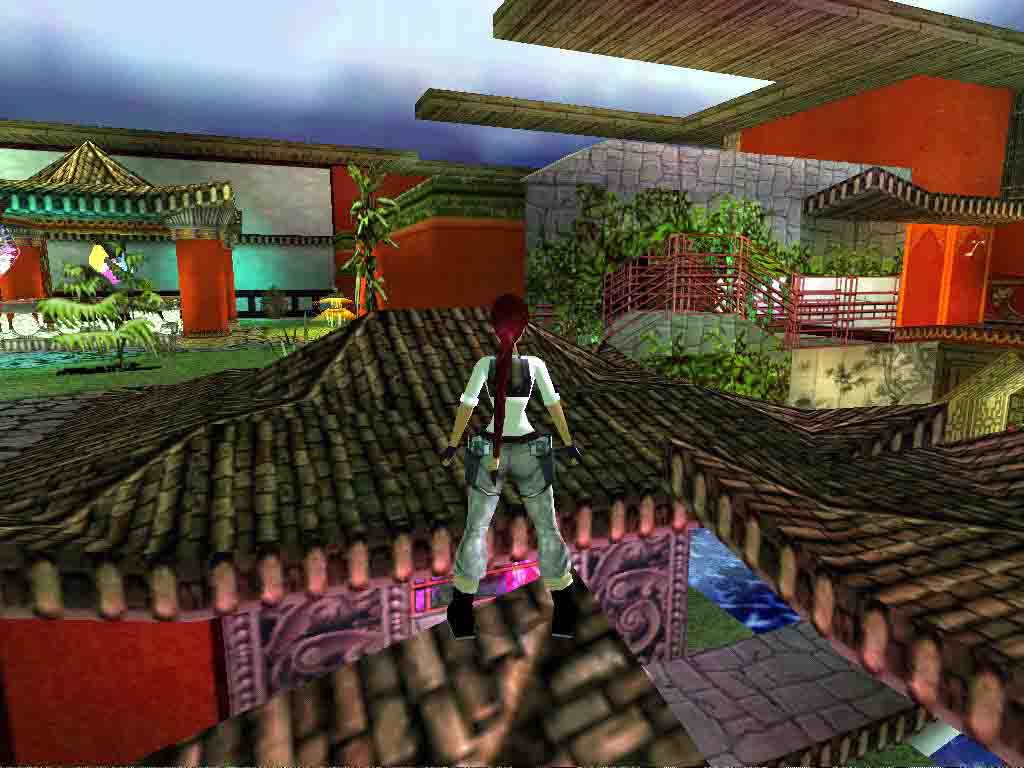
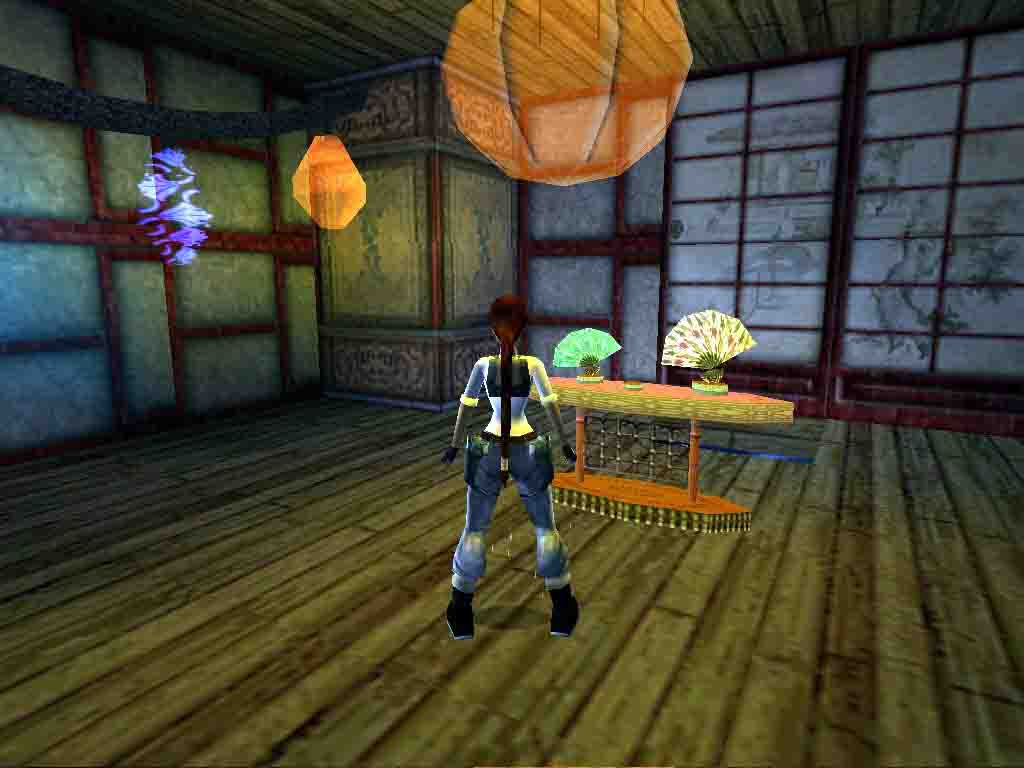
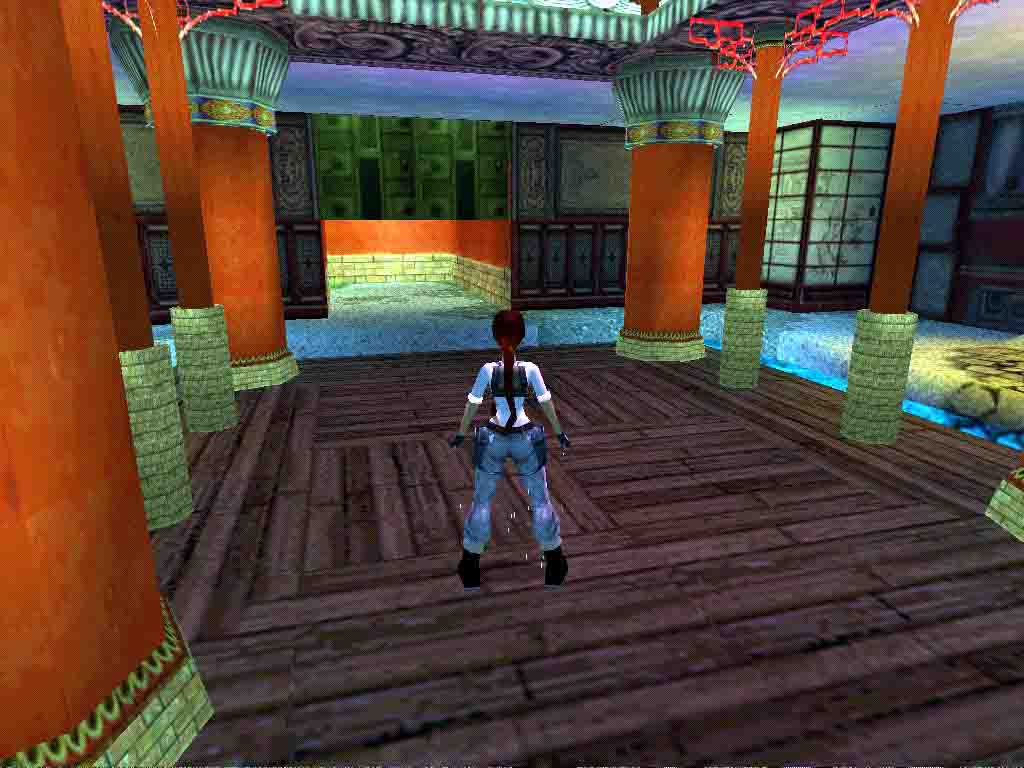
The good news is that the place is much more peaceful than the temple. The bad news is that making your way out won't be easy. At all.
If you haven't jumped and grabbed the edge while sliding at the beginning, you've landed in a hole. Sidestep R to the highest part of the floor and hit Action+Forward to pull up in the room above. A door slams shut behind you (no big deal, there's nothing down there anyway).
-- A Circonvoluted Path to the Village --
Objective: Find your way to the Village
Flooding A Little
You're in a small red room with basins on each side and in the center. There's a jumpswitch ahead, but it's the too-high-to-be-grabbed type one. You can also spot an opening to your R (N), but it's too high as well. Run ahead (W) and crawl across the CS. Pull up in the higher passage and run through it to reach a small room. There's a switch ahead but guess what? It's too high.
Run across the room past the central wall and behind it, and turn around to locate the jumpswitch up there. This one's low enough so flip it. It raises a cage in the Basin Room. Return there via the passage and the CS (if you have problems getting rid of the camera, try moving around blindly).
Run to the other side, turn R (S) and go to the highest part of the floor near the cage. Hit Action+Forward to pull up on it. Walk to the far R corner, turn slightly R (NWW) to face the jumpswitch, hop back and do a RJ+G to flip it, raising a block under the switch in the small room.
Go there via the CS and the passage. Climb on the newly raised block and activate the switch: you've flooded the Basins Room, and now can access that high opening in the far L corner.
Return to the Basins Room again and swim to the opening (NE). Pull up, run through the short passage, drop down at the end, run through the lower passage and drop down again. Turn around and go L (W) to enter the next room.
It's a rather small one with a puddle in the center and a closed door to your R (E). Run further in the room, turn around and look up: there's a lever up on a balcony. Go on the highest part of the floor and pull up on it. Push the lever to open the nearby door. Drop down in the room and pass the door. Run through the passage. The wall at the end is climbable so climb up to the top and pull up. Slide down, turn R (N) and climb on the block.
The Yin, The Yang and a Roll
You're standing in an opening overlooking a large partially flooded room. You can see an opening above a high pillar in the distance, as well as another one in the wall to your L (NW), but very much inaccessible for now. Since there's nothing else to do, dive.
Swim L (W) through a low CS then activate the UW ceiling switch just after the CS. It raises a cage near the opening in the W side of the room. Would you continue in the tunnel and swim up, you'd find a switch there, but it's flooded at the moment and can't be used.
Swim back in the Large Flooded Room, pull out of the water on the newly raised cage and go through the opening to enter a passage running along the Flooded Room.
There are several things to do here, so let's start with the trickiest. Go R (N) then R (E) into the next recess. A fixed camera prevents you from clearly looking around (that's the tricky part). Use you binoculars and look R: there's a high triangular CS up there. Turn R (S), walk to the wall, jump up, grab the edge and shimmy R to pull up in the CS.
Crawl to the end and drop down in the room. Crawl under the ceiling to pick up some uzi ammo then turn around (W), go to the other side and crawl again to get the Yang. Now pull up back in the CS and return to the passage. Leave the recess.
Go further R (N) then into the next recess. Turn around (W) and again use your binoculars there to locate the high passage. Jump up, grab and pull up. Run ahead, pull up on the R then drop down into the room. Crawl into the low opening to your R and pick up the small medipack. Leave the opening and use the switch, lowering a cage elsewhere in the Garden (it's for later). Now run L, crawl under the ceiling to get the Yin and return to the passage via the climbable N wall in the opposite corner (NE).
Leave the recess and this time go L (S). Drop down into the lower passage to your R (W) then run through it into a small room. There's a lever here on some half slanted block. Climb on the part supporting the lever and push the latter to open a door at the N end of the passage. Return there via the E ladder in the SE corner.
Go L (N), run through the newly opened door at the end of the passage and pick up the Roll there. Your task here is over so return to the Large Flooded Room and dive.
Of Spikes and How To Get Rid Of Them
Swim L (N) to the other end of the room then through the low passage and pull out of the water. The Roll Receptacle is here. Use the Roll on it to drain the Large Flooded Room (thus turning it into the Large Dry Room).
Return to said Large Dry Room and cross it diagonally R to return to the low CS, this time crawling through it. Continue down the passage after the CS and climb up the ladder at the other end. Pull up and activate the now dry switch ahead: three ropes are now hanging from the ceiling of the Large Dry Room. Turn R, pull up on the slope and slide down. Go climb the block to your R to be back at the top of the Large Room.
Do a RJ to grab the first rope, swing, jump and grab the second one, repeat to the third one and eventually jump through the high opening ahead. Follow the passage, climb down the ladder at the end and turn around (S). There's a higher passage to your R (W) but don't go there yet. Locate the raised floor in the far R corner of the room, go on it, jump up and grab the crack above (alternativaly, you can do a RJ from the high passage to grab the middle of the wooden crack). Shimmy all the way to the L until you can pull up in an alcove where you'll find the Sun Stone.
Drop down into the rrom, climb into the higher passage ahead (W), follow it, go R (N) in the next room to reach another passage at the end of which you'll find a ladder. Climb to the top and pull up. Cross the room, pull up again into a wide, higher passage and run into the next one.
Note: If you haven't found the Yin and haven't activated the nearby switch, you'll soon find yourself facing a dead end. Return to the Large Dry Room, RJ+G to the closest rope, swing, jump and grab the second one and turn 45° R to face the opening and the cage. Swing and jump. Proceed from here like shown in the "The Yin, The Yang and a Roll" section, starting at the fourth § (go get the Yang as well, while you're at it). Once you're done, you can get back to the middle rope with a diagonal L RJ from the cage.
Considering the spikes around, the only place you can go now is down that hole in the center. Run off the middle of the edge and hit Action to grab the chain. Slide down to the bottom, turn R, step back, sidestep R so the chain isn't in the way and to a RJ to the opening ahead (which was previously obstructed by the cage you lowered with the switch near the Yin), pressing Action to avoid hitting the wall.
Activate the switch ahead to lower the southern spikes. Turn around and do a RJ from the opening to the chain block. Climb up the chain, turn around at the top and backflip.
Turn around (S) and go put the Sun Stone in the empty Sun at the other side of the room, lowering the western spikes. Return to the Hole Passage and from there L into the western room. Dive in the pool and pick up some shotgun normal ammo and a small medipack in the center. Exit the water on the other side.
Combine the Yin and the Yang and put the resulting Yin-Yang in the panel ahead, lowering the northern (and last) spikes. Return to the Hole Passage then L into the northern room. Pick up the shotgun normal ammo between two columns to your L then head N for the opening ahead. Run up the narrow ramp to the top and enter the Village.
-- At the Courtyard --
Objective: Enter Houses District
You're now at the Courtyard. There are numerous things to do around, but your very first one here will be to find a secret.
First locate the closed door to your R (N) then run into the Courtyard until you find a switch on your R as well. Save once there, it's tightly timed.
Activate the switch and hit "Look" to get rid of the camera and save precious time. Immediately turn R and sprint to the stairs. Jump once once there, run to the top then sprint while turning L and pass the door before it closes.
Go pick up Secret #6, a Golden Rose on the pedestal ahead, reopening the door in the process, but don't leave the room yet. Run toward the door and look down and to your L: the wall down there looks a bit shattered. It's not shatterable, though, but you can kick it open. Crawl across the CS to enter a room where you can pick up uzi ammo, revolver ammo, more uzi ammo, a large medipack, a small medipack in a puddle of water, some flares and shotgun normal ammo. Once you've harvested them all, return to the Courtyard via the CS. Once there, notice that there's now a block before the switch, preventing you from accessing the room again.
Alright. Now, let's get to work. Run ahead (S) to the other side of the Courtyard and activate the switch there on your L to raise a block in another smaller courtyard elsewhere. Turn around (W) and run across the Courtyard and through the opening at the other end to enter said smaller courtyard. Notice the water hole and the closed golden door on your way, both to the L (S).
Enter the next courtyard and locate a pool in the R corner (NE). Go pick up some uzi ammo in there then turn around (W) and go through the opening. The block you just raised is right there. Climb on it, turn around and do a RJ+G to a high "window".
Look up to locate the MS beyond the window and SJ+G to it. Turn R and swing to the end. Let go once there and immediately hit Action again to grab the edge of an opening giving onto a roof. Run ahead then R (S) despite the fixed camera, climb on the higher ledge and go activate the switch there on your R. You've opened the golden door. Return to the roof and drop down from there into the Courtyard.
Turn around (E) but don't pass the door yet. Run ahead until you locate the water hole to your R (S) and dive. Swim through the long UW tunnel, exit the water at the end and climb on the red block ahead (S). Turn R (W) to locate another switch there. Activate it to raise a cage in the room beyond the golden door. Return to the Courtyard via the UW tunnel. Run ahead (W) then L (S) to finally pass the door.
Ignore the stairs ahead - they don't lead anywhere for the moment - and enter the room to your R (W). The cage you just raised is here in front of you. Climb on it, turn L and pull up on the roof. Run ahead a bit, turn L (E) and do a RJ+G to an high ledge giving onto a small cave. Run into the latter and activate the switch L of the entrance, opening a door in the room below.
Don't return there yet. It's now secret time again.
Turn around and locate the highest part of the breached wall to your L. Climb on it, crouch and crawl under the ceiling. Turn around and drop down into the stream below that happens to be the top of the little cascade you've seen from the Courtyard. There's a switch in front of you: activate it to lower a block in the corridor giving onto the Cage Room.
Since it isn't possible to get back there via the breach,
run off from the top of the cascade into the water hole (you can't drop down
from there). It can be a bit tricky landing exactly in the water hole, though,
and you run the risk of hitting hard ground instead, losing health in the
process. A safer but more complicated way is to position Lara as in this
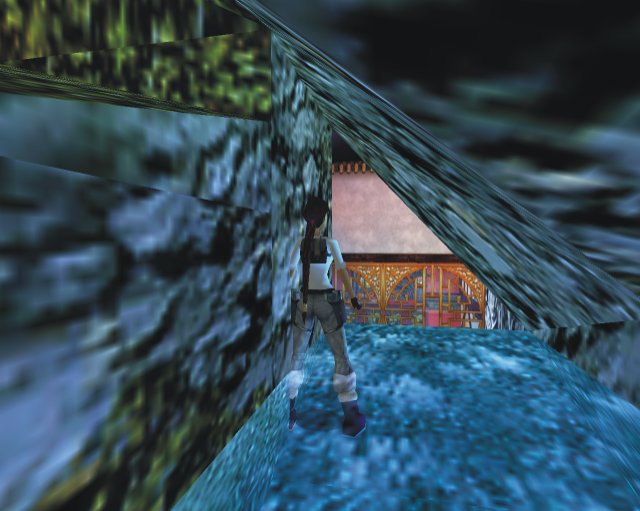 then roll. She'll "slip" at the edge and land in the
water hole.
then roll. She'll "slip" at the edge and land in the
water hole.
Now that you're back down, return in the house beyond
the golden door. The opening where was the block is there in the corridor
before the stairs on your L. Stay in the opening, walk to the edge, go L and
turn slightly L (NEE) to aim at the high ledge on the side. Hop back and do
a RJ with a R mid-air curve, then grab the edge at the last moment 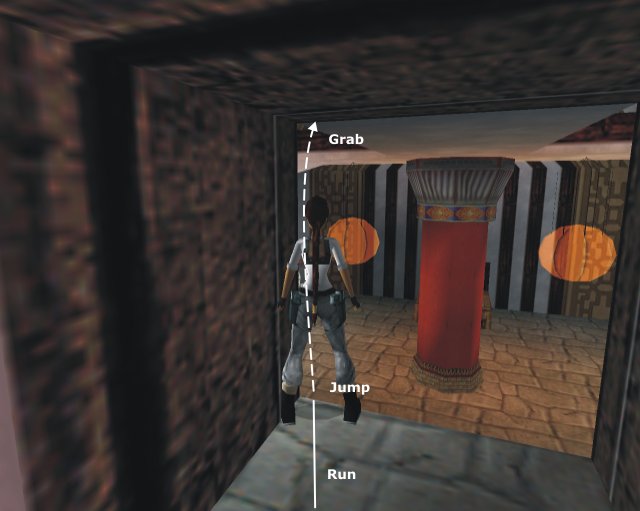 . Pull up.
Go L then R to cross the middle ledge. Turn around at the end and look up: there's a jumpswitch up there. Flip it to lower a block at the top of the stairs in the corridor. Drop down into the room and go climb said stairs. Run in the lower passage you just revealed and go pick up Secret #7 at the end: a Golden Rose.
Return to the Cage Room and go R (S) to climb into the now accessible opening. Enter the small room and flip the jumpswitch that's on the opposite wall, lowering two blocks in the Cage Room. Return there again.
Go through the first opening (S) and activate the switch at the end of the short passage beyond. Return to the room, run into the second opening (W) and repeat, opening a door on the balcony that's on the E side of the Cage Room. Return to the Cage Room and from there to the corridor.
Climb the stairs to the top and pass the newly opened door to access the balcony. Run ahead (S), cross the next room then the cave-like one beyond and dive into the UW tunnel. Swim to the other end and exit the water in the Houses District.
-- A Chinese Fan and a Key --
Objectives: Open the doors to the Garden
Run ahead a bit and watch the fly by. Among other things, it will show you a fan which is one of the items needed to open the Garden Doors. Continue ahead (S) on the stony path and stop where it's highest. You can spot a table with some fans on it through the bars in the house ahead. It's for a bit later though.
For now, jump up and pull up on the roof above. Go R (S) then R (W) again. There's a small covered bridge ahead. Run to it then cross it to activate the switch at its end, lowering a block in a long pool below.
Don't go there yet, though. Return on the roof and run to its highest part in the center. Turn around then slightly R (NWW) to aim at the top of the red wall. Hop back and do a RJ+G to it. Pull up.
Go R (N) to run over the covered bridge then on the wooden ledge on the L. Turn L (W) at the end and drop down from it on another ledge below. Flip the jumpswitch ahead to lower a set of cages below. Drop down on floor level.
Run ahead (N) and stop at the cage. Turn L (W): there's a bell in a recess and a ladder beyond. Jump over the bell to reach the ladder, climb to the top and pull up. Follow the corridor to its end, run down a flight of stairs and pick up the Chinese Fan on the balcony, behind a lamp. Now let's go use it.
Run to the end of the balcony and drop down to floor level. The Long Pool is just there to your L (S). Dive and swim L (E) to find the UW tunnel that was previously obstructed by the block you lowered with the switch on the covered balcony. Pull out of the water, go to the other side of the Fan Table and put the fan on it. A camera shows you a large golden double door, but nothing happens yet.
Return into the water hole and swim back in the Long Pool. Continue ahead (W) to the middle and exit the water by pulling up on the L (S) ledge. Enter the house ahead, which is in fact a beautiful courtyard with a central square pool and jump in the water.
Swim/wade ahead then R (W) at the corner. Dive there to swim through a triangular hole and go pull the UW lever in the far L corner of the small flooded room, lowering a block at the W end of the Long Pool. Leave the room and return to the Long Pool via the Square Pool.
Swim L (W) this time and pull up in the newly accessible short passage. Pick up the Key at the end. A camera shows you a high red room elsewhere in Houses District with the matching keyhole. Let's go there.
Return to the Long Pool and swim ahead (E) toward the other end. Leave the water by the R (S) edge just before the stone bridge. Run diagonally L (SE) to find an opening giving onto a large red room. There's a rope there near the center. Run to it, turn around, jump up and grab it. Swing to jump to the upper floor and go use the Key on the Keyhole to your L: the doors to the Garden are now open.
All you have to do now is find them. Drop down into the room below, run ahead then diagonally R (NW) to return to the Long Pool and jump in the water. Make your way to the Square Pool Courtyard like you did the first time but don't go into the water. Run R (W) instead then L (S) around the corner: the Garden Doors are just ahead. Run through them then a bit into the passage beyond.
You've just reached the Garden itself.
==== In this part, you should have found...
Enemies: None
Items of note: Yang, Yin, Roll, Sun Stone, Chinese
Fan, Key
2 Secrets
a few Traps - 1 Timed-Run
== Part 3: China Garden II =
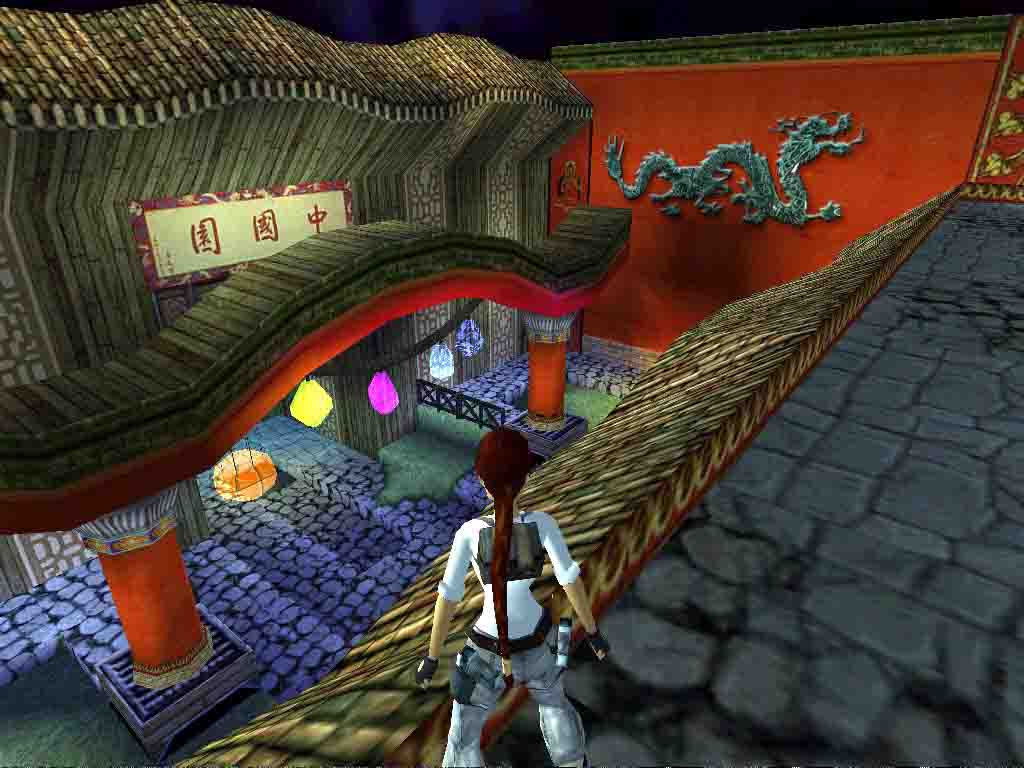
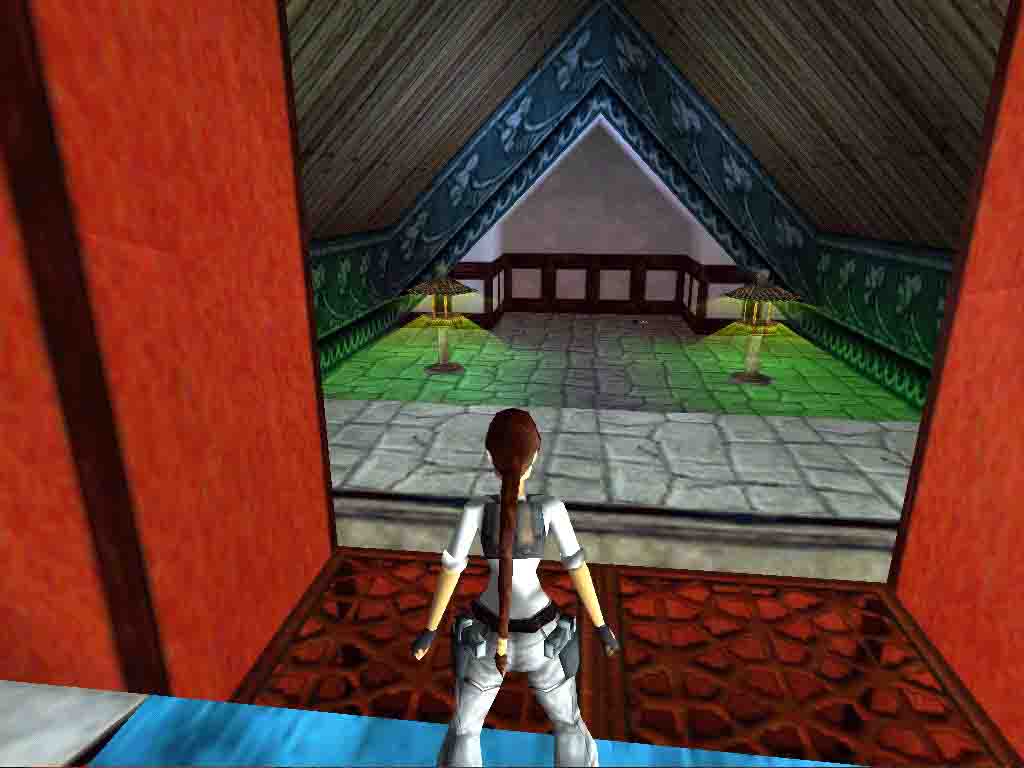
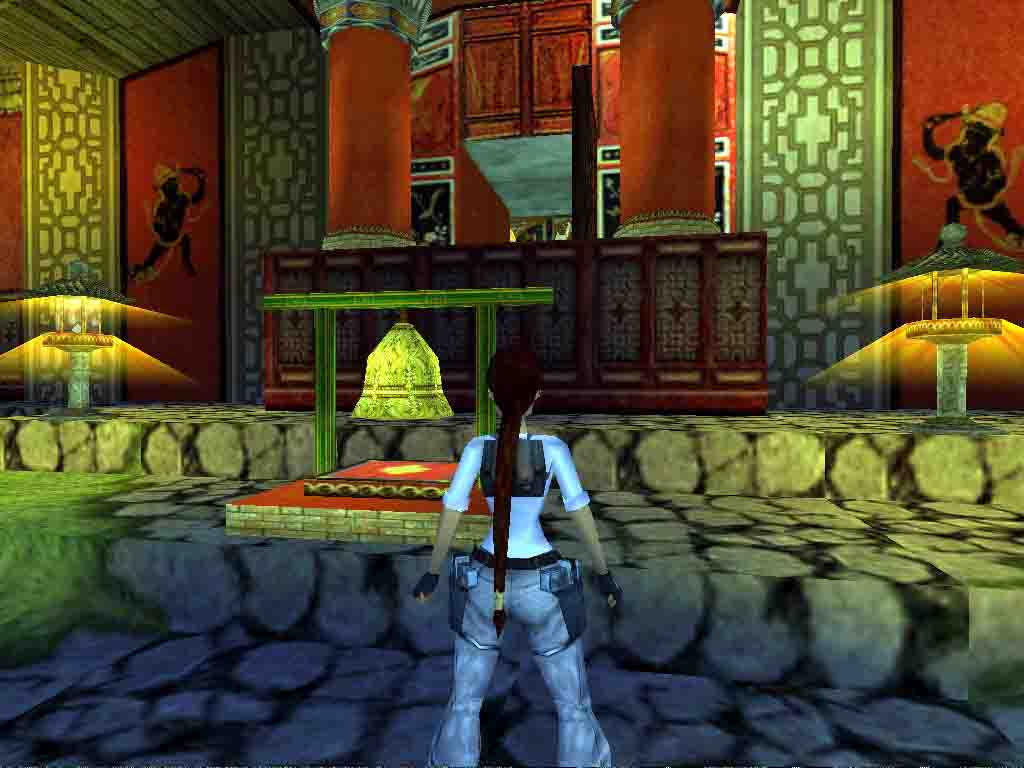
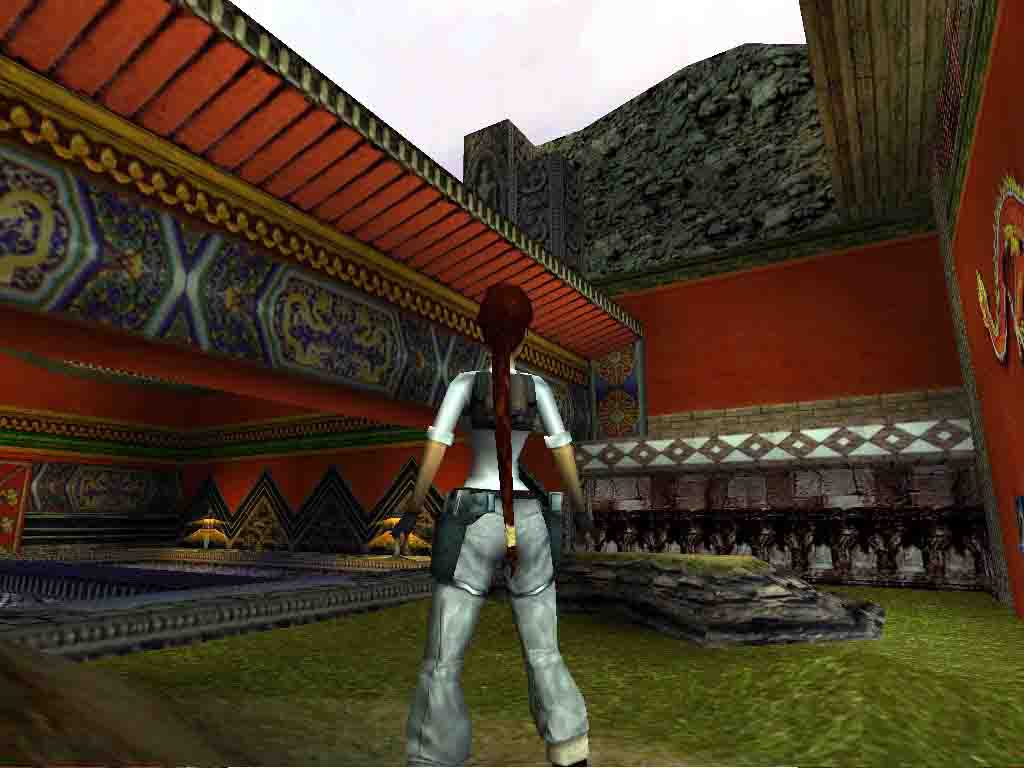
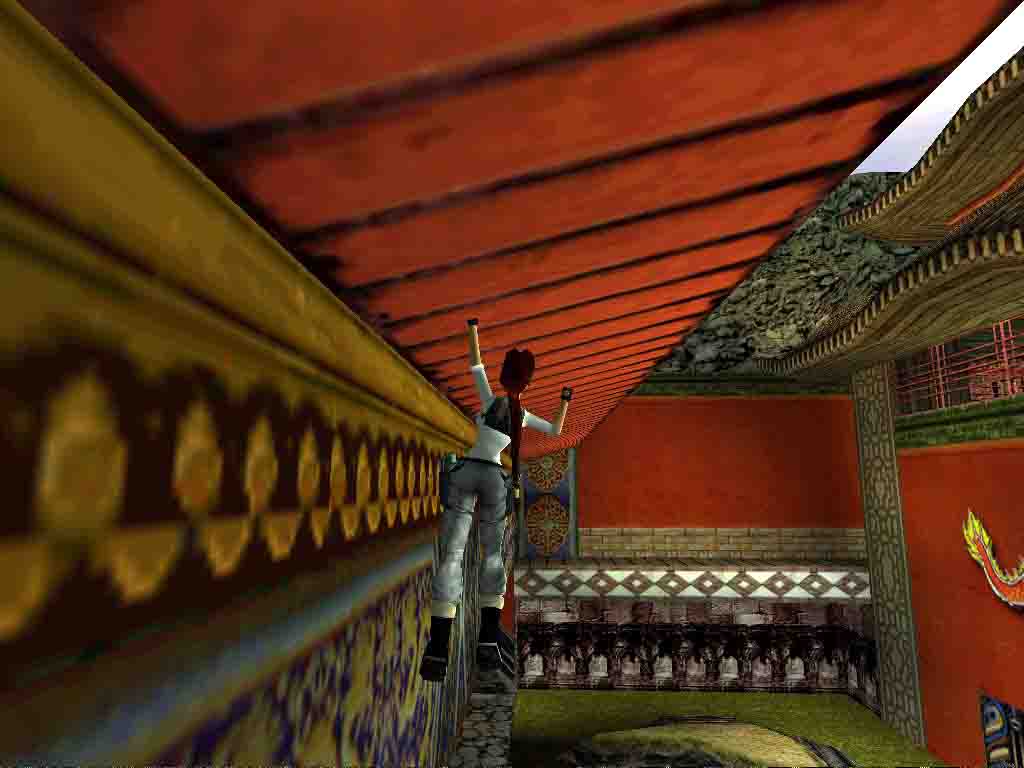
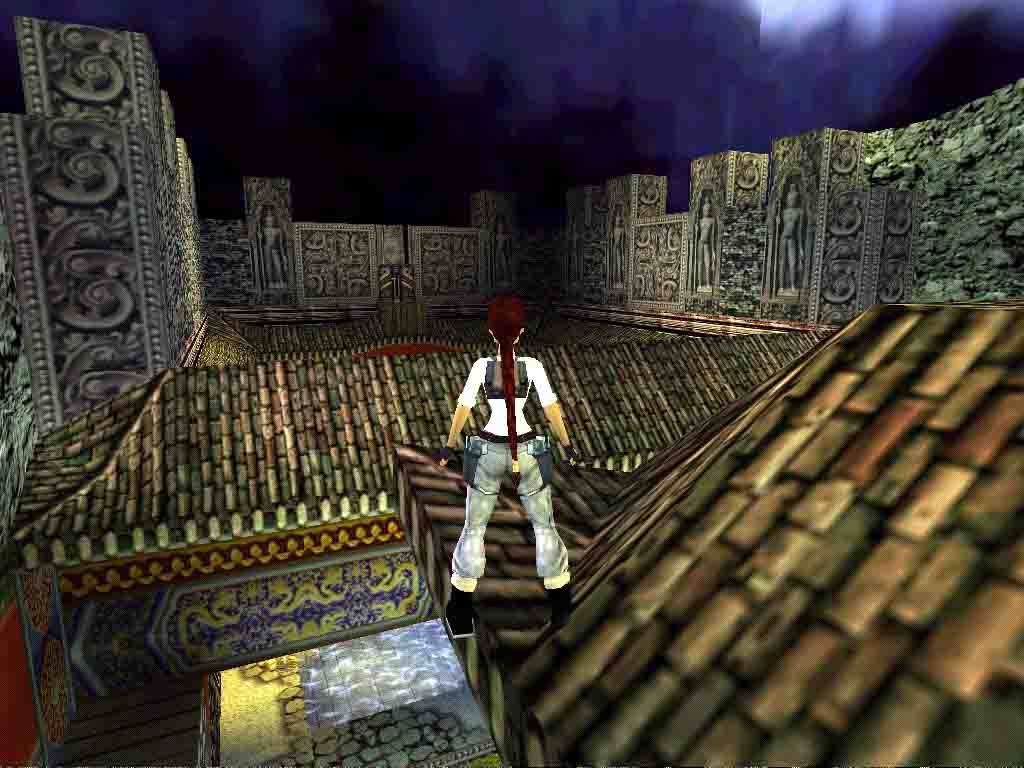
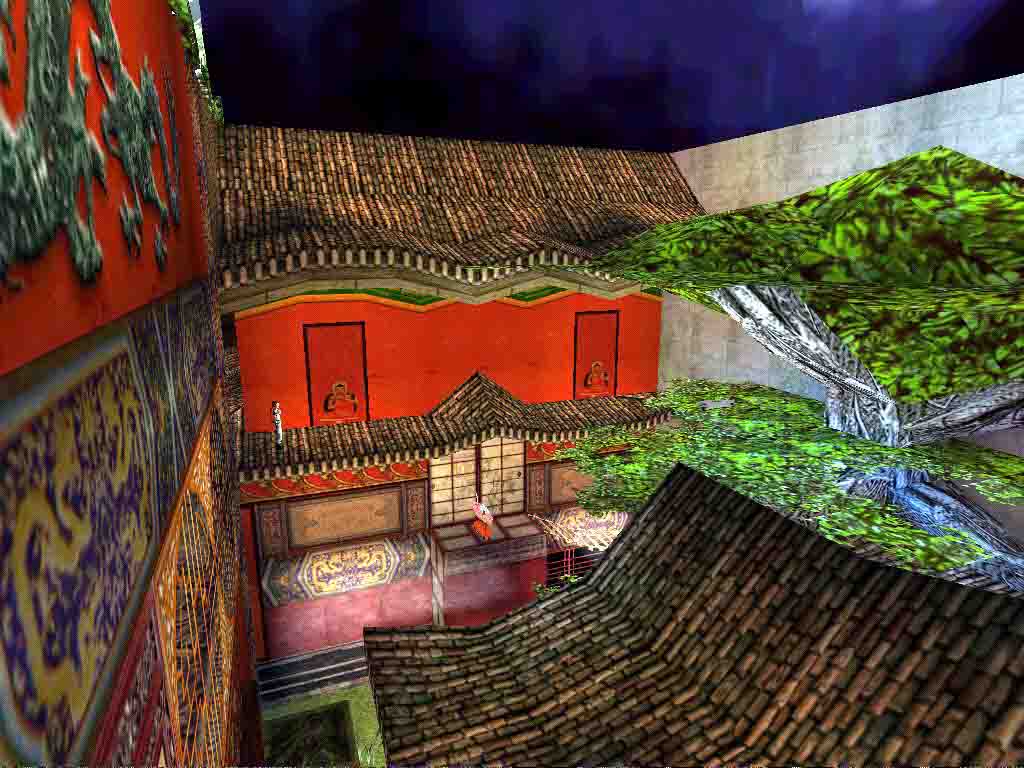
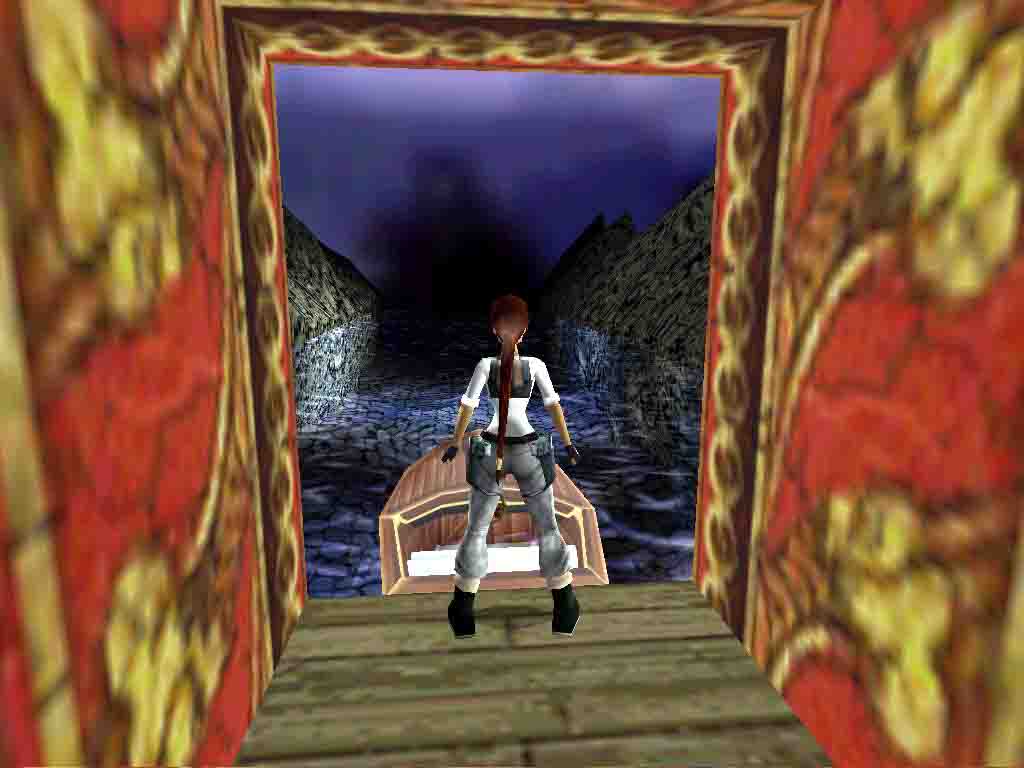
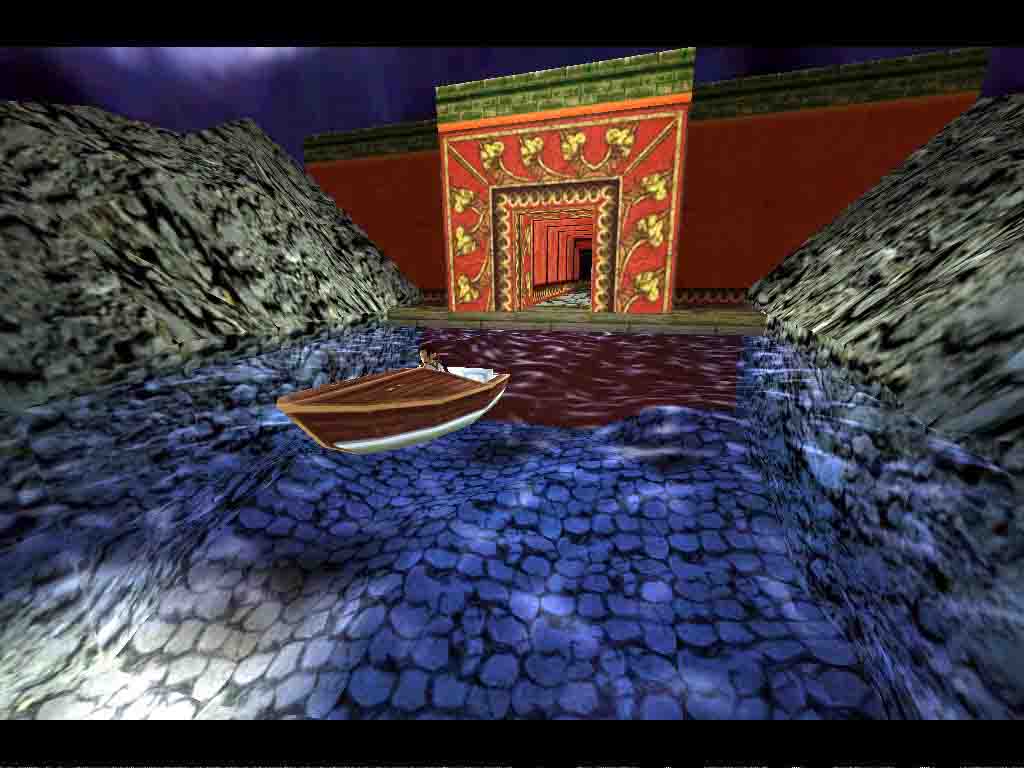 Secret 8:
Run ahead. You'll soon find yourself on the edge of a pool. Look down into the water and to your R (SW). This black square thing down there is in fact an UW Door. Dive, swim to it and hit Action when facing its center to open it.
Swim through it then along the UW tunnel to eventually reach a small square room where you can surface and exit the water. Climb on the black block to your L (S). The discreet greenery covering the wall ahead means its climbable. Climb all the way to the top and pull up.
Run into the passage: there's another pool ahead, and you can spot a block on the other side which looks much inaccessible. Dive to begin with and swim to the other part of the pool then to the far L corner (SE). Pick up the revolver ammo there then return to the entrance by pulling on the low block then up in the passage. Turn around to face the pool.
See that crack up in the L wall ahead? That's what you'll use to reach the high block. Walk to the edge then sidestep L. Turn slightly L to face the crack and do a RJ+G to it. Shimmy R around the wall to reach a climbable part of it. Continue R to the far corner, climb down once or twice and backflip on the block.
There's another ladder to your R (S) so turn and climb up to the top. Pull up.
-- It's Hot. Let's Find Something To Fan Lara --
Objective: Find the Chinese Fan
You've reached the upper floor of what we'll call the "Large Courtyard" for future reference. There are two doors here, one ahead (S) and one to the R (W) with a keyhole. You don't have any key yet and the S one will only open from the other side so forget about both for now. We're going down, but first a small detour for a secret.
Run ahead toward the keyhole door and turn L (E). The part of the nearby roof ahead (i.e. the middle part) is slightly flatter than the rest and you can walk on it. Proceed, and do a RJ+G to the wood bridge ahead. Pull up, turn around (W) then drop down hitting Action to grab the edge. Let go and immediately hit Action again to flip the jumpswitch there, opening a door on the lower floor and losing a bit of health as you land.
Run ahead (W). The newly opened door is up there on the opposite wall, beyond the bell. Climb on the block and run through the doorway. Run off into the room and go pick up Secret# 8: a Golden Rose. Return to the Large Courtyard.
Down in the Hole
Run ahead (E) to the other side and locate the hole there. Don't jump into it: you'll end up in water, but sucked down by a strong stream and will eventually drown. Look down: there's a flat ledge on the L. Go to the middle of the edge, turn 45° L (NE) to aim at the flat ledge, hop back and run off, holding Action to avoid hitting the edge. You should land on the ledge.
Turn around (SE) and do a SJ to the wet flat ledge in the far L corner. Turn around, slide down two slopes, going forward, and jump at the last moment. Hit Action to grab the greenery covered climbable wall ahead, above another slope. Shimmy L to the other side of the wall and backflip there to land on a platform behind. Pïck up the shotgun wideshot ammo and the shotgun normal ammo.
Walk to the edge and do a SJ+G to the climbable wall. Let go, slide down the slope and grab the edge. Pull up, backflip, roll in mid-air and hit Action to grab another climbable wall under the platform. You're not done yet.
Climb down until Lara's feet are one tile away from the slope below. Backflip, roll in mid-air and hit Action to grab a crack in the wall. Shimmy to the R and around the corners until you reach a flat ledge. Pull up, jump down in the UW tunnel ahead and swim through it to exit the water in a new room.
Up on the Roofs
Run to the hole ahead and climb down the flight of stairs there. Turn around (N) at the bottom, run ahead then straight (W) after the corner to enter a corridor. Run until you reach the edge of a ledge overlooking a large open area with a pool on the other side (we'll most creatively call the Large Pool Area). Ignore the ledge running along the L wall for now and run off on ground level.
Run ahead then go R (S) after the wall. There's another ledge ahead, but ignore it as well and locate the switch to your L on the W wall. Activate it to open a double golden door located beyond the L ledge (S).
There's raised ground between you and said L ledge, but it's not high enough to be useful. Go R (N) instead. There's raised ground here as well before the other ledge. Go to the highest point and do a SJ+G to the ledge. Pull up. Go R (E) to the other end and look up. The red ceiling here is a MS. Jump up, grab it and swing your way across the room to eventually let go on the S ledge.
Go R (W) and pass through the doors you've just opened. Run down the ramp but don't drop down into the lower area once at the end. Turn L (E) instead. The wall ahead is climbable. Climb, pull up at the top and turn around (W).
Do a RJ to the next ledge then carefully deal with the slopes beyond to eventually reach a wide opening to your R (N), giving onto a cavernous passage. Pull up into said passage, run ahead toward the wall and pick up the uzi ammo there. Go R (E) and run to the other end.
There's a sloping roof to your L (N) which happens to be your next destination. Position Lara to the L side of the corner slope, standing one step away from the roof, hop back and do a RJ over the slope to land on a flatter part. Turn R (E) and have a look.
The roof you're now on is the one overlooking the Large Pool Room from the W. Looking E in the distance, you can spot a switch on the opposite side. That's where you're going now.
Turn L (N) and run along the roof (careful not to slip and fall, though). Turn L (W) at the corner, hop back and slide down the slope. Grab the edge, shimmy a bit R and pull up on the flat triangular ledge. Turn around, sidestep L to stand on the very corner then step back as much as you can while staying aligned with the other sloping roof ahead. Do a RJ to land on it. Slide and grab the edge.
Shimmy L to pull up on a flatter part. Turn 45° R (SE) and do a SJ over the slope to another higher flat part. Run along the L ledge, SJing at the corner, and finally reach the switch in the middle of the E wall. Flip it to open a door located just below.
Go to the roof R of the switch, turn around and jump down in the pool below (you can even do a cool swan dive from there). Swim around to the closest L corner (SE) where you'll find a slightly raised platform, high enough to allow you to pull out of the water. Leave the pool by its E edge (L).
Turn L (N) and run through the newly opened door to your R (E). Pick up the Chinese Fan on the floor in the center of the room. Don't leave yet. Turn around and locate the small medipack in the far L corner (SW). Go pick it up.
-- Finally, The Fan Will Be Better On A Nice Table --
Objective: Put the Chinese Fan where it belongs then find your way to the door it opens.
Return to the S ledge via the raised floor, the N ledge and the MS. Pass through the open golden doors, run down the ramp and (again) don't run off in the lower area. Turn around instead, hop back hitting Action to grab the edge and shimmy to the L. A crack in the wall will allow you to reach a recess. Pull up and pick up the small medipack. Now you can go into that lower area.
Run W (R of the recess) then L (S) to enter a large area with a structure in the center, a wood upward ramp and a big tree growing against the opposite wall (The Big Tree Courtyard). Run up the ramp. If you look up and L, you'll see the Fan Table up there at the top but don't go there yet. Stop at the tree for a goodies detour.
Turn R (W) and SJ to the stony ledge surrounding the central structure. Run to the center of said structure and pick up 2 uzi ammos. Continue ahead (W) and run off into the lower passage. You'll find a small medipack to your L and revolver ammo to your R. Pick them up both. Pull up back on the stony ledge and return to the wooden ramp.
Run up to the top this time and put the Chinese Fan on the Table there. It opens a door in the N wall, on your L. Don't try to get there from where you stand: you can't and get to find another path.
Run down the ramp, run ahead then L (E) to eventually pull up back into the passage with the ladder. Use the latter to climb up to the top and the upper area. Run ahead (E) to the end of the ledge and turn R (S) there to face the lower part of the roof ahead. Do a RJ+G and pull up on it.
Turn R (W), run along the roof then around the corner. Hit look to stop the distant camera once there and continue ahead (S), SJing over the slopes in the middle to reach the other end. Turn R (W) and do a RJ to the extended tree branch ahead.
Run to the trunk, turn 45° R (NW) and SJ on another branch. The door is close, but don't rush there yet. Turn L (W) to face the roof of the central structure, run on it and to the other side to pick up a small medipack. Return to the tree.
Turn L (N) and go to the tip of the branch. Turn around and drop down on a lower branch below. Turn around again and walk to the edge.
The opened door is ahead and slightly L but a bit too far to be reached directly from the branch. Locate the block on its R, extending from the wall. Sidestep R, turn slightly R, hop back and do a RJ+G to the block. Pull up and turn L (W).
The next jump is a tad tricky. Walk to the edge and sidestep R to position Lara one step away from the wall. Turn slightly R to face the open door and do a SJ with a R mid-air curve to land in the doorway.
-- Joi Gin, China! --
Objective: Find the Key to the pier, the ignition Keys and sail away from China.
Run ahead on the wooden ledge but stop just before the roof above. Jump up, grab the edge, shimmy R, pull up on the flat corner, turn 45° L (NW) and do a SJ over the slope to land on the flat top of the roof.
Locate the ledge ahead on on your R (NE). Run on the roof to the middle, turn R (E) and do a SJ to it. Pick up some shotgun normal ammo there and (yes!) the shotgun (worth the detour, wasn't it?). Return to the roof, go L (S), turn around at the end and hop back to slide on the sloping side and land on the wooden ledge below.
Note: if you accidentally fall in the water during the next sequence, swim S to locate a bridge and pull up on it. Go L where it's slightly raised and from there pull up back on the starting wooden ledge.
Run to the end of the ledge and look up. There's a red MS above you. Jump up, grab it and first swing straight ahead to let go in the recess and pick up some uzi ammo. Grab the MS again, but this time turn R at the junction and swing to the end to let go on another wooden ledge.
Run through the passage to the R (N) to reach a room with a couple of cascades. There's a ladder ahead and to your L (SW). Climb up but stop after the first floor and go L around the corner. Let go to land on the floor. Go L then R to find the Key hidden behind.
Return to the ladder, go R to reach the next side and this time climb all the way to the top. Pull up and turn around. The wall ahead by the cascade is climbable. Sidestep R to clear the highest part of the cascade, hop back and do a RJ+G to the wall. Climb up and stop at the first opening to your L. Go L and let go. Pick up the flares there.
Turn to the ladder and step back. Turn slightly R to face it, standing on the edge and do a SJ+G to be back on it. Climb to the top and go L again to let go on a flat part of the cascade above.
Turn around and SJ over the slope. Repeat with the one to your L then again
over a third one. Turn L (N) once there and locate the climbable wall ahead
and to your L (NW). Walk to the next slope staying on the edge, turn to the
climbable wall, hop back and do a RJ with a hard R mid-air curve, hitting
Action at the last moment to grab the wall 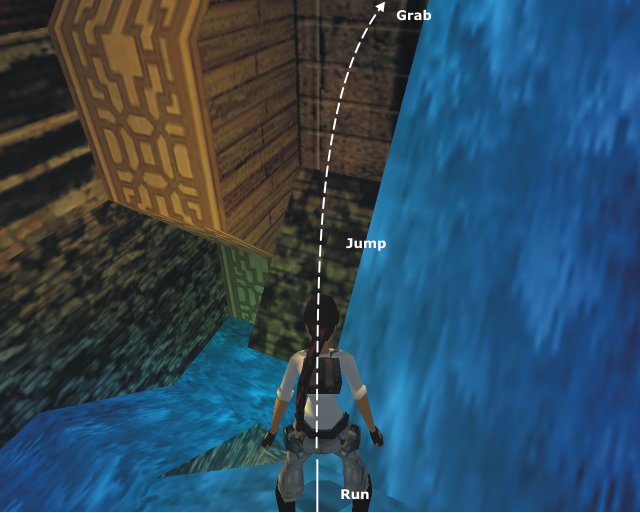 . Climb and pull up at the top.
Activate the switch to your L to open the door ahead. Pass through it: you're back in the upper floor of the Large Courtyard.
There's one last task ahead before using the Key. Run ahead (N) to the other side, through the passage there then down the wide stairway. You'll eventually reach a room with a high inaccessible CS to your R (E) and a wide, quite accessible passage ahead (N). Save. The next sequence is indeed tricky.
Run into the passage staying on its L side. Soon the camera will become distant as two stone dragons roll at you to crush you flat. Don't hit Look to change the camera. It allows you to see exactly where the dragons are and is in fact helpful here. The L one (from the distant view, it's to your R actually) is faster than the R one so stop, wait for it to pass and sidejump R. If your timing is good, you should clear it easily.
Wait for the dragons to stop and hit Look to stop the distant camera: a door has opened to your L (W). Pass it and activate the lever in the short passage beyond. A cage raises in the previous room, as shown in the fly-by. Return there.
Climb on the cage then crawl through the CS. Climb on the block, run into the lower passage and run down the stairway to reach a small room with a sloping ceiling. Pick up the Keys in the opposite side. They do look like ignition keys and actually are. Return to the Large Courtyard upper floor, via the stairway, the CS and the passage L from the Cage Room.
Run to the Keyhole to your R and use your Key on it to open the nearby door. Run through it then down the passage: you'll find a boat at the end (don't go in the water, you'd be stuck there forever). Use the ignition Keys on the boat and sail away from China!
==== In this part, you should have found...
Enemies: None
Items of note: Chinese Fan, Key, Ignition Keys
("Key" in your inventory)
1 Secret
a few Traps
Thanks to Jackie (Geckokid) for the cantonese translation of "farewell".
==== CHINA WHAT'S WHAT (Combat Strategies)
- Giant Venomous Spiders: Those may be the most dangerous foes of the whole series. They're ugly, scary, quick, harmful and venomous on top of that. If you can't shoot them from a safe location, don't try the pistols, they're tough too and it'd take a long time to kill them, giving them plenty of occasions to bite and poison you. Use the revolver, and even then be cautious. It takes more than two bullets to finish them off.
- Baby Venomous Spiders: The tiny counterpart of their gigantic parents, they aren't very dangerous except for the fact they're venomous.
Authorized walkthrough by Sutekh
Airport 4:
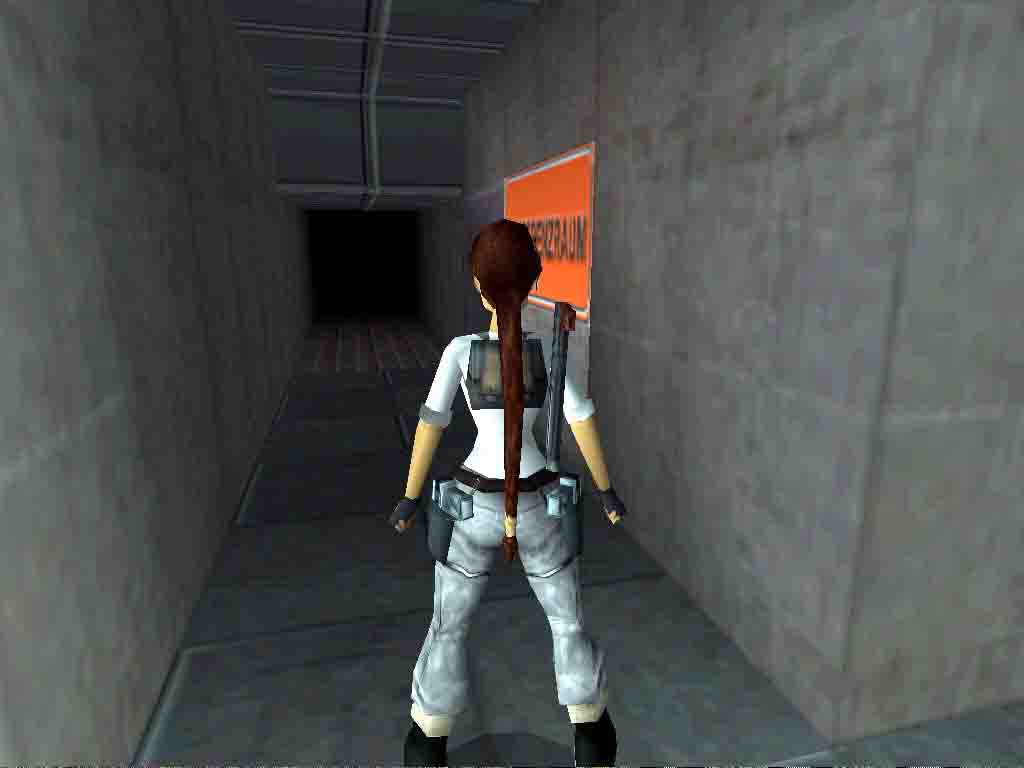
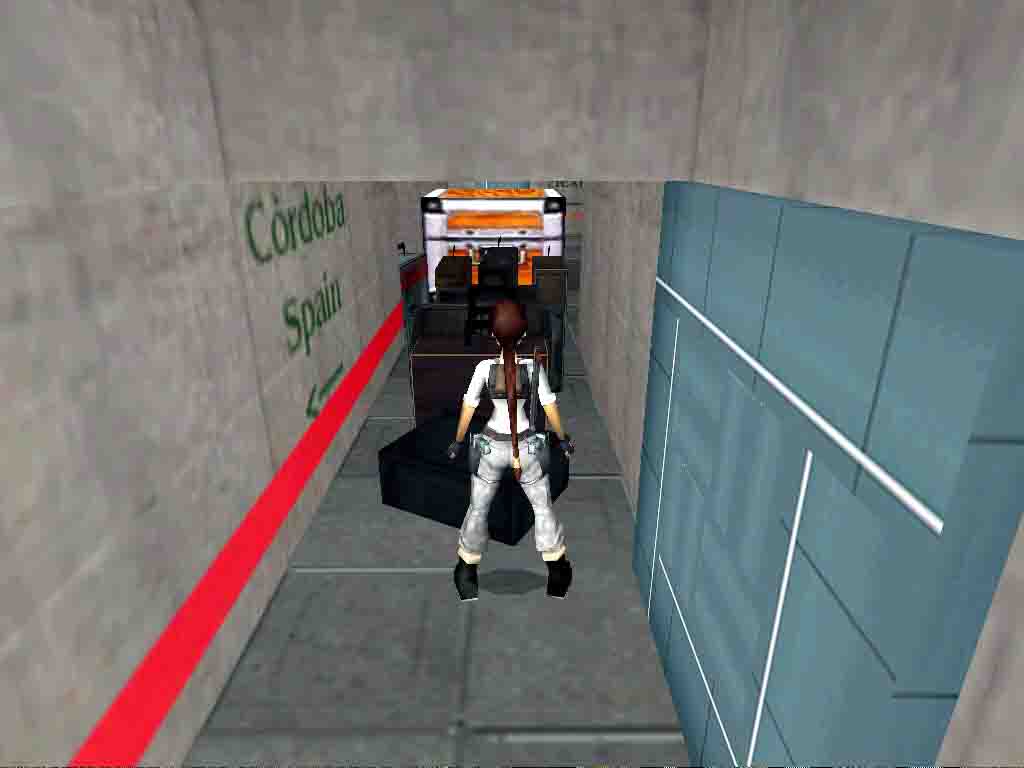
Chapter 4: Córdoba
Story:
Five mysterious gemstones are disperced all over the world to bring back the reign of chaos. Lara has to find them all and take them to a secret place, where an old enemy already is waiting for her...
CS = Crawlspace - MS = Monkey Swing - L = Left - R = Right - N, S, E,
W = Cardinal Points - UW = Underwater
SJ = Standing Jump - SJ+G = Standing Jump + Grab - RJ = Running Jump - RJ+G
= Running Jump + Grab
-- General Notes --
* Items in bold and blue are necessary to complete the levels or get the
secrets, either by using them, picking them up or both.
* You'll find a summary at the end of each level and a Spoilers Section for
puzzles at the end of this walkthrough.
* If you keep your eyes open while visiting Córdoba, you might find some Easter Eggs. Look at the paintings.
== Part 1: The Mystic Tree ==
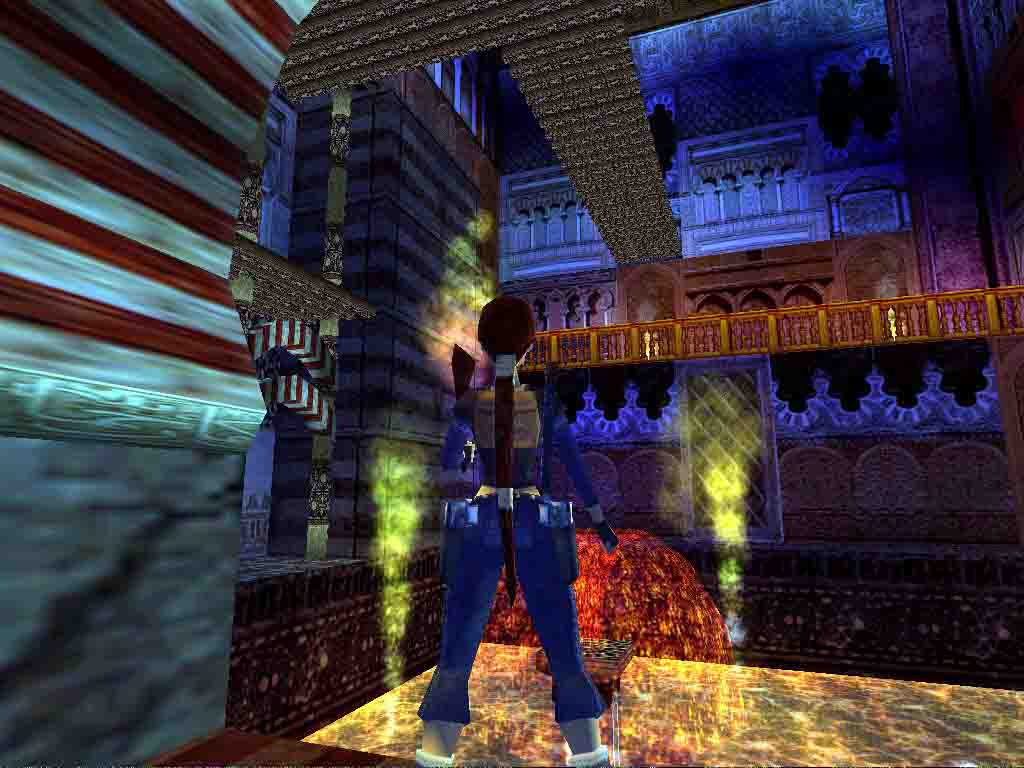

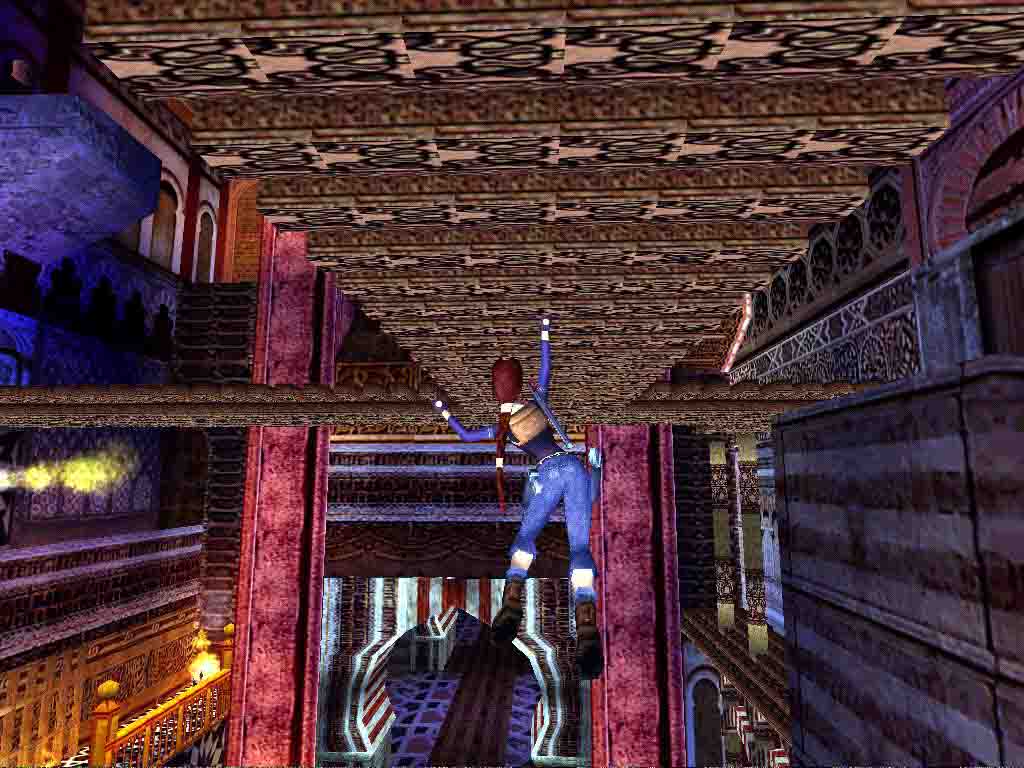
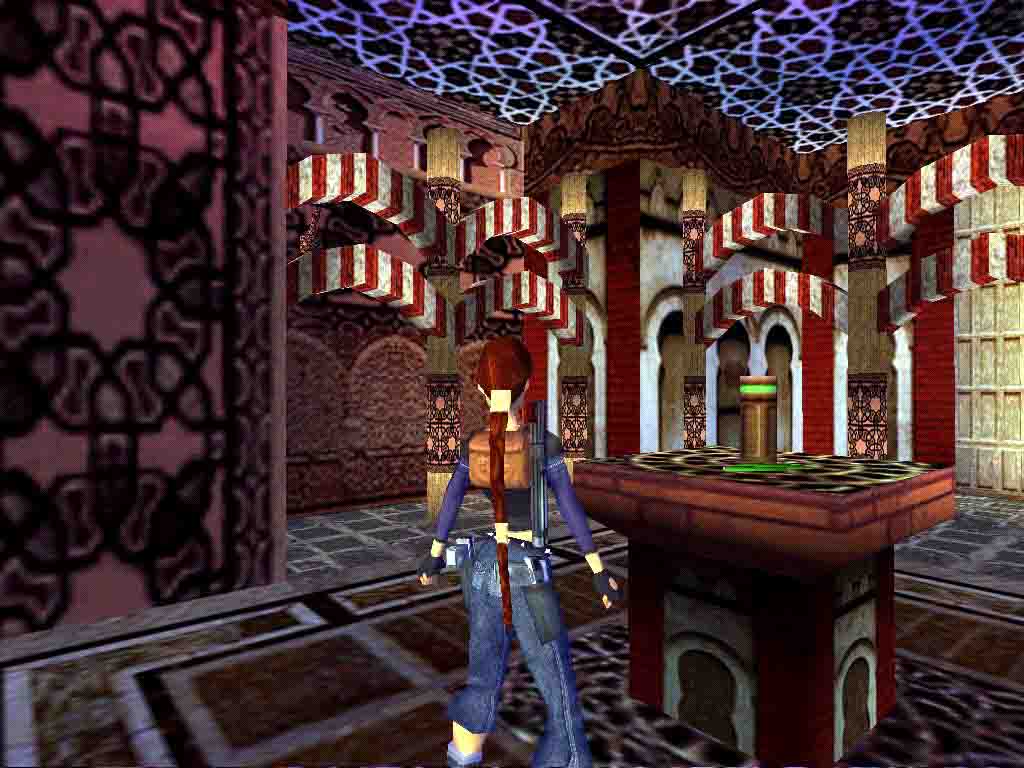
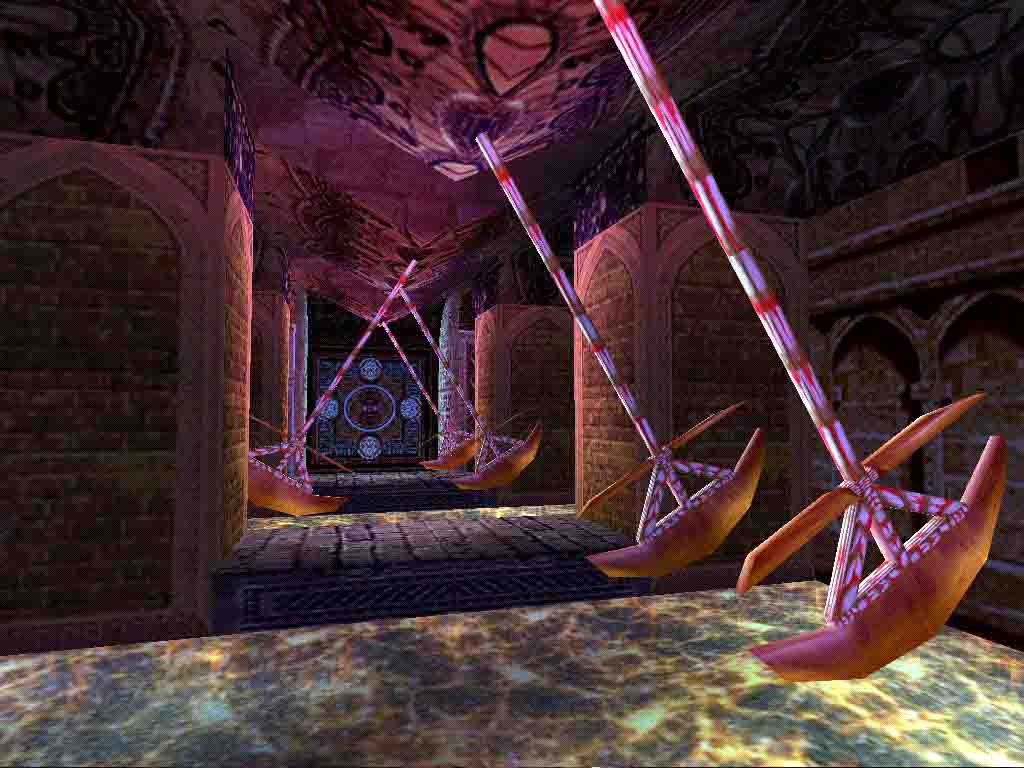
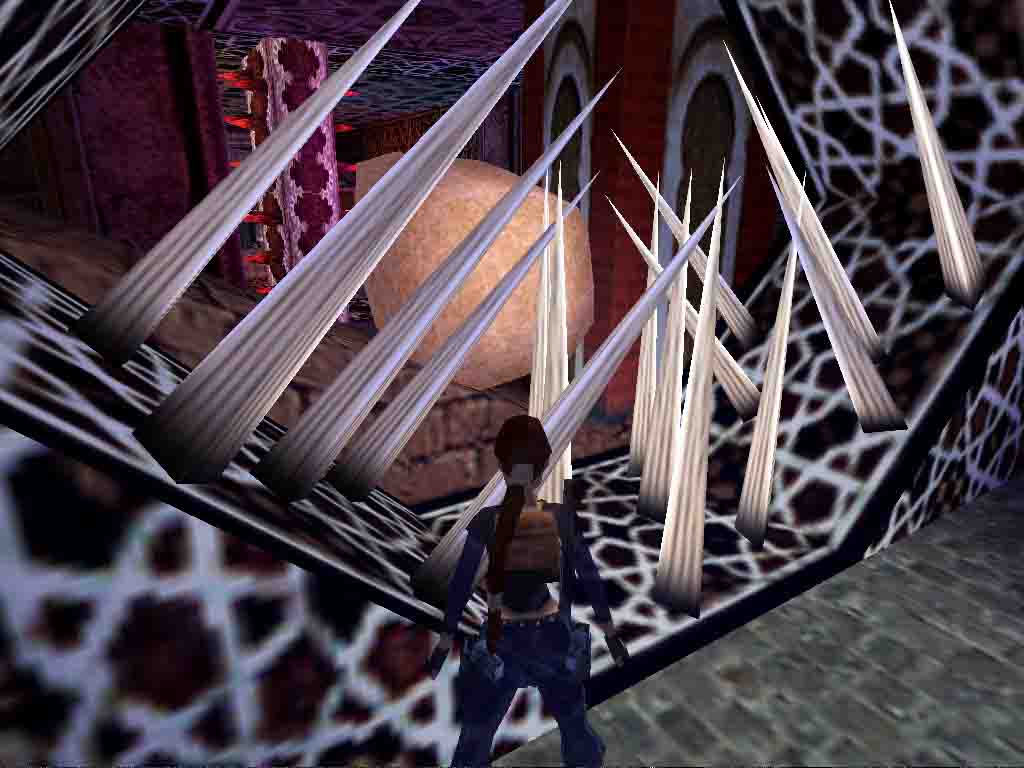
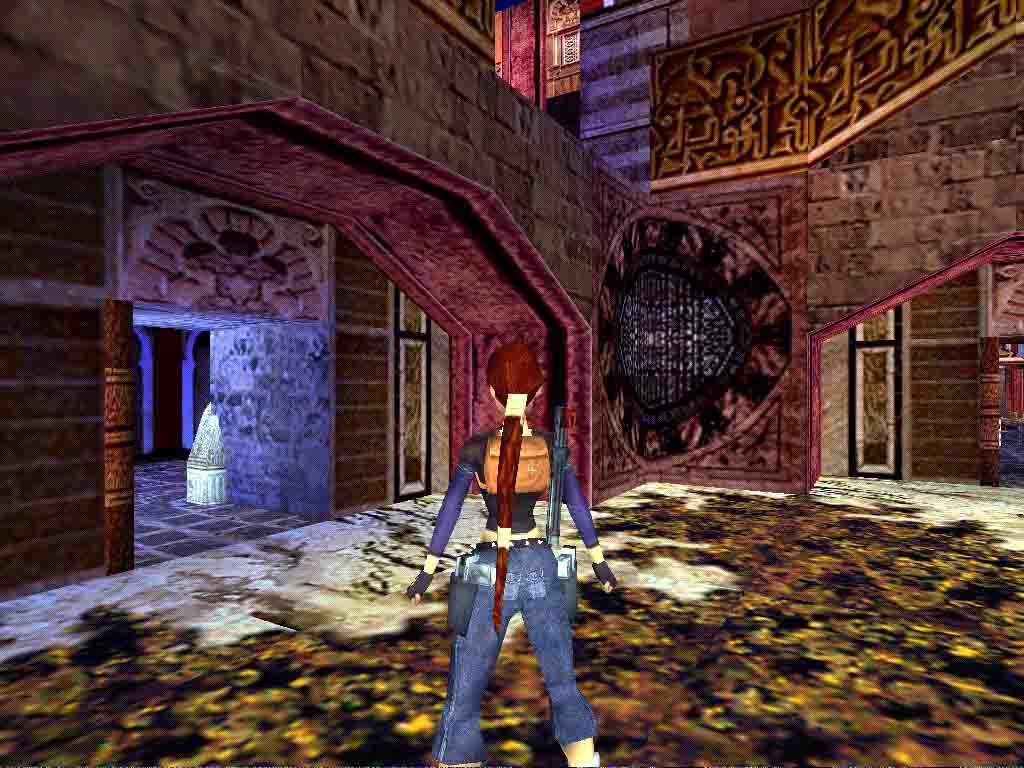
Welcome to Córdoba, once lavish capital of a Moorish Empire and now pretty much doomed by the evil Chaos Gem, as you'll soon find out.
You start in a rather small courtyard (the "Entrance Courtyard"). In front of you (E) is a tall closed door flanked by two unlit braziers. Looking up and L (N), you can spot a closed door and a switch (there's another closed door up there as well, which you can't see at the moment). Let's get up there first.
Since the ledge is too high for you to pull up, run L (N) a bit then turn L (W) again after the tall pillar. Go on the raised floor there to your L and pull up on the ledge above. Go R (N) then R (E) again at the corner and go activate the switch to open the nearby door, hearing a dog barking somewhere in the distance. Your Spanish adventure begins.
-- Of Trees and Mysticism --
Objective: Find the Mystic Tree
Which Way to the Backyard?
Pass the door to enter a long red room (the "Long Red Room" from now). There are unlit braziers here too, next to two closed stone doors on your R (E). Continue ahead and past the openings and turn around (S). Look up. There are recesses up there with a climbable wall below. Let's start with the L (E) one and go for a Secret.
Jump up, grab the climbable wall and pull up into the
recess. Turn around. Your goal is the ledge between two columns to your R
(NE). Walk to the edge standing in the middle, turn slightly R to aim at the
ledge and do a RJ with a hard L mid-air curve once you've cleared the column
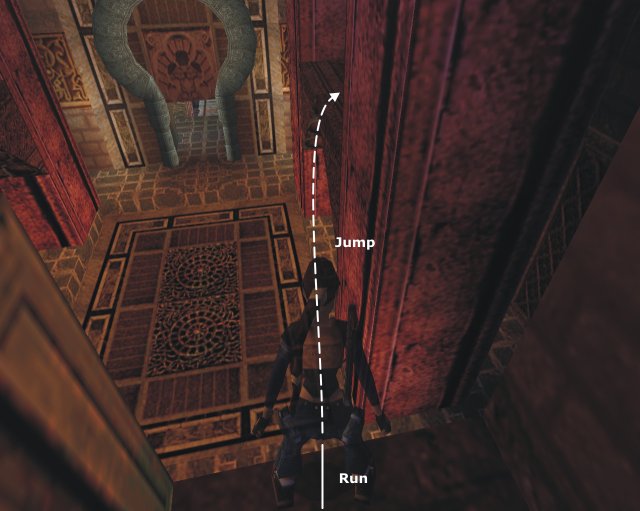 . Turn around and activate the switch, opening
the second square door in the Entrance Courtyard.
. Turn around and activate the switch, opening
the second square door in the Entrance Courtyard.
Turn L (E), drop down from the ledge and pick up the small medipack on the floor just in front of you. Now let's go fetch that Secret.
Return to the ledge in the Entrance Courtyard and go R (W) to pass through the newly opened door. Enter the room beyond - which is Secret #9 - and pick up a large medipack, uzi ammo, shotgun normal ammo and some more uzi ammo. Return to the Long Red Room and stop again after the two openings. Turn around.
Go to the R opening (W) and climb into it via the climbable wall below. Turn around, stand in the middle of the edge and turn slightly L to aim at the ledge between two columns on your R. Repeat the very same jump you did for the secret switch, but this time with a L mid-air curve (obviously).
There's nothing here, so walk ahead and stop on the L edge, standing one step away from the column and turn slightly L (NNW) to aim at the high platform ahead in the dark. Hop back and do a RJ+G to it with a R mid-air curve and hitting Action at the very last moment. Pull up and pick up the Backyard Key. Safely drop down from the platform into the room below.
Enter the end of the Large Red Room through the opening ahead. Ignore the winding stairway for now and go R (E) to the downward ramp. Run down and dive in the pool to your L to pick up some shotgun normal ammo near the SE corner. Leave the water, run to the end of the ramp and use the Backyard Key on the Backyard Keyhole to open the nearby Backyard Door and enter... well I think you've guessed by now... the Backyard!
The Hound That Wouldn't Die And The Tower Key
A Hell Hound savagely attacks you as soon as you enter. Do not try to kill it. It will rise alive again and again and again. It is absolutely immortal. Rush R instead then R again into a passage then a small courtyard. Locate the block in the far R corner next to a closed wood bars door and jump on it. There's a switch to your L but don't activate it yet. Run off the block into the small "room" and pick up the uzi ammo first.
Return on the block and activate the switch, opening the nearby wood bars door. Turn L, step back to the edge and backflip luring the Hell Hound in the room. Immediately SJ on the block again a quickly flip the switch up to trap it in there. You've got rid of the horrid dog.
Turn L, run off the block and head for the previous area by going R (N) in the passage. Once there, climb (or SJ) into the opening ahead and run off to land by a long pool which looks like a sewer entrance.
Go in the pool, turn R (E) and wade past the first two recesses on you L and R. Go pick the large medipack in the next R (S) recess, turn around and head to the lever ahead. Push it to open a wood bars door in the upper part of the Backyard. Return to the latter.
Locate the raised floor on your L when you leave the sewers (SW) and go on its highest part. Jump up to grab the edge of the slope above. Pull up, backflip, roll in mid-air and grab the edge of a flat platform. Pull up.
The wall ahead is climbable, so climb to the top and pull up through the newly opened door. Don't run into the passage yet. Turn around and look up: there's a MS above you. Grab it and swing to the end to let go on another flat platform. Run into the short passage there and pick up the shotgun normal ammo. Return to the previous passage via the MS.
Run into the passage, pick up the flares at the end then go into the opening to your R (W). You can spot a key on your L, on a roof ahead. Don't try to reach the higher roof to your L, it's trapped and you'd be torched. Do a RJ instead to the key roof, and pick up the Tower Key. Turn around and run off from the roof to the sloping one below. Slide backward and safely drop down into the Backyard.
Rush and Flames
Now let's go use that key, with a short detour first to open a door. Return to the Long Red Room (the entrance is just to your R) and climb up the winding stairway. Turn L (E) into the passage near the top (but not at the top). Go L (N) first and run to a balcony overlooking the Backyard where you'll find a small medipack. Go back to the passage then ahead (S) this time to reach another balcony, this one overlooking the Long Red Room. Activate the switch at the end to open a door in the Long Red Room, on floor level.
Return to the winding stairway and climb to the very top this time. You'll find yourself on a small balcony overlooking the Long Red Room. You can spot the Tower Keyhole in another balcony to your R. Don't try to jump there. Turn R (W) and look up: there's a crack up in the wall. Jump up, grab it and shimmy to the L until you can safely let go on the larger balcony, near a closed tall double door. Go use the Tower Key in the Tower Keyhole to open said door and enter the room beyond.
There's a pool of scalding water to your L with a nice fountain in the center and a closed door beyond. Take note of the triangular extended ledge location then go R (N) to find a switch. Save and prepare yourself for your first timed-run.
Activate the switch and backflip + roll in mid-air
to save some precious time. Run to the pool then R on the triangular edge
to do a RJ+G to the other side, taking off at the very last moment. Quickly
pull up and immediately sprint L through the door before it closes 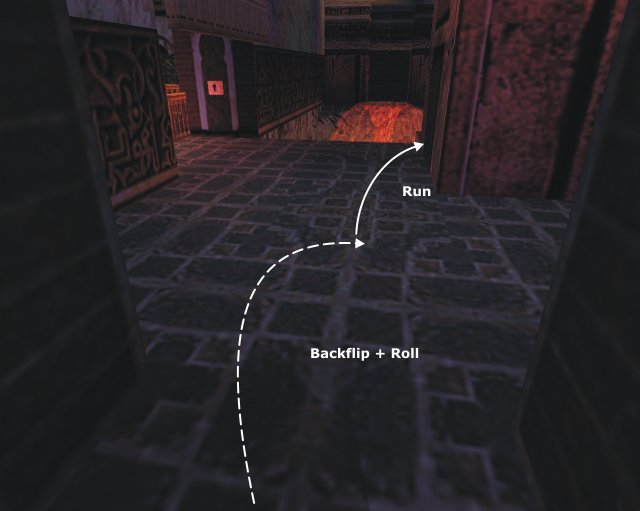 and
and 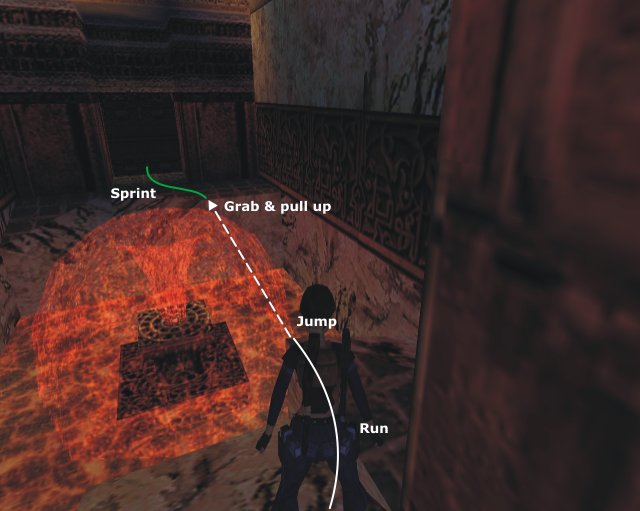
You're now on a bridge extending over a small courtyard. Run ahead until you're above the higher floor, go L and run off to it. Go climb on the red ledge ahead (E) overlooking the Entrance Courtyard. Run to the end and pick up the shotgun normal ammo there. Turn around and return to the small courtyard.
Go R (N), and run off from the edge into the lower part. Climb on the crate in the far R corner (NE) to pick up some shotgun wideshot ammo. Turn around (S), run off the crate and pick up what you're actually here for: the Torch in the corner ahead.
Turn around and go SJ on the lowest middle crate. Turn L (W), go to the far L corner of the crate, turn slightly L to aim at the tallest one, hop back and do a RJ to land on it. SJ on the red ledge ahead, go L (S) then 45° L (SE) and SJ over the corner to be back on the higher part of the courtyard. Run ahead to the other edge and run off to the upper part of the Entrance Courtyard below. Pass the open door to your L (NE) and enter the Long Red Room.
Run a bit then turn R (E) at the second brazier. The door you opened before doing the timed-run is here. Pass it and go light you Torch on the lit brazier ahead (careful not to stand too close to it or you'll catch fire as well). Return to the Long Red Room and light both braziers there, opening the door at the end of the nearby passage. Don't enter the room beyond yet, you're lacking a key.
Return to the Entrance Courtyard and run off to floor level. Light the two braziers there as well, opening the nearby tall metal door. Leave the Torch here (you'll get it back later) and enter the small courtyard beyond the open door.
Run ahead (E) and activate the switch in the other side to raise a block behind you. Turn around (W) and pull up on that block then on the ledge to your R (N). Turn R (E) again, SJ on the roof and pick up the Silver Key at the other end. Drop down into the courtyard below and return to the Entrance Courtyard.
Note: I've chosen to bring the lit torch from here to the following parts because it's shorter and will save you a couple of tricky jumps. If you don't want to bother with dropping/picking up the torch and/or have trouble aligning Lara with the torch in hand, you can leave it here. There'll be other torches later.
Pick up the torch and go R (N). SJ on the raised block below the ledge then SJ again on said ledge. Enter the Long Red Room.
Go R (E) into the passage at the first brazier (if you haven't lit the two braziers here yet, now would be a good time to do so). Enter the small room, drop the torch, use the Silver Key on the Silver Keyhole there, opening the nearby wood bars door. Pick up the torch and pass the door. You've made it to the Mystic Tree.
-- Lara Croft And The Very Hard To Open Door --
Objective: open the wood bars door below the Mystic Tree.
There will be much to do in the Mystic Tree Courtyard and its vicinity, so let's start right away.
Climb down the stairs and run along the wooden floor to a closed door. Drop the torch there then turn around (S) and run toward the S wall in the opposite side of the courtyard. Turn L (E) at the square rock and climb on it. Turn 45° L (NE) and run off from the block to the ground below. Pick up the Enchanted Light Key. Turn around and SJ on the higher rock then go R (W).
Follow the rocky path upward to find yourself next to the Tree. Go L of the Tree and run off to a lower rocky ledge. You'll see a keyhole there, but you don't have the key for that one yet (as a matter of fact, your whole raiding tour here will be dedicated to finding that key). Do a RJ over the fence into the veranda ahead and locate the lever to your L (W). Ignore the ledges around: they are too high for you to climb on. Activate the lever to open a nearby door in the NW corner of the Mystic Tree Courtyard.
Return to said Courtyard by SJing over the fence. Go R (W) then R (N) at the corner. The door you've just opened is over there. Pick up the torch you left here and pass the door cautiously: the room beyond is riddled with burning rocks and lava (which is why we'll call it the "Lava Room" from now on).
More Flames and Much Heat
Notice the rocks covered with lava: those are the burning ones. The grey ones on the other hand are perfectly safe. Now that you have that information, walk to the edge, turn 45° L (NW) and SJ to the grey rocks ahead. Drop the torch using the pistols shortcut ("1") so it falls at your feet instead of being thrown away, running the risk to land on a burning rock.
Turn around (S) and run to the wall. Sidestep R to the very corner and pull up onto the ledge above. Run L (E) and pull up into the high CS. Crawl to the end and pick up the small medipack there. Return to the room below by dropping down from the other side of the ledge (where you first pulled up). You're now going for a secret.
Turn around (N) and run ahead until you stop at the bottom of a slope. SJ over it and look L (W) to locate a low CS. Crawl into it, hearing the sweet chimes of Secret #10 as you do so. Pick up the (hard to see) flares and revolver ammo then crawl out and slide down the slope to be back in the Lava Room.
Run ahead, pick up the torch then go L (E) to cautiously go around the burning rocks. You now can see a closed door at the top of a stairway beyond the lava and a recess in the far R corner (SE) of the room. This recess is your next destination.
Position Lara as in 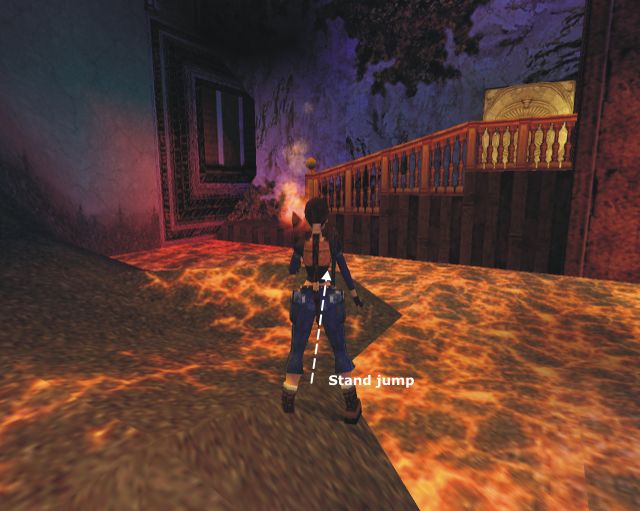 and do a SJ over the burning rocks to a safe triangular one beyond. Drop the
torch. Turn around (SE), carefully step back and do a RJ to land in the recess
and do a SJ over the burning rocks to a safe triangular one beyond. Drop the
torch. Turn around (SE), carefully step back and do a RJ to land in the recess
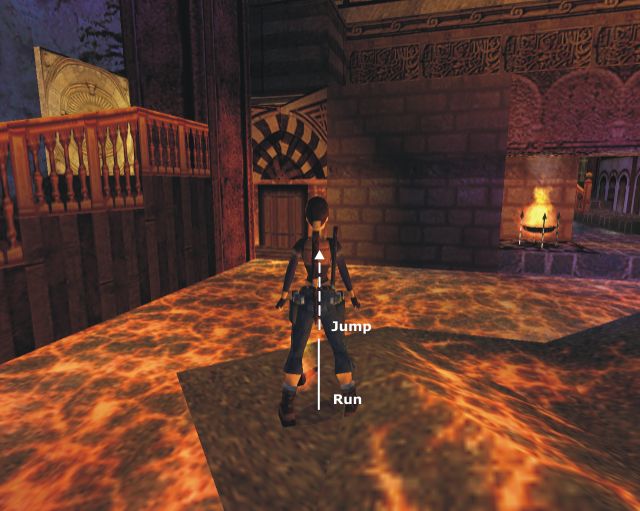 .
Activate the switch there on your L to open the door at the top of
the step. Now you have to reach that door.
.
Activate the switch there on your L to open the door at the top of
the step. Now you have to reach that door.
Walk to the edge, standing in the very L side, turn slightly L to aim at
the safe rocks, hop back and do a RJ to them. Walk ahead, turning a bit R,
position Lara as in 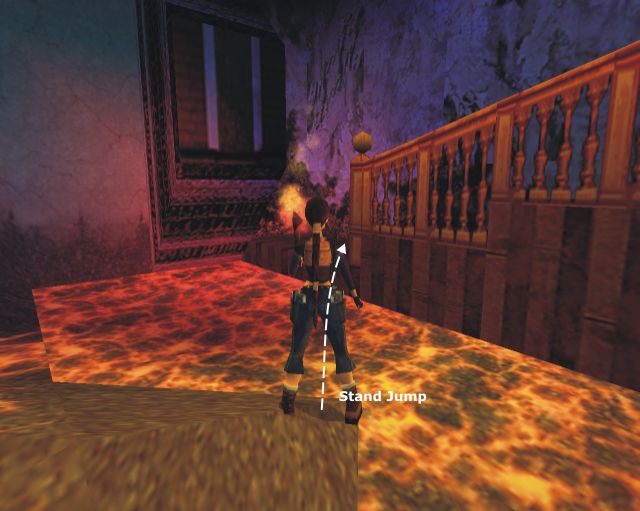 and do a SJ to the bottom of the stairs. Run up the latter and pass the door
to enter a long, high-ceilinged room looking very Moorish: The Moorish Room.
and do a SJ to the bottom of the stairs. Run up the latter and pass the door
to enter a long, high-ceilinged room looking very Moorish: The Moorish Room.
There's a large opening in the other side of the room, but it's currently obstructed by red walls. You can't see it from where you stand, but there's also an unlit brazier L of the opening. Now there are two possibilities: either you have brought the lit torch here from the Entrance Courtyard or you haven't. In the latter case, follow the paragraphs in italic below. If you do have the lit torch with you, resume after the paragraphs in italic.
Go L (N). There are two pillars ahead, each supporting a lit brazier. Look down to the floor, you'll see a Torch between the two pillars (there's two other ones on each side of both pillars, in case you'd lose the first one). Pick it up.
Go back to the central alley but don't try to jump to the top of the pillar to light your torch up there: you can't. Go R (W) instead to be back on the stairs. Climb them down and stop just after the last step. Turn L (W). You see that lit brazier in the entrance of the Lava Room? That's what you'll use to light the torch.
Turn slightly L to aim at the safe rocks and do a SJ. Walk ahead a bit and do another SJ over the burning rocks. Run ahead toward the W wall, turn L (S) to face the entrance and walk as close to it as possible. Toss the torch there - Hit Draw, generally Space - then do a SJ holding Action to avoid hitting the wall. Pick up the torch and light it on the nearby brazier. Return to the Moorish Room with your lit torch like you did the first time.
Run ahead to the other side of the room: the unlit brazier is there, L of the opening. Light it with your torch, lowering the nearby red walls, then drop the torch. Turn around, pick up the flares, go get your torch back and run L (E) into the opening.
You're now standing at the edge of a lava pool, with flames bursting out all over the place. You can spot another unlit brazier in the far R corner (which is why you still need the torch). There's also a ledge with a closed tall metal door on your L (N). That's where you're going now.
Standing at the edge, sidestep L until Lara's one step away from the wall. Turn L to face the ledge, hop back and do a RJ to it (a simple straight one will do). Drop the torch. Go L (W) and go activate the switch there. This will be the first of three you need to activate in order to open the wood bars door barring a high ledge in the other side of the room.
Go get the torch back and run to the other end while not staying too close to the edge to avoid being burned by the flame rising from the lava. When you reach the wall, sidestep to the edge, turn 45° L (SE), hop back, wait for the flame to stop and do a RJ to the next ledge.
Go R (S) and light the unlit brazier. Hop back and drop the torch. Turn around and look up and L to locate the jumpswitch in the middle of the wall. Flip it. Lighting the brazier has lowered a red wall to your L (N), and the third switch behind it is now accessible. Go activate it to open the wood bars door. Turn around and go get that torch again.
Go to the newly opened door, carefully dealing with the now lit brazier in the corner. SJ on the higher ledge and go lit the unlit brazier there as well, opening the tall metal door in the opposite side of the room (the wall behind the brazier is climbable but it doesn't lead anywhere). You can now drop the torch, this time for good.
Going Up, Swinging and Dashing
Return to the next ledge (mind the brazier)
and run to the other end, stopping before the switch recess. Walk to the edge,
standing two steps away from the wall, turn very slightly R to aim at the
metal door ledge, hop back, wait for the flame
to stop and do a RJ doing a R mid-air curve once you've cleared the wall 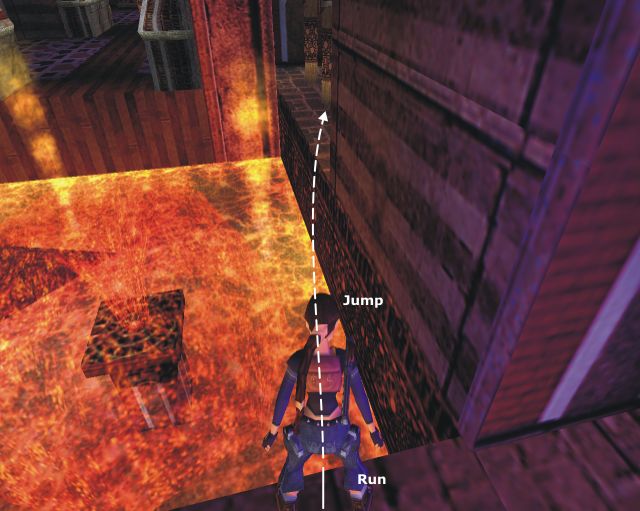 .
.
Pass the doorway and enter the corridor. Run up the ramp but stop at the top and turn R (E). There's a nasty flame trap here. Wait for the flame to be off to run to the other side. You're now by the edge of another lava pool. Run to the end of the ledge, turn R (S) and do a RJ+G to the opening ahead. Pull up.
The bridge you can see above is in fact a MS. Locate the two lit braziers on your L on the nearby balcony and go between them. Turn L (N) to face the first one, sidestep so Lara's shoulder is against the wall and very carefully walk until you stand on the very corner of the brazier tile, where the flame can't burn you. Jump up and grab the MS.
Swing, going R at the junction (there's a deadly fire emitter on the L anyway) and let go to land on a wooden ledge. Go L (W) and run to the wall which is climbable. Grab it, go either R or L so you're not in the exact middle then climb up until Lara's hands are one tile away from the ceiling then climb up twice more. Backflip to land on a higher wooden ledge behind.
Locate the jumpswitch up and ahead and to a RJ+G to flip it (you'll lose a tiny bit of health upon landing). This has extinguished a fire protecting a nearby key. Return to the higher ledge via the ladder.
Turn around this time (E) and first go pick up the small medipack ahead on the grey ledge. Turn R (S), SJ on the wooden bridge and go get the Tower Key there to your L (E). Turn around (W), run along the bridge and go L (S) at the junction. Run to the other end, turn R (W) and do a RJ+G to the climbable wall below the opening ahead. Pull up and turn around (E).
Locate the block up and ahead extending from the wall and do a RJ to it. Turn R (S). The Tower Keyhole is just there so use your Tower Key in it to have a rope drop from the ceiling. Turn around, walk to the edge, sidestep L to the corner, turn slightly L (NNW) to aim at the rope, hop back and do a RJ to grab it.
Reorient Lara so she's facing the opening in the far L corner, swing and jump into it. Walk to the other edge. The opening you're in overlooks the Moorish Room. Drop down from the former to the latter.
Run to the other side of the ledge, stopping one tile away from the wall. Turn 45° L (SW) and do a RJ to the central ledge ahead. Pick up the revolver ammo there to your R then turn L and run ahead, doing another 45° RJ to the L (southern) ledge. There's a switch at the other end. Run to it and save. It's timed-run time.
Activate the switch then roll to turn around and start
sprinting. Stop sprinting to run with a L curve when you're about two tiles
away from the wall. Jump over the corner, run with a L curve and jump again
over the other corner. Run to the ladder
with a R curve, jump up, grab and quickly climb to the top. Pull up there
and rush through the doorway 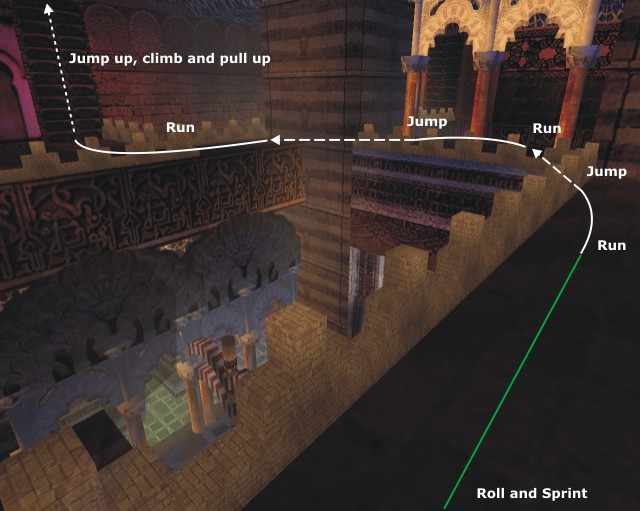 .
.
Not much to do here indeed except (of course) push that lever to your L, opening a door near the timed switch on the southern ledge. So proceed and return to said southern ledge and pass the doorway to your L (S).
A Chain and A Secret
[Important: Make sure you find the way to make the chain appear or you're in for one helluva backtracking later on.]
You're now on a terrace overlooking the Mystic Tree Courtyard. To your L (E) is the Enchanted Light Keyhole: use the Enchanted Light Key in it to open a door in the far L (SE) corner of the courtyard below. If you look down and to your L, you'll see some flares on a ledge: don't go there yet.
If you don't have that key yet, don't panic. You won't have to backtrack through lava rooms all the way up here once you have it, as you'll soon see. Proceed as shown in the three following paragraphs then go get the key (see the very first § of the present section) and easily come back using the upcoming chain.
Go R (W), run across the terrace to a red wall - which in fact happens to be a door, turn R (N) and look up to locate the jumpswitch up on the wall. Flip it to open the nearby red door. Go to the new opening and walk to the edge.
There's a block extending from the wall ahead (W), but you can't reach it from where you stand. Turn R (N) and look at the wall: there's a crack in it leading to the block. Position Lara one step away from the wall, turn slightly L to aim at the crack and do a SJ+G to it. Shimmy L until you can pull up on the block.
Turn L (S). Your next destination is the terrace with the lever to your R. Walk to the edge, standing in the middle, turn slightly R (SSW) and do a RJ, doing a hard R mid-air curve once you've cleared the wall. Push the lever: it creates a chain that will most conveniently allow you to easily go back up later. Turn around, walk to the edge in the L corner (NE) standing one step away from the wall. Turn 45° L to face the chain and do a SJ+G to it.
You could return to floor level sliding down the chain right away, but let's go for a secret first and collect goodies on the way.
Turn around the chain until the extended block is on your back and backflip on it. Turn L (E), walk to the edge in the R corner, turn slightly R to aim at the terrace below, hop back and do a RJ to it. Run across the terrace, turn around at the edge and drop down on the lower ledge. Pick up the flares there on your L.
Turn R (E) and do a RJ to the higher ledge ahead. You're
now in for a couple of (tricky) banana jumps. Go R (S) and run to the wall.
Hop back then step back twice. Sidestep R as much as possible then turn slightly
R. Don't hop back. Do a RJ and a hard L mid-air curve once you've cleared
the wall to land on the next ledge ( 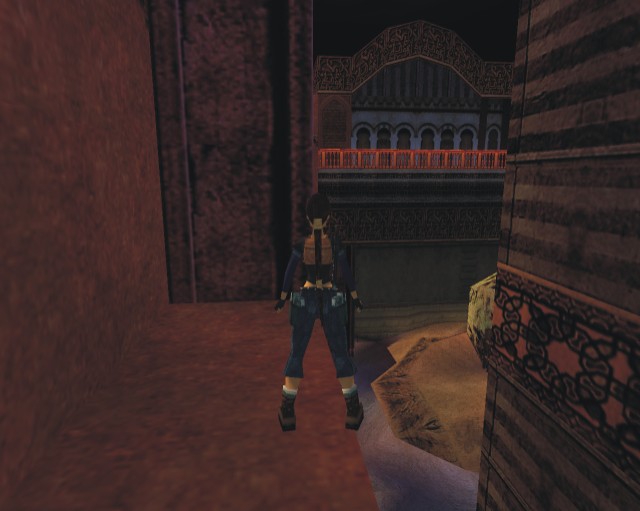 for initial position and
 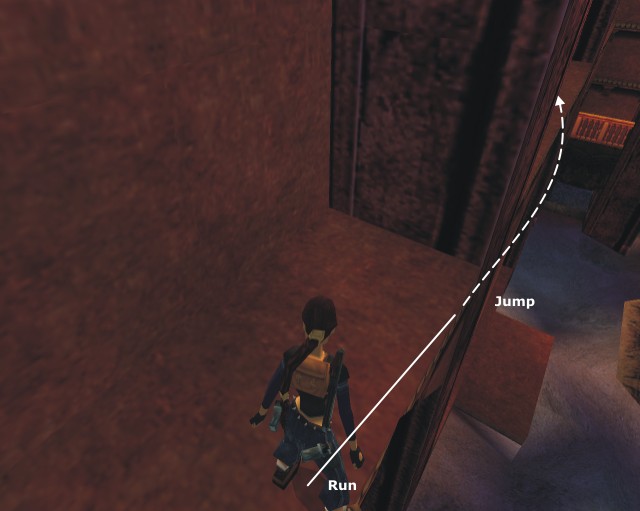 for the jump).
Turn L and pick up the uzi ammo then run to the other side of the ledge and proceed to the next one with another banana jump. Pick up the small medipack there to your L. Run to the other side of the ledge, turn L (E) and drop down from it into Secret #11. Pick up some shotgun wideshot ammo and shotgun normal ammo. Directly sidejump L over the fence to be back in the Mystic Tree Courtyard, on floor level.
Turn R (S). The door you opened with the Enchanted Light Key is there in front of you. Run ahead and pass the doorway.
The Traps Gauntlet
Alright. Take a deep breath. You're now in for one hellacious trap gauntlet. This room contains almost all traps you could dream of: spikes, boulder, darts, hot floors, spinning blades and a nasty spiked wall. Someone really doesn't want you to grab that chain in the distance and make your way up outta here. Let's start with the first set comprised of spikes, a boulder, darts and some hot floors.
Stand as close to the spikes as possible, standing on the L, wait from them to retract and run to the other side. Stop briefly as a boulder rolls at you and SJ over the hot floor and the darts to land on safe ground.
Now, the spiked wall. This one's the easiest part: go to its R side, again standing as close as possible, and wait for it to start going L to quickly run past it. The next and last part is indeed the toughest.
Go to the L corner of the safe floor, standing one step away from the hot
floor and turn L to aim at the spinning blades platform. Wait for a
blade to have just passed, SJ on the platform
and immediately crouch. Still crouching, position Lara so she faces the very
end of the brown slope (see 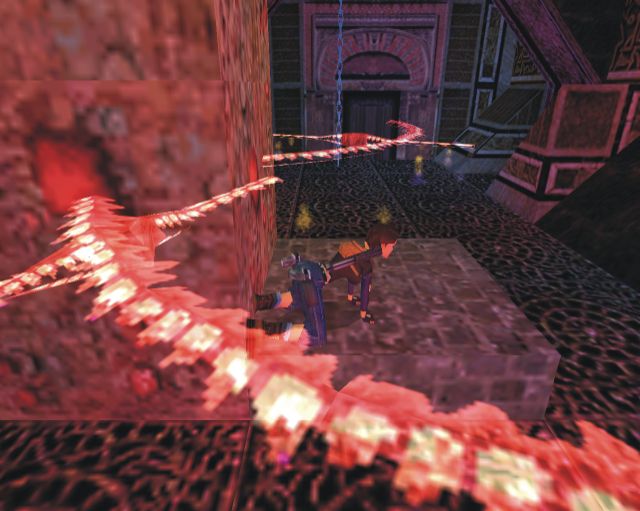 - you're not jumping there, though, but on the grey slope after). Stand up
when a blade pass above you, run with a slight
L curve and do a RJ with a L mid-air curve to the grey slope. All those curves
being done so you don't jump too far on the grey slope (see
- you're not jumping there, though, but on the grey slope after). Stand up
when a blade pass above you, run with a slight
L curve and do a RJ with a L mid-air curve to the grey slope. All those curves
being done so you don't jump too far on the grey slope (see 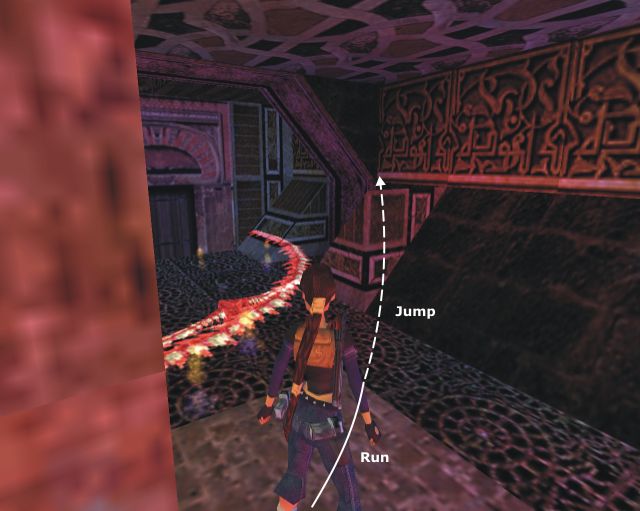 ).
You should land on the L side of the slope although not on the very edge.
Slide a bit, jump to the next slope, landing in the middle of it and immediately
jump with Action pressed to grab the chain ahead (see
).
You should land on the L side of the slope although not on the very edge.
Slide a bit, jump to the next slope, landing in the middle of it and immediately
jump with Action pressed to grab the chain ahead (see 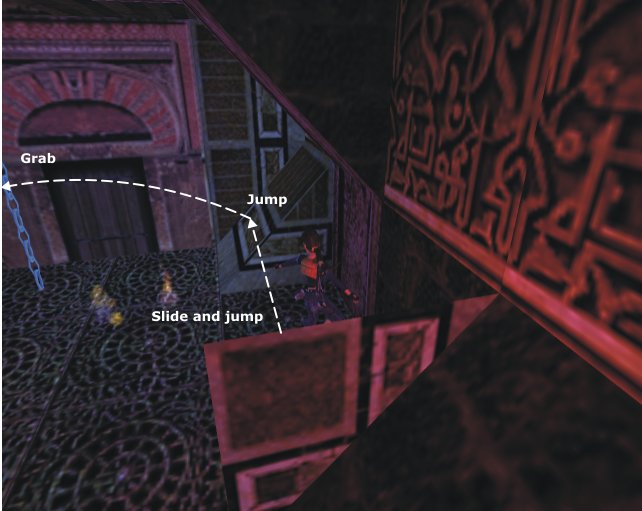 ).
Congrats! You've made it!
).
Congrats! You've made it!
Going Back Up and Another Rush
Turn around the chain and climb up until Lara's waist is aligned with the edge of the hole above and backflip. There's a switch on your R (NE), but the hot floor below prevents you from accessing it. Look L (W) and up to locate a ceiling trapdoor up there. Stand below its handle, jump up and hit Action to open it. The wall on your R is climbable so climb up to the top and go R once there to let go and land in a higher passage.
Pick up the shotgun normal ammo then turn around and walk to the edge. There's a jumpswitch ahead. SJ+G to it and flip it to turn off the hot floor below the nearby switch.
Activate the latter to open a trapdoor in the ceiling of the L side of the room (N). Go L. You'll find a closed door there as well up in the wall. Go L and climb on the climbable wall to your L. Go up to the top, shimmy L over another hot floor then let go. Activate the switch opening a red door giving onto the Lever Terrace as well as the door below. Make your way back there via the ladder.
Climb in the doorway to your L (N) to find yourself into a very dark opening. You could drop down from there but would lose a little bit of health so turn 45° R (NE) instead and do a safe SJ to the rocks.
Remember that chain you "created" a while ago? You're going to use it right now to easily get back up to the Lever Terrace (if you haven't created that chain, I'm very sorry but you do have to get there via the many lava rooms and heights. Once on the Enchanted Light Keyhole terrace, look at "A Chain and a Secret" to make your way to the Lever Terrace).
Run diagonally L (NW) to the chain then jump up and hit Action to grab it (you can't grab it while standing on the floor). Climb up until you see the edge of the Lever Terrace, turn 45° R so it's on your back and backflip. Turn around and pass the open red door behind the lever.
Climb the stairs past a keyhole. There's a key to your R but the spikes there prevent you from getting it. Continue ahead to the end of the corridor then make a R U turn around the wrought iron fence to find a decorated tile. Since this decorated tile happens to be the start of a rather tight timed-run, save.
Position Lara on the edge of the tile (as long as you're there the timed-run won't start, so take your time). Run ahead, take a L U-turn then sprint along the corridor. Stop sprinting to run again, make a R U-turn and run ahead stopping on the exact middle of the tile so you don't lose time while Lara positions herself on the key. Pick up the Tower Key then immediately backflip before the spikes rise again.
Return to the entrance of the corridor and use the Tower Key in the Tower Keyhole there to lower a red wall nearby. Enter the next room.
Run ahead (S) and pick up the flares on the pedestal in the second room. Since you obviously haven't gone all that way through lava and traps only to get some flares, look L (E) behind the columns to locate a well-hidden jumpswitch. Flip it to open the tall metal door to your R (S) and go pass through it.
You'll find yourself in a small alcove with a large wrought iron doors and a lever. Simply push the lever to open said doors.
Opening the Door
Aaaahhh... more traps! Swinging blades, this time. Served with scalding water. The first one being all alone and single, it'll be the easiest one. Position Lara on either side as much as possible and wait for the blade to swing away to the other side to do a SJ. Now on to the next couple.
Those ones are a bit trickiest: first off, there are two of them and secondly you need a RJ here to reach the next ledge. Not mentioning the fact that they swing in opposite directions. Again, position Lara on either side standing on the furthest edge from the blade. Wait for the closest one to swing away and do a RJ. You should clear the second blade easily.
The two last ones are almost identical but swing in the same direction. Position Lara on either side, wait for the blades to swing away and do a RJ to the last ledge. There, those were easy, weren't they?
Pick up the Chamber Key there, meaning you've almost reached your current goal. Don't forget the small medipack and make your way back across the room dealing with the blades like you just did. From there return to the Lever Terrace and use the chain to slide all the way down to floor level in the Mystic Tree Courtyard.
Turn R (SE) and run toward the central rocks supporting the Tree. Run on the slopes, SJ when needed, to reach the Chamber Keyhole there. Save. Use the Chamber Key in the Keyhole to open the wood bars door below the Tree.
-- The Blue Chaos Gem --
Objective: Protect the Tree then find the Blue Chaos Gem to free Córdoba from its influence.
Alright. You're indeed in big big trouble. As soon as you've used the key, 2 harpies have appeared and they're fiercely attacking the Tree. The problems here (because there are several of them) are: First, all damage the Tree endures, you endure it as well. Second, you have a bad tendency to aim at the Tree instead of aiming at the harpies. Third, they tend to stay high and are quite difficult to target.
The better way to quickly end your predicament is to hop back as soon as the fly-by ends, draw your revolver combined with the laser-sight and aim at the harpies. A few bullets each should be enough for you to shoot them down before they kill you through the Tree or directly. Keep an eye on your health bar though (which you can't see while aiming).
If you don't have enough revolver ammo left, you still can kill the harpies by changing target (hit "Look"). But it will take longer and you'll most probably take much more damage.
Once they're down, turn E and slide down the slope. Go R (S). The newly opened door is there to your R (W) pass through it and dive in the water hole beyond.
Turn around and dive ahead staying close to the ceiling to avoid being hit by the lateral blade. Go to either side of the room and swim along the wall. Go as close as possible to the spike, turn diagonally to aim at the center of the room, wait for the spikes to be fully up and swim through them to the safe spot in the middle. You won't take any damage. Pick up the small medipack there then swim ahead again and up to eventually surface in the Huge Flooded Room.
Once you've taken a good breath, dive again to the bottom and swim ahead past the archway then up to surface again. Turn around and pull out of the water on the middle of the lower ledge.
Turn L (S) and locate the raised floor. Walk to it until Lara "climb" on the very edge and turn around. Look up: there's a MS above. Jump up and grab it. Swing to the end, let go and immediately hit Action to grab the edge of the ledge below. Pull up.
Crawl into the short CS then turn around and drop down into another flooded room. Turn around (E) and swim into the recess to your L (N) then up to activate an UW ceiling switch there, opening a nearby door. Swim out of the recess then through the doorway to your R (N). Pick up the 1st Amethyst Jewel there.
Turn around, and surface in the large hole to your L (E). Pull up on the crate, turn around, sidestep L to the corner, turn slightly L and do a SJ+G to the CS. Crawl through it to reach the previous half flooded room and return to the Huge Flooded Room.
Swim L (S) after the archway then L (E) again to pick up some uzi ammo here in the recess. Turn around and swim ahead past the first (obviously unlit) brazier and the door to pick up a large medipack on the second brazier. Turn around (N) and swim to the far L corner before the columns and the door (NW). You'll find a hole there. Pick up the 2nd Amethyst Jewel.
Turn around, leave the hole, turn around again just after the hole and swim ahead and up to the surface. There are two openings there, to your L (W). Pull out of the water into the farthest one (L one). Push the lever to open a trapdoor in the other side of the room.
Return to the water and swim across the room to surface in the eastern side. Go on the slanted part of the ledge in the middle. The wall ahead is climbable so walk to it, and climb to the top. Go L once there and let go to land on a sloping (but not sliding) block.
Turn around. The 1st Amethyst Jewel Receptacle is here in front of you. Use one of your Amethyst Jewel on it. Once it's done, do a RJ+G to the ledge supporting the 2nd Amethyst Jewel Receptacle and repeat, lowering a block in the southern wall of the Huge Flooded Room.
Dive back in there and swim R (S). Pull out of the water into the new opening, slide down the slope and run to the red door which will open as you approach. Pick up the hard-earned Blue Chaos Gem on the floor of the room beyond in the center.
You've freed Córdoba of its evil influence! Now you have to find a way to leave the city...
==== In this part, you should have found...
Enemies: Hell Hound (can't be killed),
Harpies
Items of note: Backyard Key, 1st Tower Key, 1st
Torch, Silver Key, Enchanted Light Key, 2nd Torch (optional), 2nd Tower
Key, 3rd Tower Key, Chamber Key, 2 Amethyst Jewels, The Blue Chaos Gem
3 Secrets
many Traps - 3 Timed-Run
== Part 2: Córdoba ==
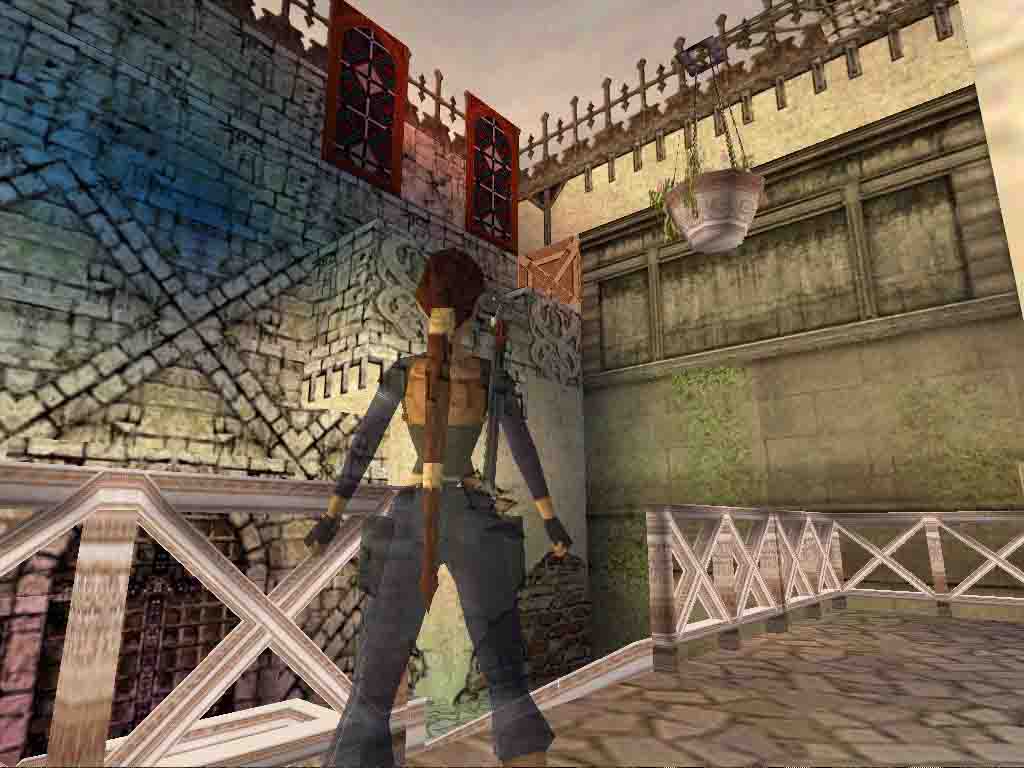
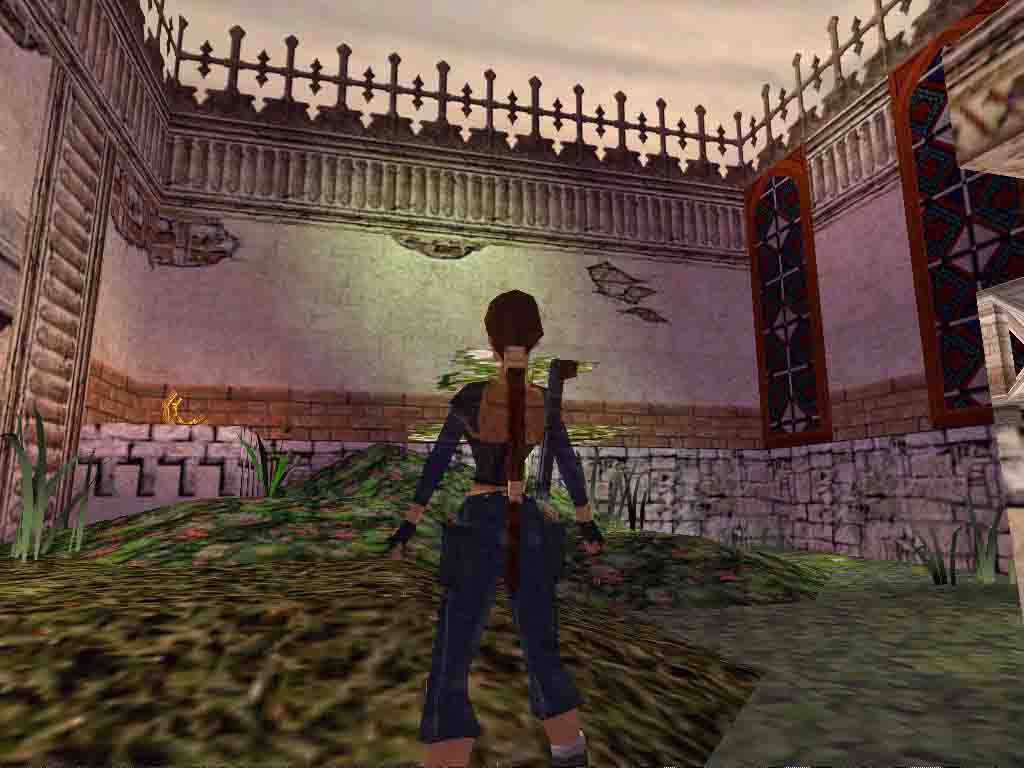

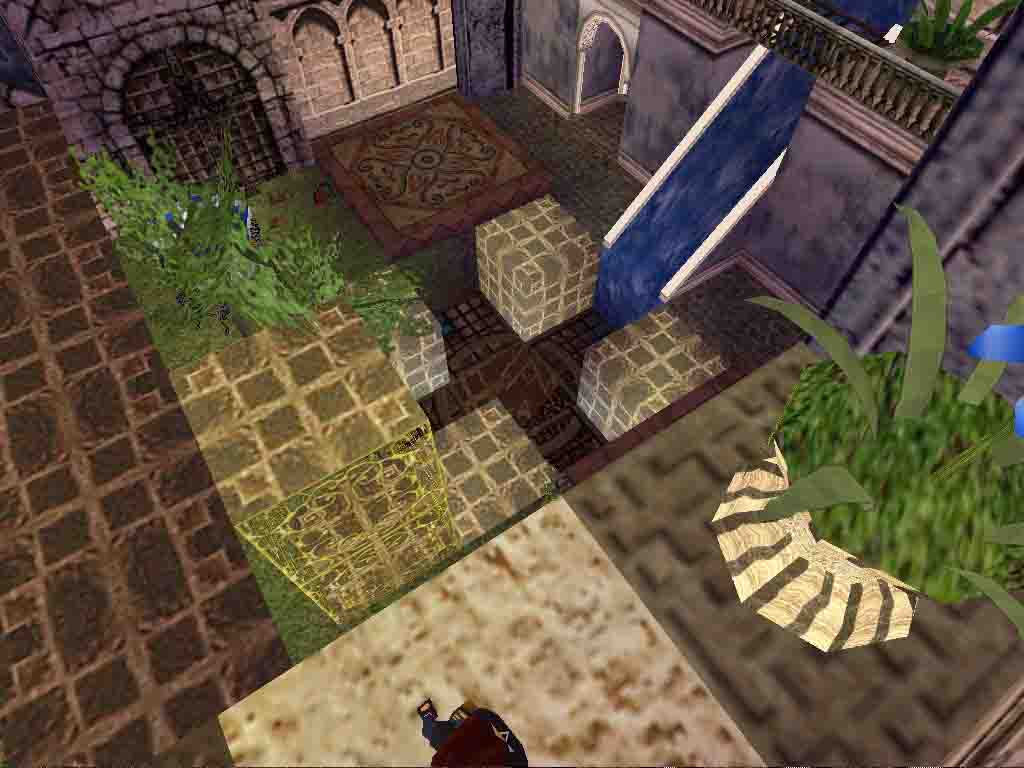
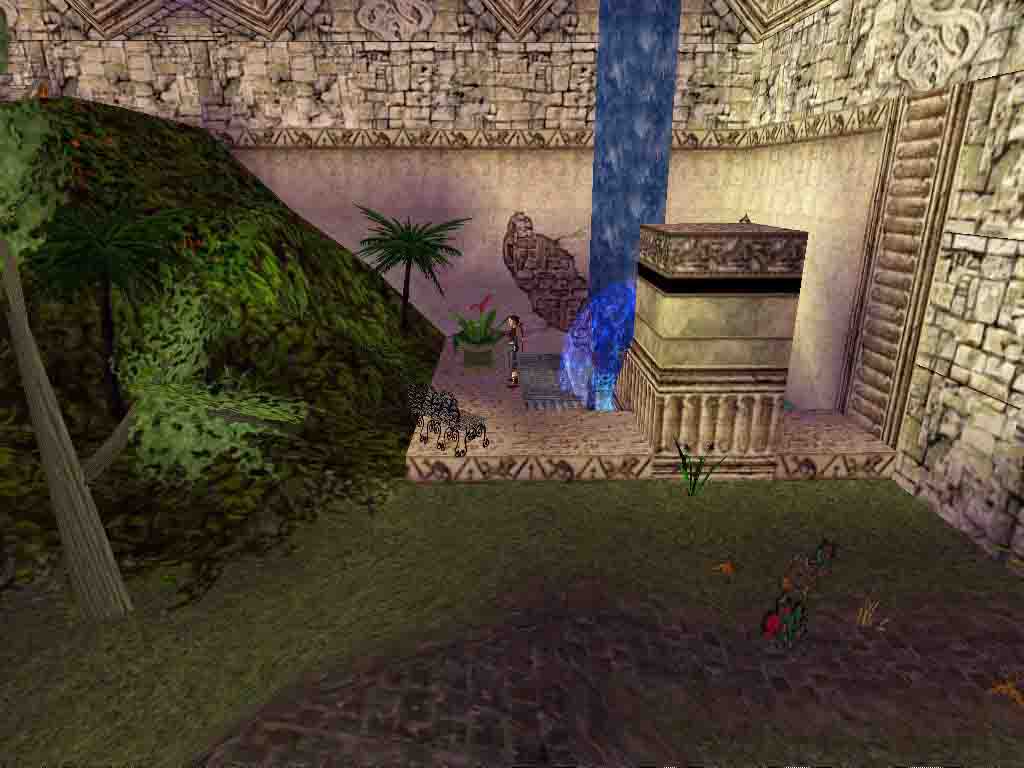
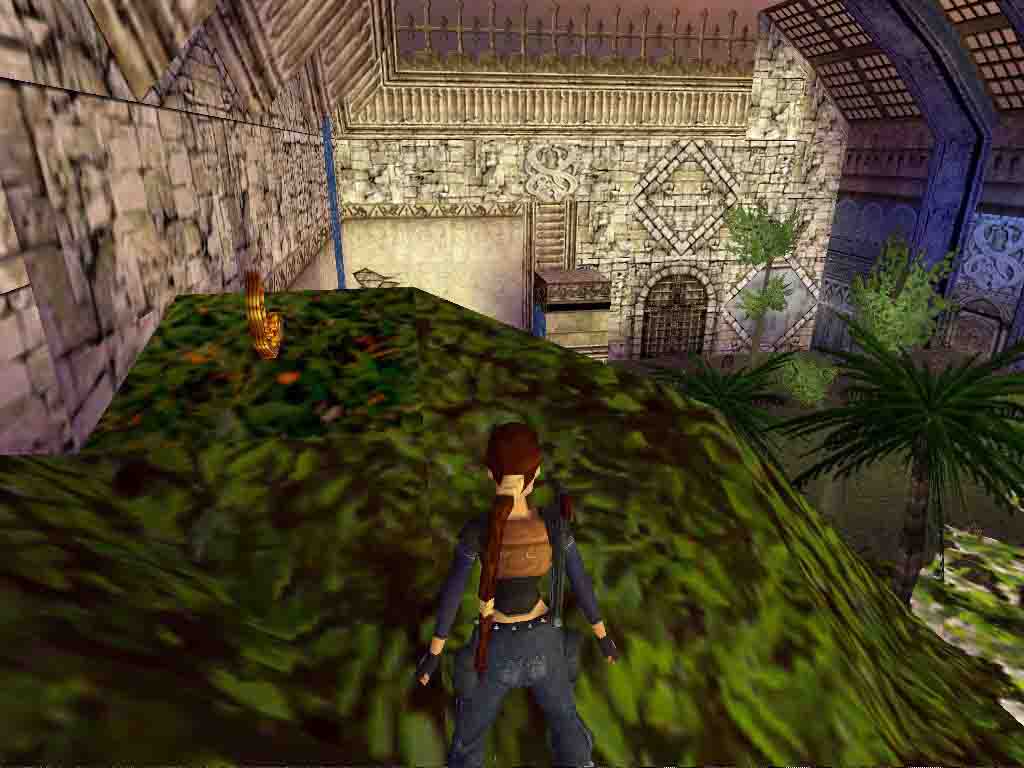
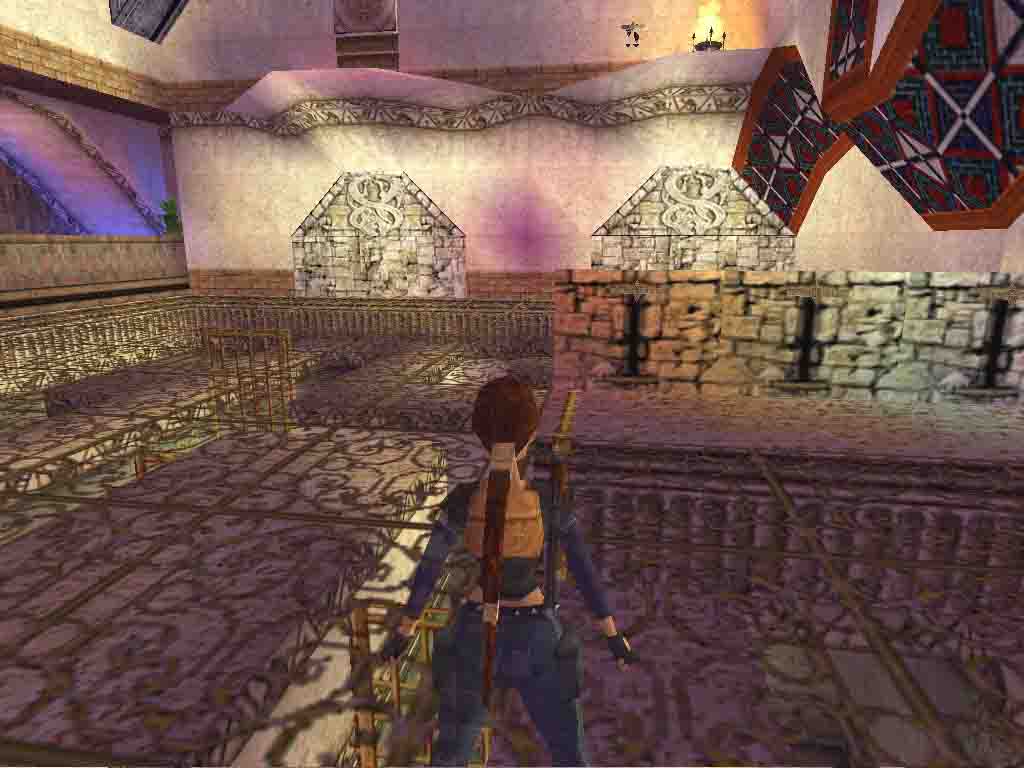
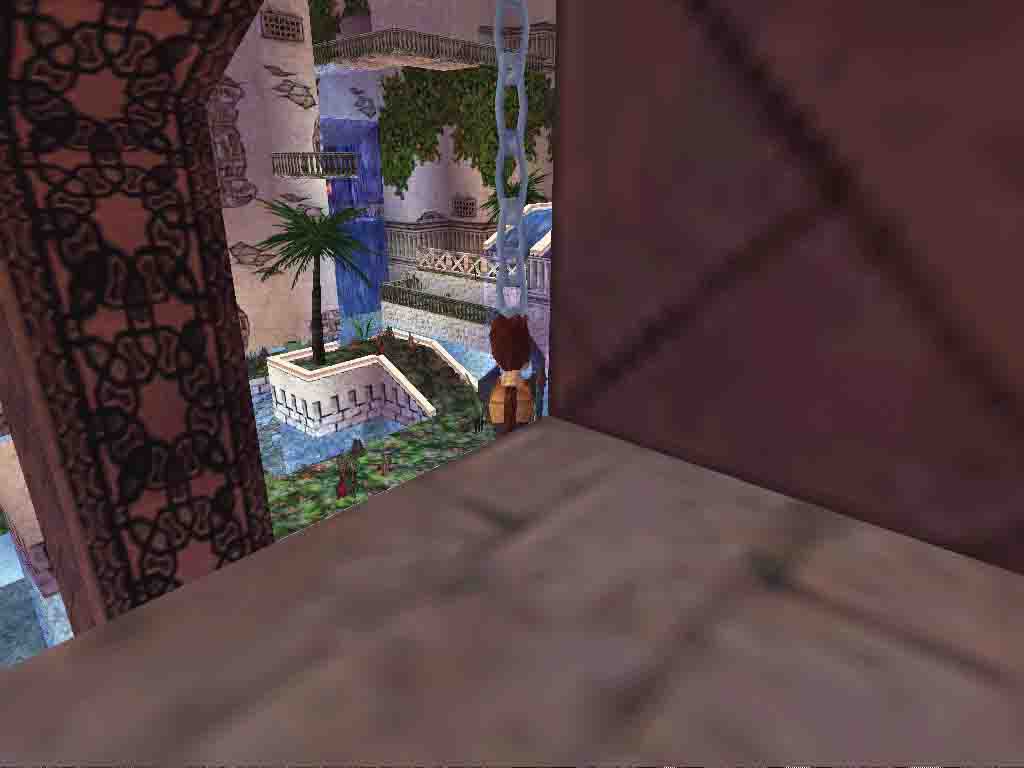
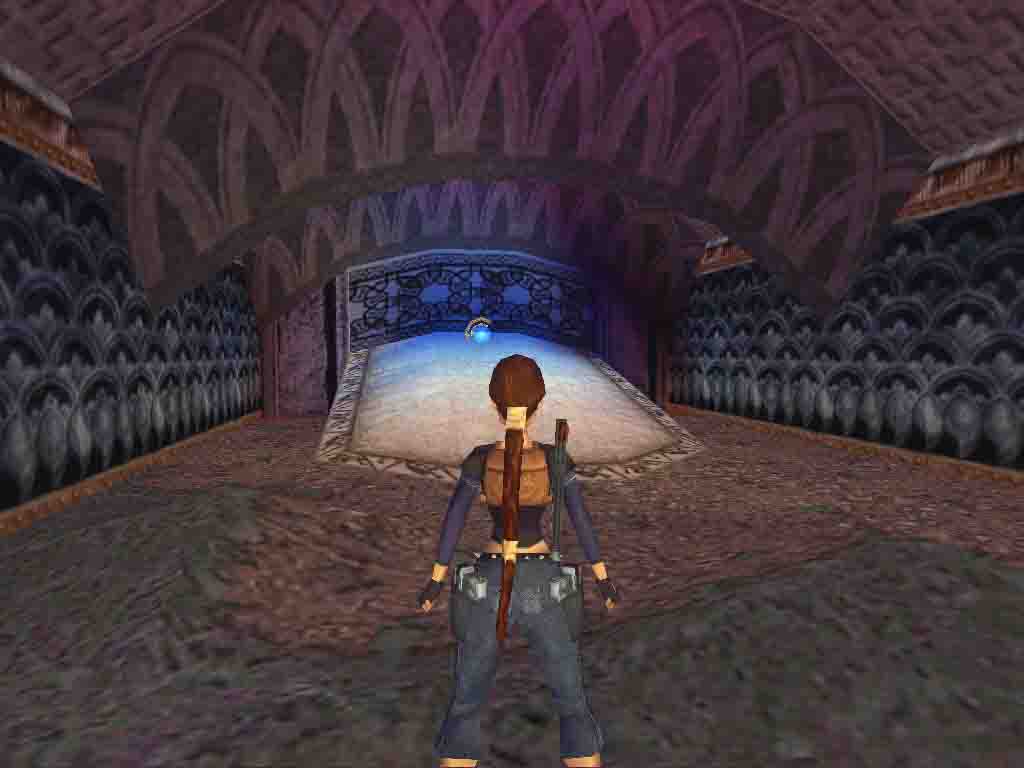
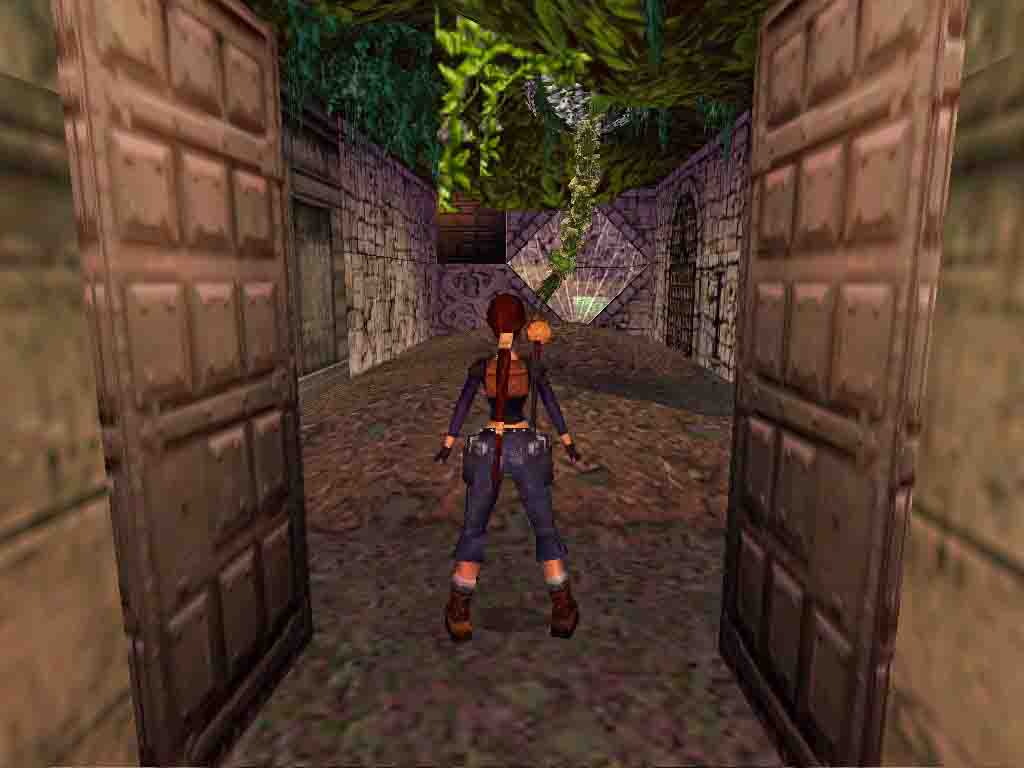
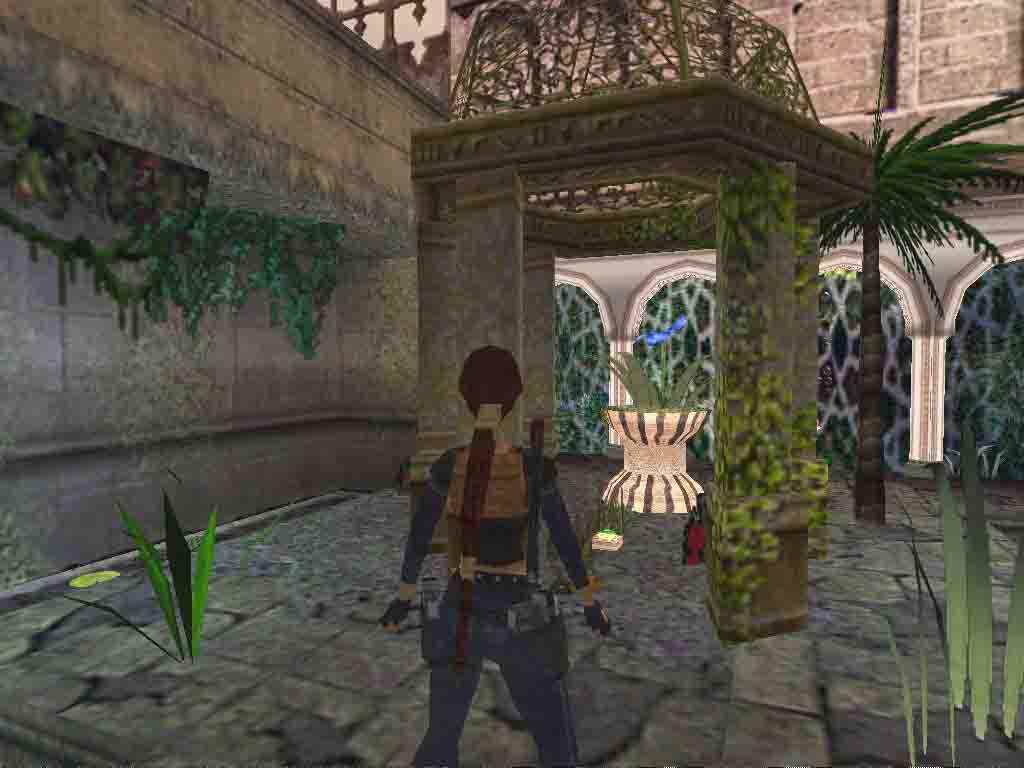
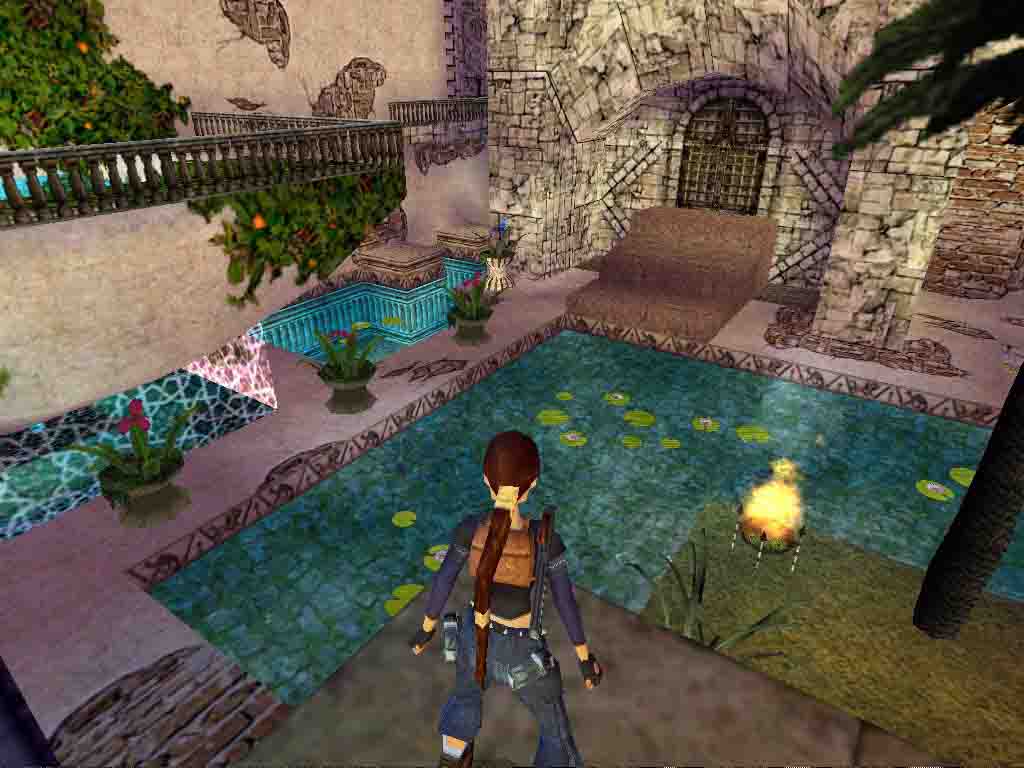
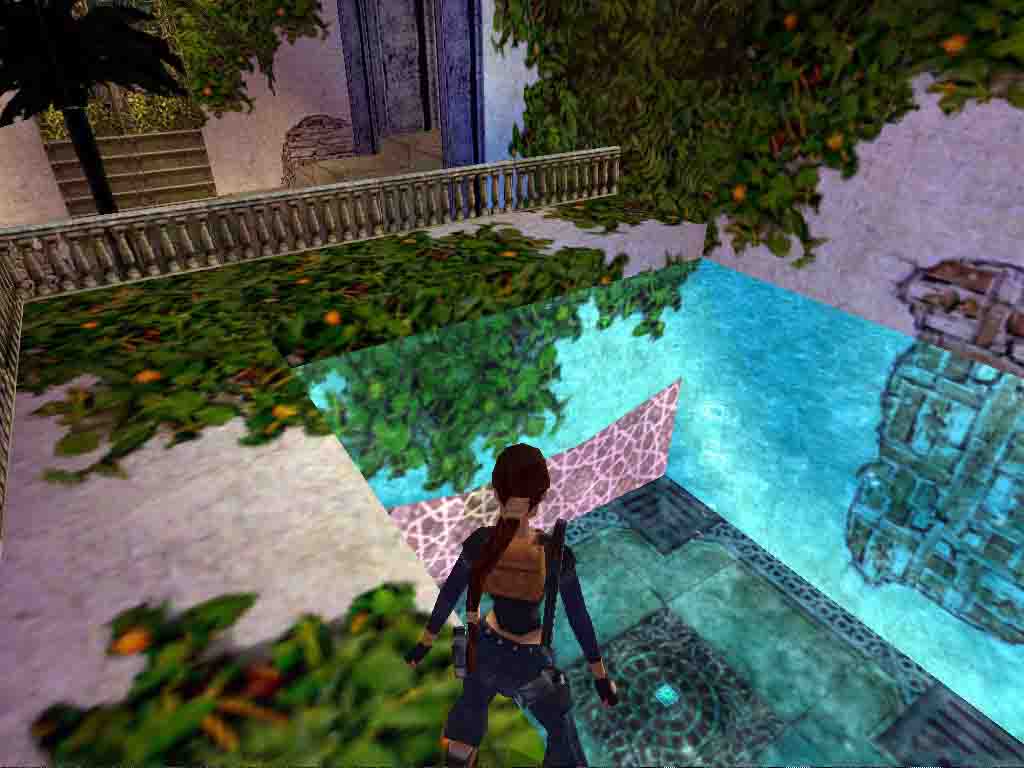
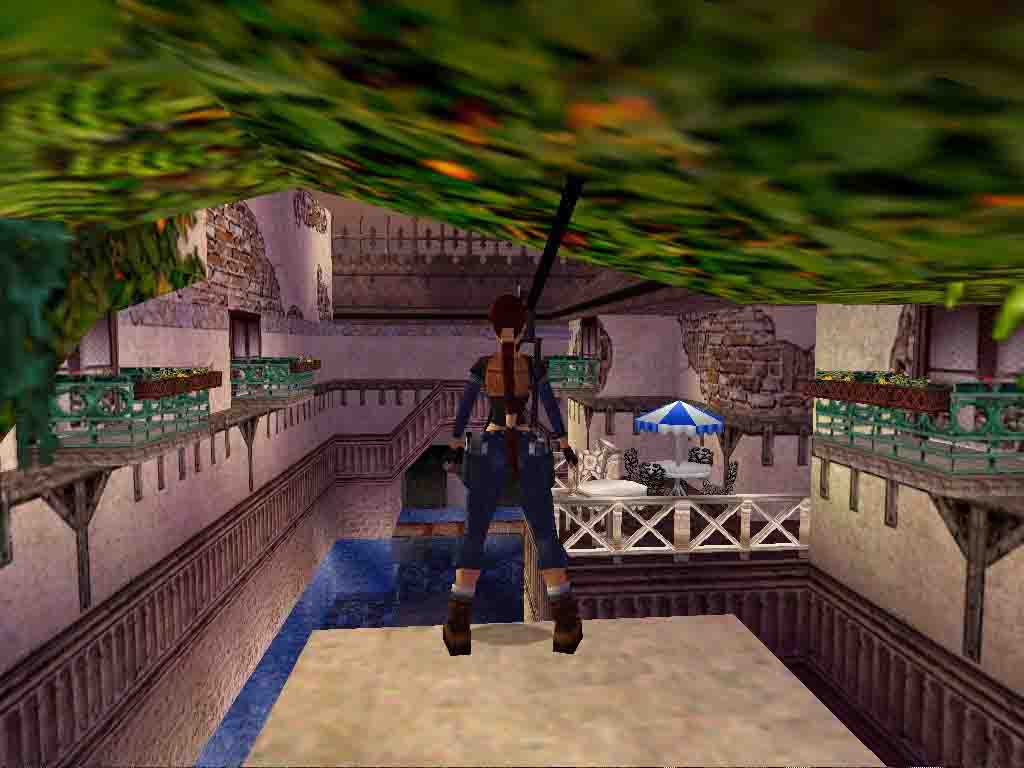
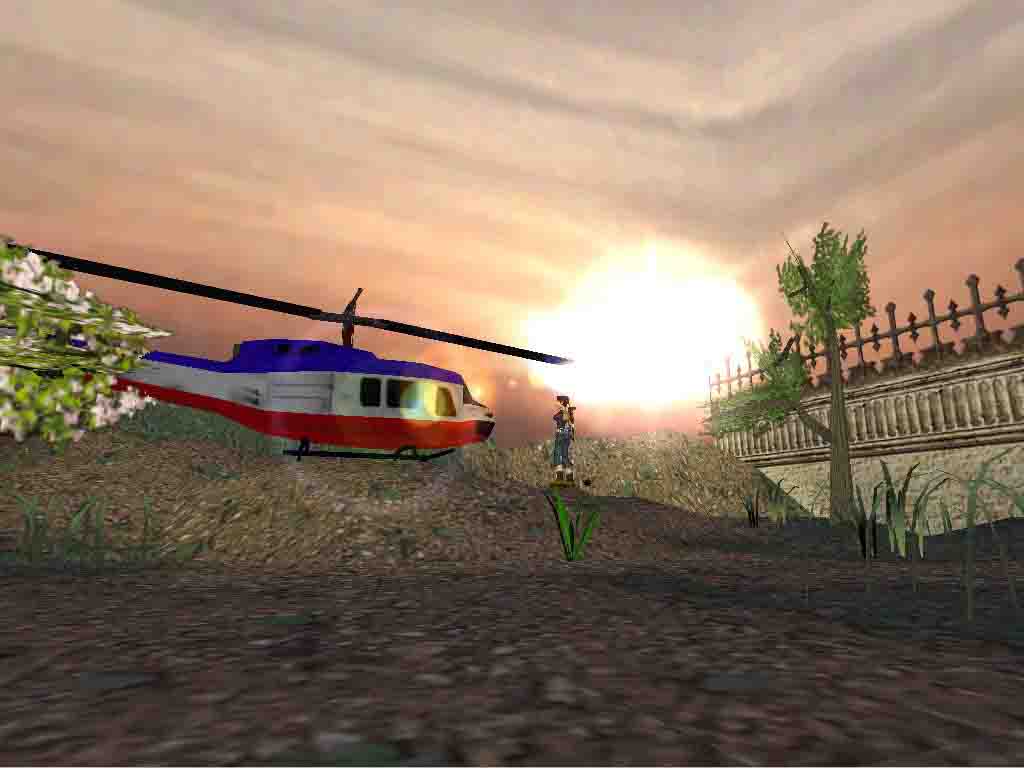
Aren't you happy to be back in good old Córdoba, peaceful city of clear fountains and beautiful monuments? Alas, the World is still in need of salvation and you do have to leave. Let's find the way out.
Run ahead through the doorway to find yourself in a small courtyard. Ignore the button-like thingy on the wall to your R: it is the receptacle of an item you don't possess yet. From where you stand, you can see a high ledge with a jumpswitch ahead and to the R (SW) and a cascade in the far L corner (SE). Let's go to the former via the latter.
-- Pushing Practice to Open the Way --
Objective: Find some crates to move and get the Ruby Cube
Jumping Funny and Hurrying
Go R (W), run a bit and locate the raised floor to your R (N) before the pillar. Stand on the highest part against the pillar and pull up. There's a crack running across the wall ahead (E). Do a RJ+G to it and shimmy R until you can pull up on the top of the cascade.
The next jump is indeed tricky. You need to do a RJ to the high ledge, but
the low ceiling here prevents you from taking a standard straight run up.
Turn R (S) to face the wall, step back so the other wall is against your back
and sidestep L twice. Turn very slightly R. Run with a hard R curve, take
off and do a L mid-air curve to align Lara with the ledge. Hit Action at the
very last moment to grab the edge and pull up (see  for initial position for the jump).
Ignore the jumpswitch for now (or you'll have to do that tricky jump again to get back here). Consider the crate ahead instead: it's movable. Push it once. Ignore the switch to your R as well and crawl through the low CS to your L (S) to drop down into a lower alcove. There's another switch here to your L. Activate it to raise a block on the other side of the movable crate.
Turn L (N) and pull up back near the first switch. Push the crate once again. Return to the second switch and flip it back up to lower the block. Turn around (W) and crawl through another low CS to reach a passage at the other side of the crate. Pull the crate twice, go around it then push it once in the very corner so it's out of the way (you'll see why in a moment).
Don't go into the passage to your L (S): it's trapped with a burning floor and the MS you can spot above is too high for you to grab it. Turn around and pull up to go back to the first switch. Save. Timed-run ahead.
Activate the switch, hit "look" to get rid of the camera showing you a block rising at the start of the trapped passage. Quickly turn L then run into the lower passage and diagonally L. Jump on the raised block then quickly jump up and grab the MS before the block lowers.
Playing Packer
Swing over the trapped floor to the other end and let go. There's another movable crate ahead. Push it once (and only once). Go L (N) then turn R (E). This passage is trapped as well so jump up and grab the MS above. Swing to the other end and let go to find yourself on the other side of the crate. Push it once again, revealing the entrance of what seems to be a warehouse.
You now can see 3 movable crates which are indeed the starting point of a Blocks Puzzle. Since it's a puzzle, you'll find the solution in the Spoilers Section at the end of this walkthrough. Once you've solved it, you'll have pick up some flares and be in a corridor, facing W.
Turn L (S) and run into the corridor ahead. Crawl through the low CS on your R (N), climb onto the crate to your R (E), turn L and drop down in the room below. Turn around. There's a lever here, a door and a little something on a low crate which happens to be a Ruby Cube. Pick it up, push the lever to open the door and pass through the latter.
Push the crate ahead once to be back in the warehouse entrance. Leave the room, pull the outside crate once and return to the high jumpswitch ledge via both MS.
Go to the slightly lower floor in the middle of the ledge, turn R (S) and drop down while pressing Action to flip the jumpswitch, opening a double tall metal door up on a balcony. Since there's no apparent way to get there, run up the ramp to your L (E) and use the Ruby Cube in the Ruby Cube Receptacle at the top. A chain appears to your L (W) near the balcony. Go to it, turn S and hit Action to grab it. Climb until Lara's waist is aligned with the ledge behind and backflip.
-- Two Oculars --
Objective: Find the parts for the Two Oculars
Rushing to the First Fire Opal Ocular Part
You're now on a balcony overlooking a large blue room with a pool in the center. SJ over the fence ahead to safely land in the water, turn around and swim through the low opening to your R (SW). Swim through the UW tunnel and pull the UW Ceiling Switch at the end to open a double door nearby. Return to the pool, swim L and leave the water by the N edge.
Climb on the upper floor and pass the newly opened door, which closes behind you (and won't reopen, by the way). Run ahead and enjoy the fly-by.
You're now in the Small Cascades Area (which isn't really small, but yet is much smaller than the other one you're about to visit). Locate the switch ahead and to your L (NW), run to it, save, and prepare yourself to perform a pretty tight timed-run.
Activate the switch and immediately sidejump R. Quickly
turn R, run to the pool and jump over the bridge (see 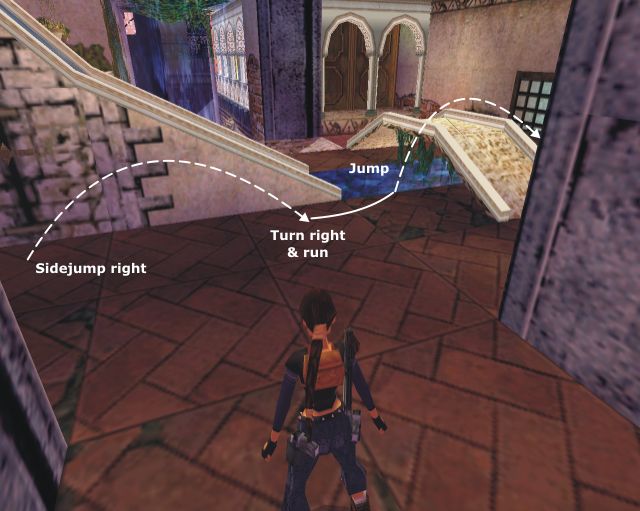 ).
Swim ahead then R and pull out of the water. Run L and jump through the opening
before the door closes (see
).
Swim ahead then R and pull out of the water. Run L and jump through the opening
before the door closes (see 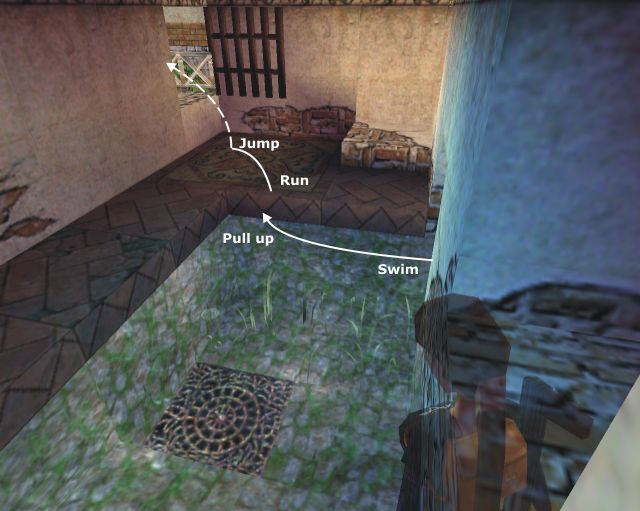 ).
).
Run to the end of the low balcony you're on then off to the small courtyard below. Go to the far L corner (SE) and pick up the Fire Opal Ocular part 2. Return to the previous room.
Don't leave yet. Go R (N), run to the other end of the ledge, turn L (W) and do a RJ over the water to land in a small alcove. Pick up the uzi ammo there. Dive back in the water and return to the Small Cascades Area, exiting the water by the L edge.
Rushing Again
Run across the little bridge, run down the ramp and through the passage to your R (N). You'll notice another receptacle to the R on your way. Since you have nothing to put in it, ignore it for now. Run ahead staying to the R and run off into the water.
Welcome to the Huge Cascades Area. Since you're going to explore the place and its vicinity from bottom to top and back, let's start right away.
Locate the low footbridge to your R (E) and pull up on it by its lowest and closest edge. Turn L (N) and run up to its highest part. Turn L again (W) and do a RJ to the low balcony ahead. Sidejump either R or L over the fence of the terrace above and turn W again. Pick up the shotgun normal ammo and the shotgun wideshot ammo there on the ground (there's an unlit brazier here as well, but it won't ever light so forget about it). Return to the lower balcony by SJing over the fence. The reason why you picked up those goodies now is that you'll be in a bit of a hurry next time you'll cross the place.
Turn R (S) and locate the lower part of the cascade above. Run to the fence, hop back and do a RJ+G to it. Pull up. Run ahead past the columns, turn R (W) and go to the switch to your R (N). Save. It's another timed-run for you.
Activate the switch and immediately sidejump R. Run
ahead with a L curve and jump at the edge with a L mid-air curve to land on
the terrace below. Go R to the brown low wall and pull up (see  ).
Sprint down the stairs then L at the corner. Rush through the door before
it closes.
).
Sprint down the stairs then L at the corner. Rush through the door before
it closes.
Rearranging the Decor
Notice the gold cage and the ledge above. Go to the L side of the cage then R (W) to the other side of the room to locate a switch in the SW corner. Look R: that flowerpot in the opposite side under the arch is movable. And what you need to do now is bring it up on the high ledge near the gold cage. So, to begin with, activate the switch to lower the cage.
Go R (N) to the flowerpot and jump over it to enter a small room beyond the archway. Go to the lever in the center and push it to raise four blocks in the central hole in the nearby courtyard.
Return to the flowerpot and push it. Go to its R side and push it on the closest raised block (it might be difficult slipping behind it. In that case stand one tile away from it and SJ over it to land behind).
Return to the lever and push it again to lower the blocks then go in the hole and push/pull the flowerpot to the opposite raising block (i.e. SE corner)
Return to the lever again to raise the blocks then go to the flowerpot. Pull it on the lowered cage. Go to the switch and flip it back up to raise the cage again.
Go to the entrance and the edge of the step there. Turn to the cage and SJ+G. Pull up and push the flowerpot on the ledge. You're not quite done yet.
Drop down from the cage into the courtyard and return to the lever to push it again and lower the block up on the ledge. Go back there and push the flowerpot on the lowered block.
Do a last trip to the lever to raise the block again and go back to the flowerpot. Pull/push it on the grey tile at the end of the ledge, lowering a block in the center of the hole and giving you access to the room below. Now you're done.
Drop back into the courtyard from the lower ledge, go into the hole then down into the room below.
Dashing over Water for the First Sapphire Ocular Part
You're now in for what might be the tightest and toughest timed-run of the whole series (you've been warned). Turn W to face the opening beyond the slope, go stand against the latter, sidestep R and save.
Note: during the following sequence, if you fall in the water, you're doomed. A strong stream will suck you down and you'll end up drowning.
SJ over the slope, slide then jump with a R mid-air
curve, grabbing the edge of the platform at the very last moment. Turn L a
bit and do a single running step. SJ on the next platform with a L mid-air
curve (see ).
Immediately run with a L curve and jump to the next platform (see
).
Immediately run with a L curve and jump to the next platform (see  ).
Run and jump to the ladder before the
platform gives way, grabbing the ladder at the last moment (see
).
Run and jump to the ladder before the
platform gives way, grabbing the ladder at the last moment (see  ).
).
Climb up the ladder until Lara enters a shaft. Once her feet are aligned
with the bottom of the L wall, climb 9 times (see  ).
Backflip to land in an alcove behind beyond a slope and pick up the uzi
ammo there. Jump back to the ladder by sliding a bit on the slope first,
climb up until Lara's hand are one tile away from the ceiling and backflip.
).
Backflip to land in an alcove behind beyond a slope and pick up the uzi
ammo there. Jump back to the ladder by sliding a bit on the slope first,
climb up until Lara's hand are one tile away from the ceiling and backflip.
Turn R (E) and jump into the water hole. Swim L into a small pool with a fountain and pull out of the water to enter a beautiful winter garden (and enjoy the music there).
There's an earth mound to your R. Run along to the wall (E), turn R (S) once there and run to the end of the short passage. Turn R (W) and pull up on the mound. Run ahead and pick up the Sapphire Ocular Part 2. Turn around, get down from the mound and return in the garden.
A Detour for the Second Fire Opal Ocular Part
Go L (E) and enter the Palace (it's a bit too lavish to be a mere house). You'll find yourself on a golden wrought iron floor overhanging a room with lots of doors. This room is in fact an upcoming puzzle, but for a bit later. For now, run to the far R corner (SE), ignoring the three switches on your way (they're for the puzzle as well), and enter the passage there. Climb up the stairs to your L (E) and activate the switch at the top to open a door below.
Go to the balcony to your R (W), turn R so the opening is on your back and drop down to find a ladder. Climb down and turn around. The door you've just opened is to your L but don't enter the passage beyond, it currently leads to a dead end. Turn R (W) instead and jump in the water (yep, you read that right).
Swim ahead until you find a floating low platform (roughly in the center) and pull up on it then on the higher block nearby. Turn R (S). You can now see a wide passage ahead. Do a RJ+G to it and pull up.
Run to the other end to find yourself by a pool with a central fountain. Jump in the water, swim ahead and pull up on the fountain base standing either L or R of the fountain itself. Do a RJ+G to catch the edge of a high CS. Pull up and crawl through it. Go R and continue crawling along the wall until you can stand up.
It's pretty dark in here, but yet you should clearly see the double wood door in the northern side of the room. You can push it open so proceed by hitting Action when standing against it and enter the next room.
The Ocular Part is there, but lies just below a swinging liana. Run toward the liana then crawl under it to cautiously pick up the Fire Opal Ocular Part 1. Three found, one to go.
Crawl away from the liana and stand up. There's a very much closed door in the far L corner (NW). Locate the switch in the middle of the R (E) wall and activate it to open the nearby door (mind the liana). Run to said door, pull up in the doorway, turn R and run off through the triangular opening. Climb the stairs, cautiously deal with the brazier in the corner by staying close to the wall and run across the passage beyond.
Remember that door you opened up there? Well, here it is. Pass through it to find yourself back on the lower terrace in the eastern side of the Huge Cascades Area. Climb up the ladder to your R (N) and return into the palace via the stairway.
Playing with Doors and Shooting Balls for the Second Sapphire Ocular Part
Before doing anything, go L (W) after the entrance and push/pull the flowerpot in the other side of the room to pick up some shotgun normal ammo. Return to the three switches.
You're now in for a rather complicated puzzle involving the three switches, some doors, some balls to shoot and served with tricky moves along the way. You'll find the solution of the puzzle itself in the Spoilers Section at the end of this walkthrough. Read below for the tricky moves.
Note: In the following sequence, would you fall in the water you still can easily return up there via the passage leading to the swinging liana, the swinging liana room, the lit brazier passage and the ladder, provided you opened the door. If you haven't, refer to the previous section, first §.
* To go from the upper floor to the Doors Room:
Go to the opening by the switches and look down. There's a chain to your R leading down but you can't access it from here. Turn L (SE) instead to aim at the top of the cascade, standing in the middle and do a SJ with a L mid-air curve. Hit Action at the last moment to avoid hitting the upper wall. Turn around, sidestep R to the wall and turn R to face the chain. Do a SJ+G to it (note: if you miss it there's a chance that you land directly on the lowest ledge)
The first time around, make a detour via the upper ledge to pick up some
goodie. Slide down a little bit, position Lara as in this 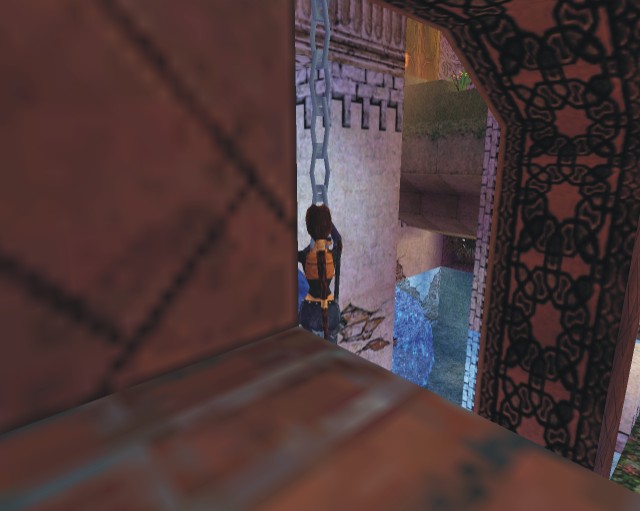 and backflip. Turn around and go pick up the revolver
ammo. Return to the edge in the corner closest to the chain, stop one
tile away from the wall, turn to face the chain and do a SJ, holding Action
from the beginning to avoid hitting the wall.
and backflip. Turn around and go pick up the revolver
ammo. Return to the edge in the corner closest to the chain, stop one
tile away from the wall, turn to face the chain and do a SJ, holding Action
from the beginning to avoid hitting the wall.
Slide down until Lara's feet touch the water (but be careful not to slide
too much, or you'd fall in said water). Turn R so the ledge is on Lara's back
and backflip (see 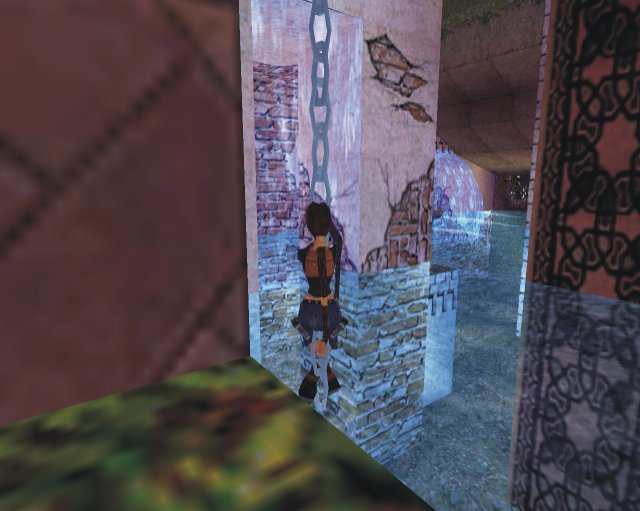 ).
).
* To go from the Doors Room to the upper floor:
Starting from the ledge by the water, facing S, walk to the edge standing
one tile away from the L wall and turn to the chain. Do a SJ+G to it. Climb
up and turn around so the ledge is on Lara's back and aligned with her waist
and backflip (see  ).
Turn around to return in the room.
).
Turn around to return in the room.
Once you've solved the puzzle, you'll be facing E standing in a room beyond the SE corner of the Doors Room and will have found a large medipack on your way.
Run into the room then L (N). The Sapphire Ocular Part 1 is waiting for you there at the top of a white upward ramp. Pick it up. Now turn R (E) and go pick up some revolver ammo in the corner ahead.
Now you have all you need to create the two Oculars. Time to use them.
-- A Smaragd Cube and a High Courtyard --
Objective: Find the first Smaragd Cube, use the Fire Opal Ocular then make your way to the roofs
Dashing to the First Smaragd Cube
Return to the Doors Room and from there to the ledge by the water. Jump in the latter and swim R (W) until you reach the low footbridge. Pull up on it, go on its highest part and do a RJ to the low balcony ahead. Turn L (S), run to the fence, hop back and do a RJ+G to the room above below the top of the cascade. Pull up.
Turn around, sidestep R until you're roughly two steps from the R wall and
turn 45° R to face a small balcony above. Hop back and do a RJ with a hard
R mid-air curve (see 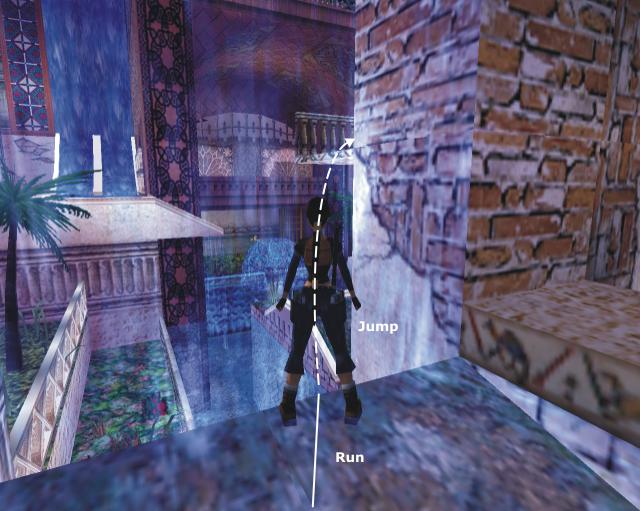 ).
Turn around (SW) to face the top of the cascade, position Lara one step away
from the wall, hop back and do a RJ with a hard L mid-air curve to land up
there (see
).
Turn around (SW) to face the top of the cascade, position Lara one step away
from the wall, hop back and do a RJ with a hard L mid-air curve to land up
there (see 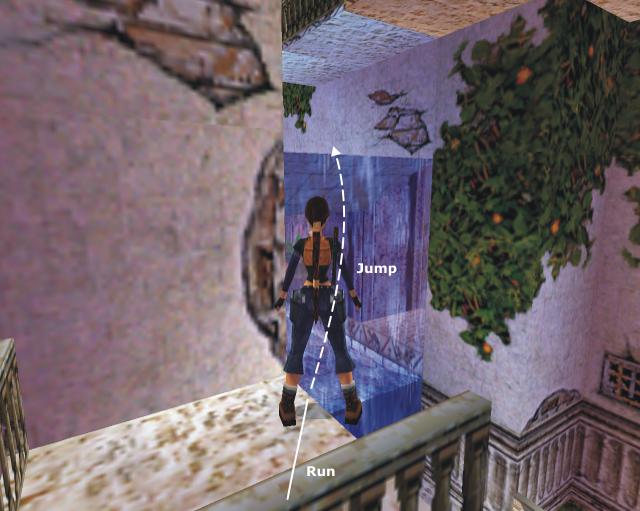 ).
).
You're indeed back near the Small Cascades Area. Run ahead (S) but don't go up the ramp. Take the passage on the L instead and run to the other end: the Sapphire Ocular Pedestal is there. Combine the two parts of the Sapphire Ocular and place it on its pedestal, opening a double door just above you.
Turn L (W), jump up and pull onto the top of the ramp. Go R (N) through the newly opened door. You'll soon find yourself facing a much closed double metal door. Don't despair, you're not here for nothing. Turn L (W) and run to the fence next to the fire (but not too close, though). Look down: there's a balcony below. Do a SJ over the fence to land on it.
Run into the corridor ahead and to its end. You'll find a switch there, and be able to spot a closed door through a wrought iron panel. Save. Another timed-run is now in order.
Activate the switch, turn L and start running, immediately turning L at the corner. Sprint with a slight L diagonal line to clear the corners. Once back on the balcony, run to take a turn around the corner then sprint with a slight L diagonal again then straight into the corridor and past the door before it closes.
You're now in a small courtyard with a movable flowerpot in the center. Pull it to pick up the Smaragd Cube it was hiding. Return to the balcony and run to its other end. Turn L (E) and do a SJ over the fence to land back on the top of the cascade.
The Smaragd Cube Receptacle is there in the middle of the E wall. Put the Smaragd Cube on it to open the double metal door in the room above. Return there via the upward ramp.
Bouncing and Swinging
Run to the ledge extending beyond the newly opened door and turn R (E). Walk to the edge and do a SJ to the ledge above (notice the closed double wood door below, but don't go there). Turn L (N), go to the edge, hop back and do a RJ to the high terrace ahead. Climb on the higher ground and SJ over the fence.
The Fire Opal Ocular Pedestal is there in all its Fire Opal Ocular Pedestalian glory. Combine the two parts of the Fire Opal Ocular and put it where it belongs, lowering a set of gold cages ahead (N). Go to the balcony they were blocking.
You're now at the top of the Palace, above the Three Switches Room. There's a switch and a closed door in the other side (N) and a rope between you and them.
Face the rope and do a RJ+G to it. Swing then jump to land on the other ledge. Turn R (E), SJ over the gap, go to the switch and save. Yep. It's timed.
Activate the switch and sidejump L twice. Hop back
and SJ into the doorway before the door closes (see 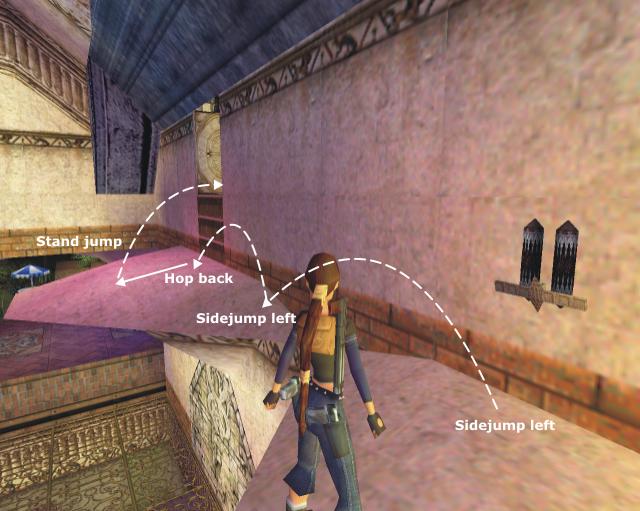 ).
).
The door closes behind you, cutting off the way back. Climb the stairs to your L (W) to find yourself in a small courtyard at the top. Go R (E) once there and run ahead until you find an archway to your L (S). Pull the movable flowerpot to access the switch behind and flip the latter down to raise a couple of cages nearby (notice the unlit brazier to your R, we'll get to it in a moment).
Turn around then go R (E) past the raised cage then L (N). Run to the wall ahead, go R (E) and turn L (N) at the corner. Sidestep R as much as possible, backflip on the slope behind and jump into the high opening ahead.
Don't enter the room (you'll go there later). Look up to spot the MS above and SJ+G to it. Swing while keeping a look at the texture on the ceiling so you don't accidentally fall. Stay along the wall at the last part and swing to the end. Once there, go L to be against the wall and on the lowest side of the MS, let go and immediately hit Action again to grab the edge of a ledge below.
Pull up, pick up the small medipack, turn R (W) and walk to the edge and the R corner. Turn slightly R to aim at the raised cage ahead, hop back and do a RJ with a slight L curve. Hit Action at the very last moment to grab the edge. Pull up.
Go to the R corner, turn slightly R to face the next raised cage, hop back and do a RJ to land on it. Do a SJ to the small balcony. Turn R (N) and flip the jumpswitch there, to open a door near the far R corner of the courtyard (NW). Turn R (E), SJ over the fence to the previous cage and drop down to ground level.
Turn around (W) and run to the newly opened door to your R (N - notice another unlit brazier nearby). Enter the small room beyond and go pick up the Torch on a metallic grate to your R and ahead (NE). Now you have to light it.
Return to the very other end of the courtyard and the high opening from where you accessed the MS. Jump in it like you did the first time by using the slope behind you. Run ahead (N) then L (W). Light your Torch on the Lit Brazier there (mind the fire) then go L (S) and drop the torch. Climb on what looks like a large jardiniere and pick up the uzi ammo someone has forgotten there (or maybe he was trying to make it grow into an uzi tree). Get your torch back and return to the courtyard.
Go to the switch and light the first Unlit Brazier to raise another cage then toward the opened wood bars door. Light the second Unlit Brazier there to raise a fourth and last cage. Drop the torch: you won't need it anymore.
Go grab the MS again like you did the first time but this time go R before the platform where you found the small medipack and continue swinging across the wrought iron ceiling. Let go at the end to land on the first cage.
Do a RJ to the second cage then another one to the third cage with a slight L diagonal. Do a RJ+G to land on the fourth and last one, turn L (S) and do a SJ on the top of the aquarium. Turn around and drop down into a room bathed in shallow water. Turn around again and cross the room then run along the passage to your L, soon finding yourself standing in an opening overlooking the Huge Cascades Area from a very high point of view. You've made it to the roofs.
-- Adiós, Córdoba! --
Objectives: Find the second Smaragd Cube, use it and fly away from Córdoba
Flying through the Roofs
You're now in for a nice trip on the roofs. Standing at the edge, sidestep R to go against the wall and turn 45° R to aim at the upper green part of the roof (point 1), which is flatter. Hop back and do a RJ to it.
Turn L (S) and do another RJ to the flat part ahead (point 2) then another one to the top of the column (point 3). Turn 45° L (SE) and jump on the roof (point 4). Slide down, grab the edge and shimmy L to pull up on the flat corner of the roof (point 5).
Turn 45° L (E), step back and do a RJ with a L mid-air curve to the top of the next column (point 6). Turn R (S) and look up to locate the crack running in the wall above. Jump up, grab it and shimmy L until you can pull up in a high CS (point 7).
Crawl into the CS, drop down and use the lever there to open the nearby double wood door. Climb up into the CS, crawl then drop down from it on the top of the low wall below. Turn R (W) and drop down again on the terrace near the newly opened door. Turn around and run through the doorway.
Beyond the Double Door
There's a switch just in front of you so activate it to open a door nearby (and no, it is not timed). Run into the L passage to find the newly opened door to your L and pass it. It closes behind you meaning no way back.
Go R (E), run through the passage and climb down the stairs to reach another courtyard with a pool of shallow water in the center and a deeper one against the N wall. There are also two movable flowerpots here, but you'll care about them later. Let's first go fetch that cube.
Go to the deeper pool and jump in the water. Swim L (W) under the projecting edge and pull the UW ceiling switch there to open a double door nearby on the other side of the pool. Exit the water by said projecting edge.
Looking through the window, you can see the second cube lying at the bottom of an aquarium. Turn around (E) and do a RJ+G to the first low pillar emerging from the water. Pull up and do a SJ to the second one then another SJ into the doorway.
Go R (S) and locate the ladder in the corner ahead. Climb to the top, pull up and go around the hole (N). Run ahead then L (W) at the junction to find yourself on a high balcony overlooking the pool. Run to the other end and do a RJ+G to the next balcony that runs around the aquarium. Dive and pick up the second Smaragd Cube at the bottom.
Swim L and exit the water by the S edge. Go L (E) then L again a bit and SJ over the fence to safely land into the deep pool. Leave the water, again by the S edge. Now let's take care of those flowerpots.
Go L (E) and locate the grey tile L of the flight of stairs. Push/pull the closest flowerpot on it (if you have problems slipping behind it for the first push, jump in the water and pull out by the edge behind the flowerpot). Now turn R and run past the stairs (you'll see another grey tile on their R). Go to the other flowerpot - notice the wrought iron trapdoor on your way - and push/pull it on the second grey tile, opening the nearby trapdoor.
Turn around, go L (S) and run off into the now accessible hole. The Smaragd Cube Receptacle is at the end of the short underground passage to your L. Put the Smaragd Cube in it, lowering a couple of cages in the southern side of the courtyard.
Turn L (W) and run to the stairway ahead. Turn L (S) at the bottom and pull up into the high opening then onto the block to your R. There's a zip-line here. Grab it and slide down but let go before the end to land on the wooden ledge. Would you fall into the water you'd be sucked to death by a strong stream.
You can see a chopper waiting for you on your L. SJ over the water and run to it to fly away from Córdoba.
==== In this part, you should have found...
Enemies: None
Items of note: Ruby Cube, the Fire Opal Ocular
part 2, Sapphire Ocular Part 2, Fire Opal Ocular Part 2, Sapphire Ocular Part
1, 1st Smaragd Cube, Torch, 2nd Smaragd Cube
Secrets: None
a few Traps - 6 Timed-Run
=== SPOILERS SECTION ===
-- Part 2: Córdoba --
Solution to the Movable Crates Puzzle
Quick solution:
Map of the rooms and initial positions 
Detailed solution:
Initial positions with crates numbered 
- Pull crate 1 twice. Climb on the brown crate to your R, pick up the flares,
go to the other side of crate 1 and enter the corridor to your R.
- Go to crate 2 and pull it once.
Current positions 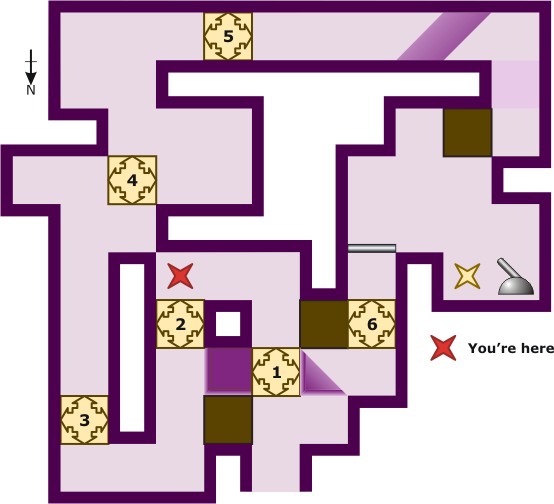
- Return to the warehouse entrance and climb on the block in the NE corner
to go behind crate 1. Enter the corridor, go L (N) and push crate 3 as far
as you can.
- Push crate 4 once, turn L and push crate 3 in the hidden recess.
- Go to the R side of crate 4 (i.e. facing E) and pull it once.
- Go around it, enter the corridor to your R and go pull crate 5 twice.
- Go to its R side (i.e. facing S) and pull it three times
Current positions 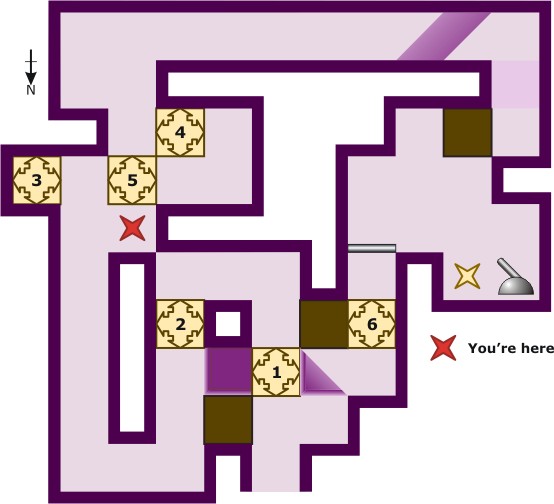
- Go to the L side of crate 5 (i.e. facing W) and push it once. You now have
access to the last part of the corridor and the puzzle is solved.
Solution to the Doors Puzzle
Quick solution:
Map of the room and initial positions 
- Left switch acts on doors 2, 6 and 9
- Middle switch acts on doors 1, 3 and 5
- Right switch acts on 7, 10 and 12
- Ball A opens door 4
- Ball B opens door 11
- Ball C opens door 13
- Ball D opens door 8
You need to shoot all four balls in order to access the Ocular Part.
Detailed Solution:
- Flip down the rightmost switch, opening doors 10
and 12 and closing door 7. Make your way down to the
Doors Room (see main walkthrough).
Current positions 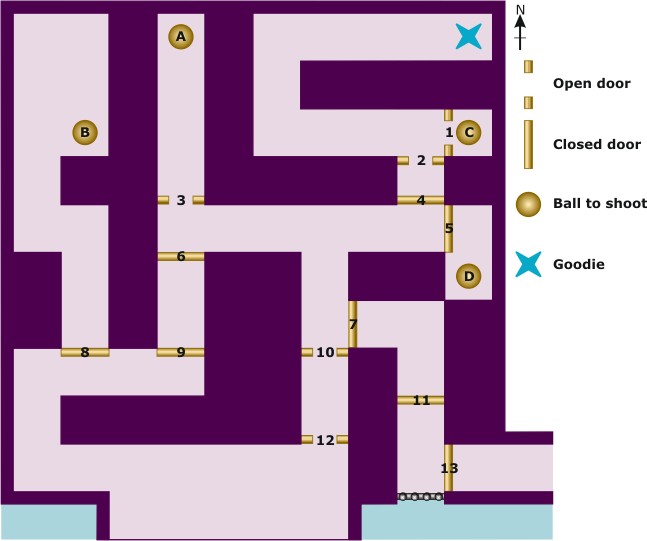
- Pass through doors 10 and 12, turn L (W) at the junction then pass door
3 on your R (N). Shoot ball A to open door 4.
- Turn around to pass door 3 again, go ahead (E) at the junction then L (N)
through doors 4, 2 and turn R (E). Shoot ball C to open door
13.
- Don't leave yet. Turn around (W) and run to the end of the passage, where
you'll find a movable flowerpot. Pull it, jump over it and pick up
the large medipack.
- Return to the ledge by the water and make your way back up to the upper
floor (see main walkthrough).
Current positions 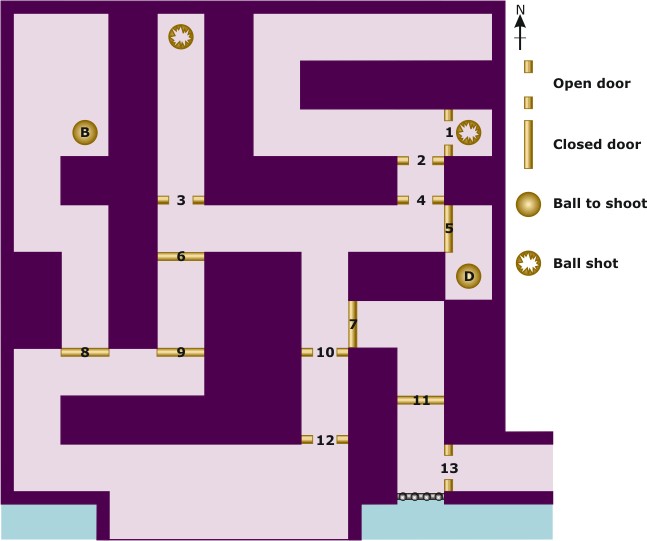
- Flip down the leftmost switch, closing door 2
and opening doors 6 and 9
- Flip down the middle switch, closing doors 1
and 3 and opening door 5
- Flip up the rightmost switch, opening door 7
and closing doors 10 and 12
- Return to the Doors Room
Current positions 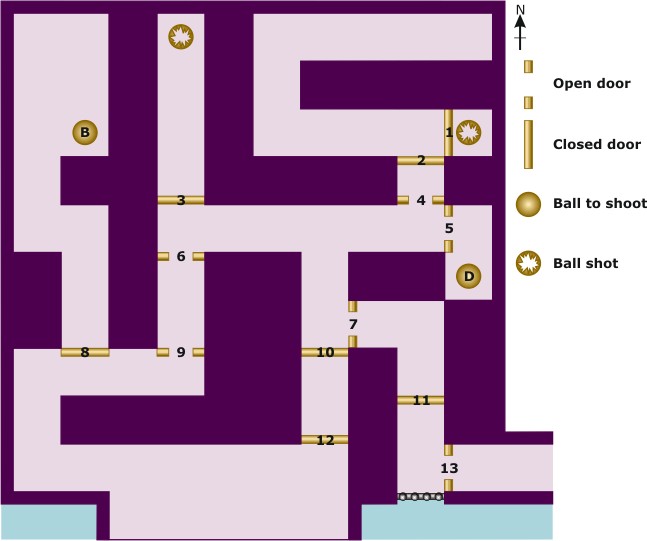
- Once on the ledge, turn around (W) and run into the corridor. Pass doors
9 and 6, go R (E) and pass door 5 at the other end. Turn R (S) once there
and shoot ball D to open door 8.
Current
positions 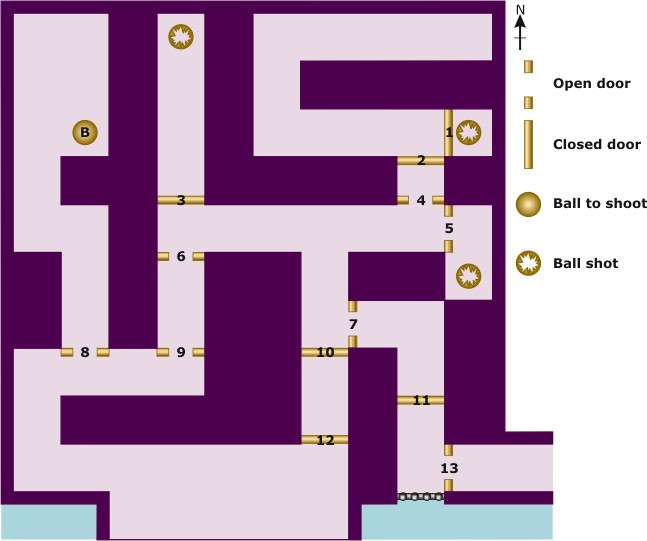
- Turn R (W), run through the corridor and past the first junction. Pass
door 8 on your R (N) at the end, run into the passage and turn around (S).
Shoot ball B to open door 11.
- Return to the corridor through door 8, turn L (E), pass doors 9 and 6 to
your L (N), turn R (E) and run ahead. Go R at the junction and pass door 7
to your L (E). Continue through doors 11 and 13 to find yourself in a new
room. Puzzle solved.
Airport 5:
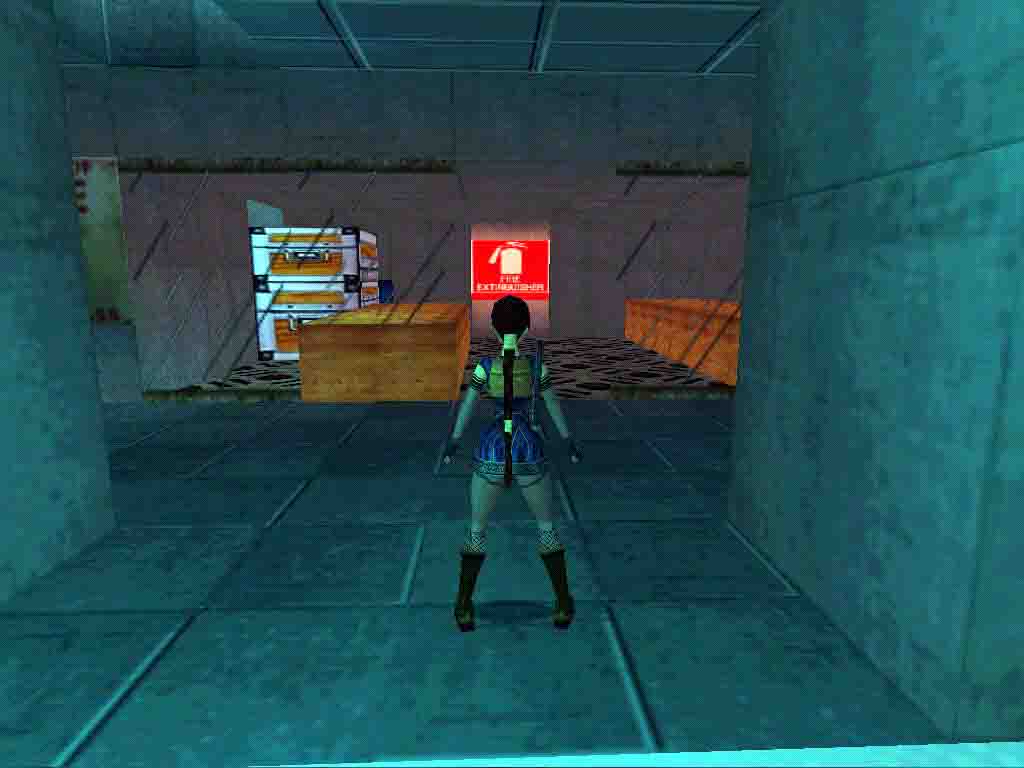
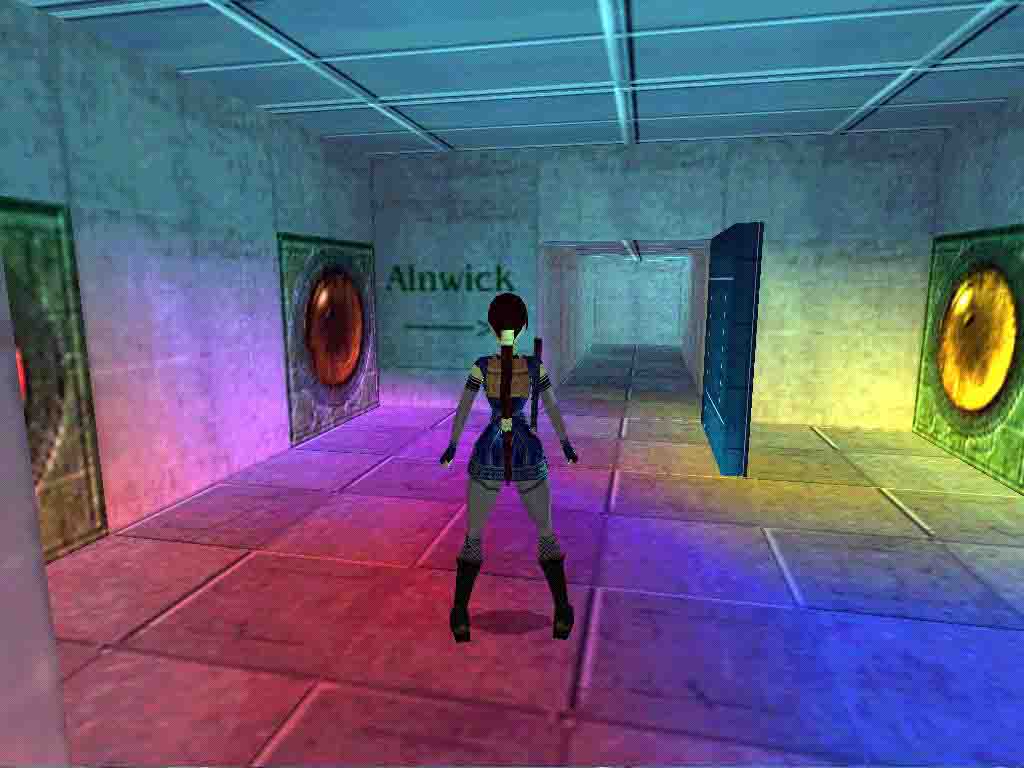
Chapter 5: Natla's Hideout
Story:
Five mysterious gemstones are disperced all over the world to bring back the reign of chaos. Lara has to find them all and take them to a secret place, where an old enemy already is waiting for her...
CS = Crawlspace - MS = Monkey Swing - L = Left - R = Right - N, S, E,
W = Cardinal Points - UW = Underwater
SJ = Standing Jump - SJ+G = Standing Jump + Grab - RJ = Running Jump - RJ+G
= Running Jump + Grab
-- General Notes --
* Items in bold and blue are necessary to complete the levels or get the
secrets, either by using them, picking them up or both.
* You'll find a Combat Strategies Section at the end of this walkthrough as
well as a summary at the end of each level.
== Part 1: Hellforge =
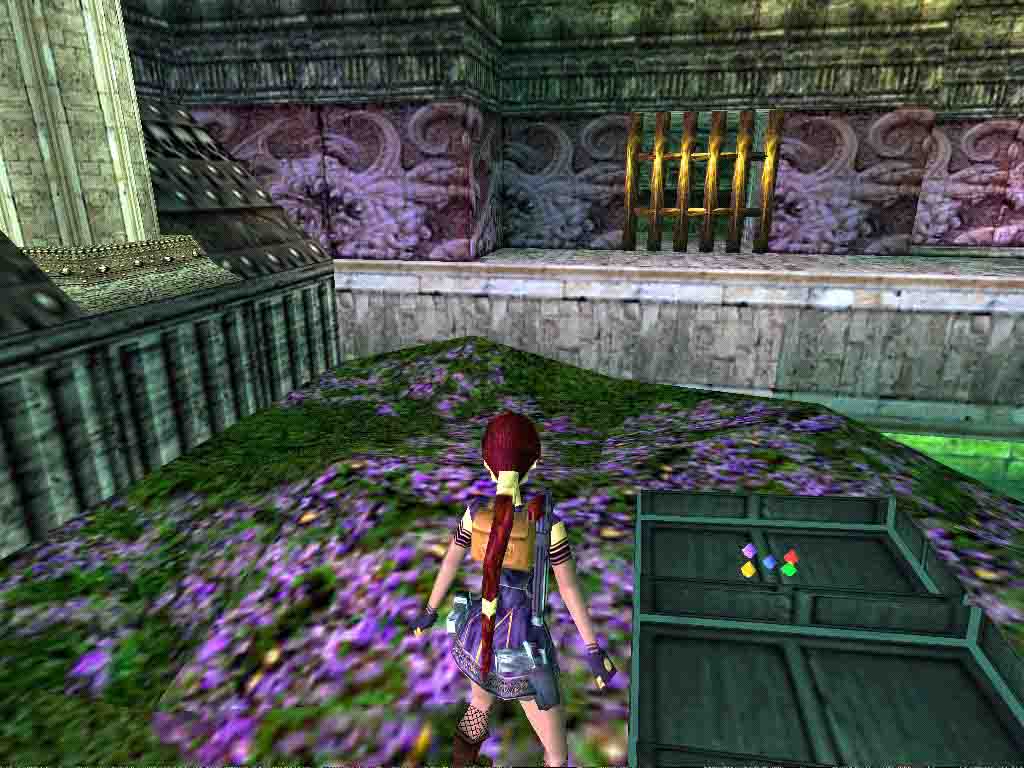
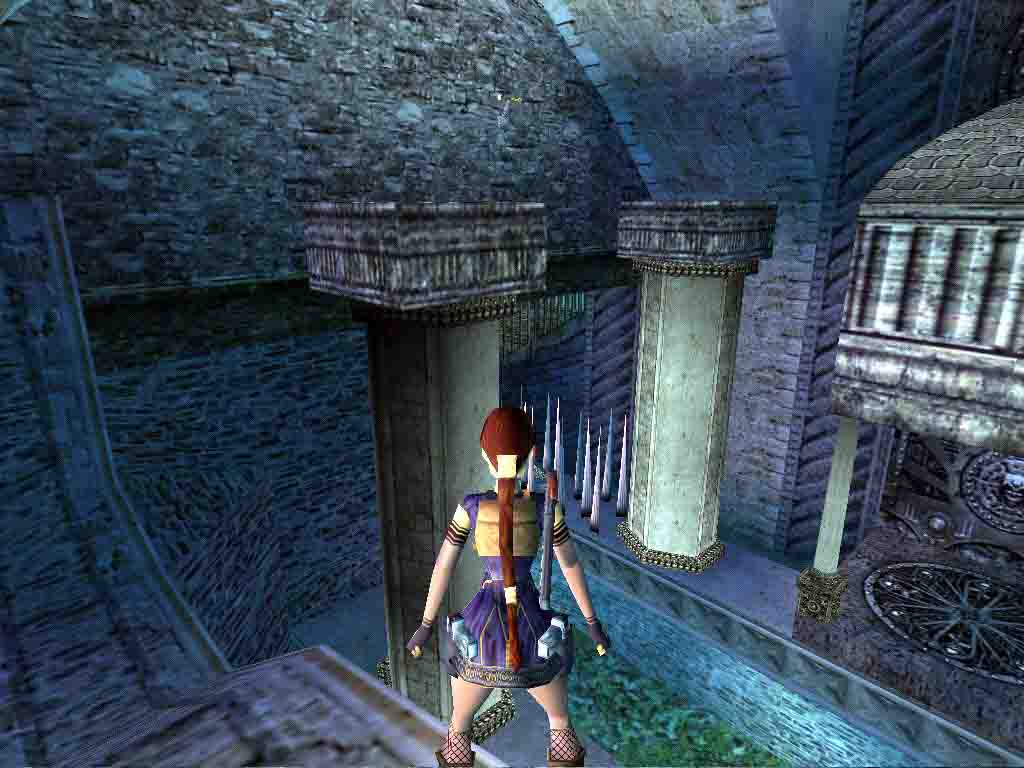
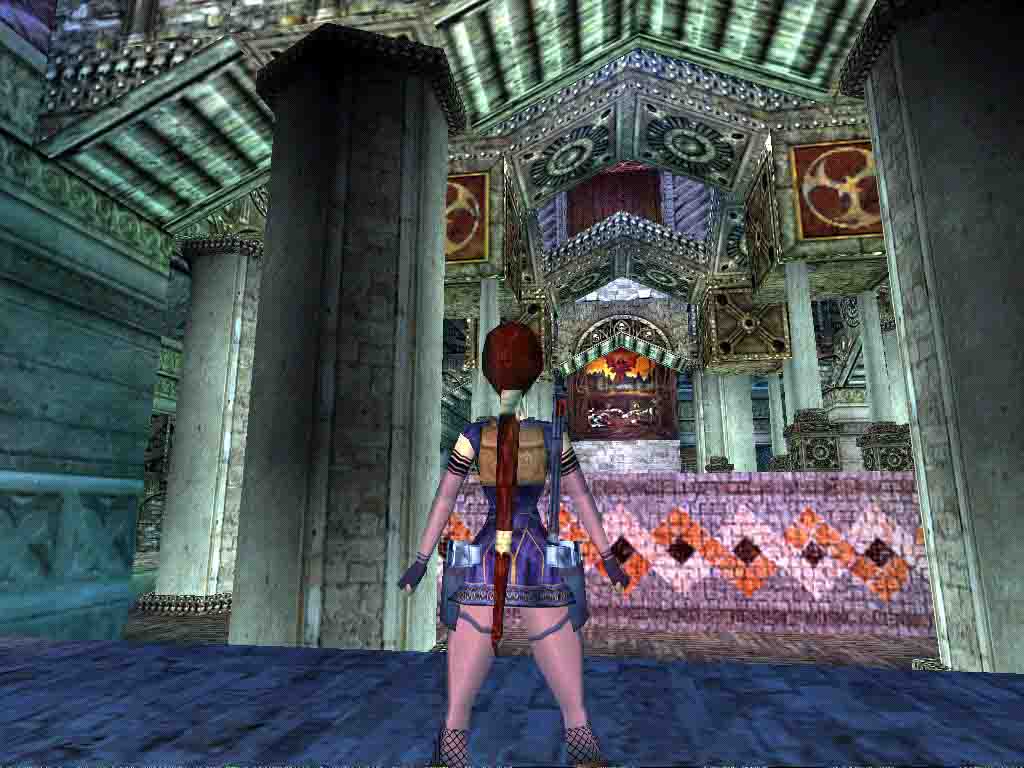
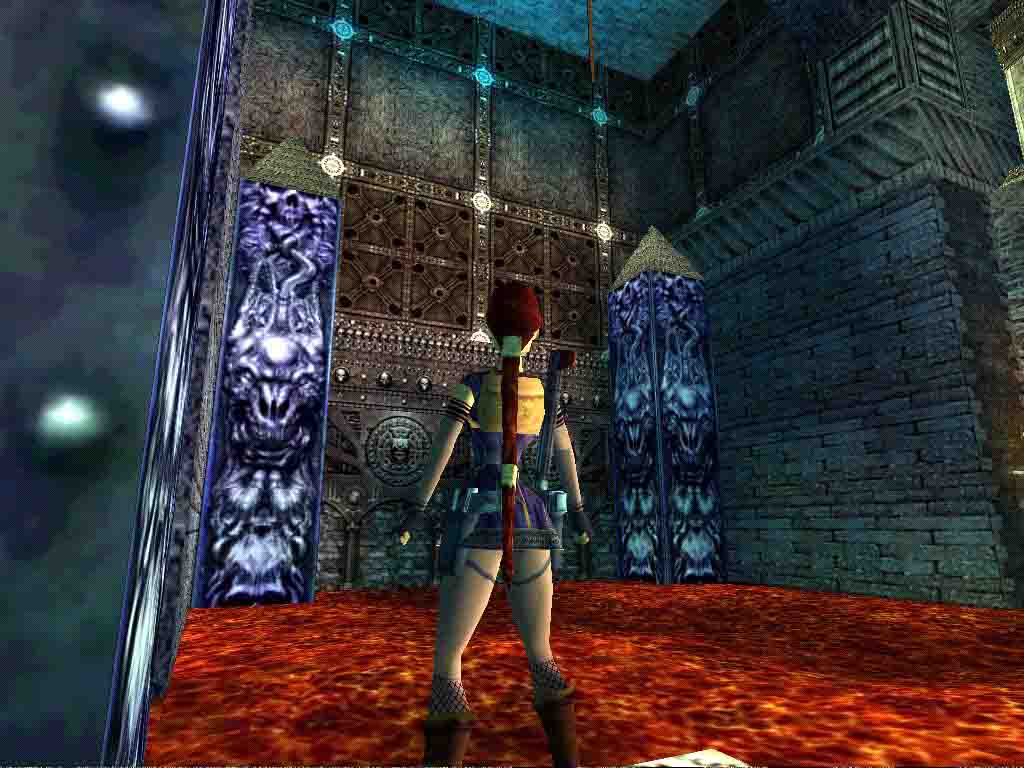
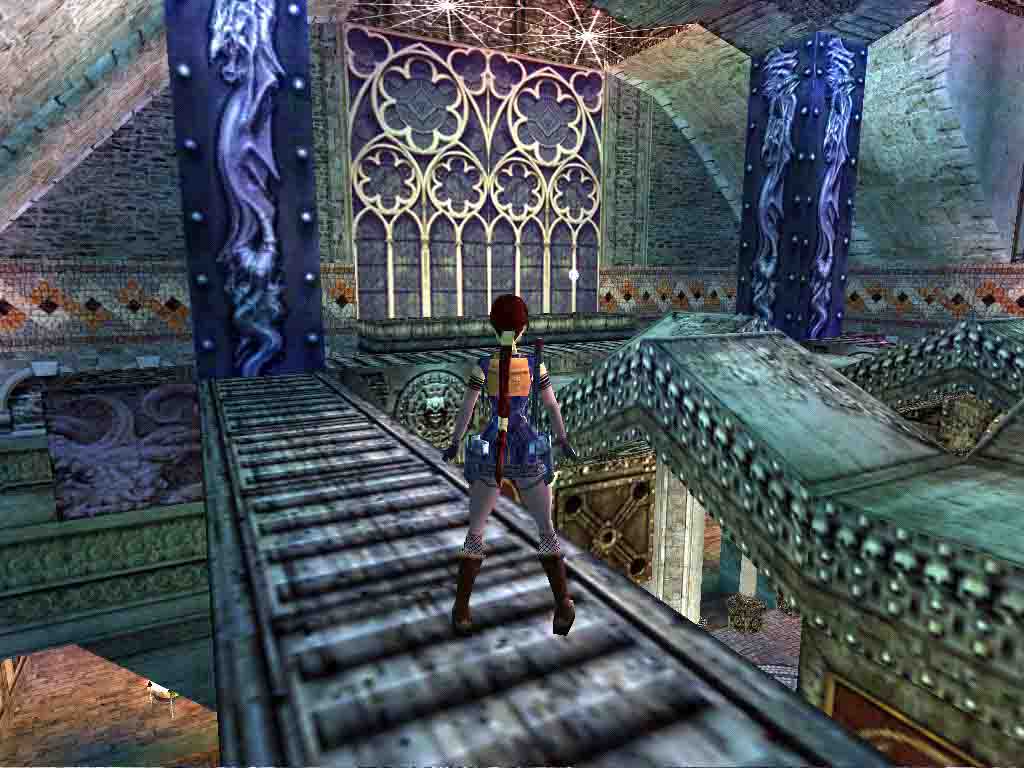
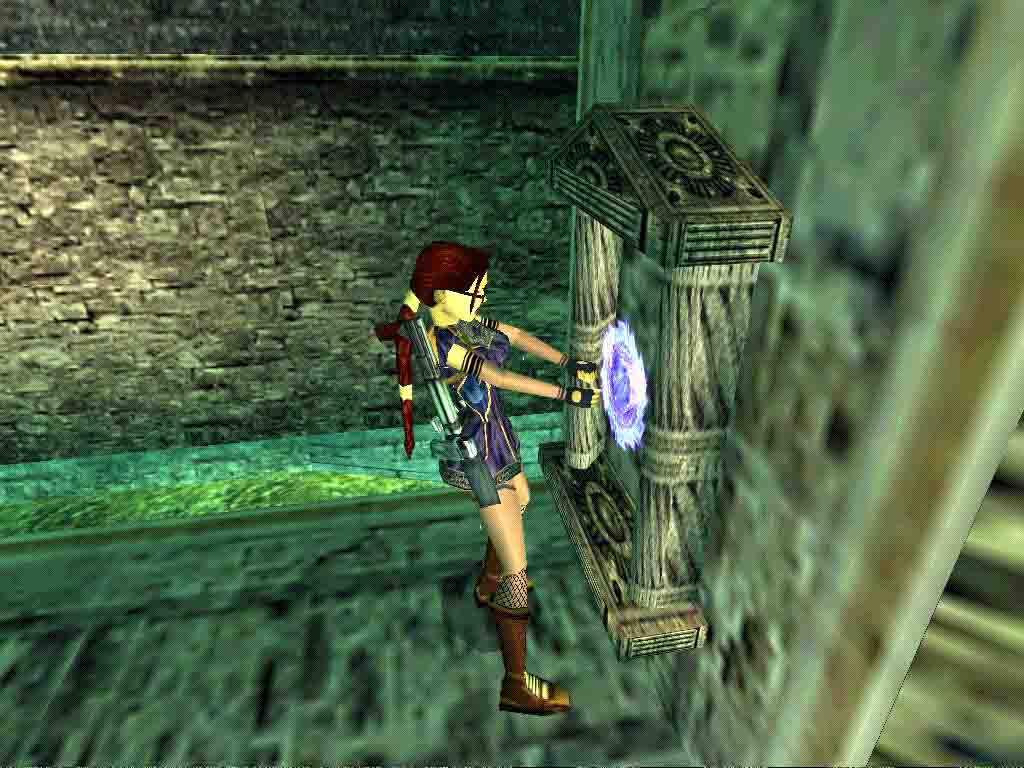
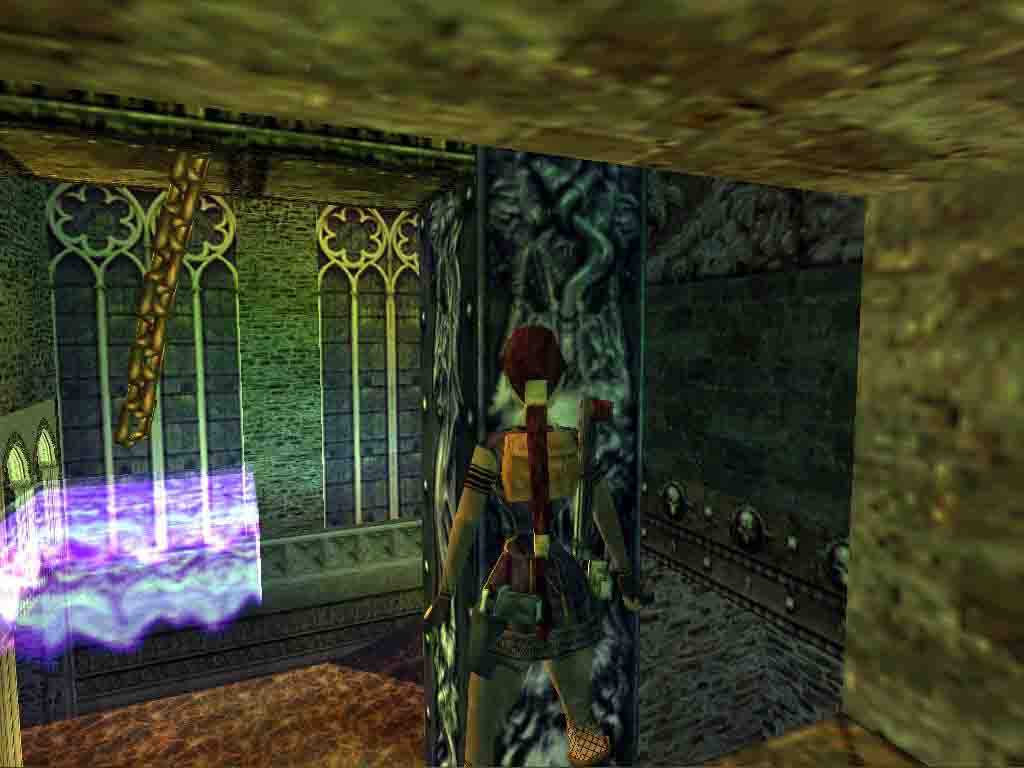
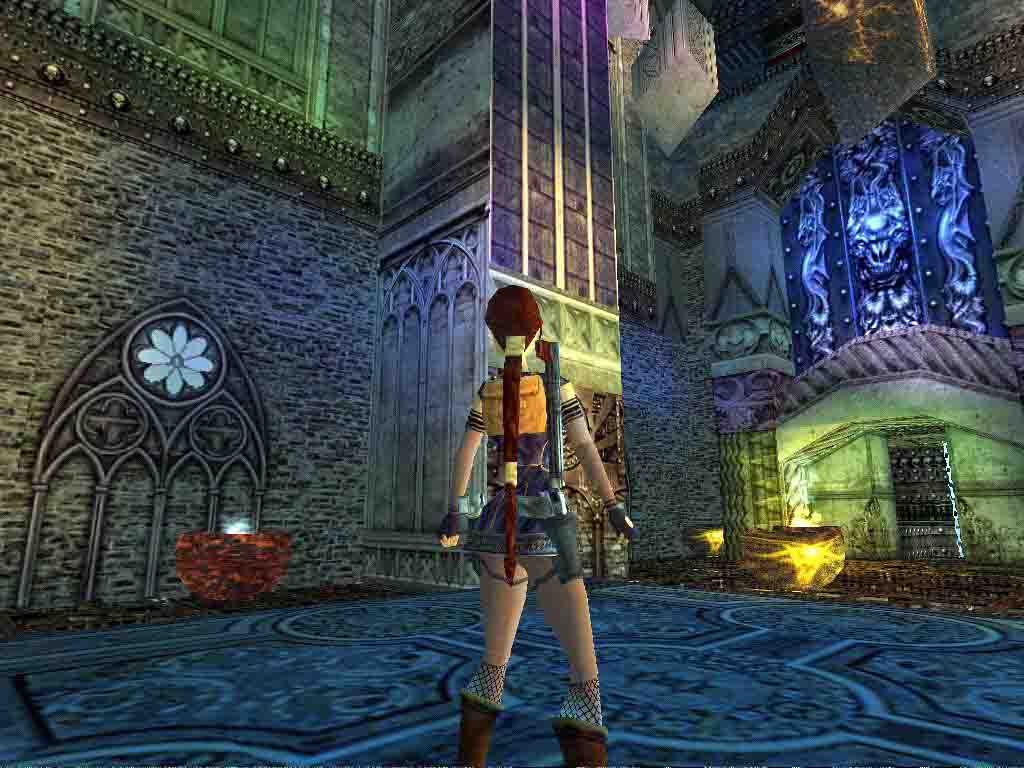

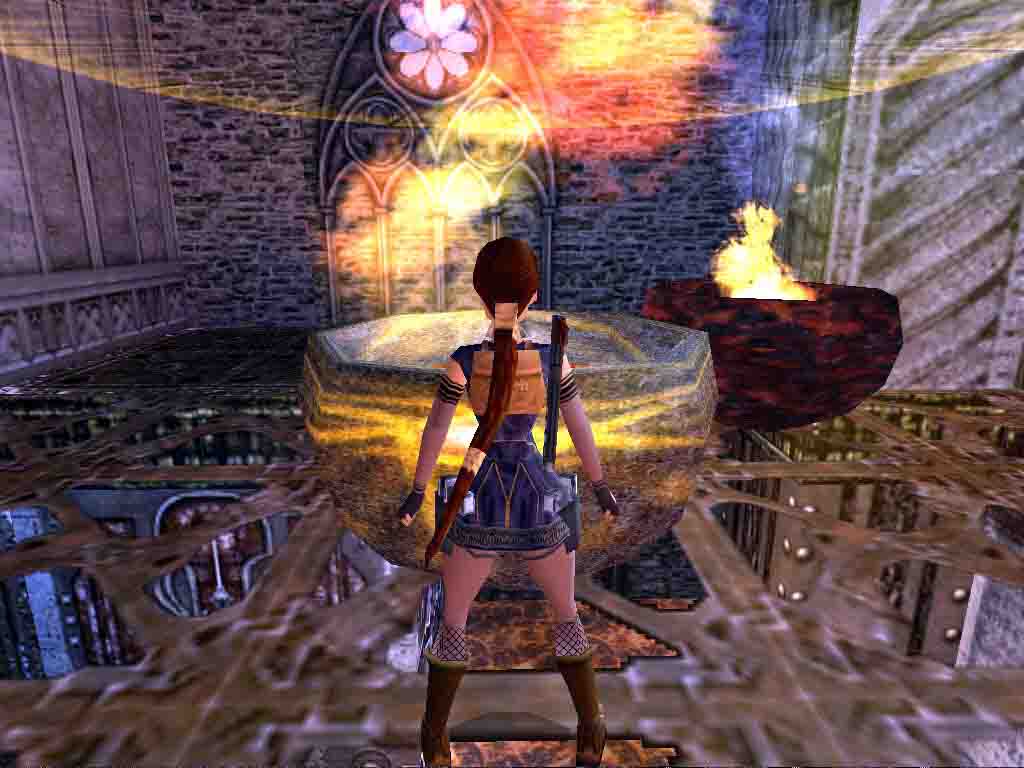
 Secret 12:
And now the moment has come to confront your arch-enemy and save the World from her dark threat. But, of course, you first have to reach her. Which isn't going to be easy at all.
First things first, pick up the Chaos Gems in your open suitcase on the ground. The door in front of you opens, granting access to the Hellforge. Pass through the doorway and run into a large partially flooded area. Continue ahead (W) past the two columns. You'll see an empty frame at the top of a ramp on your way. Your next goal is to find something to put in it.
-- Even the Sun has Frozen --
Objective: Find the Frozen Sun and use it to access the rest of Hellforge.
A Door to Open
Keep on running W, then swimming as the water deepens to enter a rectangular pool lined with two ledges and ended by a closed door. Since the ledges are too high for you to climb, locate the ladder at the start of the pool to your L (S), near some spikes.
Swim to it then sidestep R until you can stand up, but not too far or you'll take damage from the nearby spikes. Jump up and grab it then climb down once. Backflip, roll in mid-air and hit Action to grab the crack in the wall. Shimmy L and pull up on the ledge.
Immediately draw your weapon of choice: as soon as you set foot on the ledge, a skeletal harpy attacks from your L. Take it down quickly, taking advantage of the long ledge to avoid being hit.
Once it's down, run to the other side of the ledge (W) and open the sarcophagus there (hit Action) to pick up the revolver ammo it contained. This said, the door nearby is still as closed as can be, so let's find a way to open it.
From the sarcophagus, turn around (S), climb on the higher floor by the water,
go L to the column and turn around (N) again. Walk to the edge, turn slightly
R to aim at the higher ledge ahead and do a SJ+G to it. Pull up. Go R (E),
SJ over the slope and position Lara on the highest point of the arch you're
on. You're goal is the top of the high pillar to your R. Turn 45° R (SE),
hop back and do a RJ with a hard L mid-air curve. Hit Action at the very last
moment to grab the edge and pull up (see 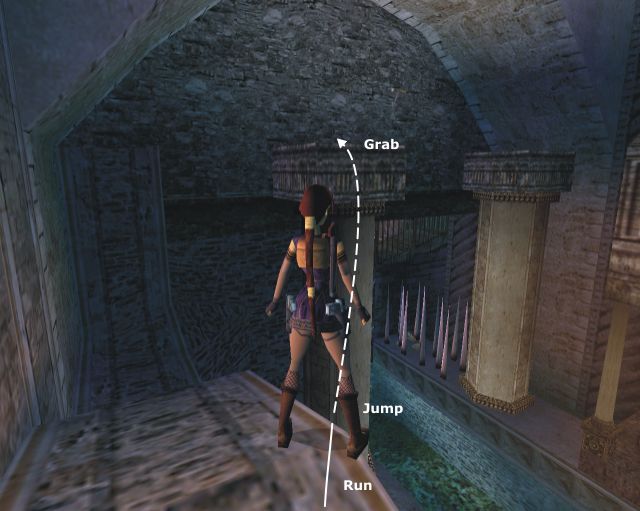 ).
).
You now probably see the jumpswitch high on the wall to your R. Since trying to grab it from here is a bit risky, turn R (S) and do a RJ to the next pillar. Turn L (E), walk to the L corner and turn slightly L to face the jumpswitch. Do a SJ with a slight R mid-air curve and grab to flip it, opening the door at the other end of the pool.
Return on the ledge via the ladder like you did the first time, run L (W) to the other end and climb on the higher floor. Turn 45° R (SW) to face the doorway and do a SJ to it holding Action to avoid hitting the upper wall and go R into the next room: the Tall Pillars Room.
Escaping a Snowflake
Run across the room to the other side then continue ahead (W) to reach a passage with two flights of stairs on each side. The R one (NW) leads to a large, high-ceilinged room bathed in lava. There's a safe platform in the opposite side but it's inaccessible for now. Go L instead (SW), climb the stairs and run along the long passage to reach the switch there. Save. Timed-run coming.
Activate the switch, raising a block in the Lava Room.
Roll to turn around and sprint through the passage. Stop sprinting at the
stairs, run with a L curve then jump on the highest step of the second stairway,
again with a L mid-air curve (see 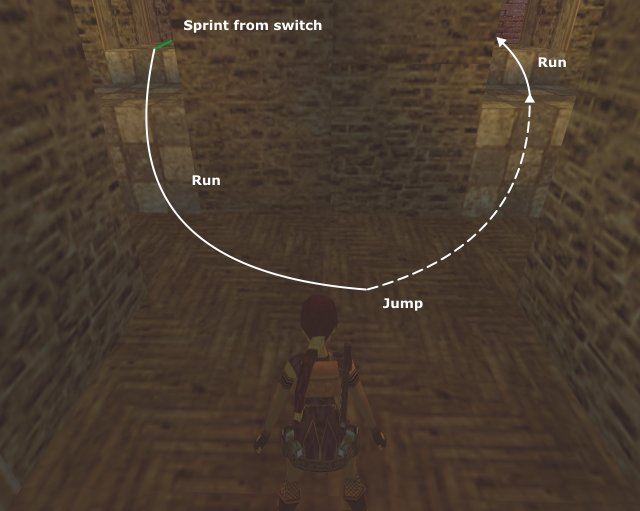 ).
Dash through the doorway into the Lava Room and run ahead to take off from
the tip of the raised block before it lowers and land on the safe platform
ahead.
).
Dash through the doorway into the Lava Room and run ahead to take off from
the tip of the raised block before it lowers and land on the safe platform
ahead.
Once there, turn R (N) to locate the ladder beyond the column. Walk to the edge, standing in the middle of the tile and turn L (NW) to face the ladder. Hop back and do a RJ+G to it (no need for mid-air curve). Climb up to the top but don't pull up yet.
Considering your upcoming predicament, you're going to have to save time and certainly not losing some positioning Lara for a jump. Release Action and immediately hit it again to grab the edge of the ledge. Quickly shimmy R before she puts her legs back on the ladder and go around the corner to the middle of the tile. Save and pull up.
As soon as you step on the ledge, a cold spirit comes to chase you. Hit Look to get rid of the camera, roll to turn around and do a RJ to grab the rope hanging from the ceiling. Quickly turn 90° R around the rope to face the ledge running along the wall, swing and jump to it (this is a long swing, make sure Lara's at the highest point of her arc before jumping). Turn L (E).
Now you have the choice, either you take a safe route by getting rid of the spirit first then getting back up there or you take the quick one by accomplishing your next tasks with the spirit on your tail. The first one is indeed safer, but involves some backtracking, timed-run included. The second one will certainly cost you a good load of health. Your call.
* Safe route:
Sprint along the ledge then across the next room with a slight L diagonal. Turn L at the edge and run off to land on a lower platform. Drop down into the room below and rush R (E) toward the entrance. Dive in the water and wait for the spirit to join you there and melt. Now you have to make your way back to the high ledge via the ladder, the Tall Pillars Room and the Lava Room. Resume below (but without the spirit, so you can take your time).
* Quick Route:
Sprint along the ledge then go L into the next room. Locate the Large Vase on your R which happens to be shatterable. Shoot it and pick up the Crowbar on the pedestal. Go R, run to the edge with a L curve and do a RJ to a high square platform. Keep on running and do another RJ with a R mid-air curve to the long ledge against the N wall. Run along the ledge: the Frozen Sun is on the wall near the end. Pry it out with the Crowbar. Turn R (E), SJ on a lower platform and safety drop into the room below. Run ahead then R (S) toward the entrance (mind the lit brazier there) and jump in the water, where the spirit will duly melt.
Once in the water, the Frozen Sun in your inventory, swim ahead (E) to return to the large partially flooded area, going R (S) after the pool then L (E). Swim, wade then run ahead. Run up the ramp to your L. Place the Frozen Sun in the Frozen Sun Frame at the top, opening a wood bars door in the far L corner (SW). Leave the ramp, swim R and go pull up in the doorway.
-- To the Forge of Hell --
Objective: Reach the Forge
Don't run ahead. The floor in this short passage is very much trapped with red burning floor. Look up: there's a MS above you. Jump up, grab it and swing to safely let go after the red floor.
Run to the other end of the passage to reach a ledge overlooking the Frozen Sun Frame Area. There's a ladder ahead, but the spikes before it prevents you from grabbing it (plus there's nothing of interest up there). Look up to spot another MS, stand on the highest part of the floor (i.e. at the very entrance) and grab the MS. Turn R and swing past the round roof to land on a platform extending from it. Turn R (S).
The Swinging Chain Room
You're standing in an opening overlooking a room bathed in lava. There is solid lava on each side (both cold and hot), a high ledge to your L (SE) and, last but not least, a pink transparent platform topped by a swinging chain.
First off, walk to the edge and stand in the L corner. Turn slightly L to face the edge of the platform and do a SJ+G to it. Now you have the choice again, depending on whether you prefer dealing with the chain and do a safe and relatively easy jump or staying clear from the chain and do a tricky one, losing health in the process.
* Dealing with the chain
Shimmy L to the corner and pull up (the chain swings diagonally and can't
hit you there). Wait for the chain to swing away then do a RJ with a hard
L mid-air curve. You'll land on the ledge to your L below and won't lose any
health (see 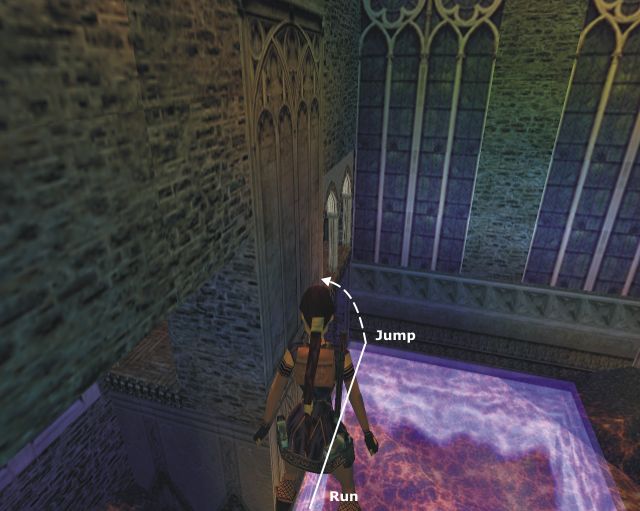 ).
Run ahead then L (N) and walk to the edge. Do a RJ+G to the alcove ahead beyond
the solid lava. Pull up. Resume at the + after the "Staying clear from the
chain" part below.
).
Run ahead then L (N) and walk to the edge. Do a RJ+G to the alcove ahead beyond
the solid lava. Pull up. Resume at the + after the "Staying clear from the
chain" part below.
* Staying clear from the chain
Shimmy R around the corner then to the next one (but not around it). Pull up, turn R (S), make sure Lara's healthy enough and run off from the platform to land on a safe triangular tile below. You're now in for a nice "triangular jump".
Turn around (N) and position Lara as in this 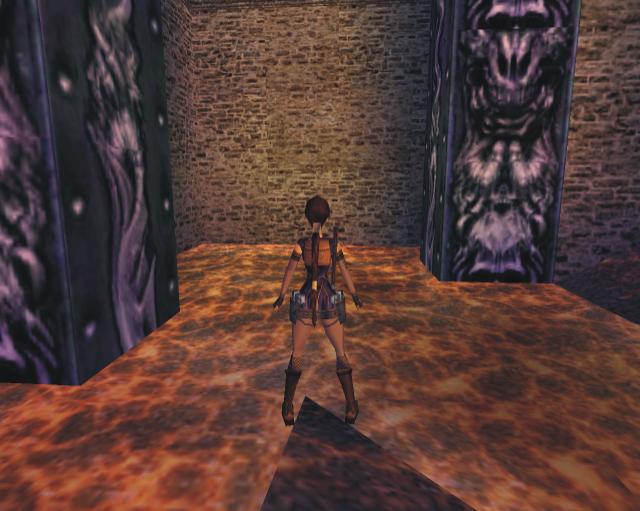 (careful not to step on the lava). Hop back and
run with a R curve. Take off and do a hard R mid-air curve to land on the
safe cold lava (see
(careful not to step on the lava). Hop back and
run with a R curve. Take off and do a hard R mid-air curve to land on the
safe cold lava (see 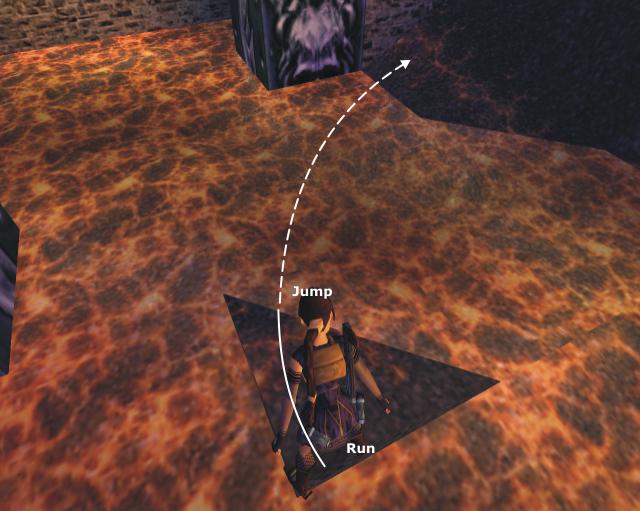 ).
Once there, run up the slope, turn L (N) and pull up in the alcove above
).
Once there, run up the slope, turn L (N) and pull up in the alcove above
+ Activate the switch ahead to open a door in the other side of the room. Turn around (S), go to the edge and do a RJ+G to the high ledge ahead. Pull up, run ahead to the other end then R (W). There's cold lava ahead and below in the opposite side. Do a RJ to land on it.
Run to the top of the slope and pull up on the ledge above. Run ahead, R (N) then L (W) through the doorway. You've made it through the Swinging Chain Room!
From pillar to pillar
As you may notice from the many high pillars ahead, you're not done yet with tricky jumping. But before doing anything else, let's go for a secret.
Go L (S) and run along the ledge to the edge. You can spot an opening in the L wall ahead (SSE). Turn to it, standing in the middle of the tile, and do a RJ with a L mid-air curve to land in said opening which happens to be Secret #12. Pick up the large medipack there.
Going in was easy, but going back to the previous ledge
will be a tad trickier. Position Lara as in this 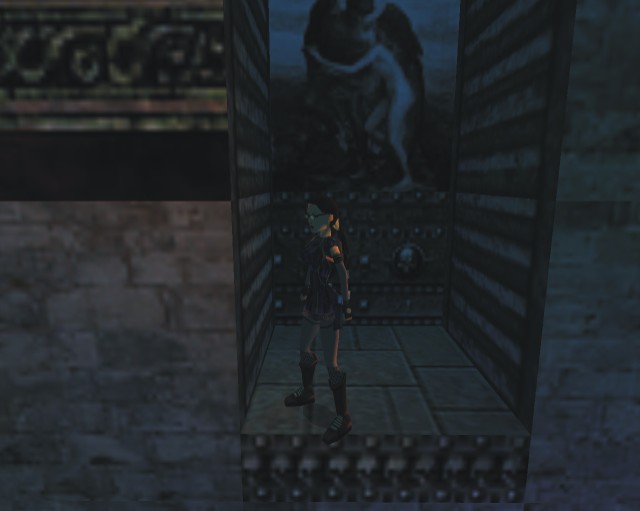 ,
hop back and do a RJ with a hard R mid-air curve to land back on the ledge
(see
,
hop back and do a RJ with a hard R mid-air curve to land back on the ledge
(see 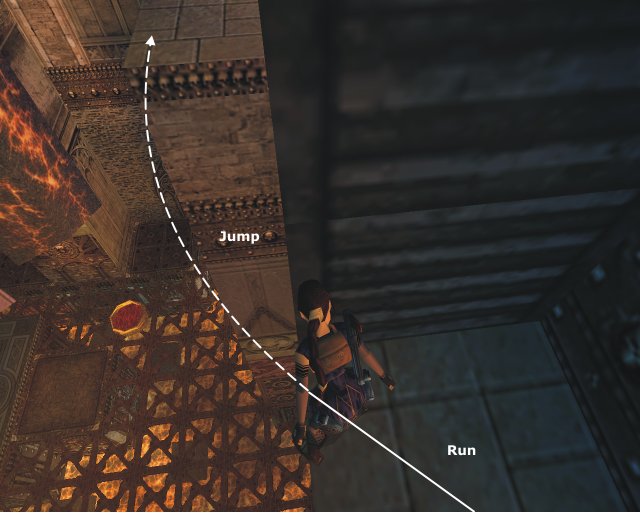 ).
Return toward the entrance and stop there.
).
Return toward the entrance and stop there.
Walk to the edge. There's a sloping-top pillar ahead and a triangular platform beyond. Do a RJ+G over the former to the latter and pull up.
Aaahhh! Another triangular jump! This one might be even trickier than the one you maybe did in the Swinging Chain Room. Your goal is to grab the edge of the floating platform to your L, taking a curved run up and aligning Lara perfectly with the edge of the floating platform: the platform is quite far and you need to do a long jump to it. It requires absolute accuracy, so save.
Turn 45° R (SW) to align Lara with the diagonal side of the triangle and
step back as much as you can. Run with a L curve to align Lara with the platform
and take off at the last moment. Do a straight jump and hit Action,
again at the last moment to grab the edge (see 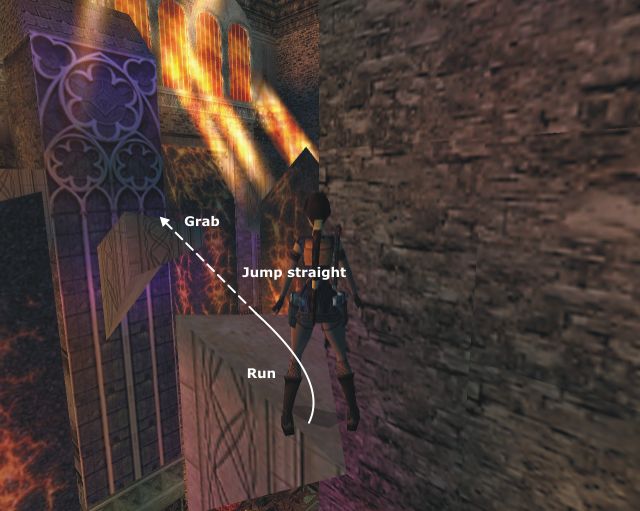 ).
Pull up.
).
Pull up.
The next jump is easier. Walk to the edge and the L corner. Turn slightly L to aim at the floating slope before a CS, hop back and do a RJ+G. Pull up, slide a bit and jump with Action to grab the edge of the CS. Slip up in it.
Crawl a bit to stand up in a rather dark passage lit by braziers. Go R (W). You'll see another low CS near the corner, but don't crawl in yet. Turn L at the corner, run ahead and go pick up the revolver ammo on a pedestal in a recess to your L (E). Now go to the second CS.
Crawl in, turn around, drop down and immediately backflip (don't slide) on
a triangular ledge. No triangular jump here, though. Turn R (W), walk to the
tip of the triangle then align Lara with the floating slope to your R (NW).
SJ on it (see 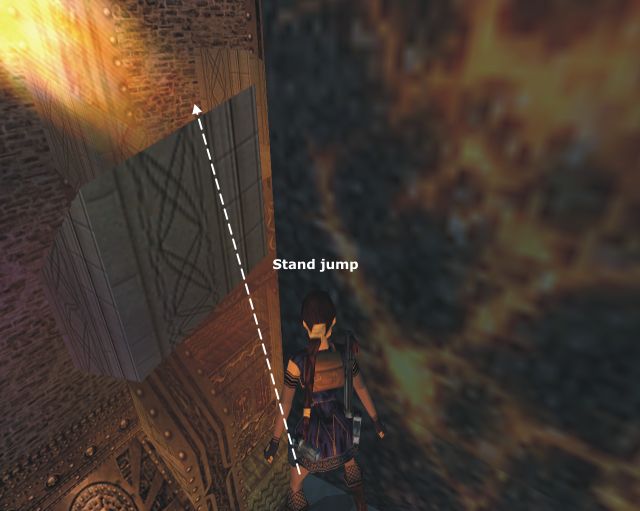 - you might only jump up. In this case SJ again). Slide a bit, jump with a
hard R mid-air curve on the next slope, slide again, jump and hit Action to
grab the edge of the sloping but walkable floating block (see
- you might only jump up. In this case SJ again). Slide a bit, jump with a
hard R mid-air curve on the next slope, slide again, jump and hit Action to
grab the edge of the sloping but walkable floating block (see 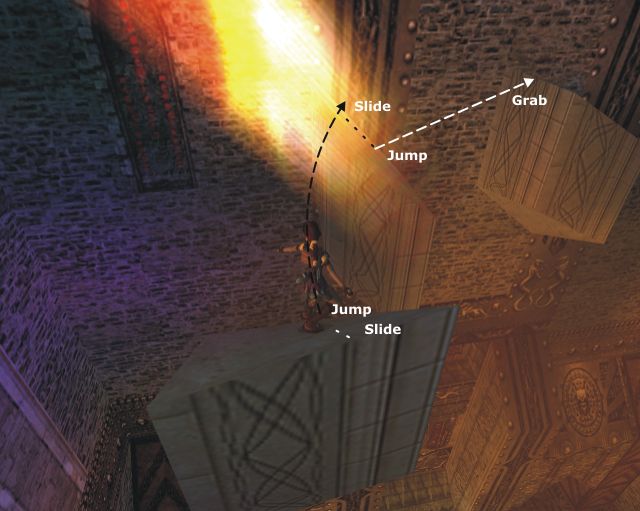 ).
Pull up.
).
Pull up.
You're almost there (out of the room, at least). Do a RJ+G to the next ledge, pull up and go L (W) through the opening.
Close Encounter of the Eight-Legged Type
You're now in a room bathed in lava, with emerged blocks to your L (S) and some wooden platforms high against the wall that don't look very sturdy (and in fact aren't sturdy at all). Turn to the emerged blocks standing on the highest part of the ledge you're on, in the middle, and do a RJ+G. Pull up.
Walk to the edge (mind the hole beyond, it's filled with lava) and do a SJ+G to the higher ledge. Pull up and go R (W) to the edge. Do a SJ+G to hang from the edge of the collapsible platform.
Pull up and immediately do a RJ+G over the next collapsible platform to grab the edge of the third one. Shimmy R and around the corner. Pull up, roll and do a RJ to the last collapsible platform. Quickly run ahead on solid floor. Go R (E) to the end of the ledge then turn L (N). There's a ledge above. Pull up.
Well, with all the webs you've seen scattered all over the place, you didn't think you wouldn't meet some of those, did you? There are 3 giant venomous spiders lurking up there, and they're all but friendly. Your best chance here is to patiently kill them by pulling up, shooting and hopping back when they come too close. Repeat until they're all dead for good.
Once you've secured the place, pull up again and go L (W). There's a crowbar lever there in the corner. Use your crowbar to activate it. Go to the opposite corner (NE) to activate a 2nd crowbar lever, opening a double door in the other side of the room. Turn around, run across the room and pass the doorway.
An Obstacle Course
Run down the ramp and immediately turn L. The spiked
balls will miss you, they're just here as a warning of what awaits
you. Don't go too far, though. The spiked wall
ahead and the fire emitter are much more dangerous.
Run to the higher floor (but not on it), stopping one step away. Turn
45° L (SE) to face the passage, wait for the wall to slide away (i.e. R) and
SJ with a L mid-air curve (see 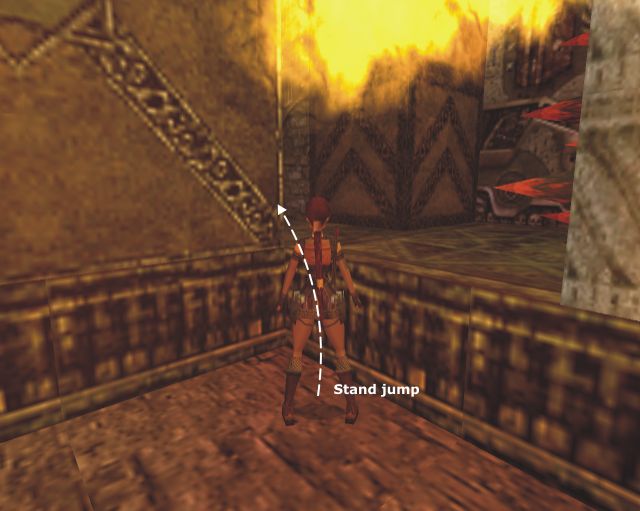 ).
Don't run but stop: there's a nasty surprise beyond the wall and you cannot
see it.
).
Don't run but stop: there's a nasty surprise beyond the wall and you cannot
see it.
Well, if the wall hasn't crushed you, you now can see it, as a matter of fact. There's a hole beyond and a chain. And to put some icing on the cake, the floor below that supports the chain is a burning one.
Walk to the edge and run off holding Action to grab the chain. Slide down
past a golden block hanging from the ceiling and turn slightly R (see 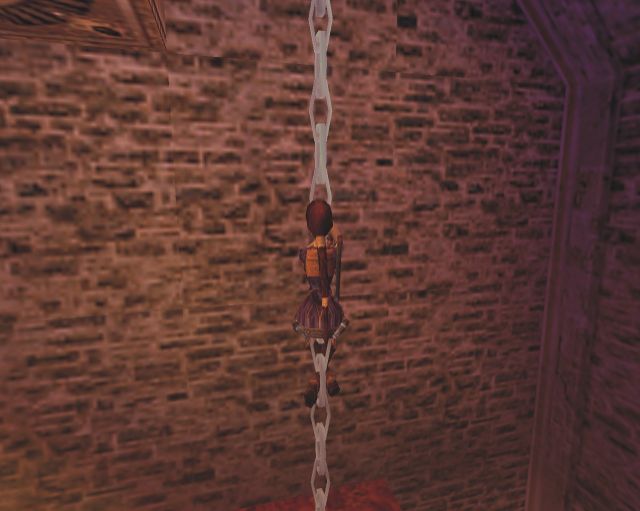 ).
Backflip: you'll hit the L side of a slope behind. Immediately jump with a
hard L mid-air curve to safely land on a ledge below the burning block.
).
Backflip: you'll hit the L side of a slope behind. Immediately jump with a
hard L mid-air curve to safely land on a ledge below the burning block.
Turn around and walk to the edge, standing in the L corner. Turn slightly L to aim at the short slope against the wall and SJ on it. Immediately jump on the rightmost long slope ahead.
Bounce from one slope to the other, holding R when you jump forward to reach the opening. Release Jump as soon as you've passed it and slide a bit before jumping again over the lava on another slope. Keep bouncing from slope to slope, jumping as soon as you hit them to eventually land just in front of another spiked wall (aren't you happy?)
There are in fact several of them ahead, so watch your steps by all means. First, go L (N) into the passage and turn R (E) at the corner: a 2nd spiked wall is there. Locate the small passage between the two spikes walled ones to your R (SE) you're going to use it as a refuge to pass the walls.
Stand as close as possible from the wall without taking damage standing on the R, turn R to face the refuge and wait for the wall to go away to slip in it. Once there, look ahead and R to notice a third spiked wall, this one going horizontally. Wait for the wall to your R to go away and hurry into the next room running far enough to clear the third wall, but not too far to avoid a 4th spiked wall beyond (how nice. While you're at it, mind the lit brazier to your L).
Pass the 4th wall and run to the edge ahead. Turn around, safety drop down on a slope below and slide into the Forge.
-- At the Forge and Beyond --
Objective: Create two Ashen Stones and enter the Garden of Stone
You see those two diamond-shaped holes on each side of the slope? They're receptacles for the Ashen Stones you're about to create in order to open the closed door in the corners.
Turn around (E) and run across the room to enter another much smaller one (notice the two golden bowls, we'll get to them in a moment). Go pick up the shotgun normal ammo on a pedestal beyond a hole and a chain then return on the lower floor near the entrance, turn to the chain, run off and hit Action to grab it. Slide down but backflip before hitting the floor at the bottom: it's a burning one. Turn around.
Getting some Heat
Do a SJ from the entrance of this new Lava Room to the first safe ledge. There are two little bowls here (one ahead and one on your L). You goal is to light them. Do a RJ on the grey ledge ahead (W) which we'll call the "Grey Ledge" for future reference, turn L (S), walk to the edge, turn slightly L, hop back and do another RJ to the brown ledge.
Go to the L corner, turn 45° L (SE) and do a RJ to the sloping ledge near the corner. Pick up the shotgun (it might prove handy in the next sequence if you don't have one already).
Return to the previous ledge, this time with a SJ, turn L (W) and do a RJ to the next safe ledge then another one to the last one. Do a last RJ to land in a small room with a black slightly lower floor in the center.
Before walking on the floor, make sure your revolver is combined with the laser-sight and draw. Step on the black floor: a skeleton will arise ahead and to your R. Aim at his head and shoot to blow his skull up: he will blindly run straight into the lava. If you don't want to use the revolver - or are out of ammo - draw your shotgun instead. Lure the skeleton so he's between you and the lava and knock him off with a cartridge.
Once he's out of the way, go pick up a candle on the floor (there are three of them, in case you'd lose one) and return to the Grey Ledge. Turn L (NWW) once there and SJ on the next one then do a RJ to the last one and another RJ to the small room.
There are Lit Candles here. Go light you candle on one of them and return to the Grey Block. Once there, turn R (S) and return to the flat block next to the little bowl. Light it. Turn R (N), walk to the R corner, turn 45° R (NE) to aim at the safe ledge closest to the entrance, hop back and do a RJ to it.
Turn around and light the second little bowl. You can now drop your candle, you won't need it anymore. Turn around and do a SJ to be back in the entrance near the chain. Walk to the edge of the hole, SJ+G the chain, climb up and backflip.
Forging the Keys
Remember those two gold bowls? They are in fact quite the movable type. What you need to do is place them above the fires you just lit to forge the Ashen Stones. Although there isn't any specific order, let's start with the one in the NE corner.
Turn around (W), enter the Forge and go R (N) then R (E) again. You must place the bowl to the R and "under" the red unmovable one near the entrance of the Chain Room, when looking at the latter (i.e. SW of it). Pull the bowl twice then go around it to its R side (i.e. facing N) and pull it three times. You'll provoke a nice firework and the 1st Ashen Stone will appear in the gold bowl. Push the bowl once so you can pick up the stone.
Now go to the second gold bowl. It goes four tiles away R of the first bowl current location. Go to it, facing W, and pull it twice. (Note: You might get a firework at this point, but no stones. In this case just proceed as follows, you'll get the second stone.) Now go to its L side and pull it three times: again a nice firework, this time served with the 2nd Ashen Stone. Push the bowl and pick up the Stone. Time to leave.
Turn L (W) and run across the room. Put both Ashen Stones in the Ashen Stones Receptacles on each side of the slope to open the nearby doors, in both corners. Pass through either doorway to leave Hellforge and reach the Garden of Stone.
==== In this part, you should have found...
Enemies: Skeletal Harpy, Icy Spirit, Giant Venomous
Spiders, Skeleton
Items of note: The Chaos Gems, Crowbar, Frozen
Sun, Candle, 2 Ashen Stones
1 Secret
many Traps - 1 Timed-Run
== Part 2: Garden of Stone =
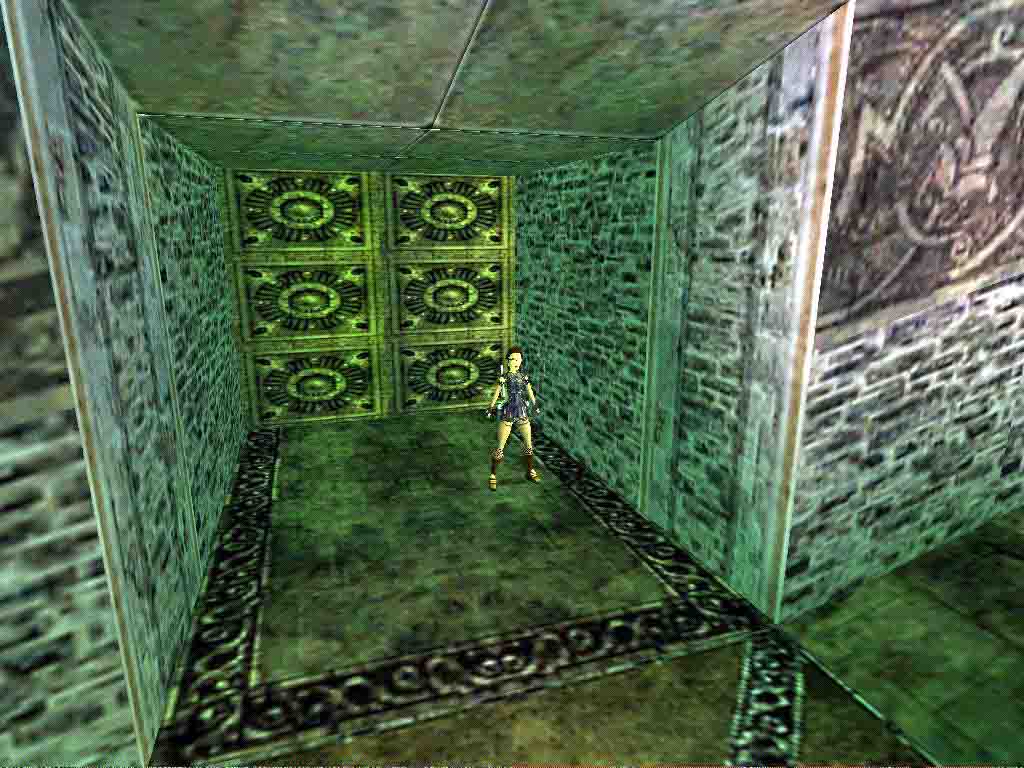
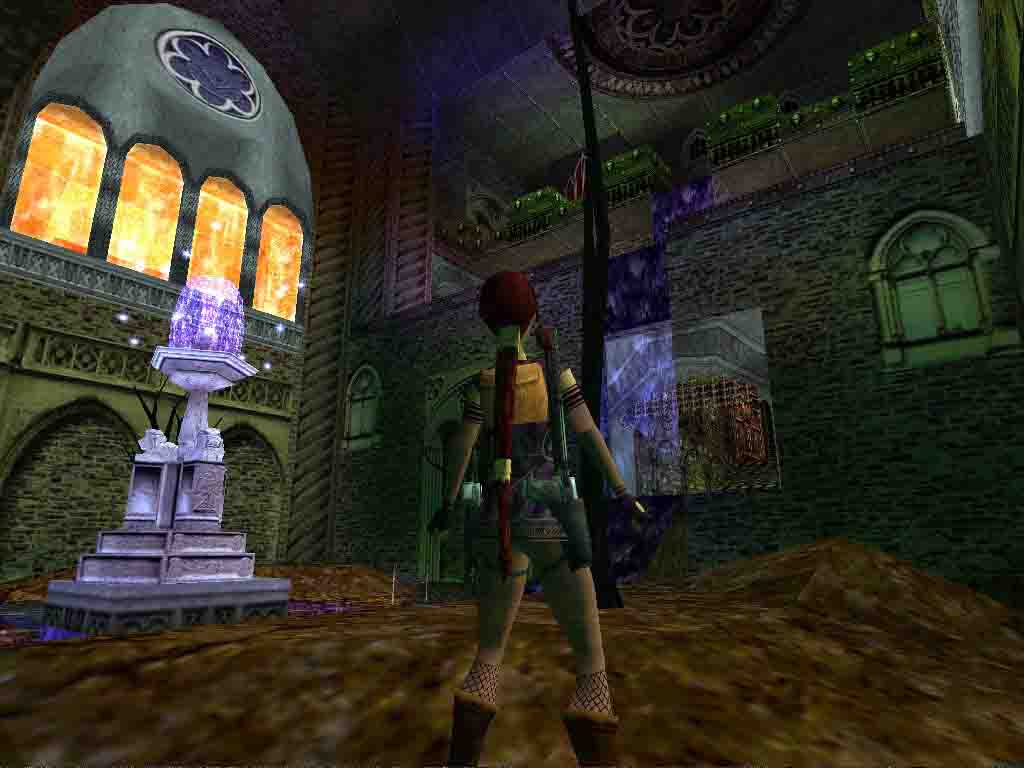

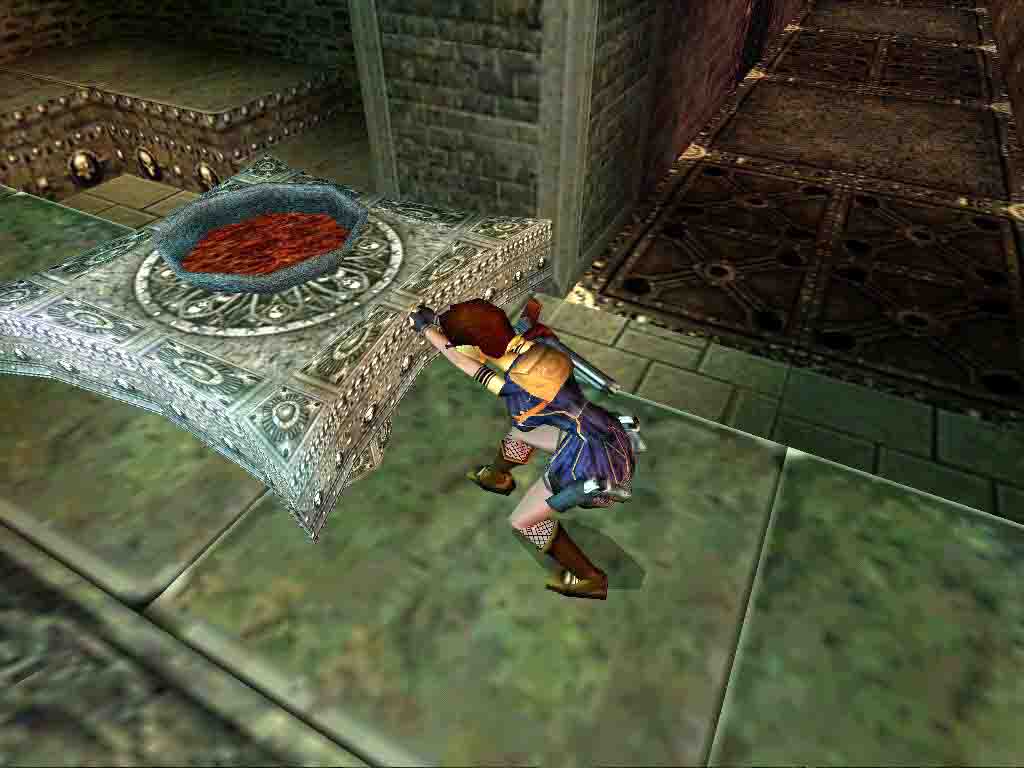
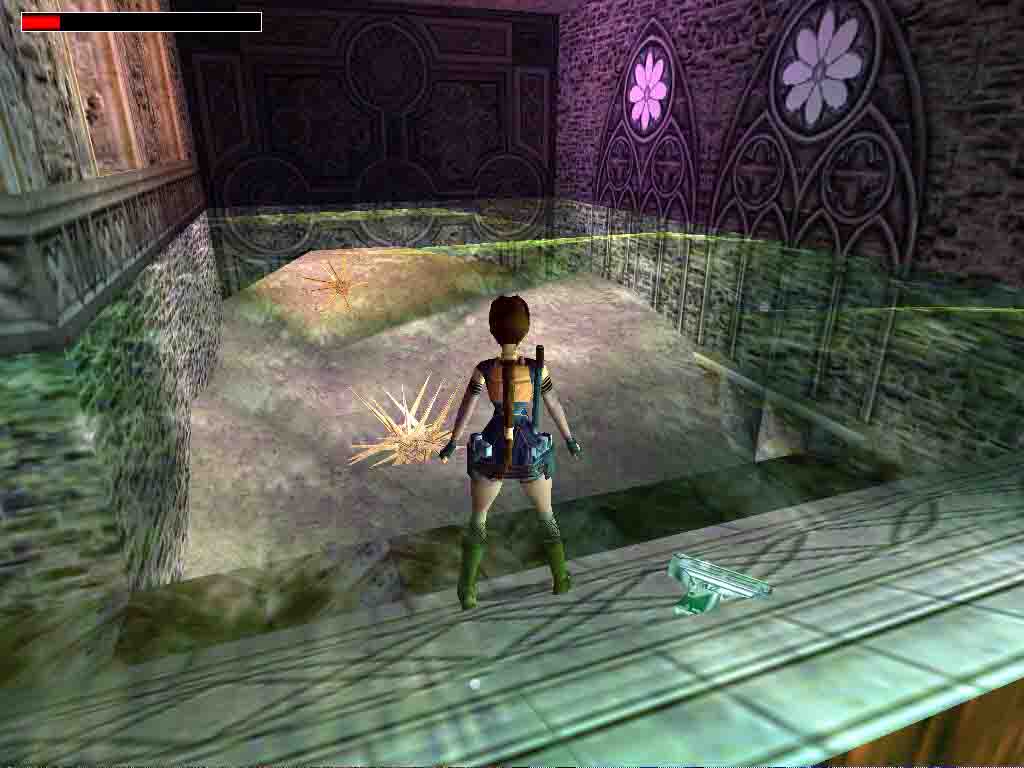
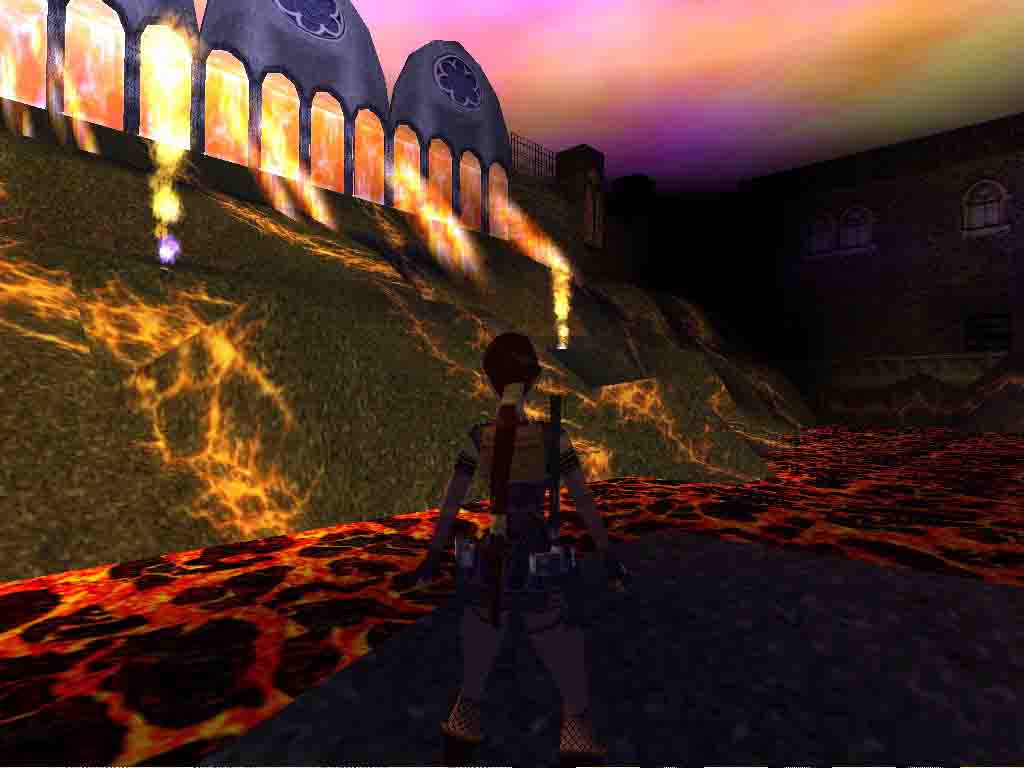
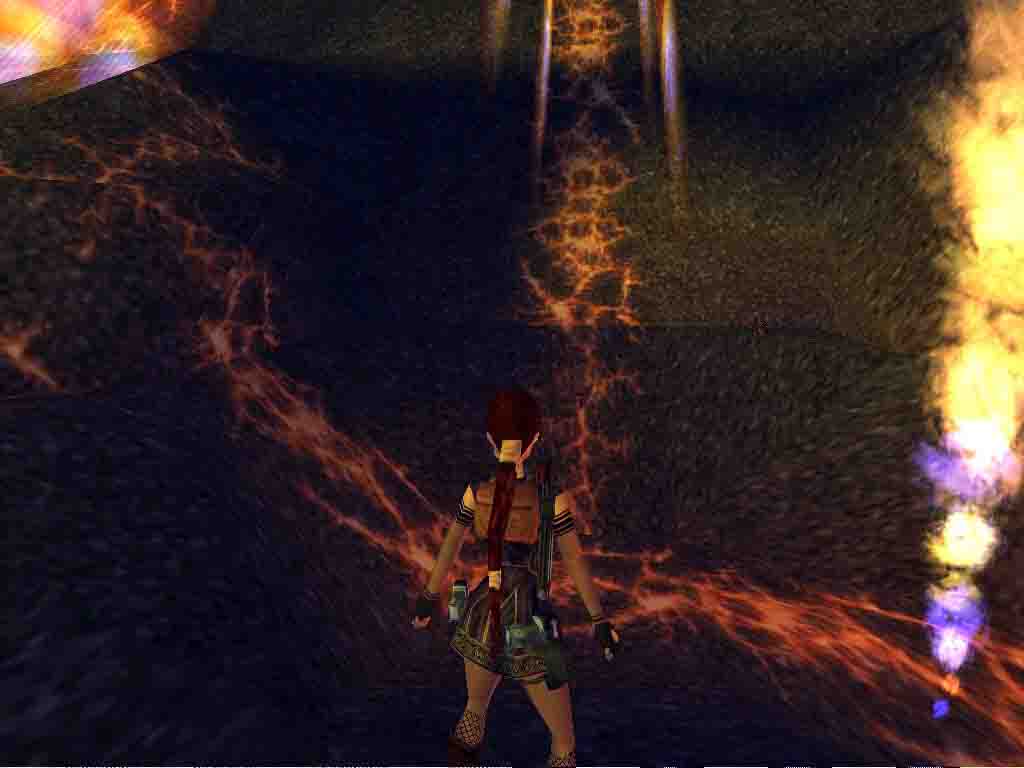
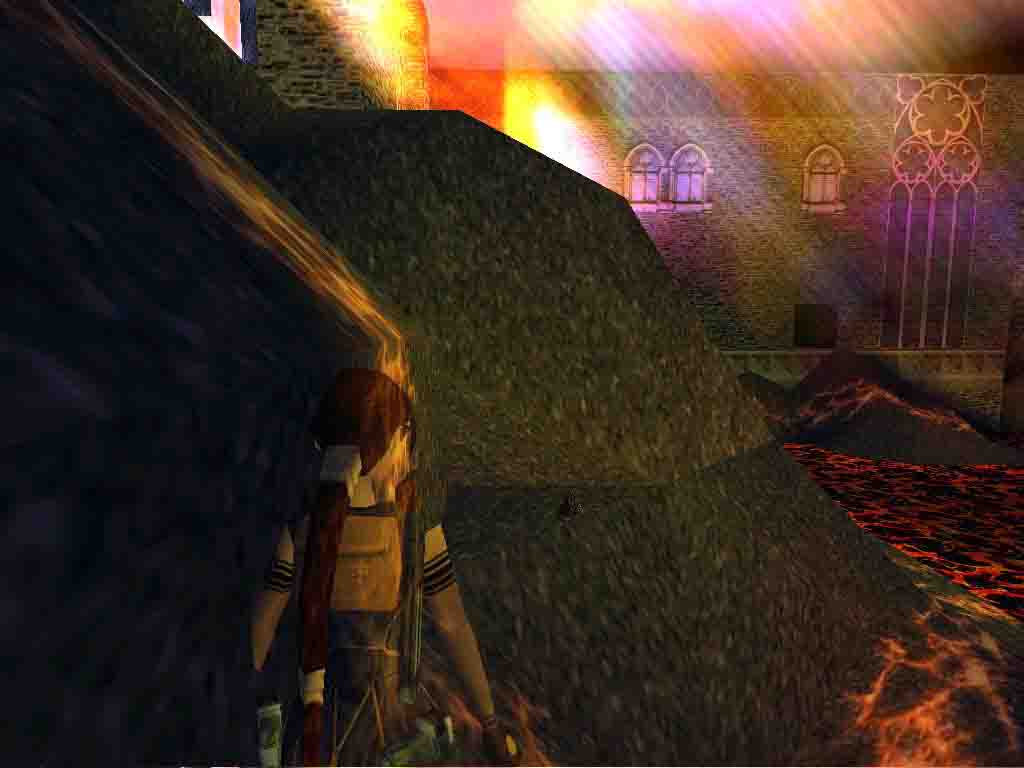
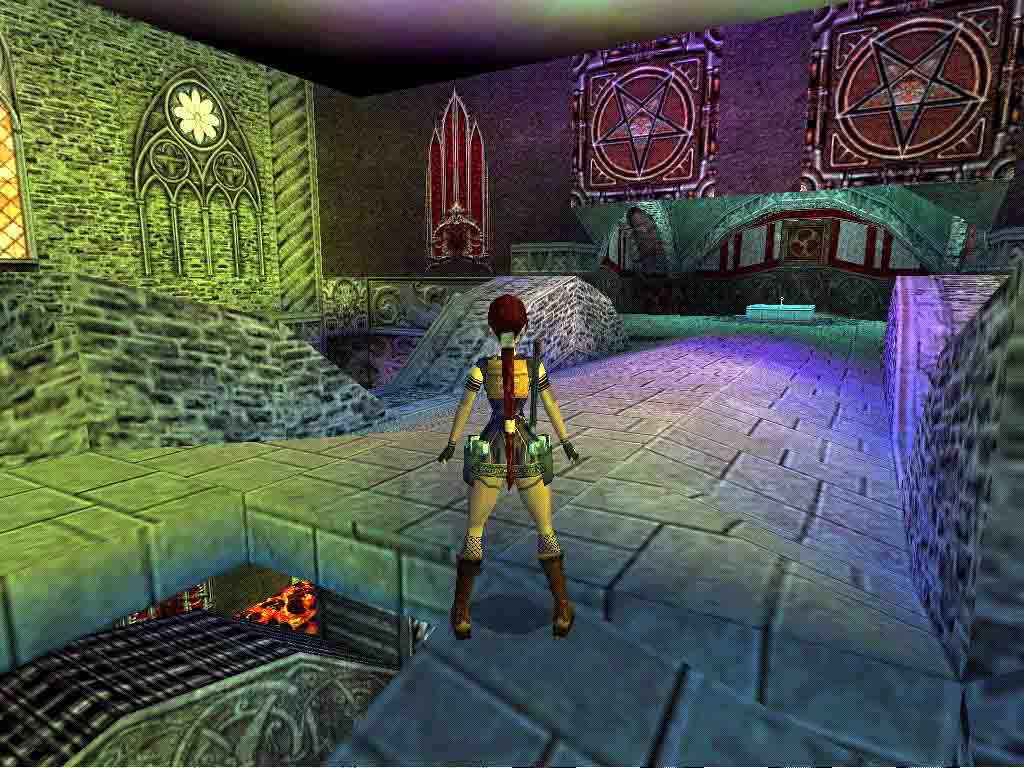
Note: Although this level comes in two parts, it will be treated as one
in this walkthrough
Important: In the next level (the Cathedral) you'll have to shoot things
on two occasions in order to progress. So make sure you have at least two
revolver bullets left at the end of this level, since you won't find any revolver
ammo in the next one.
Level Objective: Collect a Silver Key and a Rusty Key and use them to access the Cathedral
Well, you've made it through the Forge, now you have to explore the Garden of Stone and make it through as well (and stay alive).
THE QUEST FOR THE SILVER KEY
-- Preparations and Going High --
Objective: Find your way to the higher part of the Garden of Stone.
Run L (W) and up the ramp, staying close to the wall to avoid being hit by the swinging chain. You'll eventually reach a terrace overlooking a courtyard with a beautiful fountain in the center. Go L (W) and pick up a Candle on the floor, taking note of the unlit candlestick here as well (there are three candles in case you'd lose one).
Return on the ramp and run down all the way to the bottom, again staying close to the wall to avoid the swinging chains and enter the Fountain Courtyard. There's a cascade here near the far L corner (NW) with an unlit brazier on its L. Go around the fountain and notice the water hole at the bottom of the cascade. Leave your candle here on dry land (use a weapon shortcut to drop it at your feet).
Climb in the higher passage beyond the cascade (or SJ over the cascade slope) and run ahead (W) staying on the R. There's a short upward ramp: run up but stop before the corner: the tiles beyond - marked with an X - are trapped with nasty floor blades. Do a R diagonal SJ over them to land on the safe ones and set the trap off.
Ahead of you are two other sets of four trapped X tiles, separated by safe floor. This said your upcoming problem isn't the traps themselves, although they might count. For now, go to the next set and stop one step away from it, still staying R. Hop back and do a RJ over the traps, setting them off. Immediately roll to turn around and start running.
What's after you right now is a Fire Spirit, and your only chance is to lure it to the water hole where it will properly extinguish. So run/sprint, doing a tight turn at the corner to run on the tile you've already set off then diagonally R to the cascade. Slide down the slope a bit then jump directly into the water hole. Wait for the spirit to join you there and leave the water once it's gone for good.
Get the candle back (you should have left it nearby) and return into the passage. Try jumping with a wider angle at the corner to set off other traps and do a RJ over the L side of the next set, since you've already set off the R traps there. All this traps dealing is done in preparation of something you'll have to do much later, but better safe than sorry.
Do a RJ over the last L set of traps finding yourself in a new passage. Notice the closed wood bars door to your R (E): it's the entrance to the other part of the level, so ignore it for now. Go L (W) instead and around the corner. Run down the ramp. You'll find a Lit Brazier at the bottom. Light your candle on it.
Return to the Fountain Courtyard and light the Unlit Brazier there. It opens a door beyond the water hole. Don't go there (it's for much later but at least now it's done). Return to the Swinging Chains Ramp and run all the way up to the high terrace where you found the candle. Light the Candlestick there as well to make a chain appear nearby. Drop the candle.
Go to the chain, facing the edge of the terrace (i.e. E) and climb up until you can spot the higher ledge behind Lara. Backflip. You've made it to the higher floor.
-- A Hot Ashen Stone --
Objective: Find the Ashen Stone and bring it to its receptacle
Go L (N) and climb on the higher edge of a cascade flowing from a low CS to your L (W). Crawl through said CS then run on the cascade. Jump over the slope to reach a higher room (you can also use the ladder to your R and, by the way, the red raised floor there isn't trapped). You'll see a pedestal to your R, topped by a sword. Take good note of its location: it will be a life saver later.
For now run/wade ahead (W) and enjoy the fly-by.
Granted, that room looks a little bit more like Pompeii just after the eruption than Alnwick (without the ashes), but you'll have to explore it thoroughly, no matter the lava and the heights. Prepare yourself to perform the trickiest acrobatics of the whole series.
It starts easy, though. Climb on the block at the end of the cascade, run to the end, turn R (N) and do a RJ on the emerged grey block ahead. Turn L (W), walk to the edge and the L corner, turn slightly L to aim at the next emerged ledge, hop back and do a RJ to it. Repeat to land on the black cold lava in the western side of the room. You'll see an Ashen Stone Receptacle to your L, and you're indeed going to find something to put in it in a moment, but first secret time!
Turn R (N) and locate the safe upward slope L of the
quite unsafe hot solid lava one
(see 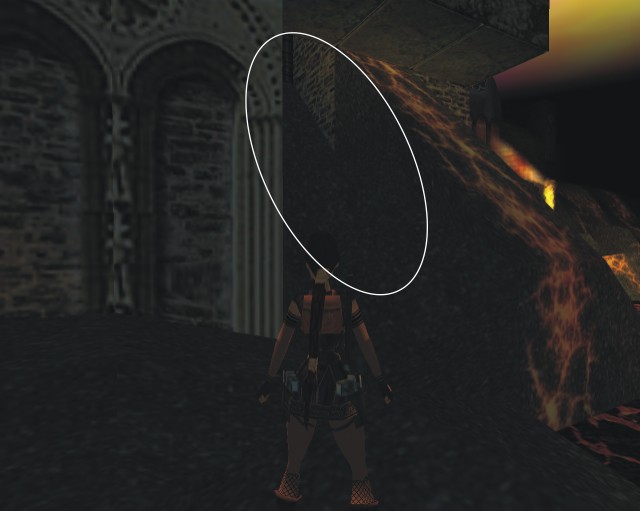 ).
Go there, run up the slope then SJ over the steeper part. Turn around, backflip
to bounce on the last part and hit Action to grab a ladder
ahead. Backflip again to land in a hidden alcove which is Secret #13.
Pick up 3 uzi ammos and
some revolver ammo there.
Drop down to the slope below, slide, turn around and (cautiously) slide again
to be back on the bottom of the slope.
).
Go there, run up the slope then SJ over the steeper part. Turn around, backflip
to bounce on the last part and hit Action to grab a ladder
ahead. Backflip again to land in a hidden alcove which is Secret #13.
Pick up 3 uzi ammos and
some revolver ammo there.
Drop down to the slope below, slide, turn around and (cautiously) slide again
to be back on the bottom of the slope.
The Course Over the Lava
Alright. Serious business starts here and now. Turn N. Ignore the slopes
emerging from the lava to your R, they're oriented in the wrong direction
and are there only for coming back. Walk toward the hot
solid lava slope and stop one step away from it. Side step R and do
a SJ over it to land on a safe slope beyond. Immediately jump to land on the
next emerged flat ledge (see 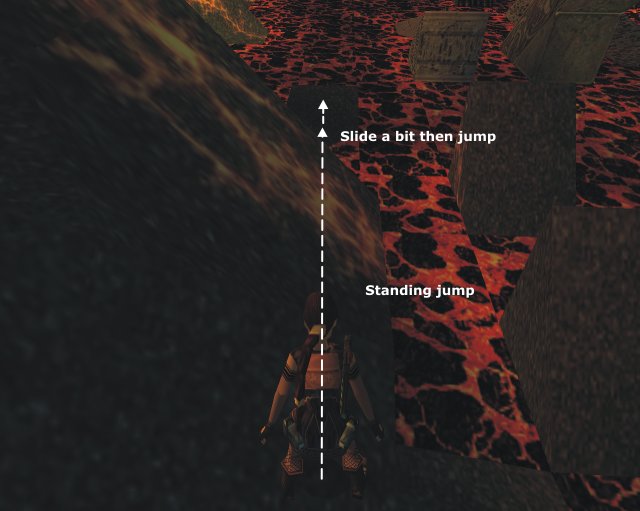 ).
).
Walk to the edge and the R corner. Turn 45° R (NE) to aim at the beige slope,
hop back and do a RJ. Slide a bit then jump to land on the beige emerged stones
(see 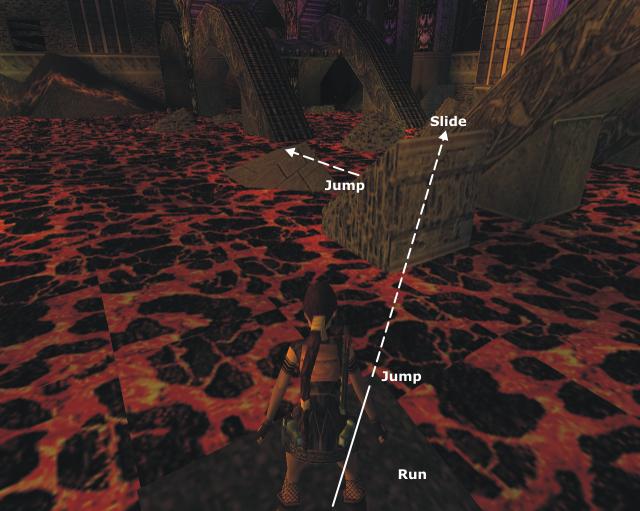 ).
Walk to the edge and the R corner and turn R (E). Hop back and do a RJ to
the emerged stone ahead which is flatter than it seems, aiming at its far
L corner (see
).
Walk to the edge and the R corner and turn R (E). Hop back and do a RJ to
the emerged stone ahead which is flatter than it seems, aiming at its far
L corner (see 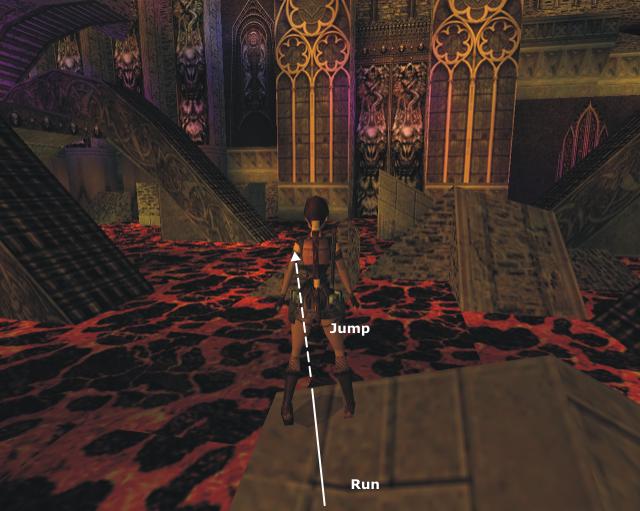 ).
).
Turn R (S) and walk along the L edge to the highest point of the ledge. Turn
slightly L, step back as much as you can and do a RJ with a very hard R mid-air
curve to land on a flat ledge beyond the slopes (see 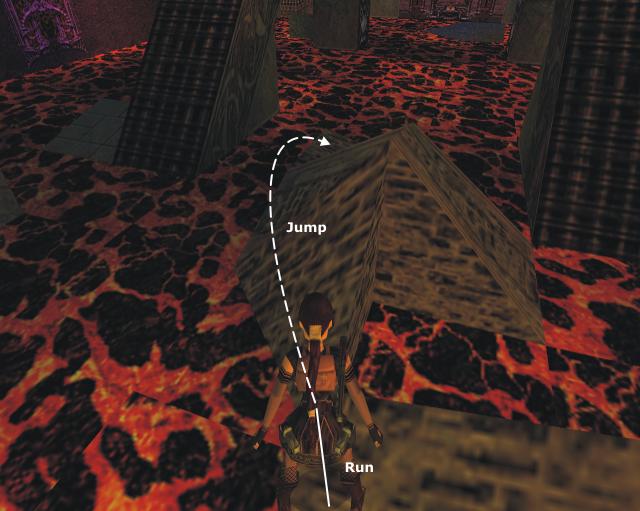 ).
Turn L (E), hop back and do a RJ over the ramp on another flat tile (mind
the ramp, it's trapped with burning floors, as
are all the similar ramps in the room). Turn L (N), walk to the edge and SJ
on the higher block, which is sloping but not slippery.
).
Turn L (E), hop back and do a RJ over the ramp on another flat tile (mind
the ramp, it's trapped with burning floors, as
are all the similar ramps in the room). Turn L (N), walk to the edge and SJ
on the higher block, which is sloping but not slippery.
Walk to the edge and the R corner and turn R to aim at the emerging slope.
Hop back, do a RJ+G and grab the edge. Shimmy R as far as you can, pull up,
slide a bit and jump with a hard R mid-air curve to land on the low triangular
ledge that's on the R of the next slope (see 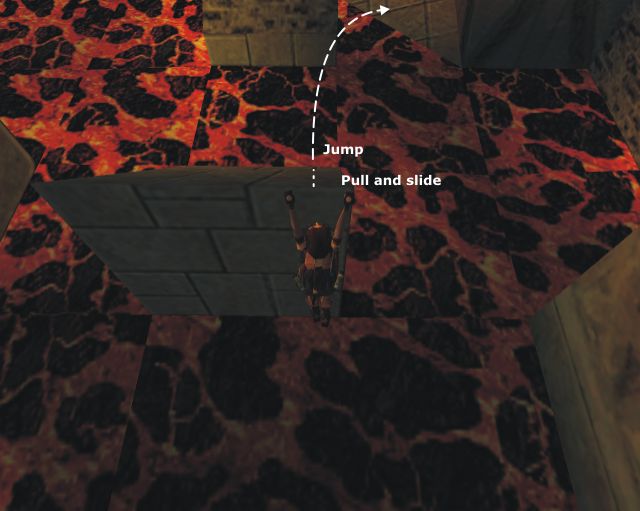 ).
).
Walk to the edge and the L corner, turn slightly L and do a SJ to the slope ahead. Slide and jump on the next flat ledge.
Do a SJ to the next one. There's a high ledge above and to your L (S) which you'll get to eventually, but first let's make a short and easy detour for the large medipack you can spot in the distance. Turn L (SW) and do a couple of SJs to pick up the large medipack. Return to the ledge next to the high one (hit Action when SJing from the medipack ledge to avoid hitting the upper wall).
Turn R (S), walk to the edge and the L highest corner. Jump up and grab the edge of the ledge above. Pull up. Turn around (N), hop back and do a RJ+G to the other high ledge. Run diagonally L (NW) to the edge, stopping one tile away from the upper edge on your L. Your next goal is a patch of cold solid lava, located beyond the high edge and below. The problem here is that said high edge is trapped with burning floors, so you must jump over it without touching it and the low ceiling won't make things any easier.
Position Lara as in this  ,
hop back and do a RJ over the trapped edge to safely land on the cold solid
lava below. The jump in itself is easy, but the initial correct positioning
is of the essence.
,
hop back and do a RJ over the trapped edge to safely land on the cold solid
lava below. The jump in itself is easy, but the initial correct positioning
is of the essence.
The Course By the Lava and the Ashen Stone
Go ahead (W), staying on safe ground close to the wall and SJ over the slopes when needed until you get close to an opening to your R (N). SJ in it. The planks barring the way are shatterable so shoot them and enter the dark room beyond. Go L (W) and run across the room to find another opening to your L (S) there.
Walk to its edge and do a SJ over the hot solid lava
to the safe one. Walk to the edge and the L corner, turn L (SE), hop back
and do a RJ to another safe patch below (see 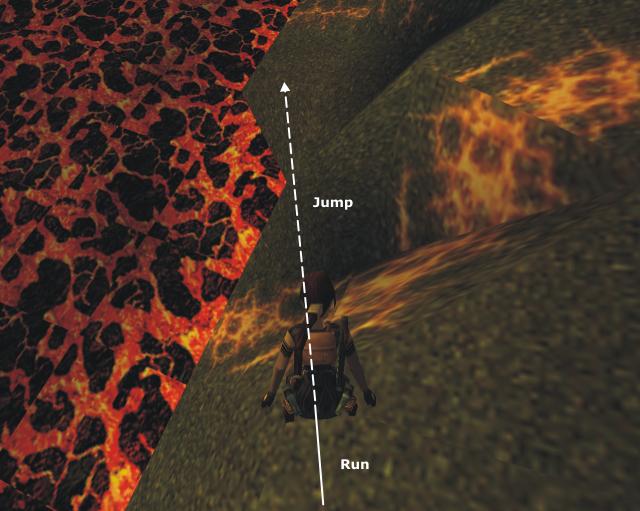 ).
Walk ahead and stop one step away from the hot solid
lava, hop back and do a SJ to another safe patch beyond. Do a SJ over
the next hot solid lava, taking off one step
away.
).
Walk ahead and stop one step away from the hot solid
lava, hop back and do a SJ to another safe patch beyond. Do a SJ over
the next hot solid lava, taking off one step
away.
Run ahead then R at the bottom of the slopes. Turn toward the rightmost one
(NW), standing one step away from its bottom and do a SJ to land on its flat
top. Turn L (S), step back once or twice and do a SJ to the triangular flat
slope top ahead. Turn R (W), walk to the tip of the triangle and do a SJ to
another triangular flat top. Walk to the wall, turn R (N), walk toward the
tip (but not to it) and do a SJ on yet another triangular flat top.
Pick up the Ashen Stone there, being careful
not to slide while doing so (see 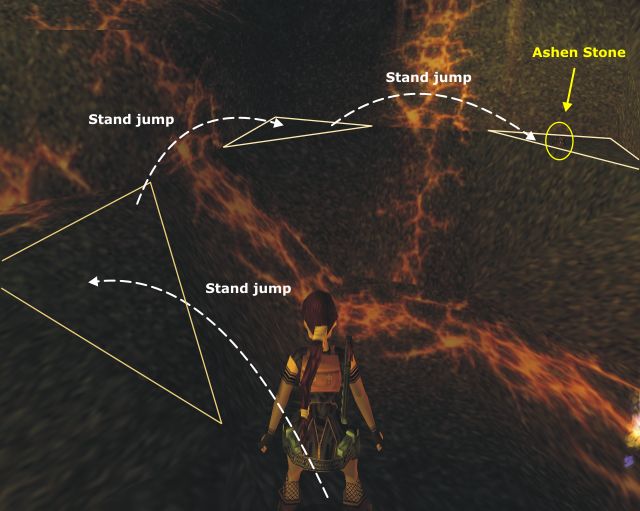 ).
Now that you've got it, let's make our way back to its receptacle.
).
Now that you've got it, let's make our way back to its receptacle.
Return to the first triangular top with SJs. Now you have to deal with a
nice triangular jump. Position Lara as in this 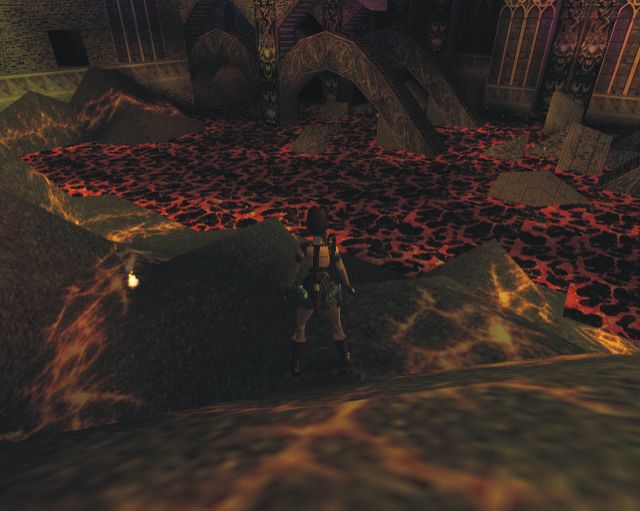 run with a R curve and jump with a R mid-air curve to land on safe cold lava,
at middle-height (see
run with a R curve and jump with a R mid-air curve to land on safe cold lava,
at middle-height (see  ).
Turn R (W), run up a bit then go L (S). Stop one step away from the hot
solid lava and do a SJ over it to land on a safe triangular spot against
the wall.
).
Turn R (W), run up a bit then go L (S). Stop one step away from the hot
solid lava and do a SJ over it to land on a safe triangular spot against
the wall.
Turn L (E), walk to the tip of the triangle, hop back and do a RJ with a
R mid-air curve as soon as you've cleared the wall. Immediately hit Jump to
backflip on the nearby emerged flat ledge (see 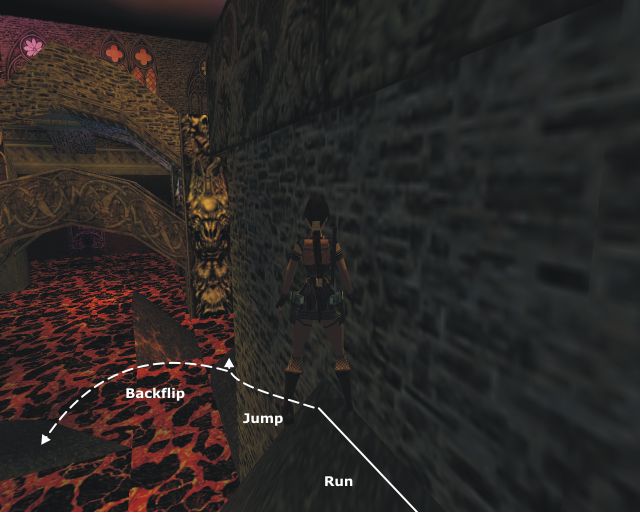 ).
Remember those two slopes you ignored a while ago? Time to use them now. Turn
L (SE) to face the first one and aim at its top, hop back and do a RJ to land
on said top. Slide, jump to the next one, slide and jump again with a hard
R mid-air curve (see
).
Remember those two slopes you ignored a while ago? Time to use them now. Turn
L (SE) to face the first one and aim at its top, hop back and do a RJ to land
on said top. Slide, jump to the next one, slide and jump again with a hard
R mid-air curve (see 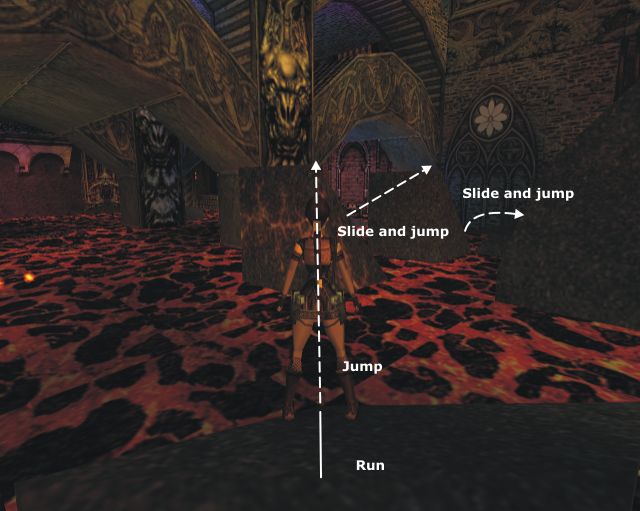 ).
You're back near the Ashen Stone Receptacle.
).
You're back near the Ashen Stone Receptacle.
-- High and Low --
Objective: Snatch the Silver Key and get away with it
Run ahead (S) to the Ashen Stone Receptacle and put the Ashen Stone in it, which opens a door nearby to your R and up in the wall. Go climb into the doorway then run ahead into the room to pick up some uzi ammo in the recess.
Turn around, go R (E) to the other side of the room where you'll see a closed decorated double door. Since you can push it open, run to it and press Action. Enter the alcove beyond.
What?!? All this for a small medipack??? Well, no. Not really. Pick up the medipack first, turn around to leave the alcove then go L into the first recess (S), turn around and look up: there's a jumpswitch up there. Flip it to open a wood bars door hidden in the opposite recess (N). Run into the latter and climb in the doorway.
Do a SJ from the edge to the ledge ahead then a RJ+G to the other one. Pull up. Walk to the L side of the raised floor ahead until Lara hops on its edge and turn L (W). Jump up to grab the extended ledge and pull up.
Turn L (S) and run diagonally L (SE) to climb on the second raised edge to your L (E). Go on its highest point, walk to the edge, turn slightly L and do a straight RJ to the ledge against the wall. Pick up the flares then go L (N).
Don't try to jump to the next ledge: it's too far. Run off from the edge to a lower platform (don't jump, you'd lose health). Turn R (E) and look up: there's a crack running in the wall above. Jump up, grab it and shimmy L and around the corner to pull up on the ledge.
Run ahead and pull up on the higher ledge then do a RJ to the next one. Your
destination is the lever you can see in the distance to your L (NW), on a
lower roof. Do not try to use the slopes ahead to get there. Turn L (W), walk
to the edge and the R corner and turn 45° R (NW) to aim at a triangular ledge
extending from the roof (see 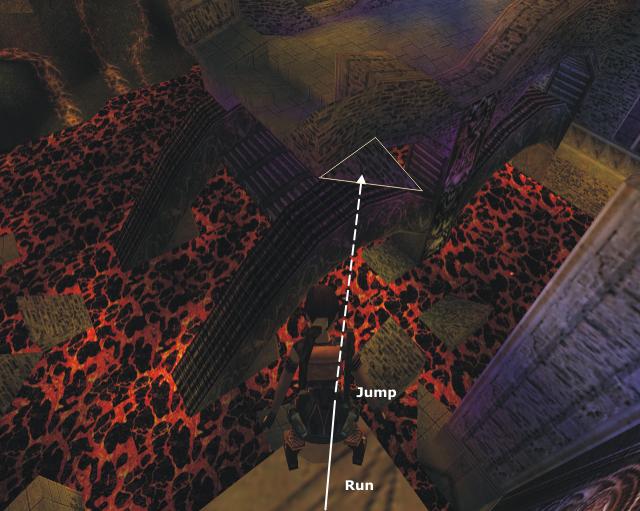 ).
Turn L (W), walk to the "wall" (which happens to be a slope) and hit Jump
+ Action to grab the edge. Pull up and slide.
).
Turn L (W), walk to the "wall" (which happens to be a slope) and hit Jump
+ Action to grab the edge. Pull up and slide.
Go R (N) and push the lever on the other side of the roof. A key appears in a room that's located beyond the opposite roof (i.e. the southern one). Your next problem is to make your way back there and there are two ways to do this. The first one is the quickest and simplest one, but will cost you a bit of health. The second one is longer and harder and will cost you life as well, but less. Considering the gain is not that important, I'd advise the quickest one although the safest one has more fun.
* Quickest one:
Turn around (W) and climb on the closest higher edge, standing on its rightmost and lowest point. Turn slightly R: you're aiming at the top of the cold lava patch below. Hop back and do a RJ to it. From there, return by the Ashen Stone Receptacle like you did the first time around but without the detour for the Ashen Stone (see "The Course By the Lava and the Ashen Stone"). Resume at the +
* Safest one:
Return to the triangular ledge you landed on by climbing on the high edge that's located L of the slope, turning 45° R then running off. Stand in the middle, facing E, and run off to land on the top of a slope below. Immediately jump to the other slope ahead, rolling in mid-air to change direction. Bounce from one slope to the other pressing R when you jump forward. When you reach the R edge of the slope, slide a bit then jump with a hard R mid-air curve to land on the nearby low triangular ledge.
From there proceed to the Ashen Stone Receptacle like you did the first time (see "The Course Over the Lava", four last § and the "The Course By the Lava and the Ashen Stone", without the detours for the medipack and the Ashen Stone).
+ Once you've reached the Ashen Stone Receptacle, return on the southern roof via the nearby room and the high ledges. When you've pulled up on the roof, run ahead (S) in the room. The Silver Key awaits you there.
Go around it before picking it up (i.e. face N, you'll see why in a moment) and proceed. You'll immediately find yourself chased by a sword spirit. Since it won't disappear in the water as its Cold and Fire cousins, you need to find another way to get rid of it. Remember that Sacred Sword you spotted before entering the Lava Room? That's what you're heading for now.
Sprint ahead (S) to the edge of the roof, roll and safety drop on the ledge below. Do a RJ+G to the other edge and pull up. Run with a L curve to the edge and do a 45° R angled jump over the burning edge to safely land on the cascade below. Turn L and rush toward the water but don't jump in it. Do a RJ to the nearby room with a hard L mid-air curve and wait for the spirit to explode on the Sacred Sword.
-- To the Other Side --
Objective: Enter the next part of the Garden of Stone
OK. You now have a Silver Key, but you still need a Rusty Key to access the Cathedral and continue your trip to Natla's Lair.
Leave the Cascade Room by sliding down the cascade then crawling through the CS and use the chain on your R (SE) to slide down to the terrace below. Return to the Fountain Courtyard by running down the swinging chains ramp all the way to the bottom, then go into the passage near the far L corner (NW). Run through the passage (mind the blades if you haven't set off all of them).
Run to the other end then go L (W). Notice the steaming tile then go L again around the corner of the arch. Turn L to face it, run to it and jump up to pull up on its top. Go to the opposite edge: there's a jumpswitch in front of you. Do a RJ+G to flip it, opening the nearby wood bars door. Pass the doorway to your L.
You're in a small, dark room with a closed wood bars door at the bottom of a short ramp to your R and a metallic decorated table to your L. The latter is movable, but first let's fetch some goodies.
Go to the far L corner (NE) but immediately hop back to avoid being crushed by the falling ceiling. Return there. There's a hole above (whence the ceiling came). Pull up in it. Go pick up the shotgun normal ammo and the large medipack then drop down back into the room below.
Go to the movable table. Its rightful place is the steaming tile you spotted a moment ago, beyond the Arch. Push/pull it there to open the wood bars door. Unfortunately, you'll unleash a cold spirit in the process. Hurry to the water hole in the Fountain Courtyard via the (formerly) trapped passage to get rid of it then return to the Little Dark Room.
Pass the door to your R which is now open. Leave the vase alone. It is indeed shatterable but only contains fire bugs (the beetles-type ones). Simply continue ahead until you reach the other side of the Garden of Stone
THE QUEST FOR THE RUSTY KEY
-- Swimming to the Main Room --
Objective: Reach the Main Room
The Siren and the Sword
You're now standing by a low CS which is the way back to the other part, in a small room bathed in shallow water. Go L (N) and cross the room to find a ladder in the other side and climb up into an upper room.
Not much to do here (except gazing at the blood soaked wall) so continue ahead (N) through the opening and eventually drop down into a lower passage, without trying to jump in the other opening: the low ceiling won't allow you to do so.
Go R (E) and draw your weapon of choice to take down the stray dog that will soon run at you to bite your throat open. Once it's down, notice the ladder to your R (S) in the recess, which will allow you to get back to the starting point and the other part of the Garden when needed then run ahead into the next room.
There's a passage in the other side of the room, going down in deeper water. Before going there, pick up the small medipack on the ledge to your L (N) then go into the shallow pool in the center to pick up some flares. Leave the water and run down then swim through the passage: you're now in the Lair of the Sea Hag (this one indeed deserves capitals).
Don't lose time (and possibly health) to try and lure her to a point where you could shoot her: she's not that stupid and won't follow you. If you have plenty of revolver ammo, you still can try and shoot her from the passage by aiming at her with the laser-sight. If she shows enough of her through the opening, and with patience and accuracy, a few bullets will do.
If she's dead or if you're really desperate for a shotgun, go pick up the one in the center of the room as well as the large medipack. Swim R (S) and up to the UW lever near the ceiling. Pull it to open a door in a nearby room.
Turn around (N), swim down and locate the opening near the bottom on your R. Swim through it, go L (W) to pick up some shotgun normal ammo then swim N through the newly opened door.
Cross the flooded room and surface in the next one to take a breath. Quickly dive again and swim L (W): a sword spirit is on your tail. Go R (N) and pull out of the water.
Turn to face the W wall and look into said water: you can spot some immersed
windows in it (see  ).
Draw your revolver combined with the laser-sight and shoot one of them (be
quick, the sword spirit is still around). Dive and swim through the broken
window.
).
Draw your revolver combined with the laser-sight and shoot one of them (be
quick, the sword spirit is still around). Dive and swim through the broken
window.
Swim L (S) through other windows which are already broken. There's a Holy Sword in the room beyond. This said, this particular spirit does have self-control, and it won't rush to the sword at once. Return to the previous room and surface. Turn around dive again and swim toward the broken windows, staying close to them. The spirit this time will give up and surrender to its attraction, rushing to the sword and exploding on it. You now can safely surface for air.
A Key, a Rush and some Spiked Balls
Turn around (N) and go pull up on the top of the partially immersed chandelier to your R (NE). Do a RJ to the wooden ledge ahead (E), turn around and look up. There's a jumpswitch here to your L. Flip it to open a couple of tall metal doors in another flooded room. Jump back in the water.
Swim ahead (W) to the other side of the pool and exit the water on a metallic ledge. There's another pool beyond. Jump in the water and swim L (S) and down. Swim ahead through the passage: the doors you just opened are here on each side. Pass the R (W) one first and pick up the small medipack there. Now turn around (E) and swim through the other door.
You're now in another pool. Swim up, surface and go R (S). Exit the water. There's a lever ahead. Push it to lower a block in the Holy Sword Room, revealing a key. Return there via the three pools.
Once you've passed the broken windows, swim L (E) past the arch then L (N). Pick up the Key on the now accessible window pane. Return to the Chandeliers Room and swim R (E) through the window you shot to be back in the Sword Spirit Room. Exit the water on the L (N) sandy ledge.
Go R (E) and run to the other side of the room. You'll see a closed double door to your L (N) with a keyhole. That's where you're going but first turn R (S) and go pick up the large medipack near the wall. Now run to the doors and open them by putting the Key in its Keyhole.
Pass the doorway. There's a closed wood bars door ahead and a switch to your R (E). Go to the switch and save: you're now in for a tight and dangerous timed-run.
Activate the switch and turn L to run diagonally to the door, which closes almost immediately. Step in the passage and let the door push you back in the previous room. Looks like you missed the timed-run, but in fact you've just got rid of 2 spiked rolling balls that would have crushed you otherwise. Return to the switch and repeat the timed-run, this time pushing your way in.
Pick up the shotgun normal ammo lying by the door and run down the ramp. Stop at the edge and let 2 other spiked rolling balls pass. You could now jump in the greenish water to your R, but you'd miss a secret which you're going to find right now (along with some more spiked balls)
Run off the edge to the top of the cascade then ahead (E). There's a wooden ledge in the other (dark) side of the room. Pull up on it but immediately hop back to dodge the spiked rolling ball you've just triggered. Pull up again. You'll see some shotgun normal ammo on the floor ahead and to your L. Don't pick it up. Don't even go where it is: it's a bait to have you immediately crushed by another spiked rolling ball. Go immediately L (N) instead to trigger the spiked ball, which unfortunately stops on the ammo and prevents you from picking it up.
Light a flare and SJ over the wooden slope to land in Secret #14. Pick up the revolver ammo and the small medipack there then return to the top of the greenish cascade.
Go L (S) and into the cascade. You'll soon be carried away by a strong stream to find yourself swimming by a stone ledge at the edge of the cascade. Swim R (W) in the recess and pick up some uzi ammo there. Surface, climb on the stone ledge and pick up the Uzi. The ledge is overlooking a large, high-ceilinged room with many ledges and balconies against the wall: you've made it to the Main Room.
-- To the Library --
Objective: Open the double door then enter the Library.
Go R (W) and stop roughly one step away from the wall, standing on the edge.
Turn L (SWW) to face a wall extending from the main one and notice the crack
in it. Hop back and do a RJ with a R mid-air curve to the crack, hitting Action
at the last moment to grab it (see 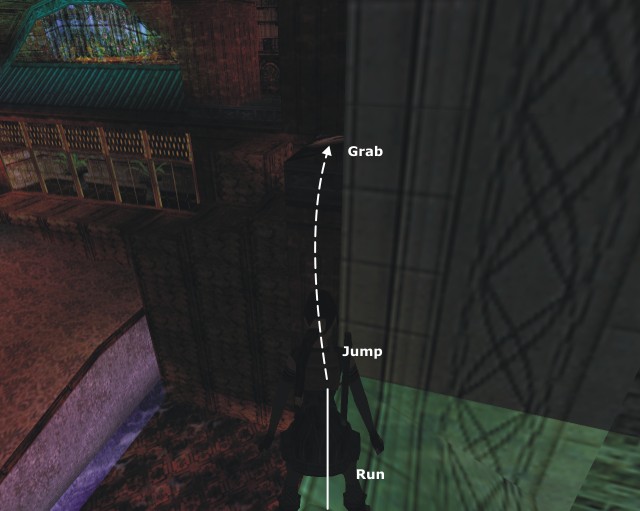 ).
Shimmy L and around the corner and let go to land on a wooden stairway.
).
Shimmy L and around the corner and let go to land on a wooden stairway.
Turn L (W) and climb in the alcove to pick up some uzi ammo there to your L. Return on the stairway, turn R (S) and climb down. Shoot the window to your R and go pick up the uzi ammo lying beyond. Turn around, return to the main room, go R (S) then L (E) at the closed double door to enter a small room.
Immediately turn around, run back to the Main Room and draw your weapon: you're savagely attacked by a skeletal harpy. Take advantage of the room to shoot it down without being hit too many times. Once it's down, return to the small room.
Shedding some Light on the Situation
First, shoot the window ahead (E) and notice the closed wood bars door on the wall beyond. Pick up the uzi ammo in the recess to your L (N) and shoot the window here as well if you so wish then turn around (S) and go to the switch. Save. It's indeed timed.
Activate the switch, opening the wood bars door you've just spotted. Turn L and run diagonally L to the window. Jump straight to land on a ledge below and to the left. Turn R while Lara stands up, run then jump through the door before it closes.
Mind the lit brazier in a hole in front of the door and go R (S) to pick up a small medipack on a half-buried crate. Nothing more to do there for now. What you've just done is in fact preparing the way for your upcoming task: the door will now remain open.
Return to the Main Room and wade ahead (W) in the shallow water to pick up some more uzi ammo near a wooden column to your L. Turn R (N), climb on the ramp and go L (W) to run off into the shallow water. Go R (N) then turn L (W) and pick up a Candle there.
Go R (S) to the end of the pool and the raised floor. Stand on its highest point and against the edge of the ramp and hit Jump + Forward. Lara will jump up, landing back in the water the first time but will land on the ramp the second one.
Once there, run ahead (E) to the edge and do a RJ through the open wood bars door. Run off to the lower part of the room (mind the brazier) and go light your candle on the Lit Brazier. SJ on the higher floor then do a diagonal R SJ from the doorway to the ramp.
Run up and R (N) at the corner then ahead to stop on the edge and the R corner. Turn slightly R to face the half emerged crate ahead and do a RJ to it. Do another RJ to the second crate, turn R (E) and do a RJ to land on the high ledge. Light the first Unlit Brazier. You'll get a camera shot of the far R corner in the Main Room (SW), but nothing happens yet (if you have trouble getting rid of the camera, keep "Look" pressed for one or two seconds).
Do a SJ from the edge to land back on the second crate, turn 45° R (NW) and do a SJ to the third one. Turn L and do a RJ to the western ledge. Light the second Unlit Brazier, turn around, do a diagonal R SJ over the corner to land on the northern ledge and light the third and last Unlit Brazier to eventually raise a block in the SW corner of the Main Room, next to the closed doors.
Drop the candle (you won't need it anymore), jump in the water and make your way to the newly raised block via the ramp.
Going Up
Climb on the block and pull up on the higher ledge to the W. Run R along it and around the corner until you find a ladder ahead (E). Immediately turn around to shoot the skeletal harpy that's now after you and pick up the uzi ammo it left behind once it's down (must have swallowed it somehow).
Run to the ladder, climb up until Lara's hands are one tile away from the ceiling and backflip on a carpeted ledge behind. There are black roses on a pedestal to your L: don't try and pick them up. You can't and would only alert one more skeletal harpy and you can't access anywhere from there either. What you have to do know is one of those nice banana jumps.
Position Lara as in this 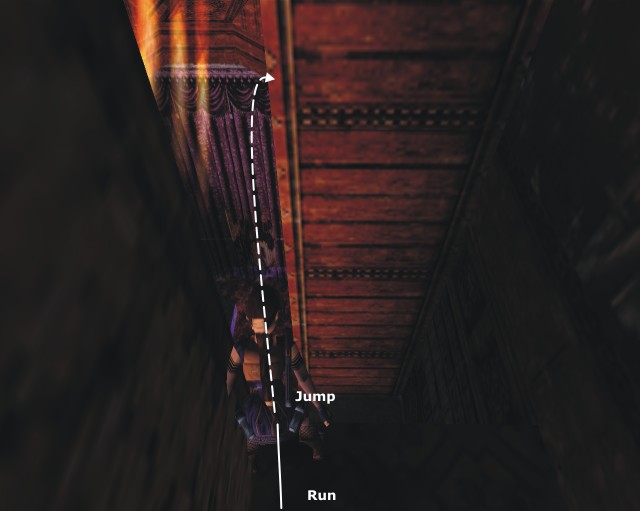 ,
hop back and do a RJ with a very hard R mid-air curve as soon as you've hit
the column to land on a ledge against the wall (see ).
Walk ahead to the slope, turn 45° L (NE), hop back and do a RJ to the other
ledge against the E wall.
,
hop back and do a RJ with a very hard R mid-air curve as soon as you've hit
the column to land on a ledge against the wall (see ).
Walk ahead to the slope, turn 45° L (NE), hop back and do a RJ to the other
ledge against the E wall.
Turn around, walk to the edge and against the R slope, turn 45° R (NW), hop back and do a RJ to land on the higher chandelier. Turn R (N), do a RJ+G to the other chandelier and pull up. Turn R (E), walk to the edge and the R corner, turn 45° R and do a SJ to the ledge below to pick up some uzi ammo. Return to the second chandelier like you did for the first one. Turn R (N) and do a RJ from the chandelier to the wooden ledge against the N wall.
Ignore the roses on the stone shelf, you can't pick them up either. Run L (W) a bit and draw your revolver as soon as you hear the flapping sound of bony wings to take down another skeletal harpy attacking you from the opposite corner. Once it's down, carefully go to the edge despite the distant camera and do a RJ to another ledge ahead.
Run along it and around the corner to the other end. Pick up the easy-to-miss uzi ammo hidden on the carpet there turn around (N) and go pull up on the higher ledge. Run ahead to the end (careful at the corner with the low ceiling) and climb the ladder on the N wall to the top. Once there, go R and let go.
Immediately turn around and draw your weapon to take out yet another skeletal harpy (looks like there's a whole congress of them in this room). When it's permanently out of the way, turn S if needed and do a RJ+G to the first beam ahead, pull up then do another RJ+G to pull up on the second one. You're as high as can be, so time to go down a bit.
Rushing Down
Locate the leftmost opening in the passage ahead (S) and below, face it, walk to the edge and do a SJ to it, holding Action to avoid hitting the upper wall. Enter the passage, pick up some more uzi ammo then go R (W) to the other end. There's a switch there to your R. Save and prepare yourself for a timed-run.
Activate the switch, opening the double doors near
the SW corner down below. Sidejump R twice, run and jump holding Action to
avoid hitting the beam. You'll land safely in the pool "inside" the ramp (see
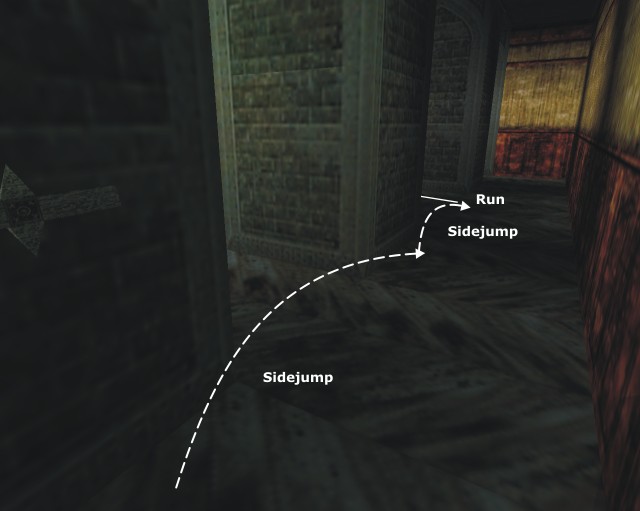 and
and 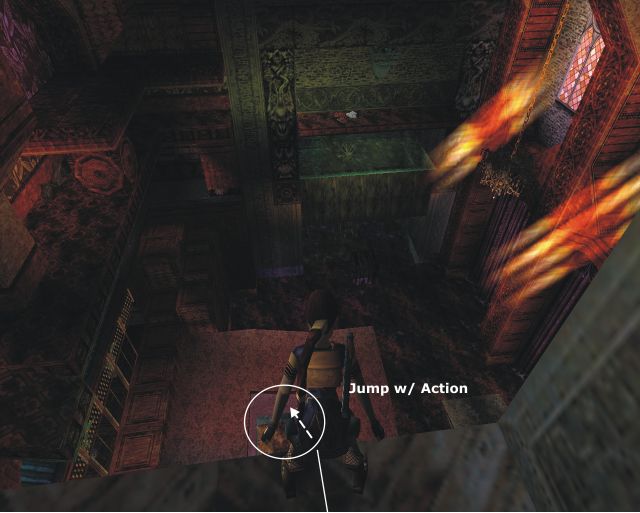 ).
Quickly pull up on said ramp and rush L then L again. Sprint to the doorway
staying L. Release sprint before passing them and run on the grey block to
the left before the door closes and stop, avoiding falling in the lava
beyond (see
).
Quickly pull up on said ramp and rush L then L again. Sprint to the doorway
staying L. Release sprint before passing them and run on the grey block to
the left before the door closes and stop, avoiding falling in the lava
beyond (see 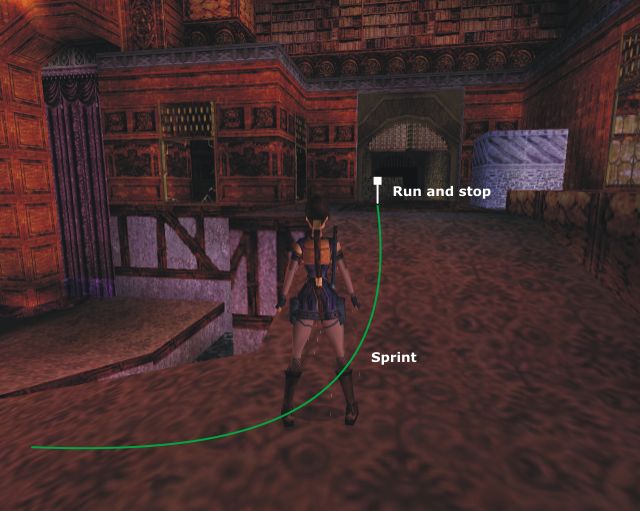 ).
).
Look up. There's a MS above you so jump up, grab it and swing over the lava to reach the other side of the passage. Go R (W) through the opening and draw your weapon to dispatch the stray dog that runs at you. Once it's down and before going any further, let's find a secret.
Turn L (S) after the opening then L (E) again. The bars in front of you are climbable. Climb them to the top and pull up through a broken window into an upper room which is Secret #15. Pick up the revolver ammo ahead then the large medipack and the uzi ammo in the R (S) side of the room. Return to the previous one.
Locate the windows in the other side beyond a lovely fountain. Go shoot them and pull up through one of them in a higher passage. Go R (N) and run ahead to find yourself in a place full of bookshelves: you're now in the Library.
-- The Library and Beyond --
Objective: Find and use the Prophecy of Chaos to access the Rusty Key
Finding Something to Read
Impressive place, isn't it? No time to gaze at the decor, though. As soon as you enter a stray dog comes to play. Shoot it down then run L (W) along the wall. Climb onto the window pane to your L and pick up the shotgun normal ammo there. Run off to the floor and continue L then L again (S) at the corner. Run to the other side of the passage then climb in the recess to your R (W). Push the lever there to open a couple of doors on the top of the bookshelves.
Leave the recess and draw your weapon to take down another stray dog (the place is literally crawling with them. Maybe they're the reader-type stray dogs) then return to the Library. Go R (E) and locate the upward ramp in the middle of the room to your L (N). Run up and pass the leftmost doorway (NW).
Go L (W) but turn around before the corner to shoot down a stray dog. Go to that corner now and the recess beyond to pick up some uzi ammo. Leave the recess and run ahead (E). Turn R (S) at the bookshelf to be back on the top of the shelves in the Library itself and safely shoot down another stray dog from your safe position. While you're at it, notice the small shelf holding two books on your L (E) and the closed door on your R (W). Return into the passage.
Go R (E) after the passage and continue through nooks and corners until you find an opening to the R. Go in it but immediately turn around to shoot down another stray dog (told you there were lots of them).
Run through the opening and along the passage, turn R at the end and draw your pistols: after the stray dogs, here comes the bat. Shoot down this vermin nicely and quickly. By the way, you're now in the Dark Arts Section of the Library.
Don't sheathe yet: the planks on your L and R are shatterable so shoot them both as well. Go into the R (W) recess and pick up some shotgun normal ammo there on a pedestal. Now run into the other recess (E), pick up the uzi ammo on your way then go R to the end and look up: there's a shatterable ball up there. Use your revolver + laser-sight to shoot it then quickly draw your pistols to shoot down another bat (no need to waste precious ammo on those ones).
Return to the Dark Art Section. The wood bars door there is now open. Jump over the fire then go L (E). There are spikes over there. Stand close to them in the L corner and wait for them to retract to quickly run into the recess to your L. Pick up the uzi ammo then return to the Dark Art Section, dealing with the spikes again.
Run toward the fire then L (S). Turn R (W), jump over the spikes when they're retracted and pick up the shotgun normal ammo then turn around to rid the place of a third bat. Go into the recess and look up to spot a jumpswitch to your R. Flip it to open another wood bars door nearby. Return to the Dark Arts Section, jumping over the spikes again.
Run ahead (E) past the newly opened door to reach the Potion and Poisons Section. There's another closed wood bars door there to your R (W). Since it's closed, run ahead then R (W) before the recess and stop at the next one to your L. Look up: another shatterable ball up here. Shoot it with your revolver to open the nearby door.
Go pass said door and run to the end of the passage to pick up your prize: the Prophecy of Chaos. You found it now let's place it where it belongs.
Return to the Dark Art Section and jump over the fire there to get back in the passage by the Main Library, then the Library itself through the first opened door. Go L (E) and run along the top of the bookshelves to reach the Small Bookshelf you already spotted. Put the Prophecy of Chaos on it to open the tall metal door in the opposite side of the room.
Exit Stage Right
Turn and run along the top of the shelves to the other side and pass the newly opened door to enter a small room. The Rusty Key is there, eagerly waiting to be picked up. Proceed. The door ahead is still as closed as can be though, so turn around (E) and run to the L corner (NE). Look up to spot the jumpswitch to your R and flip it to open the door.
Run across the room (W) and pass the doorway. Run R into the corridor beyond, stop at the corner, turn L and draw your weapon to take down a stray dog waiting in ambush there. Once you've got rid of it, continue along the corridor to find a ladder at the end.
Climb to the top and pull up in another corridor. Run through it, cross the next room and continue along the next corridor to eventually find an opening to your R (S). You're in fact back near the starting point.
Drop down into the room below turn around and locate the ladder ahead and to your L (SE). Climb to the top then go R around the corner to let go in the passage. Go R (S), run off from the hole in the far R corner then continue ahead until you reach the starting CS to the R (W). Crawl through it to be back in the first part of the Garden of Stone.
TO THE CATHEDRAL
Objective: Use your hard-earned keys and enter the Cathedral.
Note: If you haven't got the Silver Key yet, refer to 'The Quest for the Silver Key" Section and find it before resuming at the paragraph below.
OK. You're back here with both keys, so now is time to use them.
Run up the ramp and leave the small dark room to be back in the passage giving onto the trapped one. Return to the Fountain Courtyard via the latter. If you haven't lit the brazier here, go pick up a candle at the top of the swinging chains ramp, light it on the lit Candlestick and come back to the Fountain Courtyard to light the brazier.
Jump into the water hole and swim through the tunnel. When you reach the flooded room at the end, stay low to the floor and swim along the R wall to set off a ceiling blade without being hit. Turn L after the blade, surface, turn around and pull up on the low ledge ahead.
Jump and hit Action to grab the MS above. Swing ahead then R and let go to land on a higher ledge. Go to the switch there and save: timed-run ahead! (and a long one at that)
Activate the switch to open a wood bars door behind
the ramp in the area where you first lit the candle. Hit Look to get rid of
the camera, roll to turn around and run off into the water with a L curve
and start swimming L (see  ).
Stay close to the ceiling then swim L again and R into the tunnel. Swim to
the end, pull up, run and SJ over the slope. Start sprinting along the trapped
corridor then SJ at the end with a L mid-air curve to land on the raised floor
(see
).
Stay close to the ceiling then swim L again and R into the tunnel. Swim to
the end, pull up, run and SJ over the slope. Start sprinting along the trapped
corridor then SJ at the end with a L mid-air curve to land on the raised floor
(see 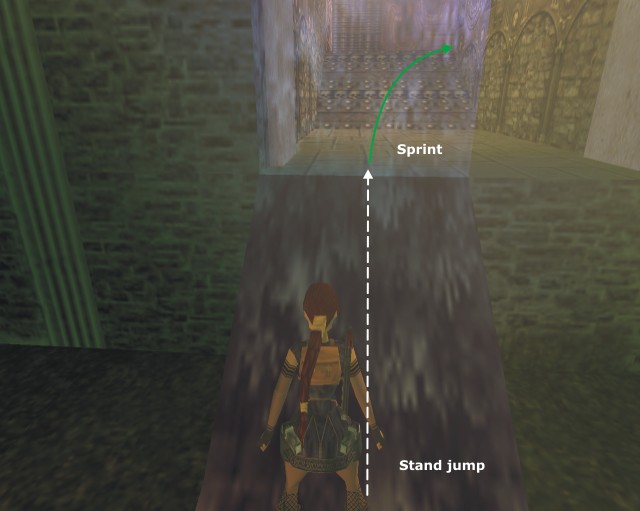 and
and 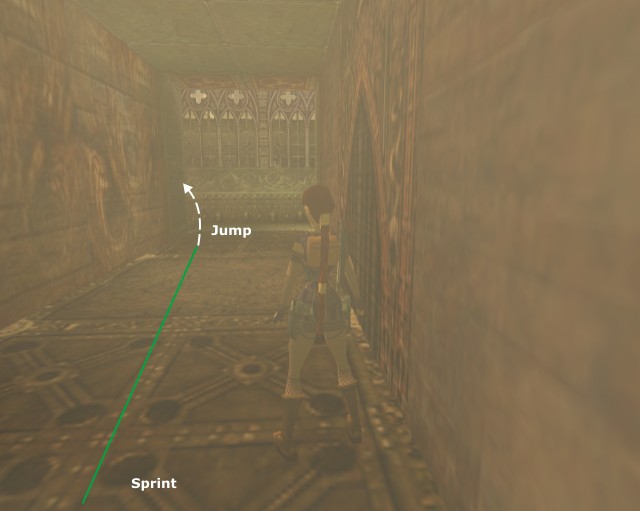 ).
Sprint L then R and run down the ramp with a L curve. Before reaching the
bottom, run off into the dark passage below (see
).
Sprint L then R and run down the ramp with a L curve. Before reaching the
bottom, run off into the dark passage below (see 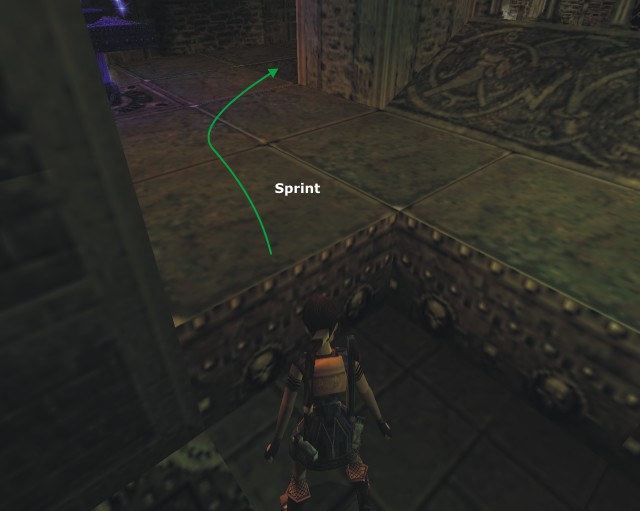 and
and 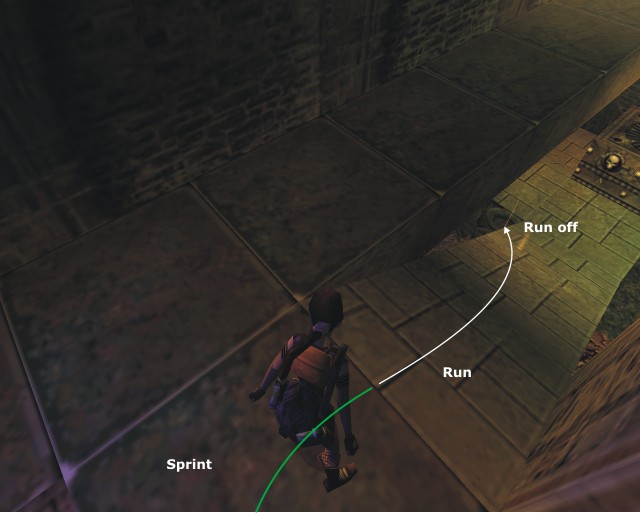 ).
Finally, run past the door ahead before it closes.
).
Finally, run past the door ahead before it closes.
Run R (N) into the dark room you're now in then R (E) again at the corner. Go to the other side of the room where you'll find the Rusty Keyhole and the Silver Keyhole on each side of an inverted pentagram on the wall. Use both keys on their respective keyhole opening a tall metal door to your L (N).
Pass through the doorway and jump into the water hole ahead. Swim a bit further to enter the Cathedral.
==== In this part, you should have found...
Enemies: Fire Spirit, Sword Spirits, Cold Spirit,
Fire Bugs (can be avoided), Stray Dogs, Sea Hag, Skeletal Harpies,
Bats
Items of note: 1st Candle, Ashen Stone, Silver
Key, Key, 2nd Candle, Prophecy of Chaos, Rusty Key
3 Secrets
some Traps - 4 Timed-Run
== Part 3: Cathedral ==
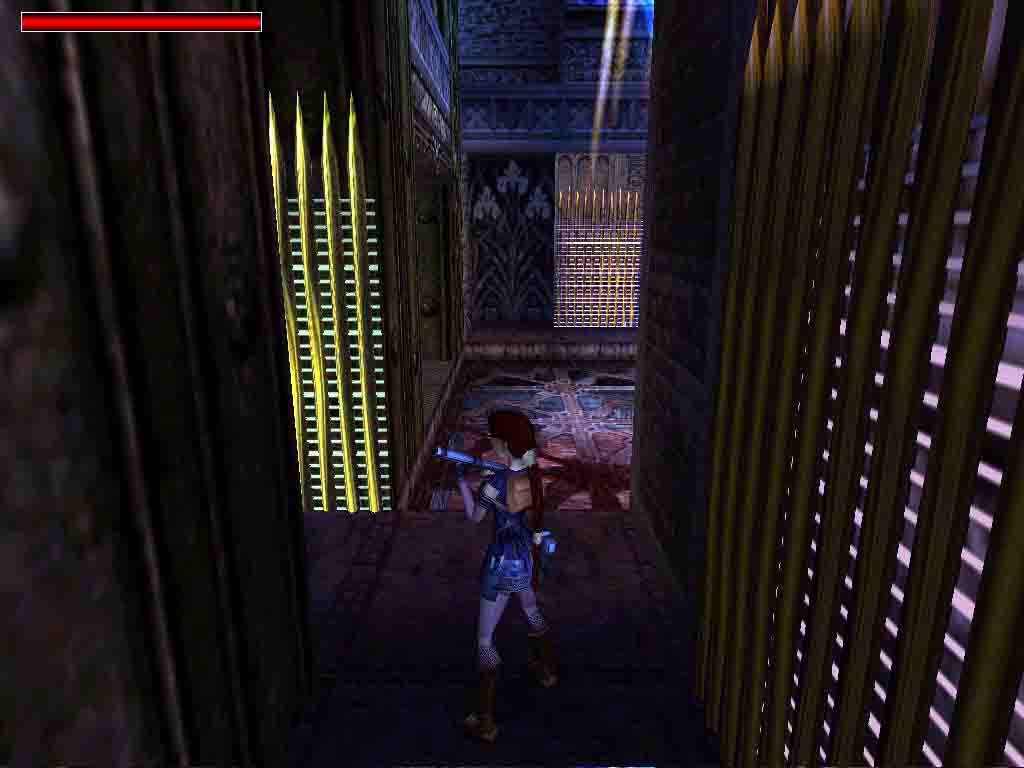
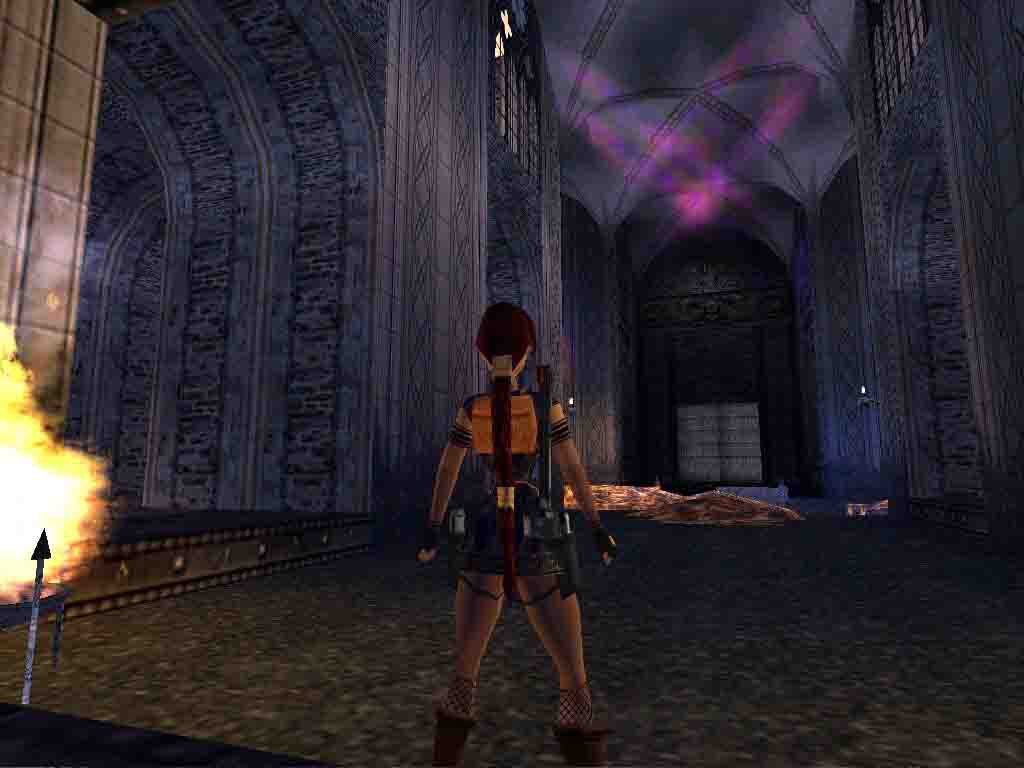
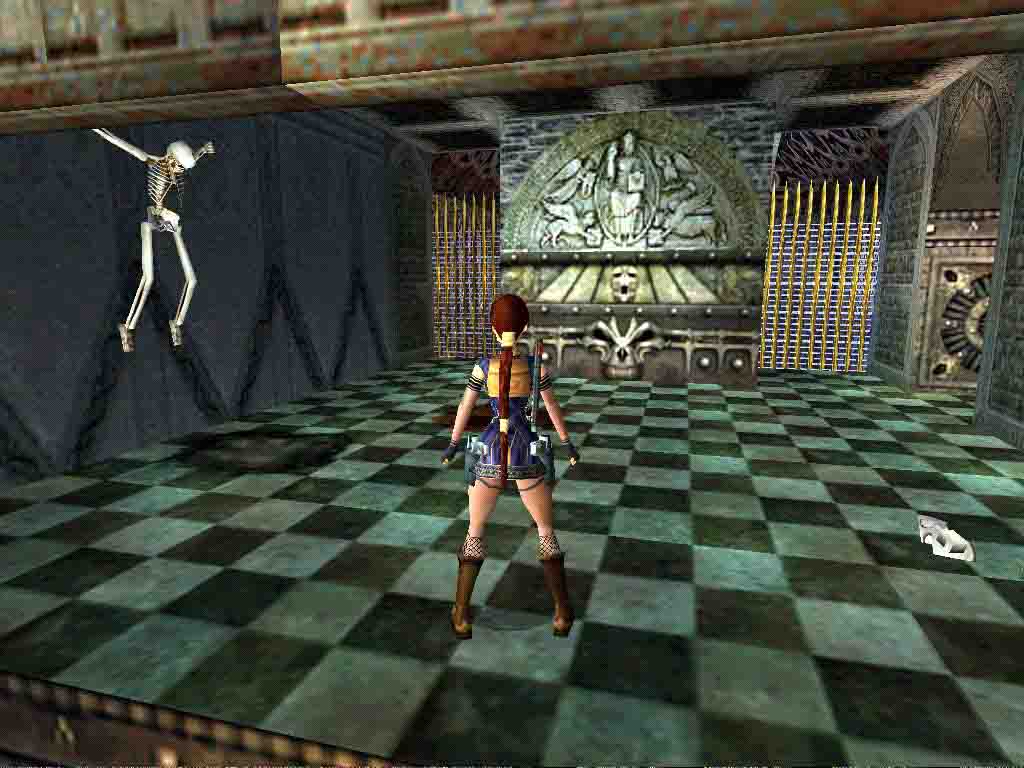
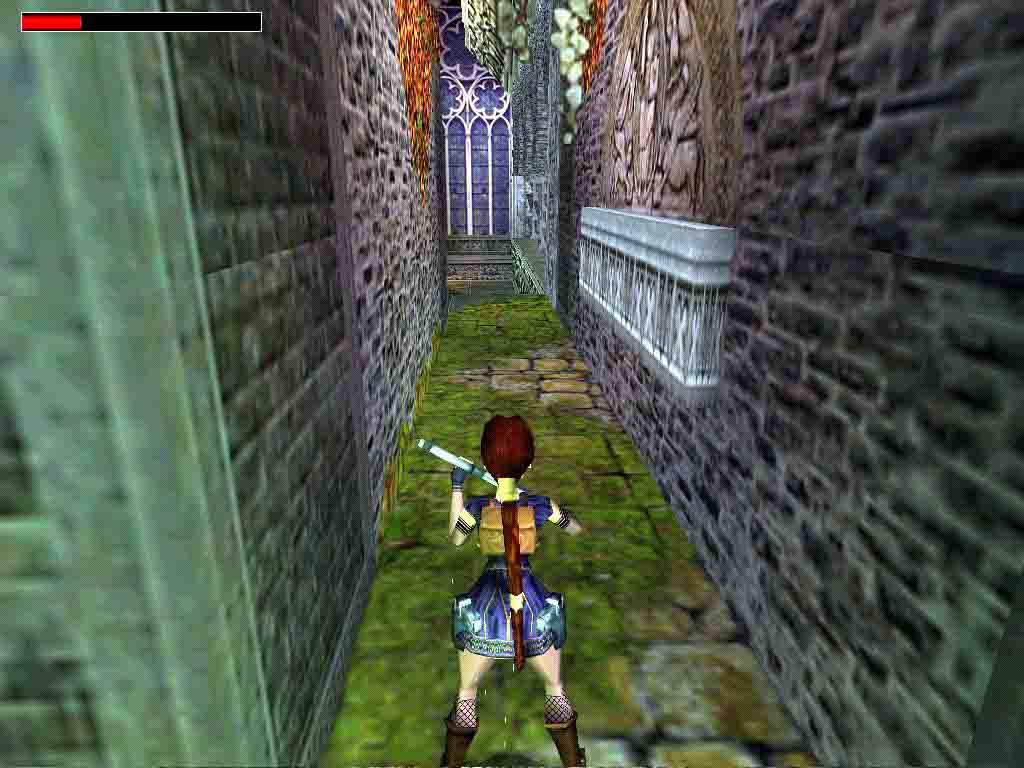
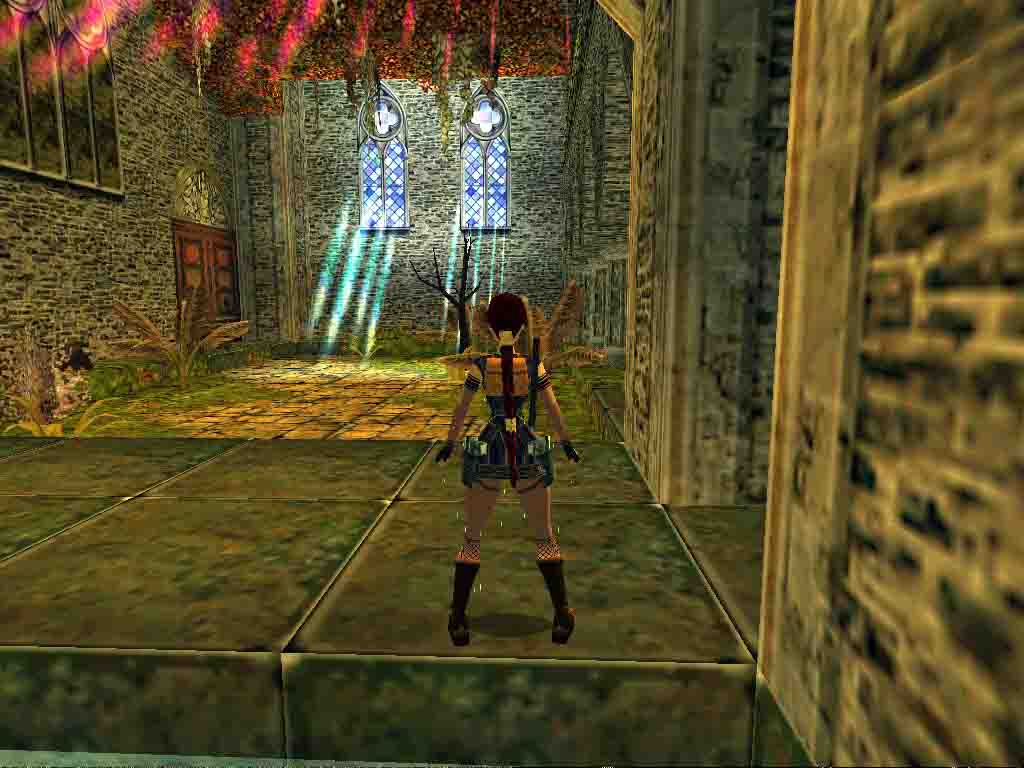
 Secret 16:
Important: In this level you need to shoot things on two occasions to progress further. As you won't find any revolver ammo here, make sure you've got enough bullets left to shoot them both.
Level objective: Find two angels and use them to access Natla's Hideout
You're getting close. You only have to make it through the Cathedral to finally reach Natla's Lair. But this also means some tough tasks, so, for now, let the stream carry you along the UW tunnel until you can surface in a water hole and pull out of the water.
-- From the Machinery Rooms to the Nave --
Objective: Reach the Nave of the Cathedral.
You're now in what looks like a machinery room. Go R (E). There's a ladder
ahead in the corner. Go to it, jump up, grab it and climb three times (see
 ).
Now you can see the source of that noise you're hearing since you've set foot
in the place. Wait for the blade door to be closed
for the third time (i.e. just before it fully opens) and backflip.
).
Now you can see the source of that noise you're hearing since you've set foot
in the place. Wait for the blade door to be closed
for the third time (i.e. just before it fully opens) and backflip.
Turn around (W) and run to the recess in the far R corner (NW) turn L once there to spot the jumpswitch. Flip it to open a door on the lower floor. Return there via the ladder, this time jumping to it when the blade door is fully open.
Turn around then go R (N). The door ahead is still closed so climb in the alcove to your L and activate the switch there to open it. Leave the recess, pass the doorway, immediately turn L and draw. Kill the stray dog before it can bite you.
Run ahead (W) to enter a new part of the machinery section. Ignore the black rose on the pedestal: just like the ones you saw in the Garden of Stone, it can't be picked up. Consider the chain in the center instead. Grab it and climb up until Lara's waist is aligned with the edge of the hole above and backflip.
There's a closed wood bars door to your L (W) and an opening to your R (E). Let's take care of the former first. Run ahead and pass the hole to its R. Enter the first recess to your R (E) and flip the jumpswitch there to open the nearby door.
Return to the room and pass the doorway (W). Both golden double doors here can be pushed open. Go to the first one to your R (N), hit Action to open it and go pick up the shotgun normal ammo in the little room beyond. Go to the second double door, open it and enter the little room to pick up some uzi ammo. Return to the chain room.
Run ahead to the opening (E). Walk to the edge and one step away from the L wall, turn L to face the alcove in the corner and do a SJ with a L mid-air curve to land in it. Immediately roll to turn around, draw a good weapon and take care of the skeletal harpy that's now after you. Once you're done with it, push the lever to your R to open a door in the room below then drop down in said room.
The newly opened door is right in front of you (N). Pass it, run ahead and enter the next room. Lara will insist on looking at something up and to your R: a small inverted pentagram. Turn to face it and use your revolver combined with the laser-sight to shoot it. After a nice explosion, two tall red doors open below.
Pass through the doorway (E) and enjoy the fly-by: you've reached the Nave.
-- One Angel in Hell --
Objective: Find the first Angel and make your way back to the Nave
Once the fly-by is over, run ahead and draw your weapon of choice: 2 skeletal harpies watch over the place and they obviously don't appreciate intruders. You can take advantage of all the room you have here but mind the lit braziers and above all the hot solid lava and the lava pit when moving and jumping.
Once they're down for good, run to the edge of the pit through the central
alley, staying R. Locate the safe pillar on your L (NEE) and do a RJ to it.
Turn around. There's an opening in the pit wall below and to your L (SWW).
Walk to the edge and L corner of the pillar, turn L to face the opening and
step back once. Do a simple SJ into the opening (see 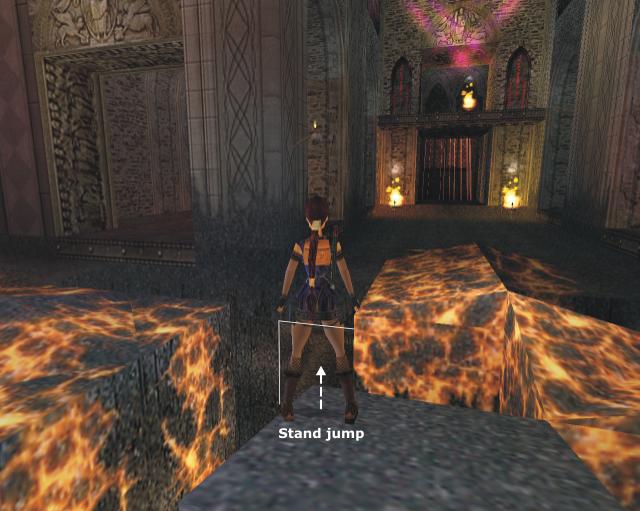 ).
).
Crawl through the low CS to enter a low passage. Don't go L (S) it's a dead end and would you drop and grab the edge, a deadly one. Go R (N), drop down at the end holding Action to grab the edge (there's lava down there) and shimmy L and around the corner. Pull up and pick up the shotgun normal ammo in the alcove.
Drop down again, shimmy R to hang from the previous edge, let go and immediately hit Action again to grab the crack below. Shimmy R until you can pull up (but you're still crouching). Turn R (W), drop down and hold the edge. Shimmy R again until you find yourself above a slope. Let go, slide a bit, backflip, roll in mid-air and hit Action to grab the edge of the opening ahead. Pull up and walk to the edge.
The Hellacious Room
That's one impressive room, isn't it? And quite dangerous too. To your R (NW), bathed in fire, is your current goal: the first Angel. In the center of the room, you can spot some (currently) still spinning blades and a couple of golden platforms, which are of the collapsible type. If you look L (S), you'll see a statue on a platform. There's a ladder under the platform topped by a burning floor, and a small inverted pentagram above the statue. Last but not least, you can spot a lever below and the room is bathed in scalding water.
Now that you've got an idea of the situation, start by shooting the small inverted pentagram above the statue to your L. The good news is that the fire on the Angel platform is now turned off. The bad news are that the blades have started spinning and that you'll have to make your way to the lever once you've picked up the Angel.
Let's go get that Angel first: do a RJ from the opening to the platform and pick up the First Angel. You can't see it from where you stand, but the burning floor under the statue platform is now turned off. Easy so far.
Your next goal is the golden platform to your
L. Turn L (S), walk to the edge and the L corner, turn slightly L and do a
SJ+G to grab the edge of the platform. Hit "Look" to get rid of the distant
camera and shimmy R, stopping before the corner. Wait for a blade
to be just about to pass above you, pull up, turn slightly R and SJ to land
on the central pillar, immediately run off and grab the edge of the second
platform (see 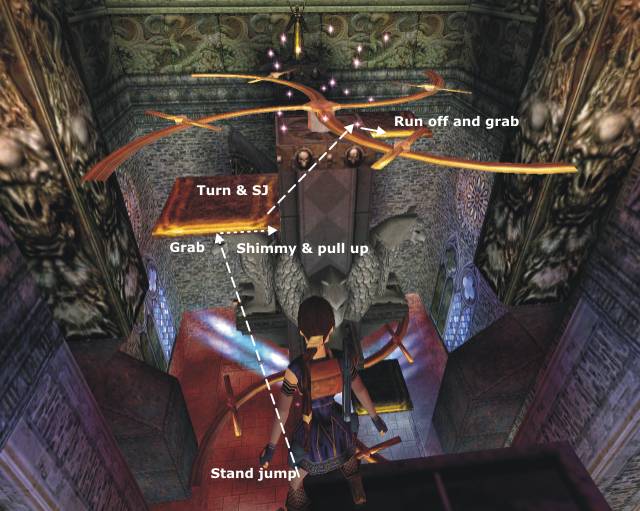 ).
).
Shimmy R stopping at the corner, wait for a blade to be about to pass and
pull up. Do a RJ to land on the R slope next to the formerly burning floor
under the statue platform (see 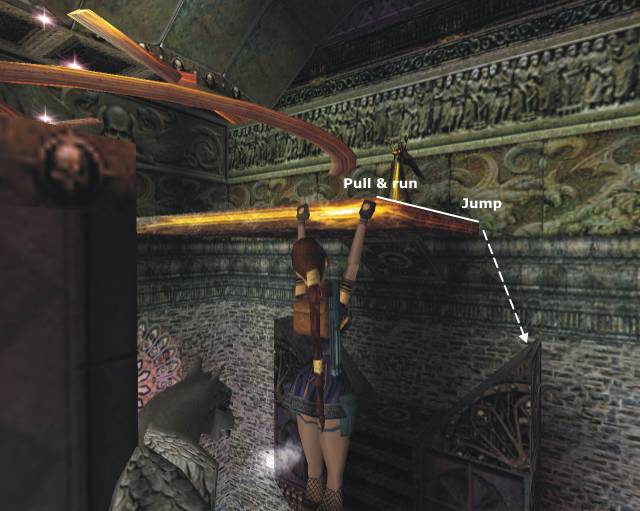 ).
You'll slide on the now safe top of the ladder. If you turn around
and look down, you'll see two more gold platforms
and another spinning blade. Dealing with those
is a bit easier than dealing with the previous ones.
).
You'll slide on the now safe top of the ladder. If you turn around
and look down, you'll see two more gold platforms
and another spinning blade. Dealing with those
is a bit easier than dealing with the previous ones.
Drop down and climb down until Lara reaches this position 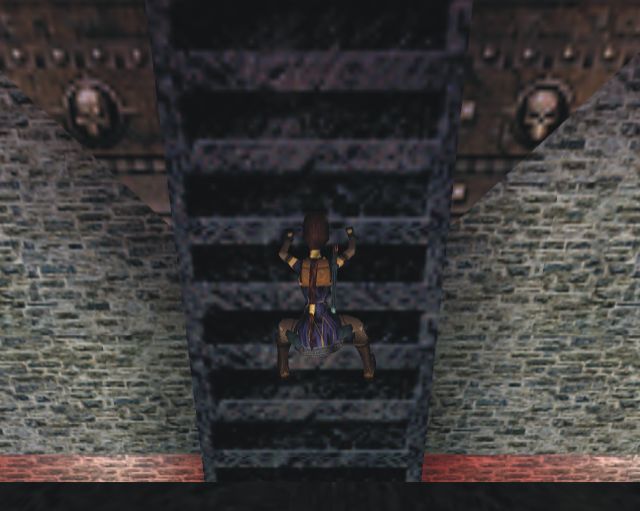 .
Since you can't see the spinning blades position, save. Backflip and roll
in mid-air to land on the first platform. Turn L to the second one and SJ.
Immediately do a RJ over the spinning blade to land on the lever ledge (see
.
Since you can't see the spinning blades position, save. Backflip and roll
in mid-air to land on the first platform. Turn L to the second one and SJ.
Immediately do a RJ over the spinning blade to land on the lever ledge (see
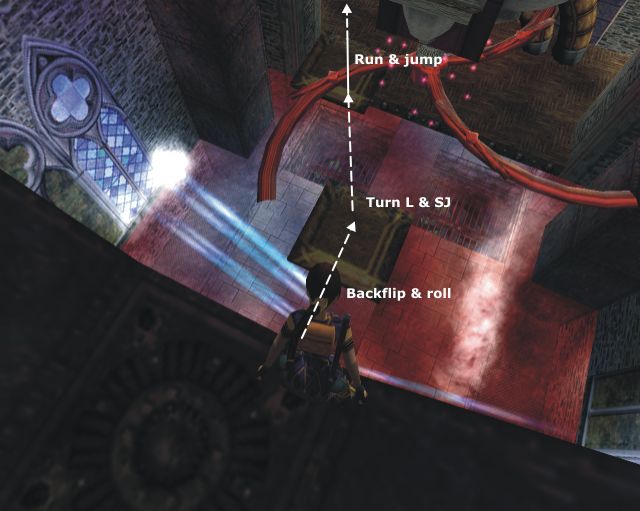 ).
You've made it!
).
You've made it!
Dodging and Bouncing
Push the lever to drain the room of the scalding water then go to the opposite side (S) and pick up the small medipack on the R of the ladder. Turn around and go pass through the opening in the R (E) wall near the far R corner (NE). Run into the passage, stop at corner and turn R.
What you see now means you're not there yet (don't you love surprises?). First obstacle: a lateral blade and a spiked wall. It's a pure question of timing, but your chances will be better if you stay on the R, and as close as possible to the blade and turn slightly L before trying to run through. Needless to say, saving here would be appropriate. Second obstacle: a blade door. This one's easy. Position Lara in the middle and simply wait for it to be fully open before running through.
Run to the end of the passage. You'll find yourself at the bottom of a looong shaft lined with slopes. You now need to make your way up using said slopes. Turn around and jump up to grab the edge of the first one. Pull up, backflip and roll in mid-air to change direction while keeping Jump pressed to bounce on the second slope. From this slope bounce 10 times then hit Action to grab a ladder ahead. Climb twice then backflip, roll in mid-air and hit Action to grab another ladder. Go R and let go in the opening.
You'll find yourself between two big wheels. Turn R (S) first and run off in the hole. Go L (E) to the end, running along the wheel and turn L (N) again. Pull up and activate the switch there in the recess to your R to extinguish a fire nearby, allowing you to go back in the Nave.
You still need to open an access to the second Angel. Run off into the wheel hole you came from, crawl under the wheel and pull up at the other side (S). Go flip the jumpswitch ahead: another wheel is set in motion in another room, alerting a skeletal harpy as a set of tall metal doors open.
Return to the wheel hole, crawl under it then through the CS in the middle to the other wheel hole. Keep crawling to the other side of the wheel and pull up on the R opening. Run off, draw your weapon and pass the triangular opening to be back in the Nave. Shoot down the skeletal harpy that's now roaming around then locate the hole behind the brazier. Go to it, turn L (W), walk to the edge, hop back and do a RJ+G. Pull up on the safe side alley.
Run ahead then R (N) and cross the room to pass the newly opened doors, SJ over hot solid lava when needed and enter the room beyond. Time to find the second Angel.
-- One Angel in a Garden --
Objective: Find the Second Angel and make your way back to the Nave.
Run diagonally R (NE) then into the passage to the R (E). The second Angel lies beyond the wheel hole, but first let's go for the last secret of the series.
Go to the edge of the wheel hole and the L corner,
sidestep L once then turn slightly R. Hop back
and do a RJ with a very hard L mid-air curve to land in an alcove on the L
and in the other side of the hole (see 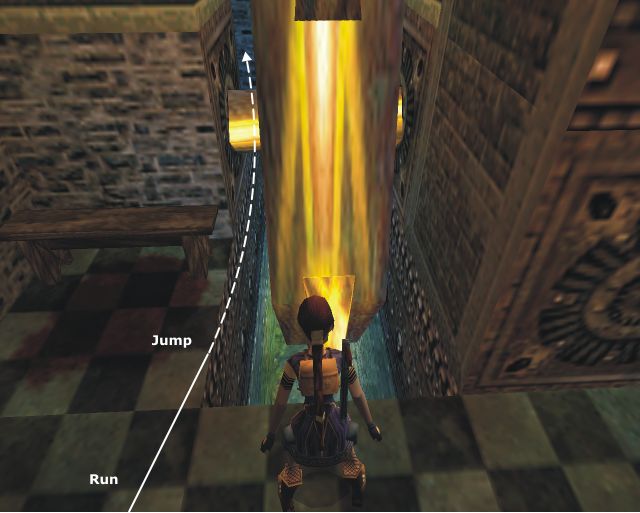 ):
you've reached Secret #16. Pick up the large
medipack there and jump in the hole.
):
you've reached Secret #16. Pick up the large
medipack there and jump in the hole.
Go L (S) in the UW tunnel. Don't go L (E) there, the fan at the other end isn't dangerous in itself but creates a strong stream that will suck you there to death. Go R (W), swim up and exit the water hole.
[If you want all the kills, run along the passage drawing your weapon on the way and turn L once you've entered the room to quickly take down 2 stray dogs then return to the water hole.]
Turn around and SJ on the grassy block behind the hole. Run ahead to its highest part, turn around again (S), jump up and grab the MS above. You're in for a long swing. At junctions, always take the greenery covered path so you don't accidentally let go and fall in the room below. Swing to the end: you'll eventually find yourself above a crack. Let go and immediately hit Action again to grab it, shimmy to the R and pull up in the CS.
Crawl ahead, turn around (S) and grab the edge. You're now hanging over another part of the garden and there are 2 stray dogs waiting to tear you apart down there. If you've got enough revolver ammo left, you can try to take them down from up there, using the laser-sight. If not, you'll have to fight them as soon as you'll land. Whatever you do, make sure Lara's healthy enough then drop down into the other garden, losing some health in the process.
Once down there and the area secured, run W. There's a pool ahead but don't dive yet. Go into the first recess to your L (S) and climb the foliage-covered wall until Lara's hands are one tile away from the ceiling. Backflip to land on a high ledge behind.
Turn R (W), climb onto the higher ledge then SJ on the next one. Turn R (N), run to the middle, turn R again (E) and drop down: there's a jumpswitch there. Hit Action to flip it, opening an immerged wood bars door in the pool. Don't jump in the water yet, turn L (N) instead and go pick up the shotgun normal ammo in the corner.
Dive and swim through the doorway then diagonally L (SW) into the leftmost recess. Pull the UW lever to your R to open two doors in the room above. Leave the recess, swim L (N) and pull out of the water. Immediately draw you weapon and put an end to the miserable and bony existences of 2 skeletal harpies.
The Second Angel is here on the leftmost pedestal. Pick it up as well as the small medipack on the rightmost one then turn around (S) and cross the room through the rightmost door.
Run ahead in the next room, SJ over the hot solid lava then go R on the safe side alley: you're back in the Nave.
-- To Natla's Hideout --
Objective: put the Angels where they belong and enter Natla's Lair
Run across the central alley then L (E) to the R edge of the pit. Jump on the pillar like you did the first time, walk to the edge then SJ on the passage before the tall metallic doors. The Angels Receptacles are here on each side. Go to the first one and make sure Lara's facing the flat part before using the first Angel on it. Repeat with the second one. The doors open.
Turn around, pass the doorway and enter Natla's Hideout.
==== In this part, you should have found...
Enemies: Stray Dogs, Skeletal Harpies
Items of note: 2 Angels
1 Secret
many Traps
== Part 4 and Epilogue: Death and Resurrection ==
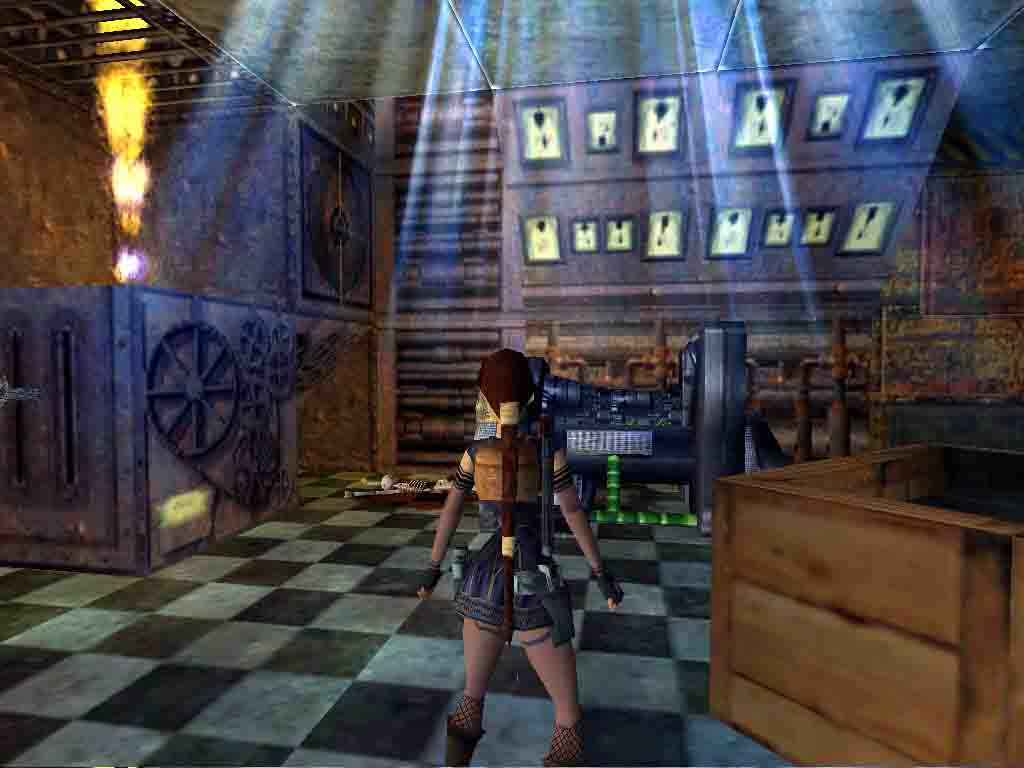

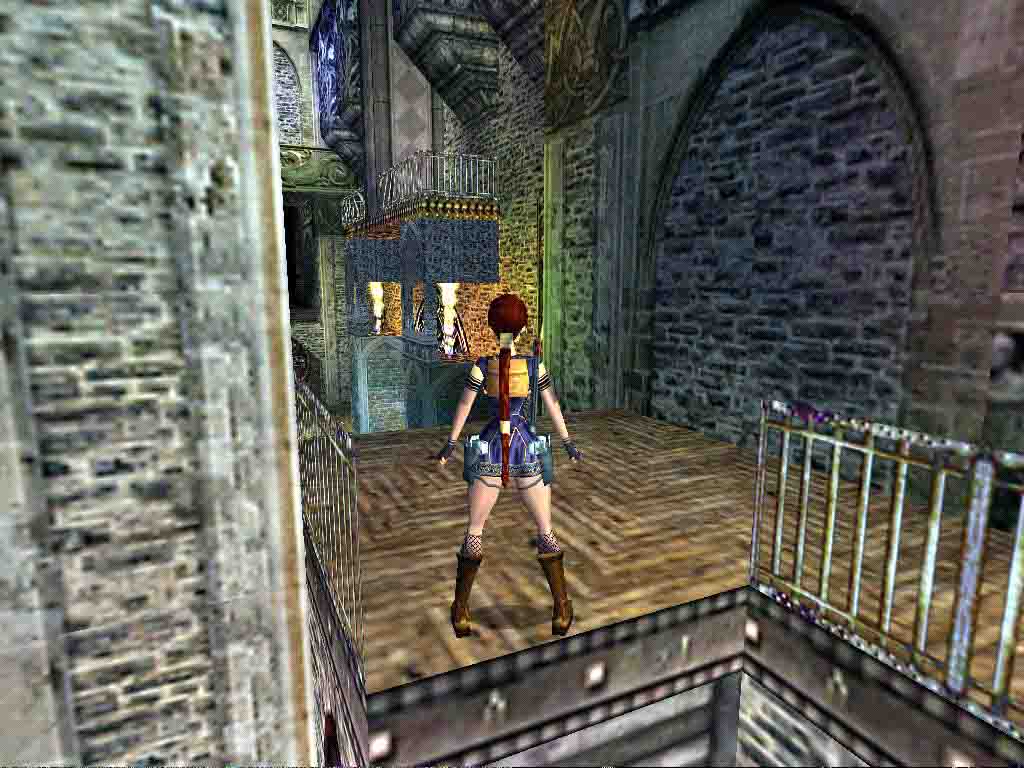
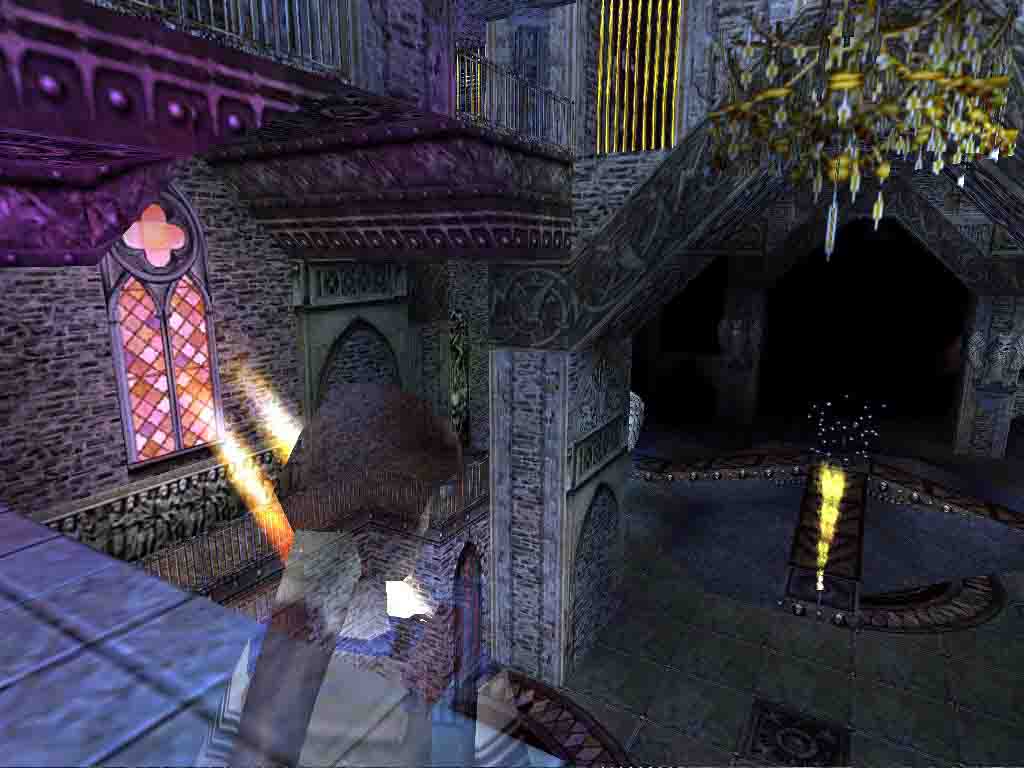
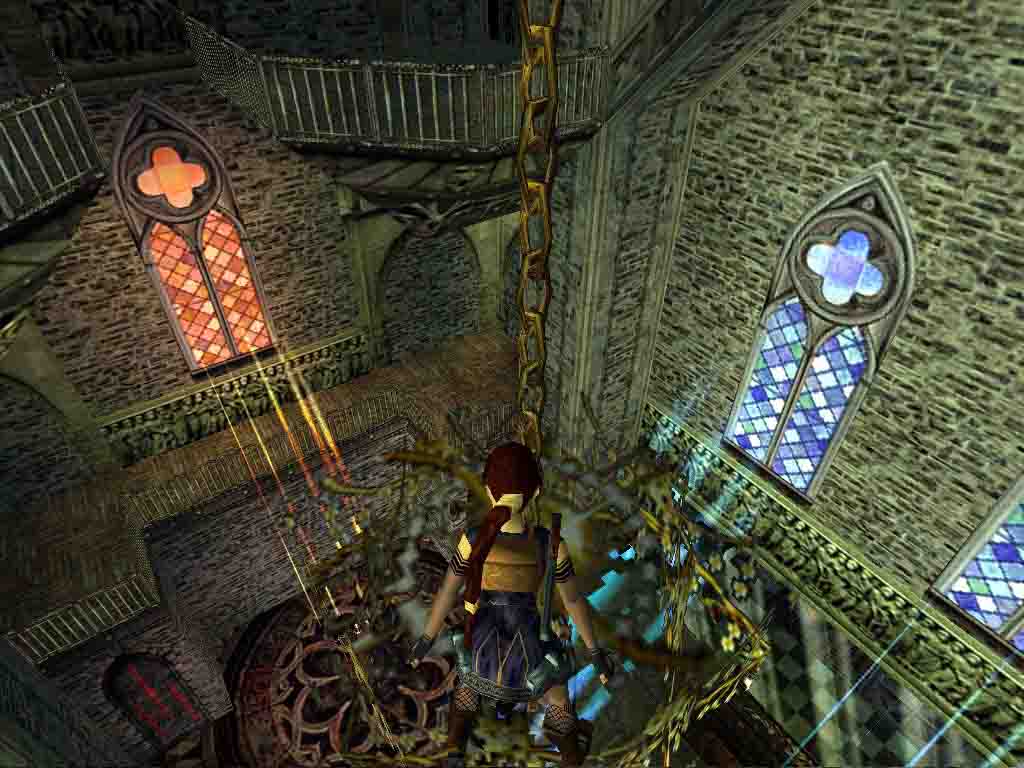
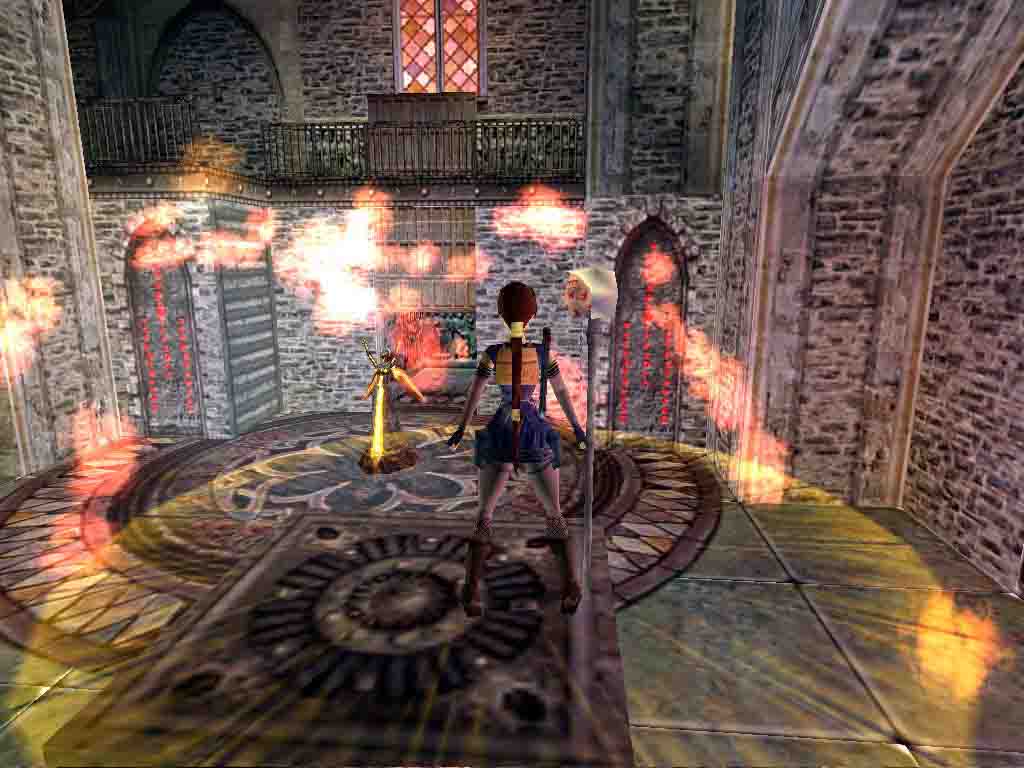
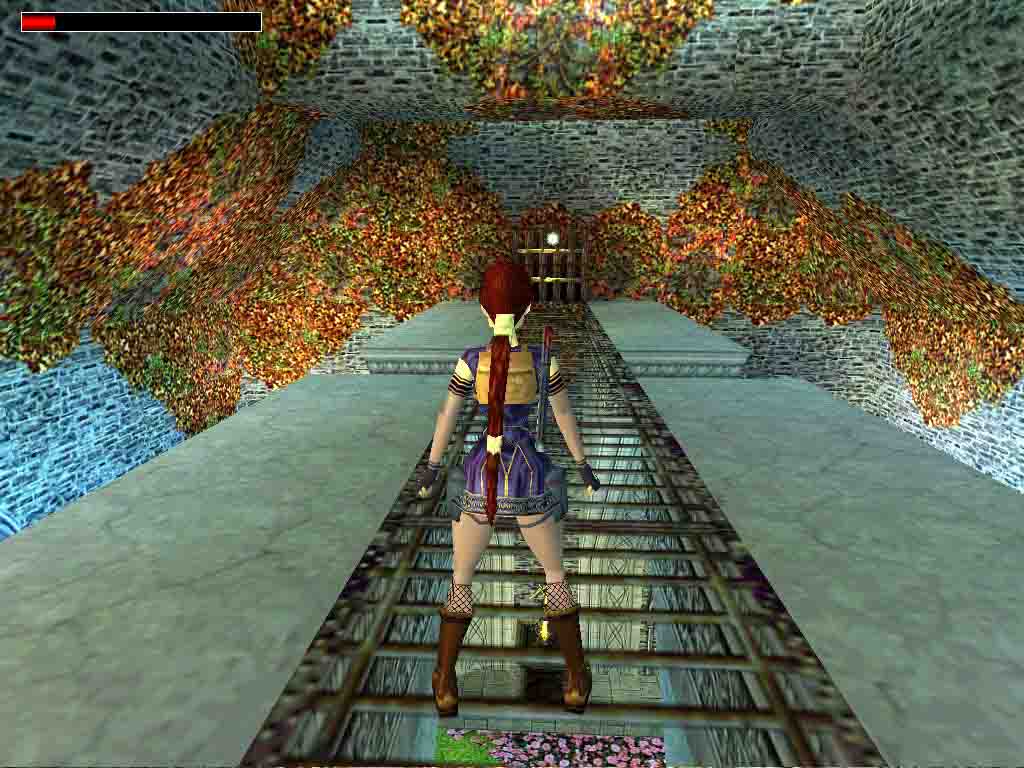

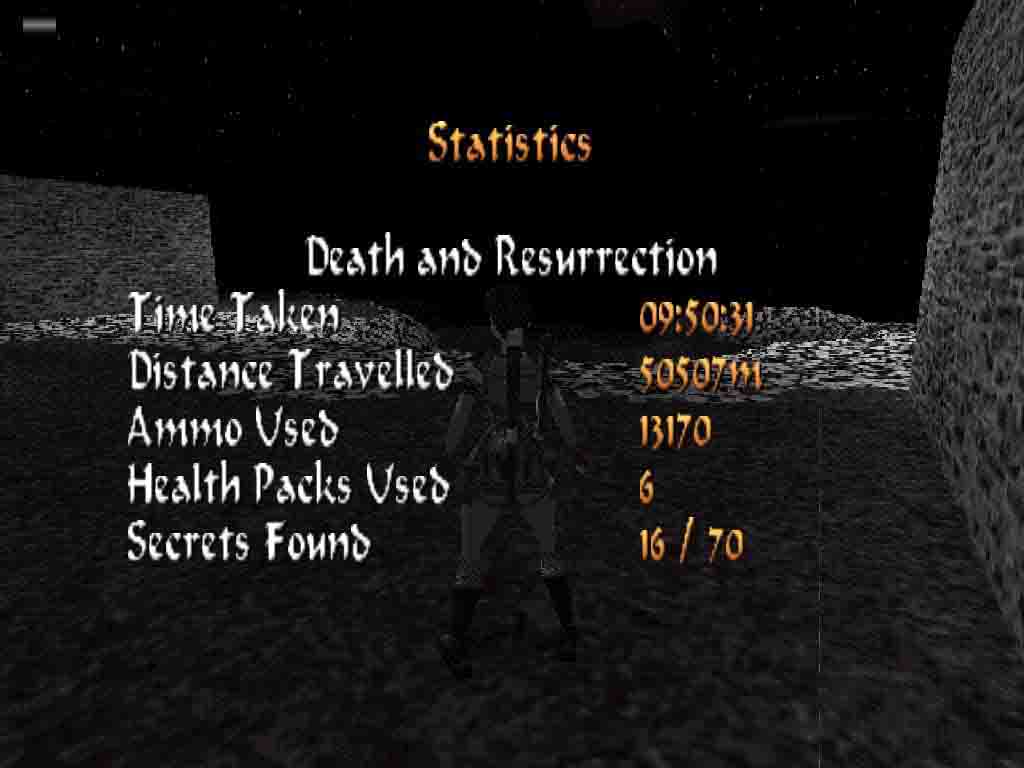
You've got the five Gems, you've reached her hideout. It's now time for reckoning and get the prize of your hard work: put an end to the reign of Chaos and bring some order to the planet.
-- To the Sanctum --
Objective: Enter Natla's Sanctum
Run ahead to enter a machinery room, similar to the one you visited in the Cathedral. You can spot a low CS in the far R corner but it currently leads to a dead end, which you're going to fix right now.
There's a ladder in front of you (E), next to the skeletal remains of the poor guy that worked here. Don't climb it yet, the flame you can see spurting from the block to your L (NE) prevents you from doing what has to be done up there. So the first thing to do is activate the switch on the block to turn that flame off. And, mind you, it's timed, so save.
Activate the switch, hop back, sidestep R once and
SJ on the block. Run with a R curve to take off from the corner. Jump with
a mid-air L curve and grab the ladder,
probably taking a bit of damage from the steam
(see 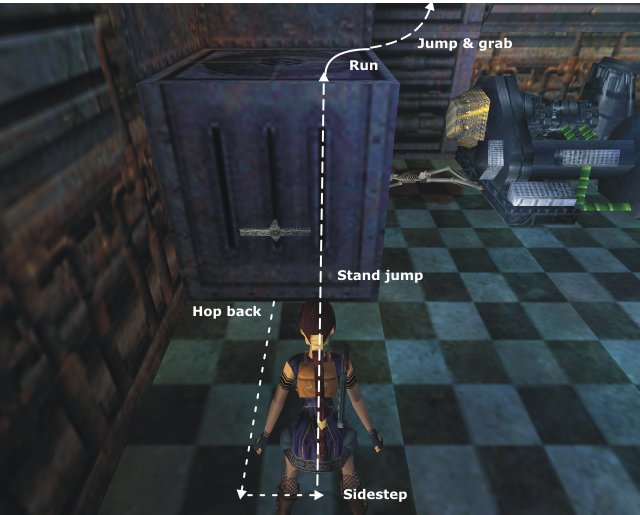 ).
Shimmy L before Lara puts her legs on it (she'll be faster this way) to get
closer to the L side but not on it. Wait for her to put her legs on then climb
up until you're above the edges of the hole.
Go L and around the corner then let go. Sidejump R over the fire,
turn R to the switch, activate it to open
a door nearby then quickly sidejump R before the flame comes back (see
).
Shimmy L before Lara puts her legs on it (she'll be faster this way) to get
closer to the L side but not on it. Wait for her to put her legs on then climb
up until you're above the edges of the hole.
Go L and around the corner then let go. Sidejump R over the fire,
turn R to the switch, activate it to open
a door nearby then quickly sidejump R before the flame comes back (see 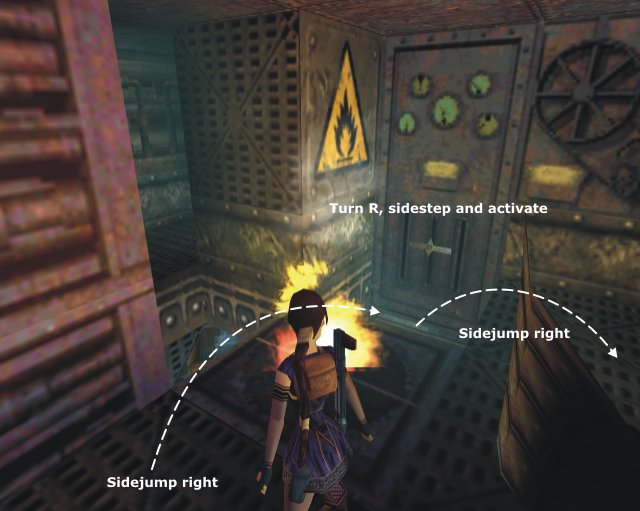 ).
).
Return to the ladder (mind the flame and the fire), grab it and go R around both corners to let go on the other side of the hole. Run R (E) to the end of the dark corridor and pass through the door you've just opened to your R (S) to find yourself in a partially flooded room. Turn R (W) then wade to the far L corner (SW) and flip the jumpswitch there on the L (S) wall, opening a door in the low CS in the lower room. Return there via the corridor and the ladder (the steam is now off).
Go R (S) and to the far L corner. Crawl through the low CS past the newly opened door to eventually stand up near a big wheel. Turn R (S) and climb on the upper floor. You can see Natla's sanctum through a window bay.
Go L (E) and locate the sign that reads "Revival Status - Insert Chaos Gems at 100%". Turn R past it: you'll find a switch there to your R. Activate it to open a door in a passage below.
Return to the big wheel and between the two columns. Run off to the lower floor, then into the hole to your R (E) to find yourself in a passage dimly lit by a couple a braziers. Go R (S) through the door you've just opened and run to the end of the passage. The wall there is climbable. Climb to the top and pull up in Natla's Sanctum. Now is time to resurrect the b... charming lady.
-- Resurrection --
Objective: Find a receptacle for the Chaos Gems
That's it, you're there. After all those efforts and travels, you've finally reached Natla's Sanctum! But you still have to find a way to use those Gems.
Run ahead (S), staying L past the central altar and to the other side of the room. You'll see a spear on a block there: you'll see later what nice use you'll do of it. For now turn L (E) before the statue then L (N) at the door to find a ladder in front of you. Climb to the top and pull up. You see those burning pillars ahead and R? You'll now have to pass on them.
Run to the edge and the R side. Turn slightly R to face the first burning pillar, hop back and do a RJ+G to it. Don't pull up. Shimmy R first as far as you can and pull up in the very corner, where the flame can't set you on fire. Wait for said flame to temporarily turn off and do a RJ+G to the next pillar. Pull up.
Your next destination is the ledge you can spot ahead and L, between two columns. Turn slightly L, wait for the flame to turn off and do a RJ with a slight R mid-air curve then hit Action to grab the edge. Pull up.
Run ahead (N) on the balcony then pick up the Key on a pedestal to your L. Return to the edge (S) and drop down into the room below.
Turn around (S) and run to the end of the room, past the Spear Block. You'll find the Keyhole there in the middle of the S wall. Use the Key in it to raise a block on the L (E) balcony then go there via the ladder you already used.
Do a R U-turn around the fence and go pull up on the newly raised block to your R. Walk to the edge, turn slightly L (SWW) to aim at the ledge, hop back and do a RJ to it. Run to the other end and stop two steps away from the wall. Sidestep to the edge, turn slightly R and do a SJ to the balcony below, holding Action to avoid hitting the upper wall. You'll lose a tiny bit of health upon landing.
Run R (N) to the edge, staying on the L, turn slightly L once there, hop back and do a RJ+G to the (non-burning) pillar ahead. Repeat to the next pillar then the ledge to your R between two columns, this time with a slight L mid-air curve before grabbing. Pull up, run ahead (N) to the end of the balcony and push the lever there to your R to raise another block on the Ladder Balcony.
Return to the edge, drop down in the room and go back to the Ladder Balcony. Go pull up on the first raised block, turn 135° L to face the second one and simply run on it. There's a hole above you so turn around (N), walk to the edge, jump up and pull up on the floor above.
The balcony you're on is pretty much closed at the end by golden bars doors. Run L (NW) to the fence and next to the R column, turn 45° R to aim at the chandelier, hop back and do a RJ+G over the fence to grab the edge and pull up on the chandelier.
Walk to the edge and the L corner. Turn slightly L to aim at the L part of the balcony ahead, hop back and do a RJ over the fence. Go L (S) and run to the end to find a switch there on your L. Activate it to open one of the golden bar doors on the other side of the balcony. Go L (N) and run through the newly opened door.
There's a ladder there to your L, but ignore it for now: the ledge it leads to is currently ended by a very closed door. Go R (E) instead and run along the ledge, SJing over the slope in the middle, to find another ladder at the end to your L (N). SJ, grab it, climb to the top and pull up. Run to the end and activate the switch to raise a block in the room below and open the door at the end of the opposite ledge.
Turn around (S) and run to the other end, then off to the ledge below. Go R (W) to the other end (i.e. the open door). Once there, turn R (N) and walk to the edge. Turn L to face the ladder and do a SJ+G to it. Climb to the top, pull up and run to the other end of the ledge past the newly opened door.
Turn around at the opening and drop down in the passage below. Turn L (E), run to the wall then go L (N) to stand at the edge. Turn 45° R to face the chandelier hanging from the center of the ceiling and do a RJ on it. Turn around (S), sidestep L to the corner, turn 45° L to aim at the opening next to the high ledge in the center, hop back and do a RJ to land on the other part of the balcony.
Go L (N) then L again (N) and run to the fence. Hop back and do a RJ over it and the other one ahead. Run ahead to the wall then L (W) and activate the switch to raise a block on the L side of the middle high ledge.
Return to the previous balcony then the chandelier. Once there, turn around (S), sidestep to the R corner, turn R to face the newly raised block and hop back then step back once. Do a RJ with a slightly L curve and hit Action at the last moment to grab the edge of the block. Pull up, turn L (E) and pull up again on the high ledge.
Say hi to the gargoyle and pass the opened door to your R (S), which will close behind your back. Run on the small balcony and turn around (N): the Chaos Gems Receptacle is indeed there. Put the Chaos Gems in it and enjoy the show. Time for the Grand Finale.
-- Death --
Objective: kill Natla
OK. You're there now and victory is within reach. Turn around (S) and walk to the edge to use the zip-line that will lead you to the raised block near Natla's Altar (and Natla herself). Let go before hitting the wall to land on the block, losing some health in the process. Considering the upcoming fight, you might want to use some medicine at this point.
There are several strategies here, depending mostly of the ammo you've got left. If you've got enough revolver ammo, stay on the block, draw your revolver, locate Natla and shoot her while aiming. She is casting rays alright but most of the times these rays won't reach you when you're up there. She will fall after a few bullets.
On the other hand, if you're short of revolver ammo, get down the block and shoot her with either the shotgun or the pistols (or why not the uzi, for once). Keep moving by side jumping L and R to avoid being hit by the rays and finish her off.
Once she's definitely out of the picture (doesn't that feel good?), go pick up her head (eww, indeed!) run to the southern side of the room and climb on the block with the Spear. Stick Natla's Head on it with a firm hand. She gets what she deserves.
-- Salvation --
Objective: Find the Source of All Good and leave Alnwick
Now time to leave. Turn R (W) and run through the now open tall metal door ahead (you can go through the L one as well). Follow the passage until you find a corridor to your R leading to another passage to the R (W). Run ahead to reach a garden.
A red flower in the center will open as you approach, releasing an orb of light happening to be nothing less than the Source of All Good. Go L (S) after the entrance and past the statue then turn L (E). The foliage-covered wall ahead is climbable. Climb to the top of the foliage then go L and let go on the high bridge.
Turn around: the Source of All Good is waiting for you there in the center of the bridge. Pick it up, opening the door at the end of the bridge then run through the doorway. You'll see explosions in the machinery room, destroying the work of Natla's minions.
Run ahead on the grass and say farewell to Alnwick.
==== In this part, you should have found...
Enemies: Natla
Secrets: none
Items of note: Key, Natla's Head
some Traps - 1 Timed-Run
==== ALNWICK WHAT'S WHAT (Combat Strategies)
- Bats: Tiny and hard-to-spot. Keep shooting until Lara doesn't aim at anything anymore, spotting them thanks to the flapping sound they make.
- Cold Spirits: Once they're after you, these pesky snowflakes just won't let you be and will follow you wherever you go. Run in zigzag to send them against the walls in which case they disappear for a second or two. Your only chance is to find some water. They can't resist it and will soon dive and melt.
- Fire Spirit: The fiery counterpart of its cold cousin, it's attracted by water just as well and will extinguish there. It's a tad slower but more dangerous: if it hits Lara too many times (generally three), she will catch fire.
- Giant Venomous Spiders: They are very dangerous being quick, harmful, tough and venomous (and ugly). Try taking advantage of the surroundings to shoot them from a safe point if you're patient enough. If not, you do a have a shotgun and a revolver, don't you? But keep moving at all costs, it may happen that they grab Lara and throw her down to kill her immediately (Thanks to Horus for pointing that).
- Natla: Her only weapon are those deadly rays she casts, so keep moving and side jumping to avoid being hit while shooting at her.
- Sea Hag: What an ugly aquatic crone she is! And harmful at that. Here, you can't do anything against her: she won't ever place herself in a position where you can shoot her from dry land. Dodge her as best as you can while you're around her and watch your health bar. This said, and if you don't mind wasting ammo, there is a very tiny chance to kill her with the revolver.
- Skeletal Harpies: Very dangerous, those ones. They cast harmful green rays and even sometimes come close to slash you with their sharp claws. Keep moving at all costs.
- Skeleton: You don't have any explosive, but you still possess very good weapons against this one. You can either aim at his head with the revolver and behead him or send him into the lava with a nice cartridge. In either case, he won't be destroyed, but he won't be able to get at you either.
- Stray Dogs: Fragile but very quick and tend to stick to you or push you. Try killing them while hopping back when possible or use your revolver. One single bullet is enough.
- Sword Spirits: Unlike their cousins, water won't harm them, nor even slow them. The only way to get rid of them is to find a Holy Sword: they're irresistibly attracted by them and will explode after a little swirling dance.
Authorized walkthrough by Sutekh
Az oldalon közölt képek, a szöveges tartalom, illetve minden sajátkészítésû anyag, a © TR Editor.hu tulajdonát képezi. Azokat semmilyen formában nem lehet reprodukálni, másolni, terjeszteni, csak a szerkesztõség engedélyével.