
Planet of the Ancients
Author: Richard Szydelko (uvavoo)
Download: Here
Unzip RichardSzydelko-PlanetOfTheAncients.zip and copy files from audio to audio, from data to data and files from TRLE Root folder into the main directory, then let this adventure begin.
Review:
I like this custom level very much despite some bugs, especially at the end when de-electrifying the subway. If I saved there, loading it back it changed to reverse (tracks were electrified and the light was red). However, using this I would have had the chance to cheat I finished it without saving from the first de-electrifying. It is an alien-type level, might be the best of it's kind so far. As an overall conclusion it is a great adventure, congrats' to the editor. There was maybe one thing I missed; maybe the gunmen could have been aliens with different heads. Already seen custom levels like that from other authors. If the first level was alike, the next one will be bug-free and even more fantastic. This level became one of my favorite ones for ideas and textures applied I have not seen before. UFOs were gorgeous and so were the bases. The first level hides 4 Data Discs but the 3rd and the 4th one has the same location with the latter accessible at the same place where the third one was when the water turns to ice. Here I just lingered on for a while not having been able to figure that solution out. :) Enemies were gunmen and ugly beasts with several difficulties making the level harder. I found two secrets on the first level which was the UZI and UZI ammo and medipack climbing down the ladder beside the houses. There are a few things, though, I still don't get. There was a lever to be pulled where I was pushing 4 blocks. I have completed the level both with using it and not so what is it for? And there were two torches I could make no use of but lighting. Texture is fab, so are added sounds. With my recommendation I am looking forward to possible sequels to it. Walkthru, pics and saves are available here: http://www.treditor.hu/english/planet_of_the_ancients_eng.htm
Walkthru:
Planet of the Ancients Part 1:
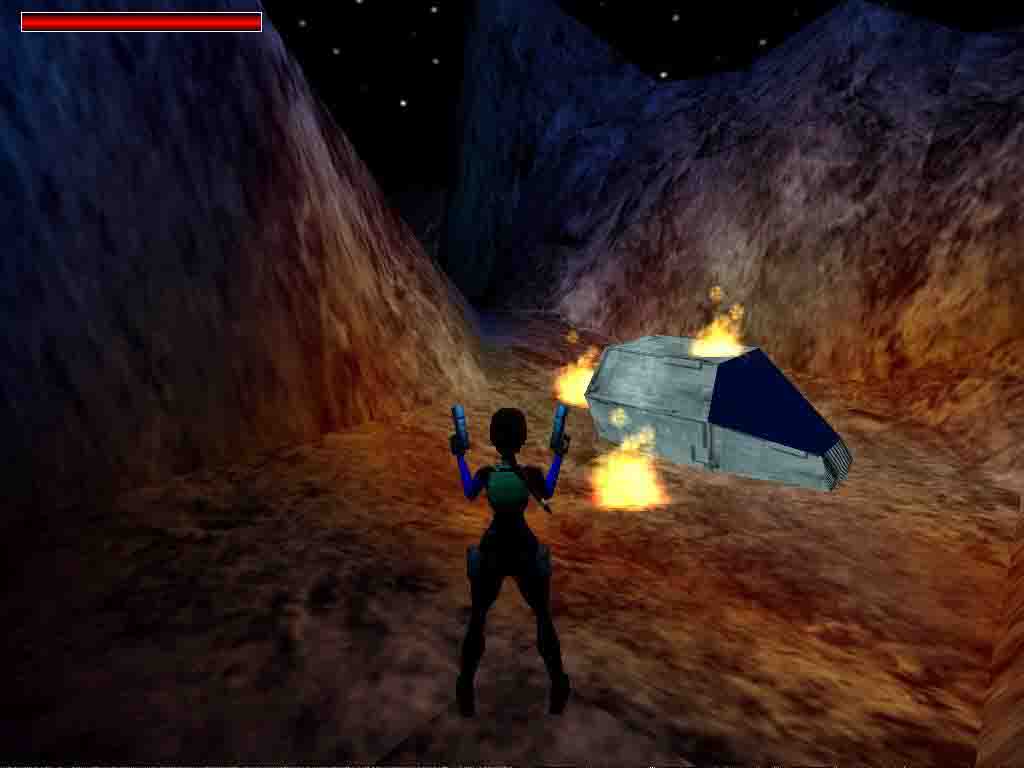
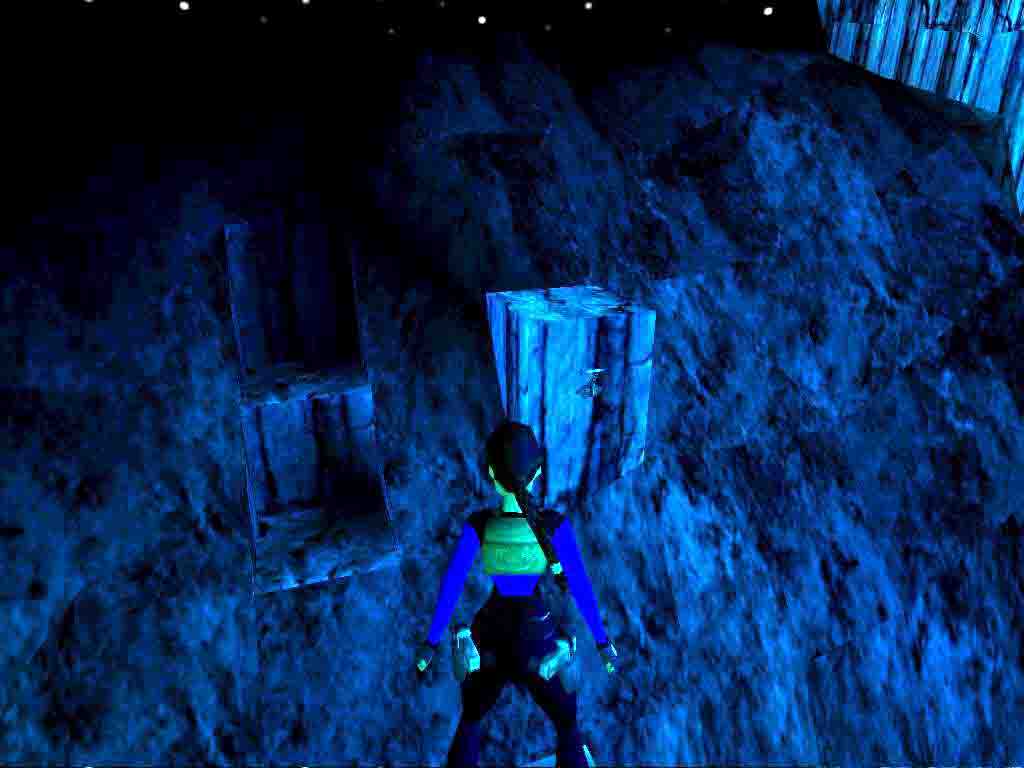
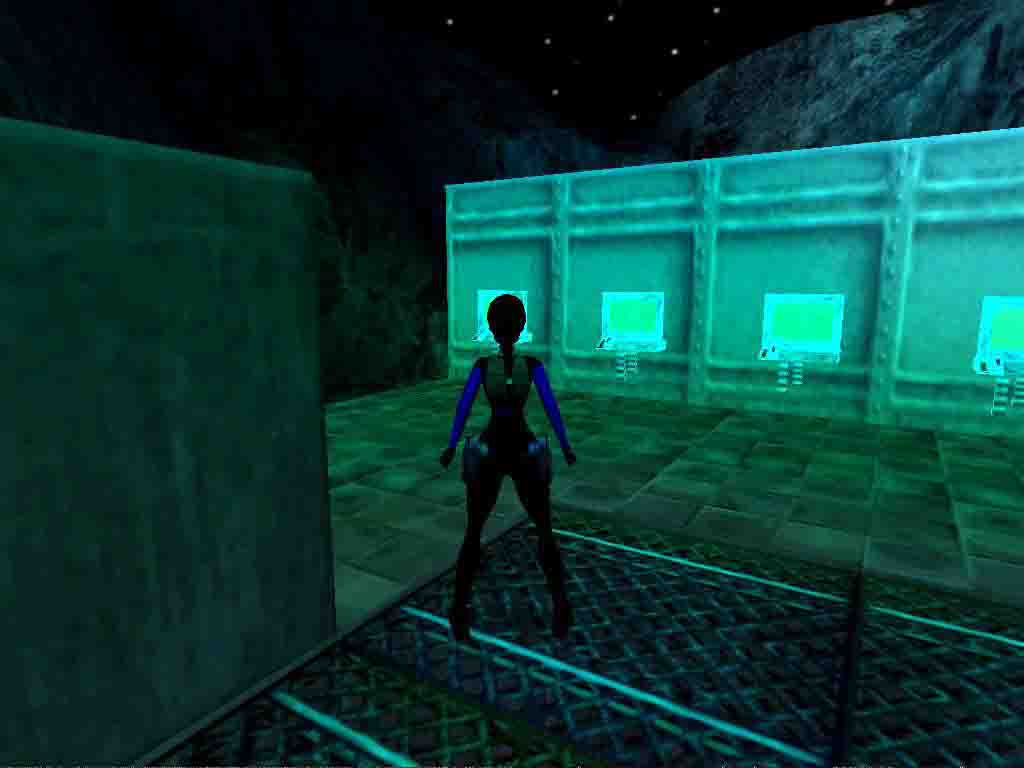
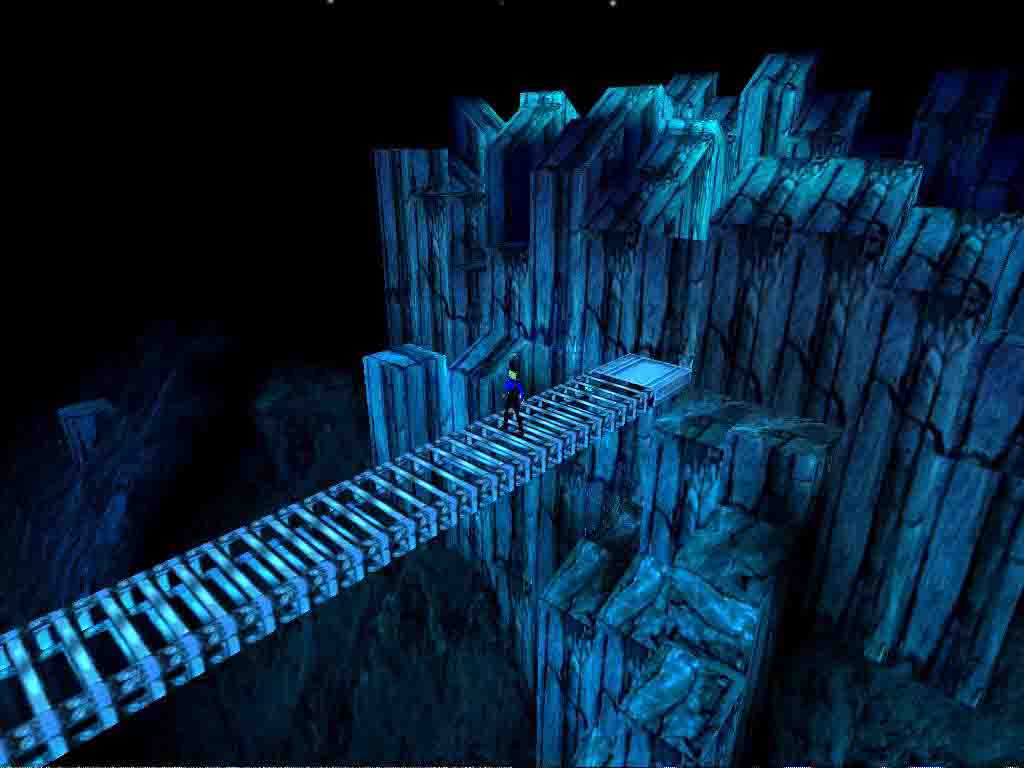
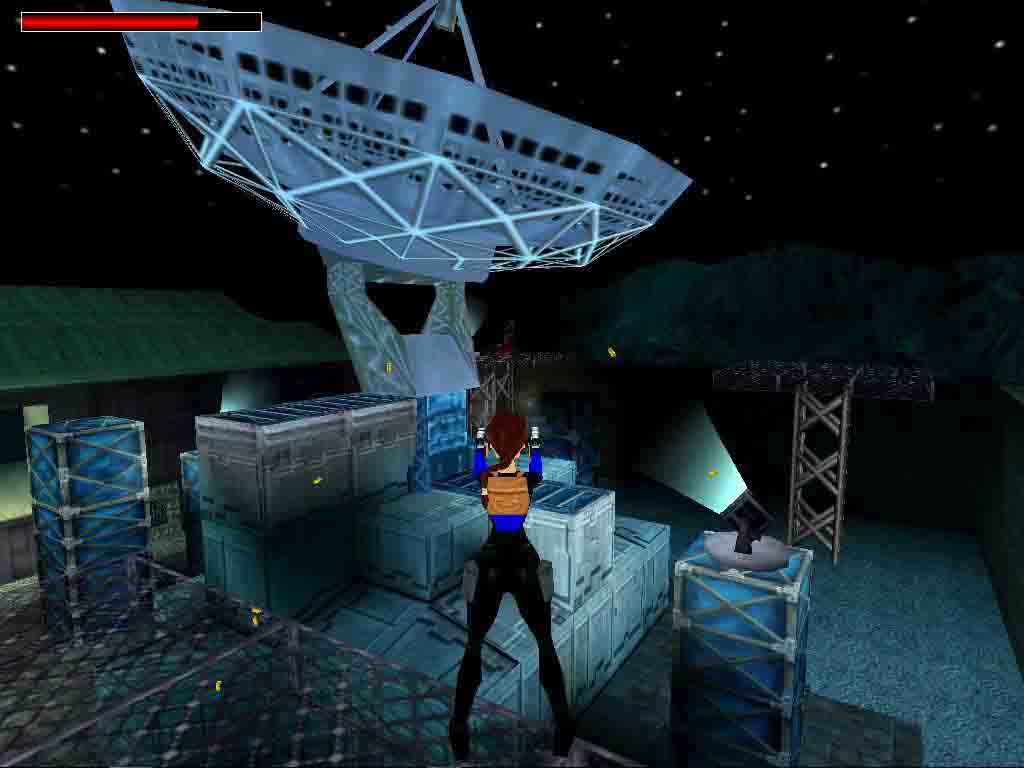
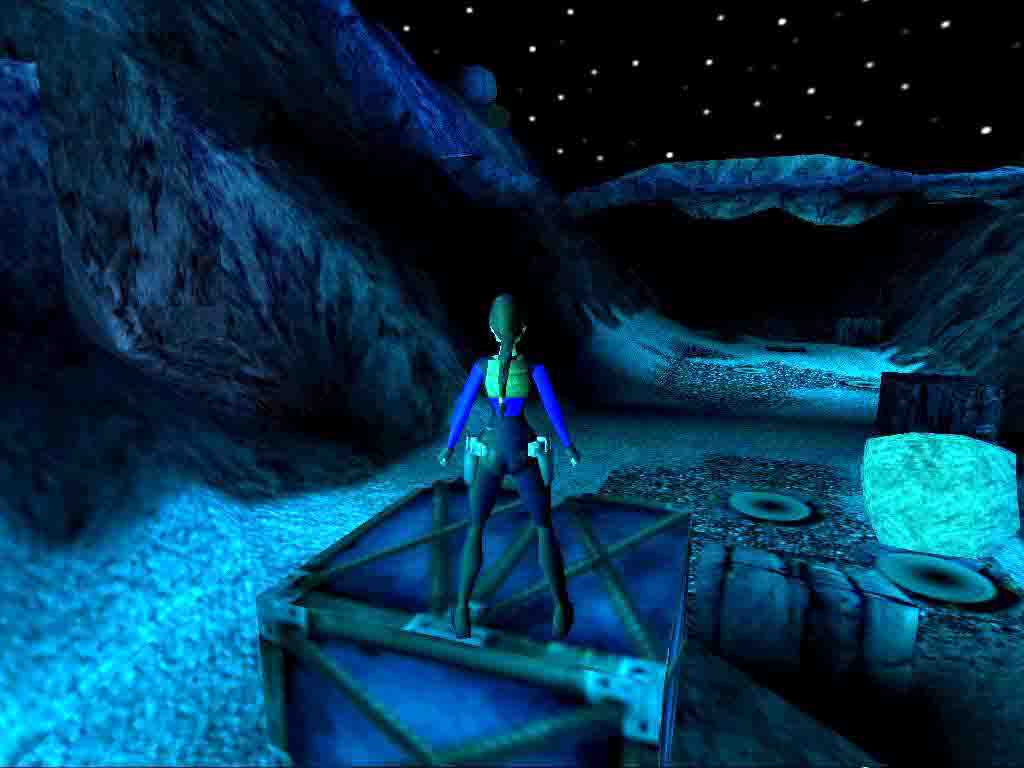
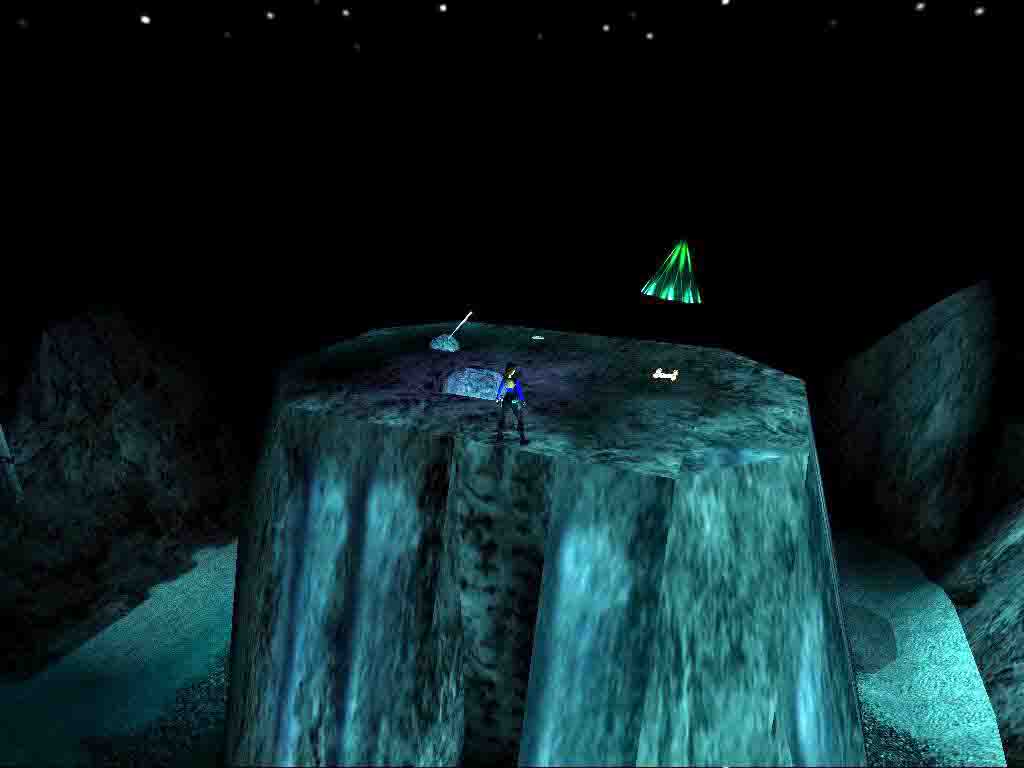
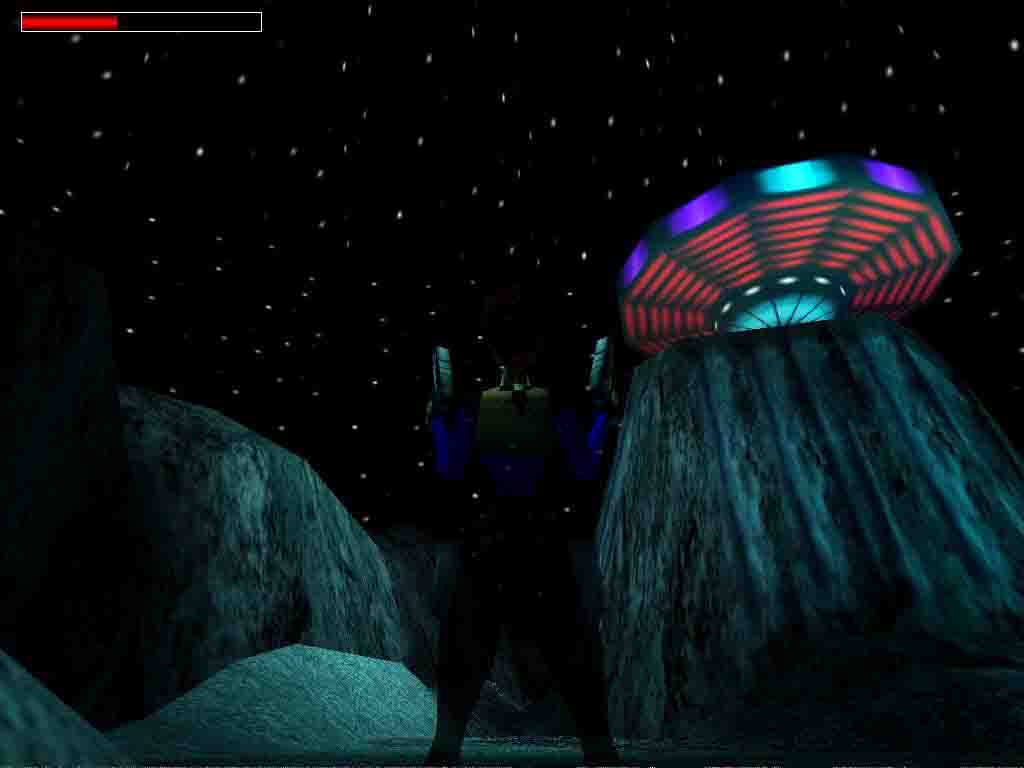
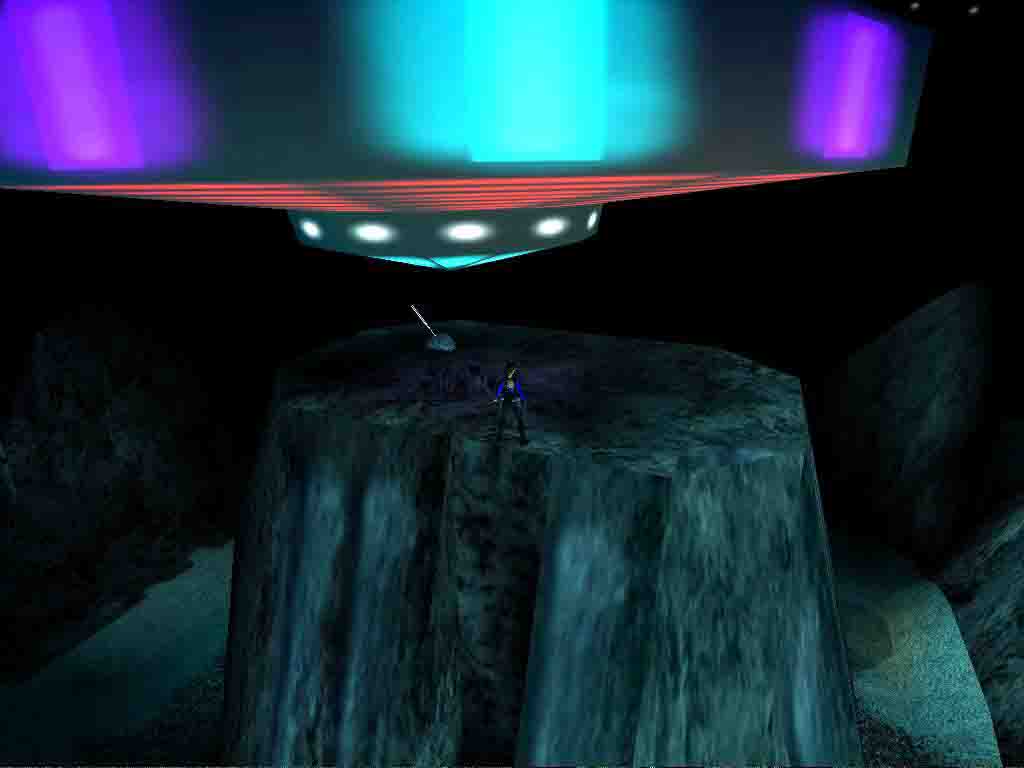
Head straight and pull yourself up on the left where later you will use the fourth card. From that spot you will be comfortable to shoot the monsters. Pick up a medipack and some ammo in a wall-space. Keep on going and pull yourself up on a block at the pillars. Keep on jumping around 'till you can pull the lever on one of the pillars. The door beside the burning block is open now. Inside, jump over the abysses in the darkness and pull the lever on the wall opposite. Light is spreading over and bars open left. Don't go in there but shoot the crates instead to blow them up making a gap on the wall back there. There is a switch inside illuminating the way to go. Go outside where you came from and opposite to arrive in great hall. Get down in the acid room to the bottom using the pillars and jump into the passage. Run up and use the wall-space to avoid a downhill rock. Shoot another mutant and crawl through the gap. Pull the block over the sign and go into the building. Inside you find 4 moveable blocks. Pull them over the signs in the middle (also find the pickups under some of them). Comparing the right blocks with the right signs does make a difference. If you get it right, a camera will show it is okay. At the end a blue block emerges. If you have to push any of them beside after that, push it over the sign again and you will make it. Pull yourself up into the gap in the wall from the block and jump down on the opposite side. Going up the slope you will encounter two rocks so go back in due pace from where you jumped. Go up the slope and shoot another mutant. Head right go down another slope and hanging down and letting go in a wall-space pull the lever on the other side. This supposed to open the door upstairs, which was open, even without this when I tried. Use the previous block to go up the slope on the opposite side and pick up the torch behind the open door. Light it at the flames and go right. Jump into the passage in the corner. The torch has no role but to make light in the dark passage. Pay no attention to the mutant, or just shoot it having dropped your torch. It won't follow you if you back up. Go up and jump on the steep slope and sliding down you can pick up the 1st Data Disc. Keep on jumping until you fin yourself on the bridge, but turn around before crossing, pull yourself up and find the UZI on the 1st secret on the other side guarded by a mutant. Cross the bridge now and go down beside the fence. End up two gunmen and pay attention two other ones on the opposite side - give them their share from a decent distance with your pistols. On the left you can pick up another UZI of you pull the lever on the right. Pulling yourself up on the block on the right, beside the lever, head right and push the lever on the other side of the barbed wire. On the way back push the lever on the platform too, both will make a block emerge beside the buildings. At the last lever, if targeted well enough, you can kill the two gunmen on the opposite platforms. Now go down from the wall to the courtyard and beside the buildings, using the newly emerged block, pull yourself upon the first building. From there jump upon another and from there on the wall. Without pulling the lever there go left and at the opposite corner climb down the ladder. Meet two armed men, after that find the 2nd Secret with ammo and medipack in the water. Climb back and save before the switch - a timed run is ahead. Pull the switch and run towards the previously discovered secret. At halfway, jump left upon the building and climb down the open trapdoor. But there is also another, maybe even faster way: while running jump left on the roof of the first building, slide down on the other side and grab the ledge of the opposite pillar. Down there grab the ammo and the medipack and on the top of the crate pull the switch. Kill three gunman on your way out, head towards the big radar. By using the emerged block jump upon the platform, from there to the separated area on the crate to the smaller radar. Back there a door has opened and inside you can pull a lever that opens the bar at the small house where UFOs lye. Pick up the Crowbar in the corner and go back to the big radar. Force the door open, kill the gunman and use the switch. See the radar pull aside in the cut-scene. If id doesn't, enter the place again and stand in front of the thing. Pick up the 2nd Data Disc and slide outside. Climb up to the radar and fall down into the water. If you pick up anything, a mutant will come your way: just jump back into the water and shoot. At the end of the water climb out on the right but after touching the corner run back and jump in again to end up another one. After that shoot the stones on the corridor and climb up the ladder. You arrive to a place with four circles on the ground and four stones up on the rocks boosted by shootable rocks. The purpose is to shoot them and make them roll to their places. Go to the bridge opposite but before that jump right in a passage and pull the switch . This will trigger an emerging block outside. Climb it and from the right side with a run-up, but without grabbing, jump. While you are still down, kill the animal on the bridge and climb up. Shoot the stone and on the other side of the bridge, head left. Making use of the gaps jump to the second bridge. Kill the animal and shoot the stones. Hang off and let go at the middle of the bridge and shimmy sideways for the pickups. Slide down where you have pulled the switch. The bar is open now and you arrive to a new area. In the corner you can climb down for a medipack and on the right you can find some ammo. The purpose is to get to the other side upon the pillar. Having finished the climbing two UFOs fly over base must be close now. :) On the following area get to the opposite side of the hill while killing the ugly beast and pull the switch. The stone opposite gets moving. Go there and after it has rolled left run right and pull yourself up. Climb up the ladder. Notice a new fleet of UFOs passing over. Pick the scroll up and push the handle. The bar has opened so go inside. You can find another torch but it is not useful either I think. Slide down the gap and with a jump grab the ladder. Climb up. Jump over to the switch, pull it and pull the rest in the corners. Jump back in the middle and fall down upon the small bridge. Climb down the ladder and push the block in the corner. Climb back up the ladder and from the block emerged jump into the passage to the waterfall. Go up and push the block 'till it stops. Go way down, a block has emerged in the water so now you can pull that switch too. You can see a spacecraft shooting a rock on the top of the hill. Go there and fall into the water. Swim left and climb out quickly in the right corner, turn around and shoot the gunman. Jump over and be swift enough 'cause the platform in the water will be enflamed after a while. Pick up the 3rd Data Disc. Jump into the gap and to the other side on the top of the pillars. Get to the higher pillar in the water and shoot the white pillar on the ceiling with the word 'Power' on it. Water turns to ice. Go back where you have picked up the 3rd Data Disc to find the 4th Data Disc. Pick up the ammo right to the open door and climb up the ladder at the end of the hallway. Kill the gunman outside and shoot the stone under the rock that will put the fire off down at the plane. Slide down and go to the computers left in the valley where the first beast attacked. Use the discs to open the bar. Go down to arrive to the next level.
Planet of the Ancients Part 2:
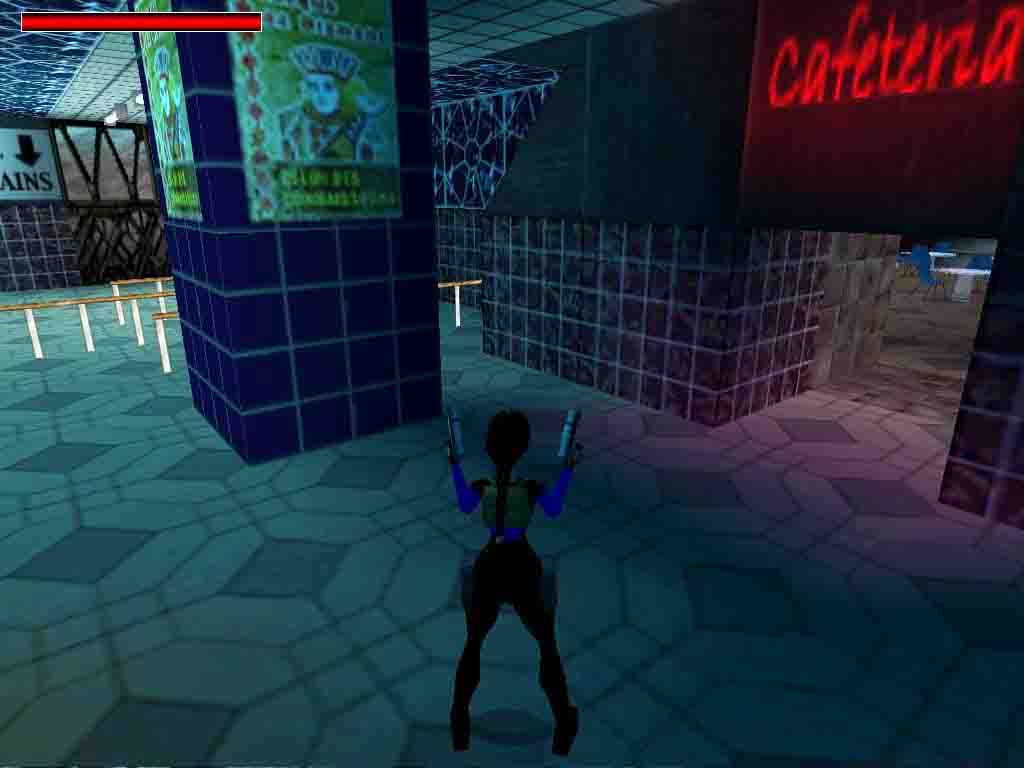
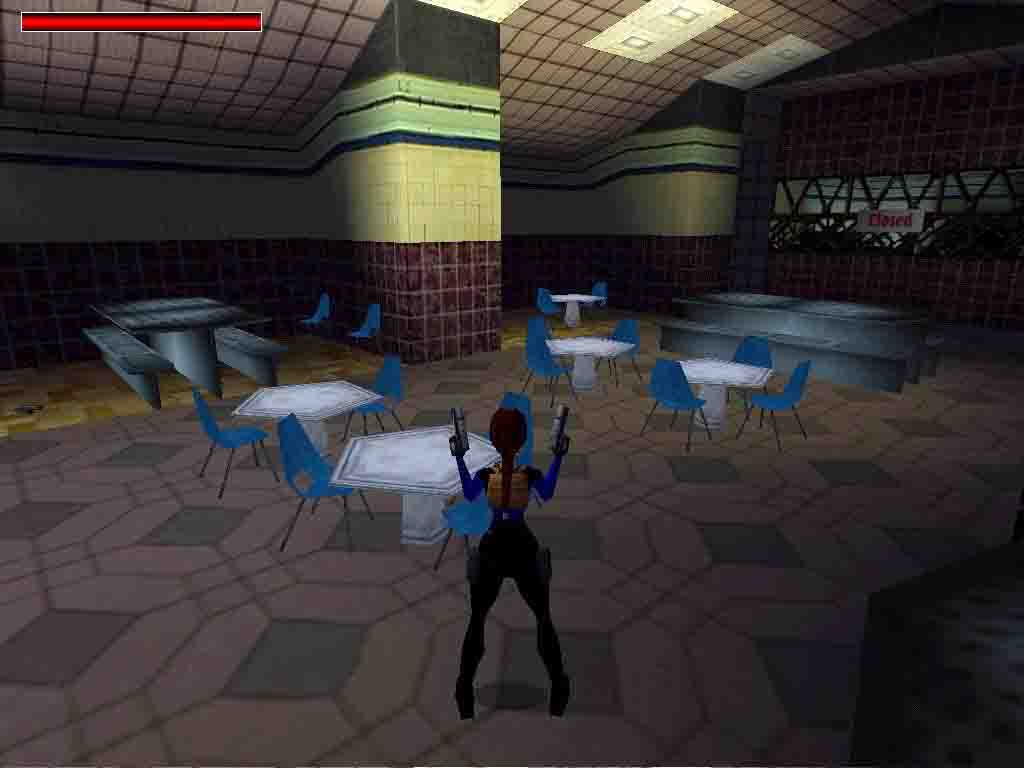
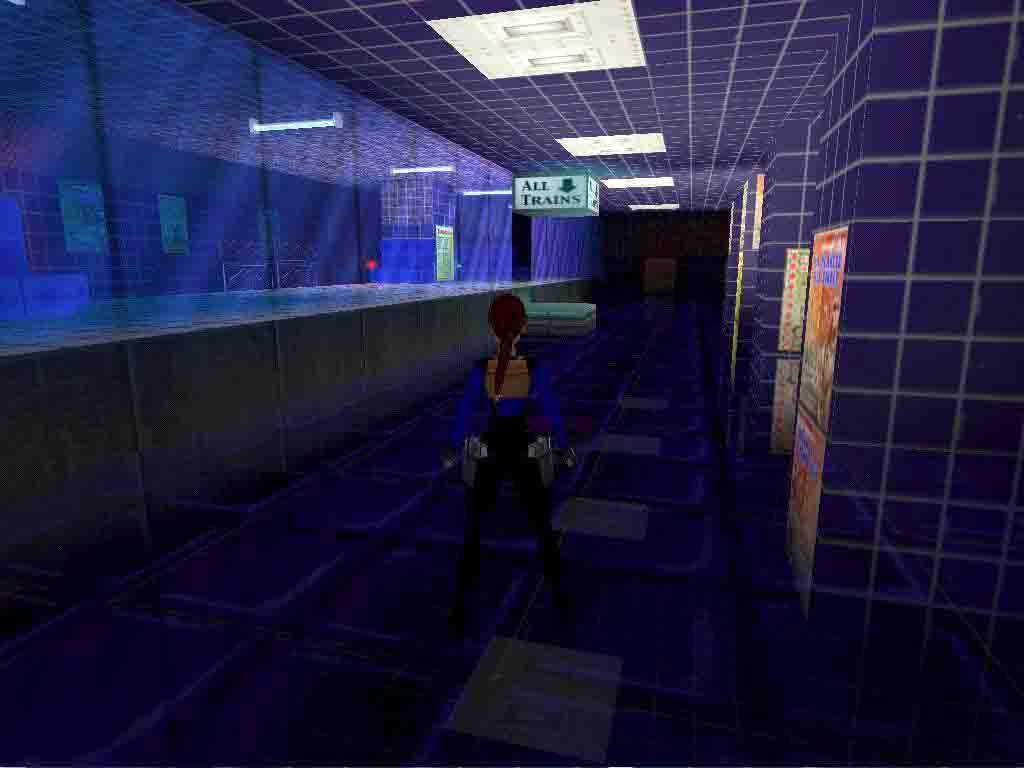
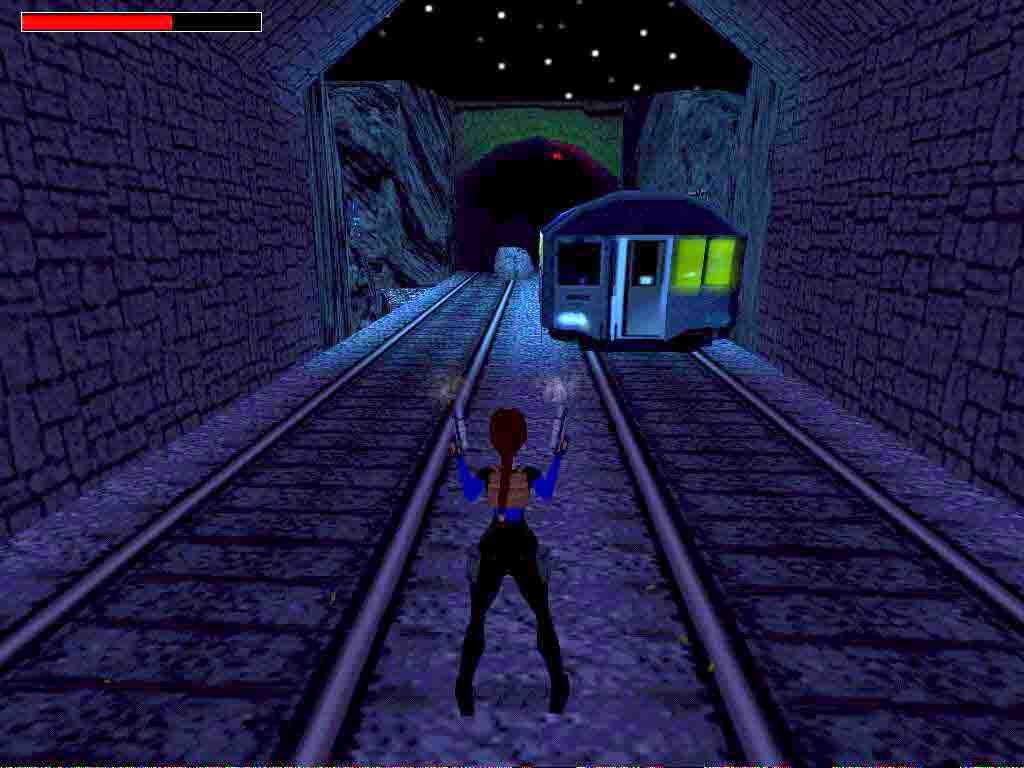
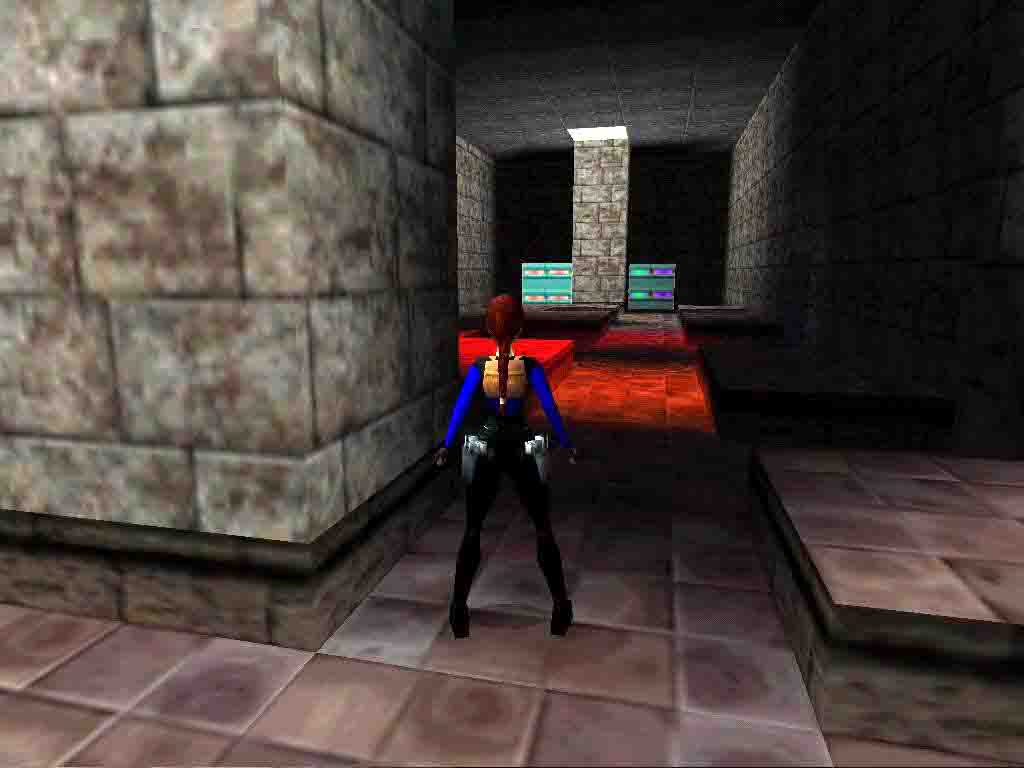
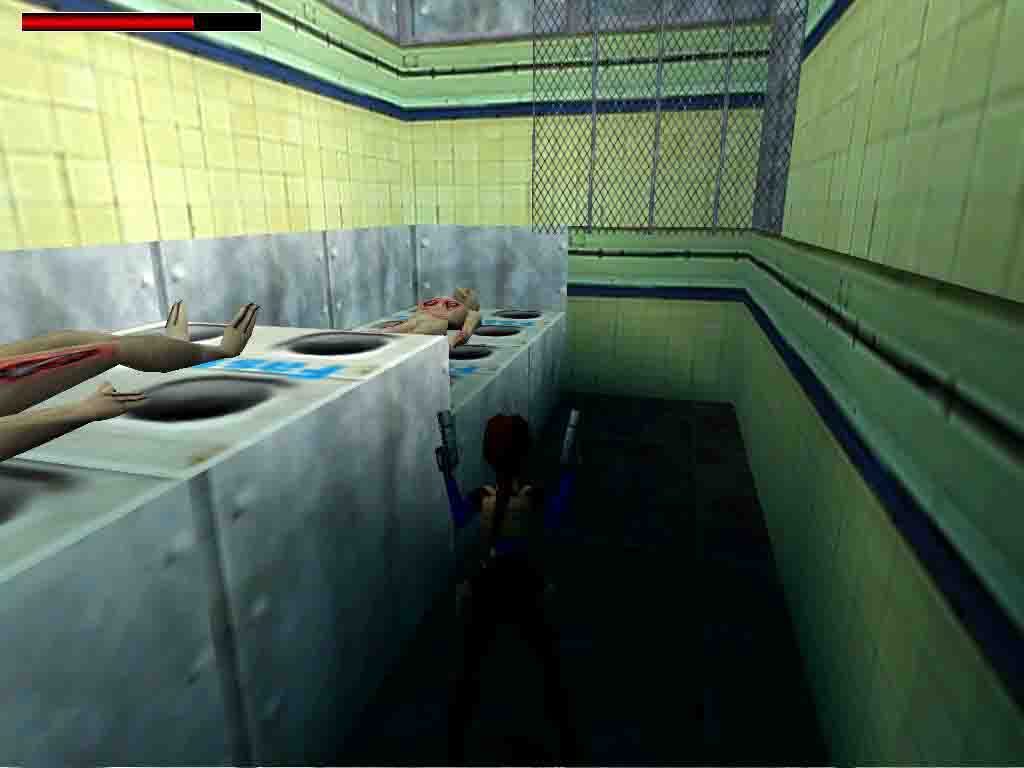
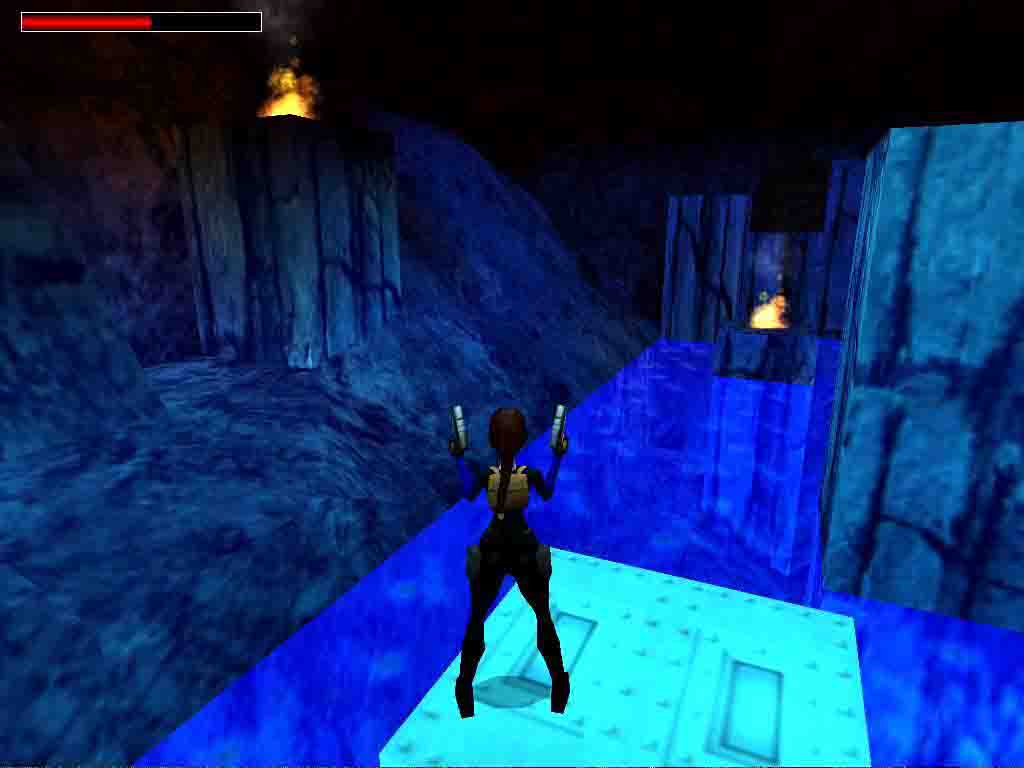
Go down the stairs and go straight into the Cafe. Shoot the three gunmen, pick up the UZI ammo and the medipack in the corner. Right after the railings shoot the bar and slide. Go right at the junction, then go left and you arrive in a small hall with steam breathers. Pull the switch on the wall and the left door will open. You find three levers inside. Pull all of them and give another pull to the left one. Behind the steam breathers on the right, a door has opened. Pull that lever too. Go back at the steam breathers and pick up the Data Disc on the left. The opposite door has also opened with two armed man and a switch inside. Inside on the hallway another gunman and another switch that will open the trap door on the ceiling outside in the hall. Climb up and down on the other side. Another baddie is in your way, then you arrive to a beautiful subway station. Shoot a glass on the right behind the railings, pull a switch inside that will open the bar where you were slipping just a minute ago. Go back there, use the Data Disc and the bar will open. Climb the block, go down at the switch, pull it and save because too bad we've got a save bug here. The task is twofold: de-electrify the subway rails and have the bars closed before the switch. You can see in a cut-scene. So you get it right if you pull the lever and see in the cut-scene the closing door and lights turning green. If it doesn't happen, then reload the previous save for the reverse setup of things. So if you have the bars closed and the lights green go back through the open door over back to the subway, head right on the tracks kill the two beasts and go down into the passage. Be careful enough to avoid touching the carriage, otherwise you die. In the passage watch out for the steam breathers and kill the gunman. Arriving into a cave kill another gunman and the beast then you arrive back to the station. Go back where you have de-electrified the tracks and pull the switch again so as to electrify the tracks, but the bars will pen. Go back there through the cave but direct your way towards the open bars, not the tracks. Pull the switch that makes the metro break through the wall. Follow it and the level is over. Quite an adventure, huh? :)
Walthru By: OBig from TombRaider.hu
Translated By: Ironman from TombRaider.hu
Minor edits by uvavoo.
Planet of the Ancients, Part 2: Revised and extended version by uvavoo
Make your way down the steps, picking up the UZI that a careless soldier has dropped. Pick up the Ammo in the room with the fans. Enter the cafeteria and dispose of the 3 guards and pick up the goodies. Get a coffee from the bar; darn, it's closed!
Notice that there is a grill which looks different from the other fans, shoot it and slide down into the depths of the subway via the ventilation ducts. At the bottom notice another grille to shoot. Enter this room through the door and hear the chimes for SECRET #3. Notice this room looks like it is under construction (my joke only, it is meant to look like this!). Jump across to the block on the left. If you fall, climb up the 'ladder' designated by the green square. Walk forward and take a running jump across to the left, keeping your finger on the jump button, bounce left and right until you land on the block towards the center. Turn round and do another running jump over the other side where you will slide and jump across, keep your finger on the jump button and you will jump again.... and again, finally clinging in the middle section.
Jump towards the RED savegame crystal. When you get there SAVE YOUR GAME before pulling the lever DO NOT SAVE AGAIN UNTIL YOU REACH THE GREEN SAVEGAME CRYSTAL. Now throw the switch, the room will have changed into a true landscape now. Jump over and see the UZI ammo which has appeared (x2). Near the first uzi ammo jump up to the block (at the near end of the long sloped block in the middle). Do a running jump across as you did earlier, slide and jump...jump again and this time you will land on the block. Notice the second switch. Head towards the switch and pull it. This will open the door back out again.
Head for the ladder at the far wall, but check out the medipack near the center of the room. Climb up the ladder and make your way out. You will see the GREEN savegame crystal, it is now safe to save your progress. Proceed down the duct and notice a closed gate ahead. Turn right before you get to it and enter the room with steam emitters. Pull the switch nearest the door which opens another door.
Enter this area with 3 switches. Pull the first switch, then the third (ignore
the second) exit the door you came in. Across and to the left head towards
the newly opened door (avoiding the steam) and pull the switch in there. Which
finally opens the door to the next room and also another door to the right
of this one which contains A DATA DISC. Pick it up and head towards the next
room and despatch the guards. Pull the switch and dispatch the other guards,
pull yet another switch and the trapdoor opens.
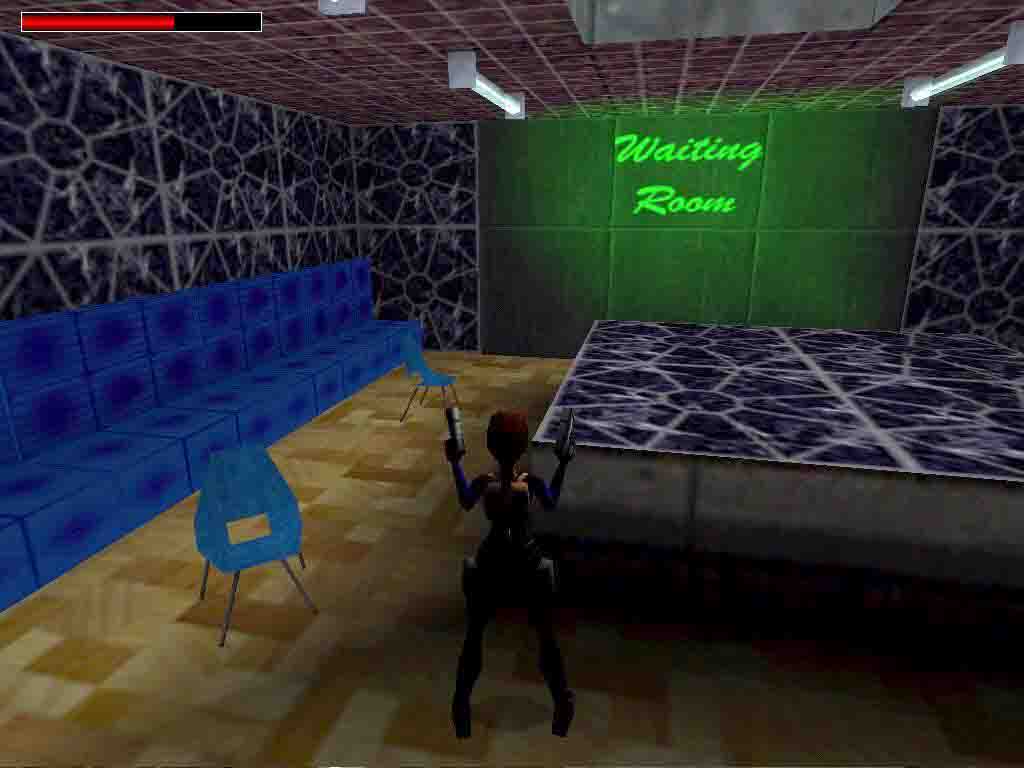
Proceed up there and along the ducting and drop into the Waiting Room. Be
careful, as another guard awaits you.
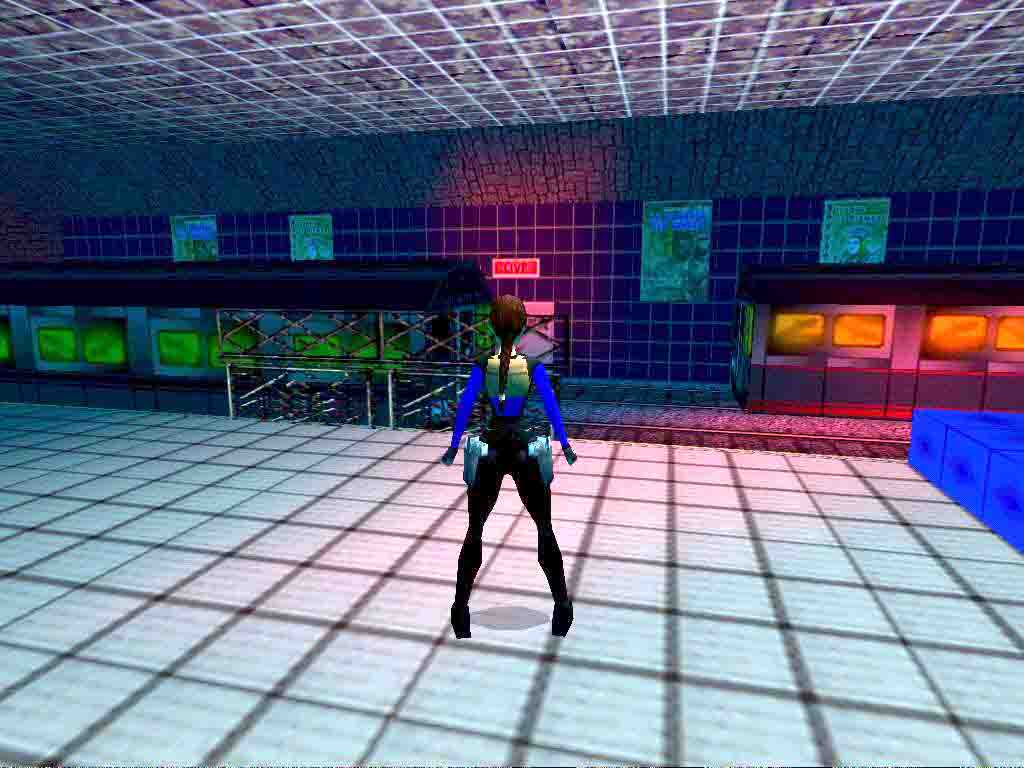
Head out of the exit door down the corridor notice on your right the train yard and a closed door to your left. Keep going until you reach the subway station. Don't slip on the polished floor! Notice the Ticket windows and that one of them is cracked. Shoot this window to shatter it and pull the switch inside which opens the gate in the ducting seen earlier. Head back and enter the room. Use the DATA DISC to open the gate. Find and pull the switch which opens the gate to the TRAIN YARD. The exit door opens automatically so you need not backtrack.
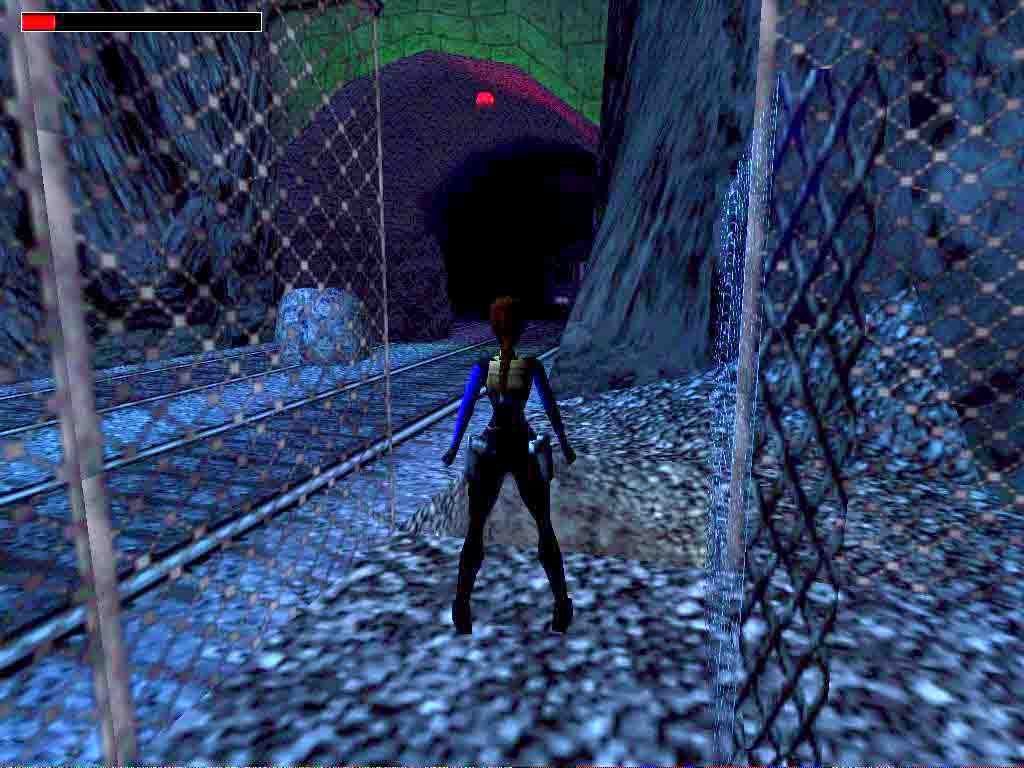
Head down the corridor into the Train yard. Save the game here when you see the RED SAVEGAME CRYSTAL. DO NOT save again until you reach the GREEN savegame crystal. Slowly walk forwards until you reach the entrance, get as far left as possible and sprint to the left to avoid the train which moves when you enter. Notice a closed gate to the left and another to the top right.
Move to the right towards the MEDIPACK and claim your prize. Avoid the central train which starts moving also. Shoot the Mute. Throw the switch which opens the gate near the tunnel. Slowly walk through the tunnel but do not walk onto the far track. Quickly move onto it and hop/jump back and let the train pass. You can now throw the second switch in the tunnel which opens the far gate.
Go through the gate and notice some scrape marks on the ground. Pull out the block and move it to the side. Enter the room for SECRET #4. Collect all the goodies, but do not leave the room. Notice a crate which can be pulled out revealing an entrance to a further room. Enter this room for SECRET #5 (a secret within a secret). Pull the wooden crate onto the metal floor piece and hear the chimes and the goodies appear. Collect your goodies and head out. Turn right and head for the control room with the glass windows. Beware a guard awaits you. Throw the switch and notice the flyby indicates the main station door to the platform opens and the other gate closes.
Head back to the station via the exit to the left (do not exit out through the train yard). Climb up the ladder and notice the GREEN SAVEGAME CRYSTAL you are safe to save now. Keep going and enter the main station and head to the platform. Careful of the trains. When they have gone head down the tunnel killing the sneaky mutants who hide there. Half way down the tunnel notice a small crawl space to your left. Crawl through here for SECRET #6. You will find yourself in a small cave. Pick up the REVOLVER. Enter the water and swim into the outdoor area. Collect all the goodies and swim back out again. Back in the tunnel head towards the train. The minor earthquake sounds blocking the tunnel at one side, the train blocks the other. Don't touch the train, it is electric and you will get a very nasty shock. Instead notice the passageway down by the fenced off area with the switch.
Drop down there and follow the ducting avoiding the Steam and the guard. Enter the large cave and despatch the mutant and guard (easy work with the newly acquired revolver). You should find yourself back in the station where a gate opens. Go through this newly opened 'window' and head back to the control room in the train yard (use the shortcut, do not head back through the trainyard). Pull the switch again to reverse the position of the gates. The platform is now inaccessible but the switch by the train is now accessible. Head back through the newly opened 'window' and back the way you came until you reach the fenced off area with the switch. Pull the switch, you should see the signal turn green and the train can now move off.
Follow the train down the tunnel keeping a safe distance. You should now exit back to the title screen indicating you have finished Planet of the Ancients Episode I.
OBig TREditor.hu
Minor edits by uvavoo.
Planet of the Ancients, Part 2: Revised and extended version by uvavoo
Make your way down the steps, picking up the UZI that a careless soldier has dropped. Pick up the Ammo in the room with the fans. Enter the cafeteria and dispose of the 3 guards and pick up the goodies. Get a coffee from the bar; darn, it's closed!
Notice that there is a grill which looks different from the other fans, shoot it and slide down into the depths of the subway via the ventilation ducts. At the bottom notice another grille to shoot. Enter this room through the door and hear the chimes for SECRET #3. Notice this room looks like it is under construction (my joke only, it is meant to look like this!). Jump across to the block on the left. If you fall, climb up the 'ladder' designated by the green square. Walk forward and take a running jump across to the left, keeping your finger on the jump button, bounce left and right until you land on the block towards the center. Turn round and do another running jump over the other side where you will slide and jump across, keep your finger on the jump button and you will jump again.... and again, finally clinging in the middle section.
Jump towards the RED savegame crystal. When you get there SAVE YOUR GAME before pulling the lever DO NOT SAVE AGAIN UNTIL YOU REACH THE GREEN SAVEGAME CRYSTAL. Now throw the switch, the room will have changed into a true landscape now. Jump over and see the UZI ammo which has appeared (x2). Near the first uzi ammo jump up to the block (at the near end of the long sloped block in the middle). Do a running jump across as you did earlier, slide and jump...jump again and this time you will land on the block. Notice the second switch. Head towards the switch and pull it. This will open the door back out again.
Head for the ladder at the far wall, but check out the medipack near the center of the room. Climb up the ladder and make your way out. You will see the GREEN savegame crystal, it is now safe to save your progress. Proceed down the duct and notice a closed gate ahead. Turn right before you get to it and enter the room with steam emitters. Pull the switch nearest the door which opens another door.
Enter this area with 3 switches. Pull the first switch, then the third (ignore
the second) exit the door you came in. Across and to the left head towards
the newly opened door (avoiding the steam) and pull the switch in there. Which
finally opens the door to the next room and also another door to the right
of this one which contains A DATA DISC. Pick it up and head towards the next
room and despatch the guards. Pull the switch and dispatch the other guards,
pull yet another switch and the trapdoor opens.
Proceed up there and along the ducting and drop into the Waiting Room. Be
careful, as another guard awaits you.
Head out of the exit door down the corridor notice on your right the train yard and a closed door to your left. Keep going until you reach the subway station. Don't slip on the polished floor! Notice the Ticket windows and that one of them is cracked. Shoot this window to shatter it and pull the switch inside which opens the gate in the ducting seen earlier. Head back and enter the room. Use the DATA DISC to open the gate. Find and pull the switch which opens the gate to the TRAIN YARD. The exit door opens automatically so you need not backtrack.
Head down the corridor into the Train yard. Save the game here when you see the RED SAVEGAME CRYSTAL. DO NOT save again until you reach the GREEN savegame crystal. Slowly walk forwards until you reach the entrance, get as far left as possible and sprint to the left to avoid the train which moves when you enter. Notice a closed gate to the left and another to the top right.
Move to the right towards the MEDIPACK and claim your prize. Avoid the central train which starts moving also. Shoot the Mute. Throw the switch which opens the gate near the tunnel. Slowly walk through the tunnel but do not walk onto the far track. Quickly move onto it and hop/jump back and let the train pass. You can now throw the second switch in the tunnel which opens the far gate.
Go through the gate and notice some scrape marks on the ground. Pull out the block and move it to the side. Enter the room for SECRET #4. Collect all the goodies, but do not leave the room. Notice a crate which can be pulled out revealing an entrance to a further room. Enter this room for SECRET #5 (a secret within a secret). Pull the wooden crate onto the metal floor piece and hear the chimes and the goodies appear. Collect your goodies and head out. Turn right and head for the control room with the glass windows. Beware a guard awaits you. Throw the switch and notice the flyby indicates the main station door to the platform opens and the other gate closes.
Head back to the station via the exit to the left (do not exit out through the train yard). Climb up the ladder and notice the GREEN SAVEGAME CRYSTAL you are safe to save now. Keep going and enter the main station and head to the platform. Careful of the trains. When they have gone head down the tunnel killing the sneaky mutants who hide there. Half way down the tunnel notice a small crawl space to your left. Crawl through here for SECRET #6. You will find yourself in a small cave. Pick up the REVOLVER. Enter the water and swim into the outdoor area. Collect all the goodies and swim back out again. Back in the tunnel head towards the train. The minor earthquake sounds blocking the tunnel at one side, the train blocks the other. Don't touch the train, it is electric and you will get a very nasty shock. Instead notice the passageway down by the fenced off area with the switch.
Drop down there and follow the ducting avoiding the Steam and the guard. Enter the large cave and despatch the mutant and guard (easy work with the newly acquired revolver). You should find yourself back in the station where a gate opens. Go through this newly opened 'window' and head back to the control room in the train yard (use the shortcut, do not head back through the trainyard). Pull the switch again to reverse the position of the gates. The platform is now inaccessible but the switch by the train is now accessible. Head back through the newly opened 'window' and back the way you came until you reach the fenced off area with the switch. Pull the switch, you should see the signal turn green and the train can now move off.
Follow the train down the tunnel keeping a safe distance. You should now exit back to the title screen indicating you have finished Planet of the Ancients Episode I.
Az oldalon közölt képek, a szöveges tartalom, illetve minden sajátkészítésû anyag, a © TR Editor.hu tulajdonát képezi. Azokat semmilyen formában nem lehet reprodukálni, másolni, terjeszteni, csak a szerkesztõség engedélyével.