
Lighting Basics
by
George
Perhaps the most important part of the whole Tomb Raider experience is the lighting. Without careful lighting, there is no atmosphere, and without atmosphere there is no Tomb Raider. It isn't about darkness and nor is it about brightness. It is about atmosphere.
There are no 'rules' to lighting as such, and every
game will have different lighting. The textures you pick, the time of
day you set your adventure, the location of your story and many other
factors will affect your lighting. The best I can do in this
introductory tutorial is suggest a few ideas I use frequently to get you
started.
First build your room and texture it. There will be no
lighting applied at all and the room will have the editor standard
starting ambience of 128,128,128. In the editor and in game the room
will look flat, dull and lifeless. No one would enjoy Raiding in an
atmosphere like that. Even Lara herself is bland and lifeless. We need
to start work on the lighting.
The Sun Bulb
Like I said, the following methods I use are not
rules. This is simply how I work and you will no doubt discover far
better methods which are infinitely more effective. For complete
beginners just learning the editor, these suggestions should get you
going building some reasonable rooms with a little atmosphere.
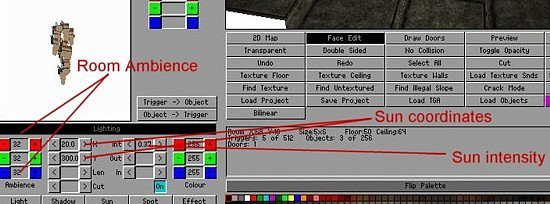
The first thing I do is turn the room ambience down to 32,32,32. Then I
put a sun bulb in, adjust the X axis to 20 so the sun lights a part of
the floor, the Y axis I spin round until I find the best effect, and I
decrease the sun's intensity to around 0.25.
Even with these simple adjustments you will notice big improvements In game. Your room will have a little atmosphere and Lara will have a lovely silky 3D sheen about her skin. Always, always, always put a sun bulb in every room so Lara has this gorgeous 3D sheen about her.
To be honest, however, your room will still be rather flat, plain and dull. From this basic starting point, I use three methods to liven up an area.
Flames
The first
is flame emitters. You can also use simple bulbs coloured red or yellow
with their radiance diameter reduced to around 2 from 5 and their
intensity softened to give the flames more of a natural glow. Highlight
the bulb by clicking on it and then click on the red or yellow colour in
the colour palette. In game the room is much improved.
Water
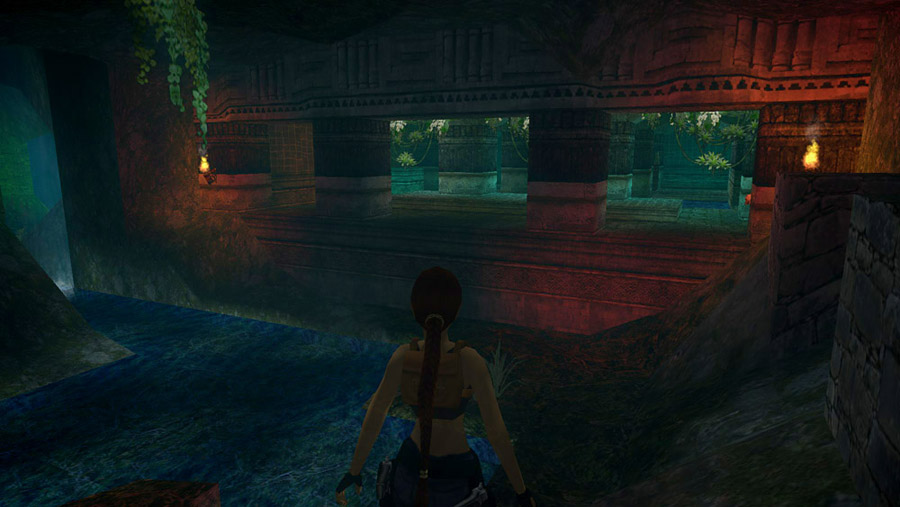
My second method is water. Adjust the water room to say 0,0,32 for a bluish water or 0,32,0 for greenish water and have fun experimenting. A simple bulb plopped on the surface and turned the colour of the water will enhance the effect. Don't forget to hit the R (reflection) button so the dry room will cast a lovely reflection from the water (the numbers 1 to 4 increase the intensity of the reflection). This is a perfect way to highlight a dull room.
Shafts of light
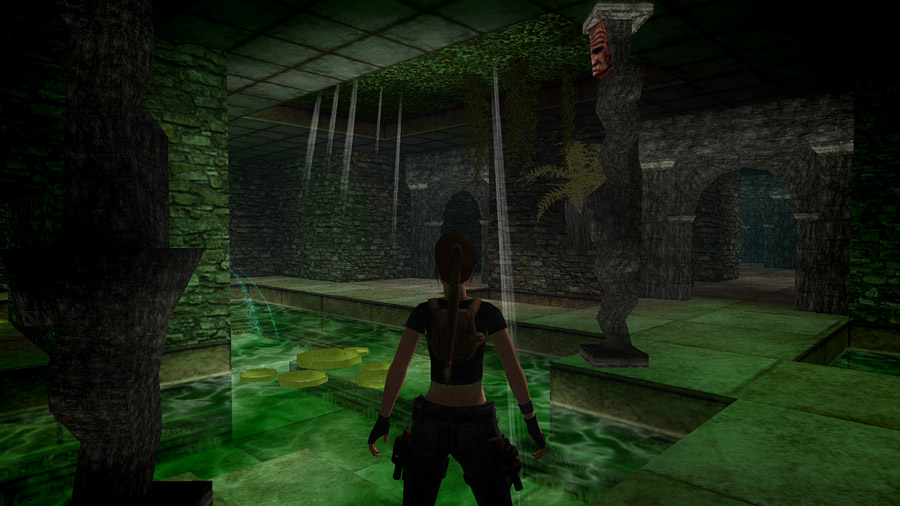
My third main method is to open the roof and let some light in from the sky, whether sunlight or moonlight, or to use artificial lights say around buildings. This can be very dramatic, especially in darkish levels like caves or jungles or levels set at night. A bulb placed on the ceiling or wall where the light object shines down and one on the floor to simulate light hitting the ground can produce some lovely effects. Not only that, but it brightens the game while keeping the illusion of darkness. Perhaps now you begin to see how you can produce dark levels which are bright. This is an art and your skills will improve the more you practice and learn.
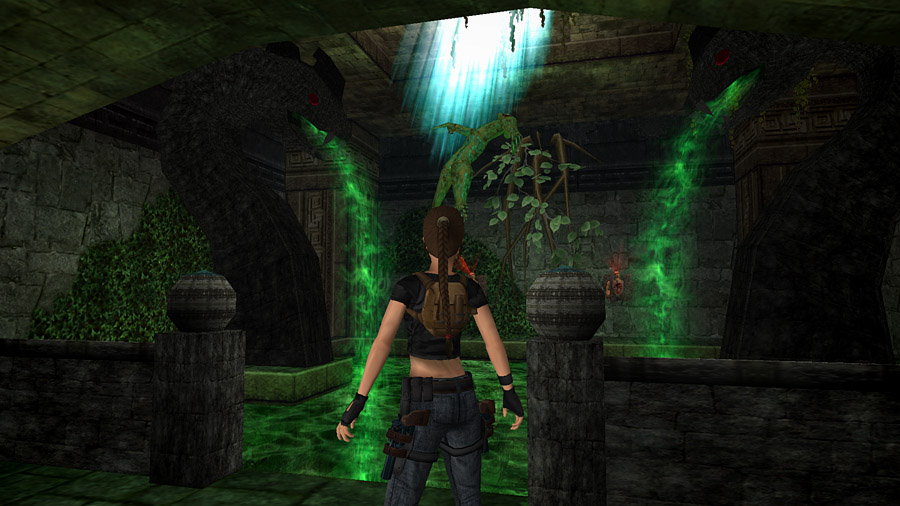
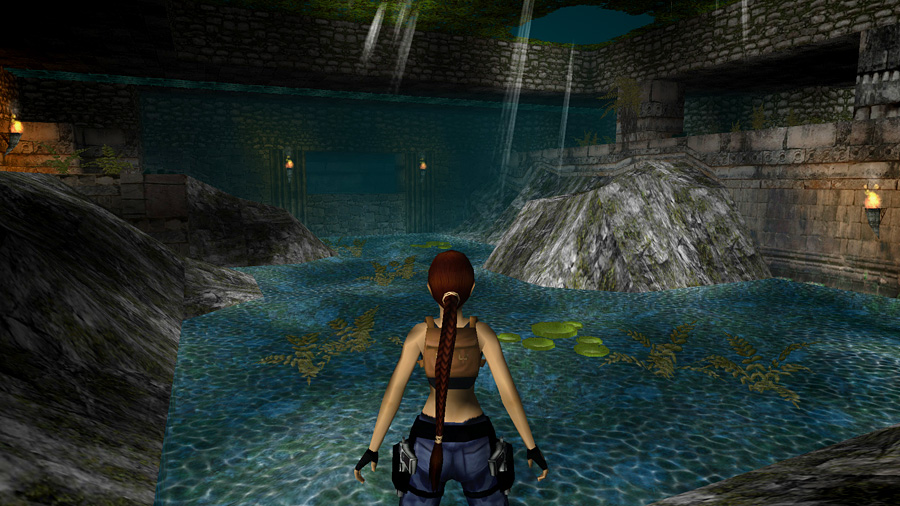
And, of course, you can mix all these effects to produce some incredibly atmospheric rooms, like this one from Jungle Ruins - The Return.
Sudden flashes of Light on Lara
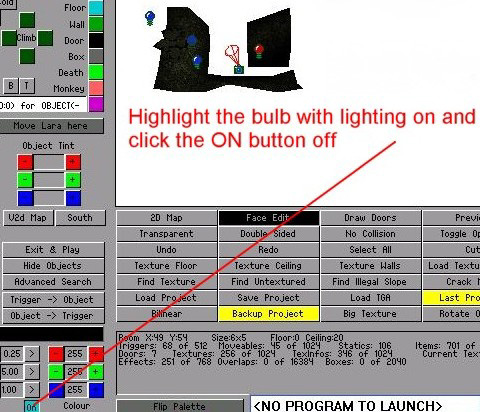
Ever noticed Lara can suddenly flash with bright light while running through a dark area? This can be easily fixed once you understand what causes it. Lightbulbs and the sun affect objects as well as the environment. So when mixing light bulbs with shadow bulbs objects can sometimes shine with the light from the bulb where the arcs for both the light bulb and shadow bulbs cross.
The fix is to click on the light bulbs in those corners and click the ON button OFF. This in effect makes light bulbs have no effect on objects and they will only light the environment. However, don't use this except to cure this bright flashing problem as objects need this extra lighting for ambience and atmosphere.
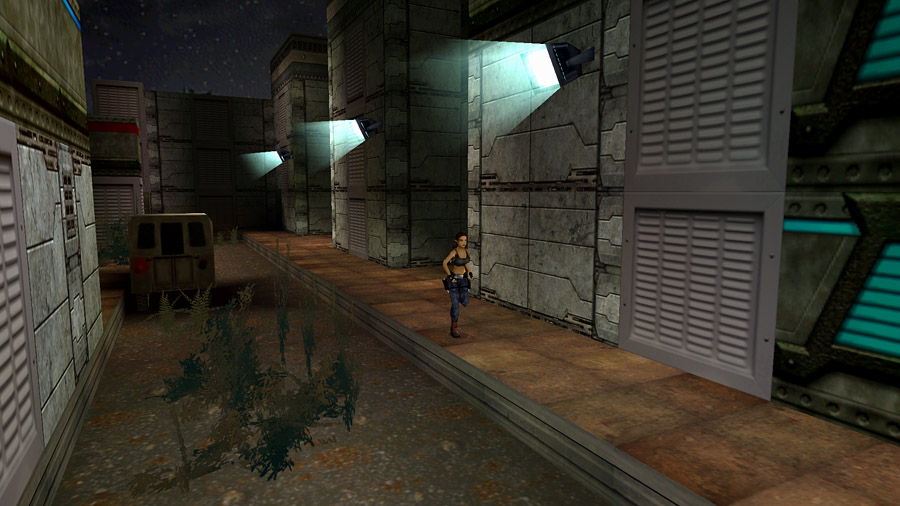
Switching this function off is also useful when using shadow bulbs, say for example, under a jeep in bright daylight. The shadow bulb switched off will put shadow on the ground under the jeep but there will be no shadow on the actual vehicle.
Adjusting Ambient Room Lighting
When adjusting the lighting of rooms, you can adjust the colour settings incrementally all together without having to do them one at a time. This is especially useful if you have the colour shading perfect, but it's too dark or too light and you don't want to lose the overall colour balance. It is also very useful when starting with a brand new room which has the lighting fully up. You can lower all three colour tints simultaneously. Saves heaps of time and cuts the frustration factor considerably. Simply hold down the Alt key while adjusting the light settings with your mouse.