
Baddies - Various OCBs
This tutorial is not credited as much of the information is from unknown sources
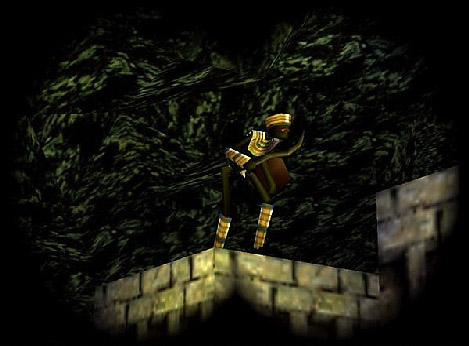
Baddy 1
(Ensure the meshwap is in your
wad)
1 - Rolls to the right when triggered.
2 - Jumps to the left when triggered.
3 -
Crouches when triggered.
4 - Climbs up 4 clicks when
triggered (make sure he's 4 clicks below the block you want him to
climb).
10 - Unlimited uzi ammo.
101-104 -
Slides to the left while crouching when triggered (eg. train level -
just doesn't work in trainmode).
1004 - Climbs up 4
clicks when triggered (seems the above OCB's may be combined with the
multiple baddies setup).
1000 - N x 1000 - Is
activated once the baddie with the previous thousand is dead and needs
no trigger (have tested up to 20.000). Must be placed in room 2 of a
level.
Note: Baddies will pick up small medipaks in the same room they are triggered before going after Lara even if she shoots at them first. They can also jump 1 or 2 block gaps.
Baddy_2
(Ensure the meshwap is in your wad)
1 - Jumps to the right when
triggered.
2 - Rolls to the left when triggered.
3 - Crouches when triggered.
4 -
Climbs up 4 clicks when triggered.
10 - Draws uzi
when triggered.
11 - Jumps to the right when
triggered and draws uzi.
12 - Rolls to the left when
triggered and draws uzi.
13 - Crouches when
triggered and draws uzi.
14 - Climbs up 4 clicks
when triggered and draws uzi.
101-104 - Slides to
the left while crouching when triggered. The setup requires the enemy
jeep from Desert Railroad and an AI_X1 nullmesh with the same
OCB as the jeep and the baddy. It works only in trainmode. When
triggered, the baddy will ride the roof of the enemy jeep parallel to
the railtracks, until they reach the AI_X1 nullmesh. The baddy will then
jump off in the direction he's placed in the map, while the jeep will
fall back.
Dog
1 - Lies down until triggered.
Horsemen and Horses
Click here
Little Beetle
1000 - beetles
come from the floor.
2000 - beetles from the ceiling.
4000 - beetles release slowly followed by a gush.
You can
have up to 128 beetles and these are also determined by the OCB number.
For example, if you want 100 beetles to come from the floor slowly and
then gush out, put (100 + 1000 + 4000) = 5100 in the OCB. To get rid of
the beetles use a flipeffect 31.
Mummy
-60 Stands
still with arms crossed over chest until triggered.
2 Lays on
the ground until triggered and only gets up as Lara approaches.
Note: Mummies will only go up or down 1 click floors.
Scorpion
1 Plays the attack Troops animation.
If the TROOPS is used with it, it will kill him and then turn to attack
the next enemy. If not, Lara will suddenly die, when the SCORPION
delivers its deadly sting to the not present victim. (See Troops)
Skeleton
1 - Jumps out of ground to right.
2 -
Jumps out of ground to left.
3 - Lies visible on the ground until
triggered.
Note: You can use AI Guard with the skellie.
Sphinx
0 Rests on the floor until Lara gets
close to it (about a block) or shoots at it.
1 Works
with two AI_FOLLOW nullmeshes. One placed at the same block as the
SPHINX and one where it is supposed to go first. When triggered, it will
get on its hooves right away and move to the desired spot.
Troops
1 Plays the
attacked-by-SCORPION-animation. (See Scorpion)
Wraiths
Click here
AI Nullmesh Objects
- How to make baddies act in certain ways.
If
baddies aren't given a special behavior they just go after Lara as soon
as they are triggered. To give a baddy a special behavior you need to
place an AI object on the square with the baddy whose behavior you are
modifying. Not all baddies are programmed to work with all the AI
available; a little experimenting is required. The following is a rough
guide only:
AI_GUARD - Makes the baddy move his head about,
looking left and right, with a 180 degree field of view. Drop an
AI_MODIFY on the block as well, to make the baddy look straight ahead
only. Baddies begin attacking once Lara shoots at them, or in some
cases, when she comes into their view and gets within one block of them.
AI_AMBUSH - Makes the baddy run to a designated square by dropping
an ambush object on his square and another on the square where you want
him to go.
AI_PATROL1 & 2 - To make a baddy run a patrol between
two points, drop an AI_PATROL1 object on his square, drop another
AI_PATROL1 object somewhere else on the map, and finally an AI_PATROL2
in another location. The baddy will go from the (second) AI_PATROL1 to
the AI_PATROL2 and back again. Conditions for chasing Lara are the same
as the Guard behavior.
AI_MODIFY - Drop an AI_MODIFY on the block
with the AI_GUARD, to make the baddy look straight ahead.
AI_FOLLOW - Baddies with this behavior are probably 'goodies'. To make a
baddy wait for Lara to follow him to a specified point on the map, drop
an AI_FOLLOW object on its block, and drop another AI_FOLLOW on the map
where you want the baddy to go. Use this to get 'baddies' to show Lara a
switch or a secret room. If Lara attacks the baddy, he will immediately
forget about the follow behavior and attack her instead (except with the
Guide in "Tomb of Seth", Lara can't kill him and he will not attack
her).
AI_X1 - AI_X2 - Drop one of these on the SAS Guard baddy
square to make him fire grenades (if you drop an AI_X1 on a different
Baddy, and he is triggered first, the AI_X2 baddy will not fire
grenades).
NOTE: If you put a HEAVY trigger under an AMBUSH or
PATROL AI point, the baddy will trigger it when he gets there.
General rules
Baddies can never pass over an illegal slope.
Box zones (splitter boxes) are placed where you want
to prevent baddies from going. These squares appear gray once assigned.
Flying enemies cannot be stopped this way. They are extremely useful
behind closed doors, as they prevent baddies trying to get through the
closed door to get at Lara, which can look a bit strange. However, once
doors open, baddies can pass over the grey box which makes for realistic
gameplay.
You can place a pick-up item (ammo, weapons,
medi-packs) on the same square as a baddy, and the pick-up will be left
on the same square where it dies. However, this method cannot be used
with some enemies, so experiment may be needed.