
Metasequoia - Making a Lantern
by
Piega
OK, we are going
to create a very detailed lantern in a way so easy that beginners will
be wondering why, why am I struggling
with this stupid program? Well, you've
probably spent more time reading this tutorial than working in Meta so
it's no surprise. I'm not going into details about sizes as you can
easily adjust your finished lantern at the end to fit the tomb raider
world.
First a setting which makes rotating your object a lot
easier. Top left click on "File" and "Configuration". Go to the "Action"
tab and enable "Rotate 360 degrees around pitch". Now you can rotate
your object with more freedom.
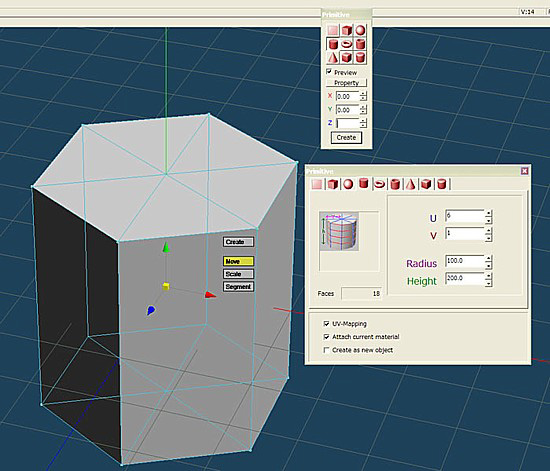
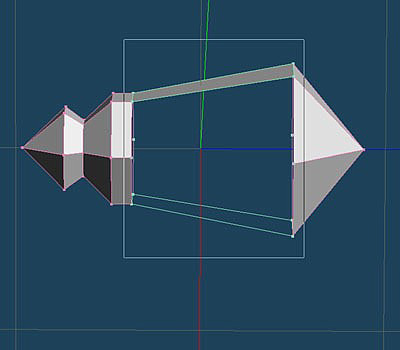
OK, look at the shot. Press
Primitive in the command panel and select the round solid cylinder
object. In Property decrease value U-8 to U-6 as most lanterns have 6
sides. 8 is also too detailed for the tomb raider world. Press Create.
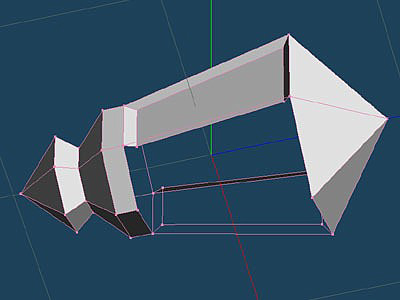
Now I'm probably the most pigheaded guy but in the end you will know
why. Rotate this piece 90 degrees on the red axis. Yes people, the blue
axis must be straight up and that's how we work. To do this press "Rot"
in the Command panel. Hold your arrow on the red circle and move your
mouse till the info box gives exactly 90 degrees. If you have a problem
with the steps ahead and you made a mistake press "Undo" in the Edit
panel and you will go a step back.
Now press the "Scale" button on the left underneath the Command tab. Click on the yellow cube, hold and scale the entire cylinder to value 0.25. Not perfect but a pleasant size to work with.
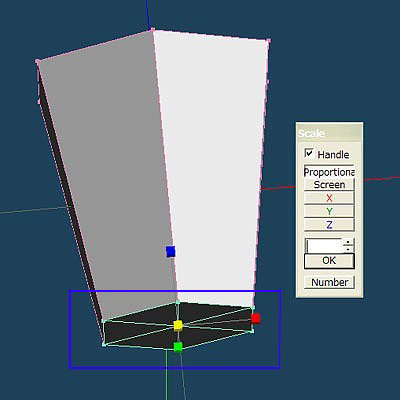
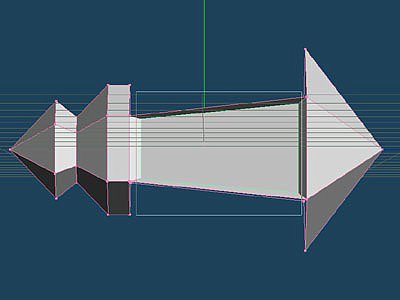
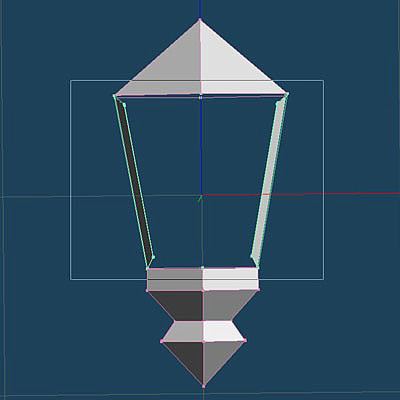
With the blue axis pointing upwards select the bottom of the cylinder. To do this press "Rect" in the Command panel. Now hold the left mouse button and drag your selection rectangle over the bottom. Press "Scale" and with the yellow cube, scale the thing to value 0.64. Now press "Move" in the Command panel and raise the bottom with about 6.50 with the blue arrow. You can be just over or under this value, you don't have to be precise. OK keep in mind that you don't click on the screen as your bottom gets deselected. Now press "Extrd" in the Command panel. Click and hold on the green selected bottom and drag your mouse until you have a nice base (see picture).
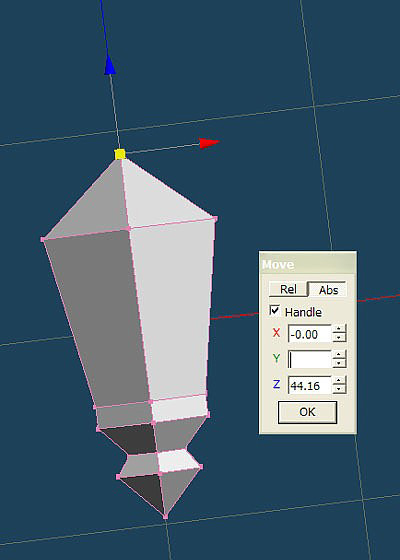
Repeat the "Extrd" command again and make it twice as thick. Use "Scale" and scale to value 0.50. Repeat "Extrd" with about the same thickness as the base. Scale this to value 1.50 (bigger). Extrude again to where you like. Now we must select the vertices as now only the faces are selected. So select them and press CTRL+J and we get a nice cone. Now select the joined vertice and raise or lower it until the cone is parallel to the other diagonal part. Now select and extrude the top of the lantern. Select the vertices and press CTRL+J again. Wow, the lantern is taking shape! Great huh! Now you see how powerful extrude and scaling is. But I said a detailed lantern and this is far from detailed! So go with me to the next step.
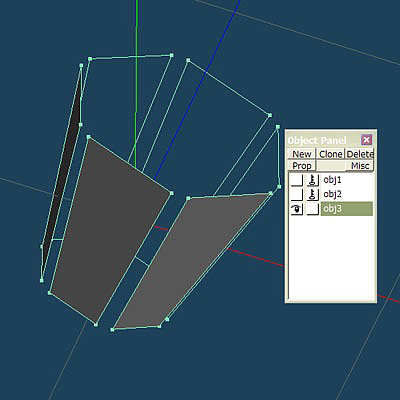
We have a lantern but it is solid and we want to look through it as if with glass so we must also have faces on the inside so that we can texture these in strpix. So this is what we are going to do but with a few steps. Delete four faces of the lantern (press "Del" in the Command panel) but leave the two opposite ones on the red axis. Strange huh? Select these two faces like in the shot.
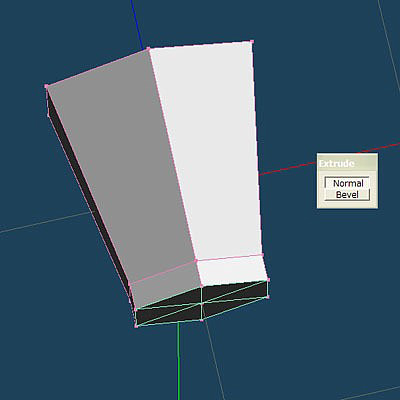
Now press the "Extrd" command again but this time switch from "Normal" to "Bevel" in the tiny window. Now extrude to the inside of the lantern like this.
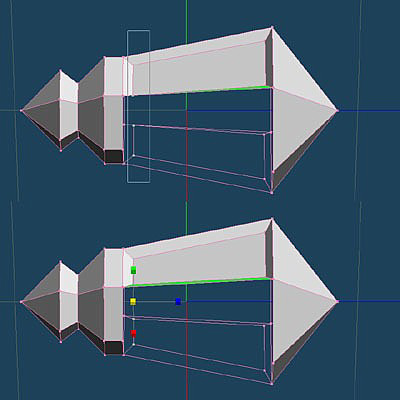
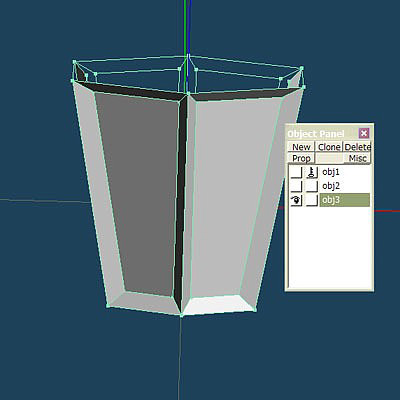
Now we have a glass frame but the top and bottom are not equal to the sides and we want a decent looking frame. So select the "glass" part like in the shot and you will have both sides selected. Now scale with the green cube so all sides are equal. Now you don't have to be precise again but in my case scaling to 0.85 looks great.
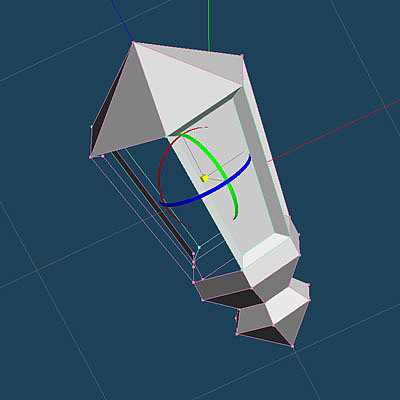
Now something important about curved faces. Curved faces are four vertices with one vertice out of place which causes the face to not lie entirely flat but to bend. These faces cannot be drawn properly in the engine and explains why faces disappear and reappear (the flickering) in game. We have just created curved faces and we are going to fix them. Look at the frame we created. From this position (in the shot below) the horizontal faces are curved. One is marked in green. To correct them, select the lower vertices. Do this from this view so you also select the vertices from the other side. Scale again to about the same value of 0.85 with the green cube! All faces are flat again and the frame looks better. Press "Undo" and "Redo" to see the difference in the corrected face.
Now why have we deleted four faces? Because scaling does not work well when faces are diagonal on an axis and we want to keep it simple. And it's going to be simple. Select the entire glass frame like we did before extruding.
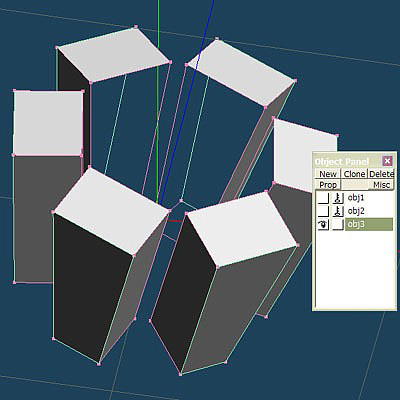
On top of Meta open the "Selected" tab and press "Copy". Do this again but now we "Paste". We have a new object added in Object Panel. Now press "Rot" and hold the mouse on the blue circle. Rotate exactly 60 degrees. Now we paste a second time and rotate again in the same way but now we rotate to -60 degrees. We now have a solid lantern out of 3 objects.
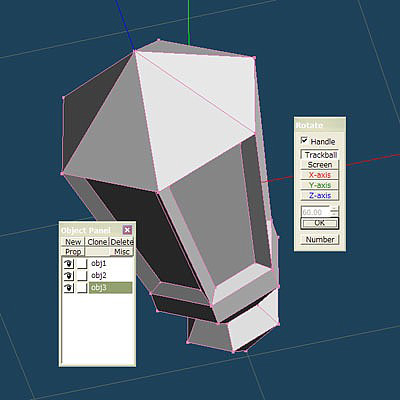
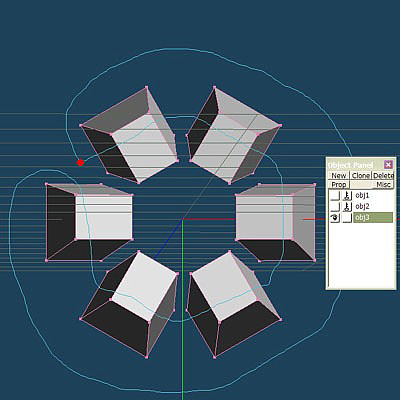
We want to keep a nice overview so in the Object Panel window click on "obj1" and then on "Misc". Click on "Merge all". Now we have one object again. Keep in mind that there are double vertices in the glass frame. It still consists of 3 parts! That does not matter though because once saved in DFX all double vertices (on the exact same spot) will be joined. Your lantern is finished if you don't want one to see through it but I do so select the entire glass frame again and copy it. Don't paste yet!

Now from the "Selected" tab press "Invert" and we get this.
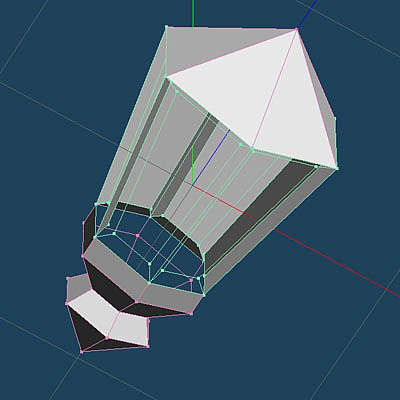
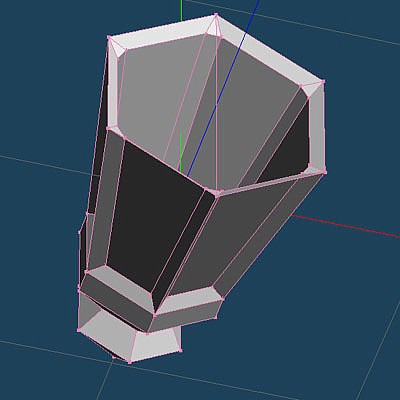
Now delete only the vertical parts of the glass frame as these faces cannot be seen when the object is finished. Don't remove the glass faces! Did you notice that we have not made a single face by hand yet? However, it is time we did as we want the lantern to be solid when we look through it. So press "Create" in the Command panel. Now make the lantern solid on the top and bottom. To create a better view on what you are doing press "Fr" on top of the 3D window. The frame with the faces you don't see will disappear so you have a free view on the faces that can be seen.
We also create the inside of the frame which becomes real 3D. Now create faces between the glass parts. Also fill the little triangles. After 3 clicks press the right mouse button or Meta will wait for the last click to create a face of four vertices. Voila, the inside is finished. Don't forget to enable "Fr" again as we need to be able to select all vertices again later. Remember that we copied the outside before we inverted to the inside? So press CTRL+V and the lantern is finished! We cannot see the inside anymore but the outside is a separate object and when we click on the eye in the Object Panel we can turn it on and off. In strpix you will be able to zoom inside the lantern to texture it. Now just for fun delete the top of the lantern so you can look inside. With the "Undo" button in the Edit panel you can make the top of the lantern return. Now the lantern is finished! Of course this is just an example. Lanterns are in so many shapes and sizes the possibilities are endless. Maybe you want to make it more perfect in the inside. Maybe you want more design on the top.
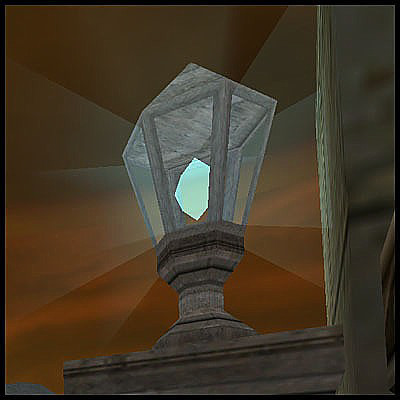
But what about the lantern? It just floats in the air! That's right but with the knowledge you have now you can create pedestals. Change the bottom of the lantern so it can stand or to create an object so the lantern can hang against the wall. So why did we work on the blue axis? No more swapping with saving and opening! That's why! If you like to work on the grid swap the thing. I always work with numbers as those are precise while the grid is not. But I'm not finished! Let's make a graphic effect like this. If you like this effect, continue reading.
So we have our lantern and we are going to create the light coming out of it. Now you will learn more about handling parts in the Object Panel. If you followed exactly the tutorial until now then we have 2 objects in the panel window. We don't want to adjust the lantern so to make sure nothing happens with it enable the little square next to the eye from object 1. Now there is a key which means this object is locked and you wont be able to adjust it unless you enable it again. Now click on the eye and the lantern will disappear keeping object 2 in sight. Press "Sel All" in the Edit panel. You guessed right, it is green now. Copy and paste and we have object 3 in the object panel. Click on the eye of object 2 so only object 3 is shown. You can also lock object 2.
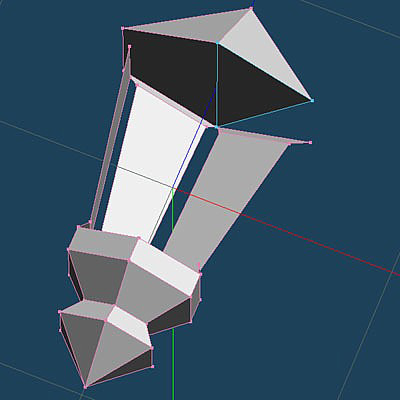
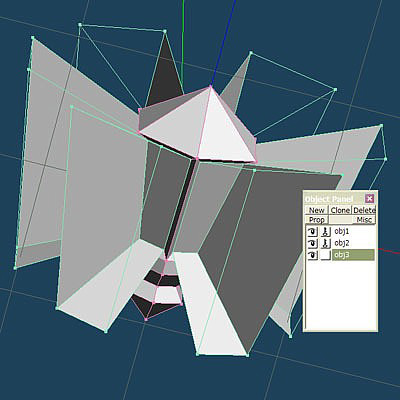
Delete the entire glass frame. Now you could also only select the glass but the lantern must be positioned at the right angle to catch them all in your selection so we play safe. In the end we must have this.
With everything still selected green press the extrude button again and extrude to about this.
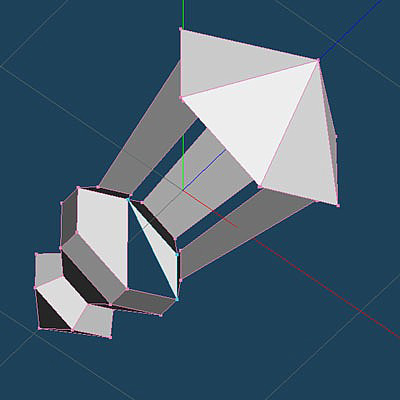
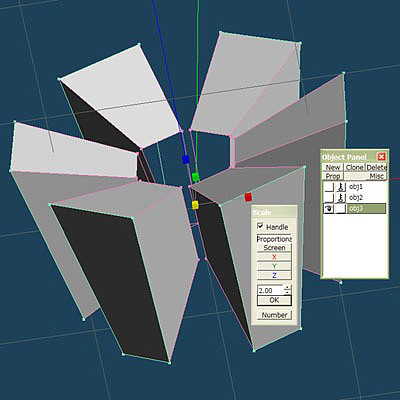
See how the outside faces are still selected but we are here to learn so left click on an empty place in the 3D window. Instead of the "Rect" function we now press "Rope". Rotate to the best view which is from underneath (don't rotate the object). Start at the red dot (my cursor is not saved when making shots) and surround the pixels of the outside as we are going to scale them.
Press "Scale" and scale the selected part to value 2. That's pretty big but keep in mind that the light fades away on these faces so the actual lightbeam looks shorter.
Delete the six extruded "glass" faces and press "Sel All" in the edit window. Invert the object (can you find it now?) and you are finished.
It is not needed to have faces on the outside of the light mesh as it does not look natural in game. I think I did not extrude enough so feel free to make the lightbeams longer. Be careful if you scale the end vertices of the light mesh as you create curved faces again. Best way is to extrude from the beginning. It only takes a minute.
You can have the light mesh in a separate static slot so you can adjust the strength and colour value in the editor. This is the end of the lantern tutorial. Oh I forgot the lightbolt in the middle! Press Primitive and select the ball. Adjust how many faces you want. Don't overdo it as it's tiny in game. Create, scale, move ... ah why am I telling you! You already know!!