The Guide
by
George
This tutorial enlarges on the information given on
page 86 of the official Manual
We are going to set up the
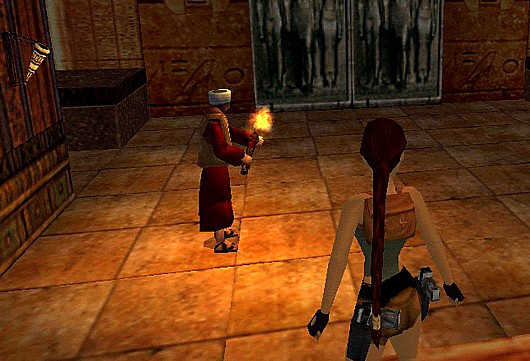
guide so that he takes a torch and lights it, then walks to another wall
torch and lights that, then activates a trigger that will open a double
set of doors.
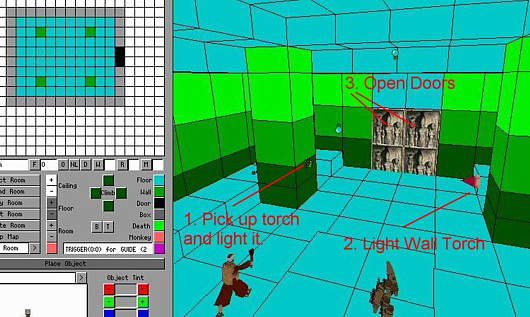
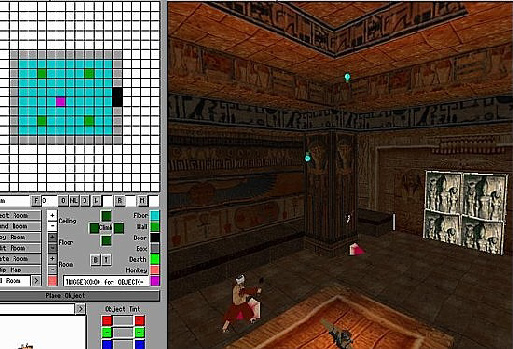
First, place your guide, the wall torch from the Settomb WAD (which is in the animating one slot) and two AI-Follow nullmeshes as shown below. It is important to face the fat end of the AI Follow nullmesh to where you want the guide to face.
Bring up the OCB dialogue box for the second AI nullmesh by hitting the O (letter O) key, then highlighting codebit 5.
Don't forget to place a trigger for your guide.

And while we're at it, let's use a textured and lighted room to make things look more interesting. This is the first room from the tutorial level.
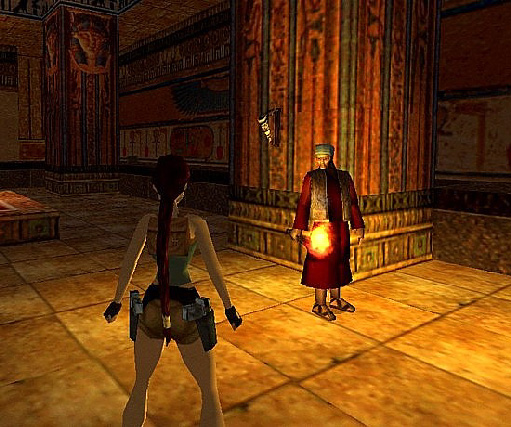
In game, the guide will take the torch and light it and then follow you around the level.
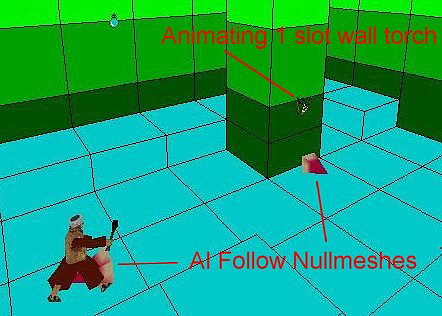
Obviously he is capable of far more than that, so let's give him another task! Place a wall torch and a flame emitter 2 and an AI follow as shown below. Remember, it is important to turn the AI Follow nullmesh so that the fat end points towards where you want the guide to face. Bring up the OCB box for the AI Follow nullmesh and this time highlight codebit 1. It is very important that you also type the number 1 in the timer field. The first two AI Nullmeshes have a 0 (zero) in the timer field, but every AI follow nullmesh must now be numbered sequentially.

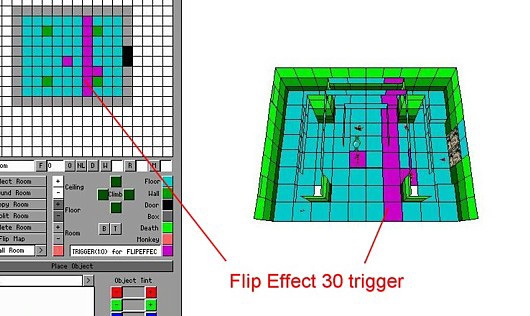
At this juncture we need to learn to use a flip
effect 30. It is only by using flip effect 30 with the AI Follow
nullmesh that the guide will work. It isn't difficult, but it does
require careful set up. If it doesn't work first time, don't be
discouraged. Once you learn the basics, the guide is a real joy to work
with.
To set up a flip effect trigger bring up the trigger
dialogue box and in the trigger window select 'flip effect' and hit
okay.
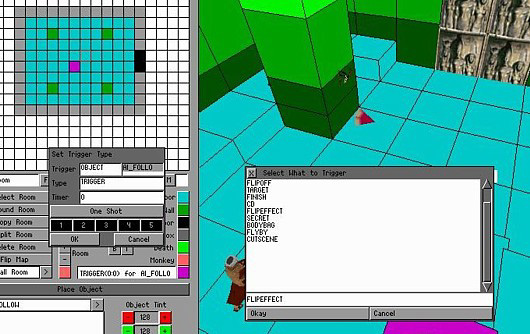
Next, and this is very important type in the number 30 next to the trigger type and put a number 1 in the timer field.
All we need to do now is place a trigger for this flip effect right across the room so Lara can't possibly miss it. If she does not trigger the flip effect, the guide will just stand and look at her.
Now place a heavy trigger for the flame emitter on the AI Follow nullmesh.
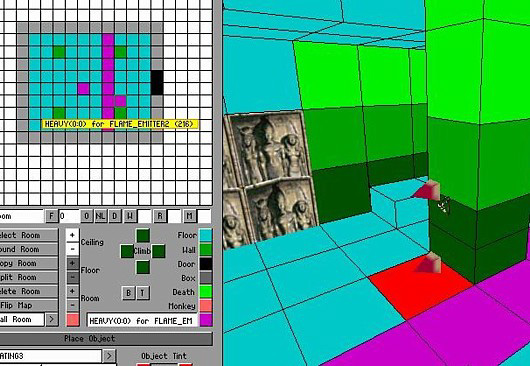
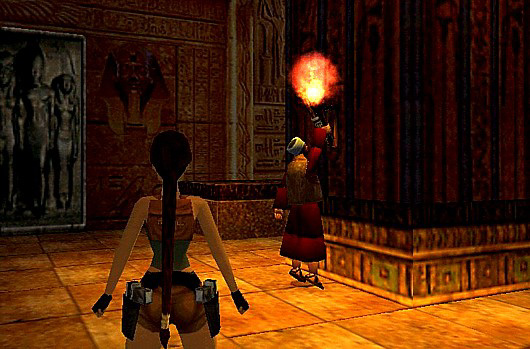
When the guide arrives on the nullmesh he will light
the wall torch by activating the heavy trigger. Without the trigger, the
flame emitter will not light.
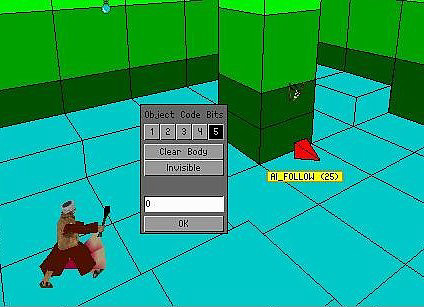
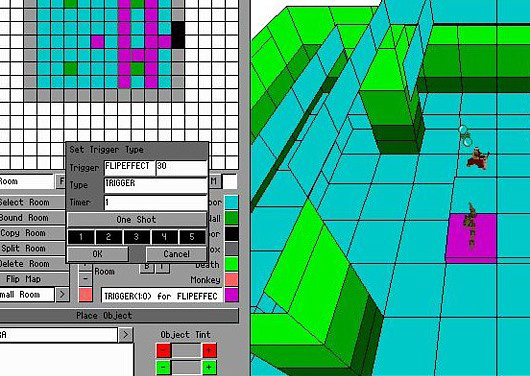
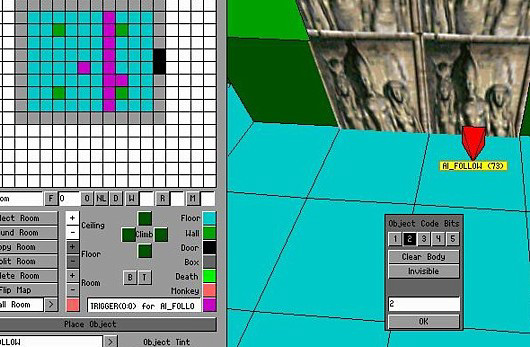
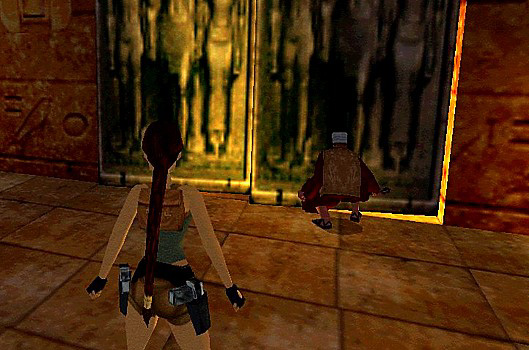
Now for the doors! Place another AI
Follow Nullmesh by one of the doors, bring up the OCB dialogue box,
highlight the number 2 codebit and put a 2 in the timer field.
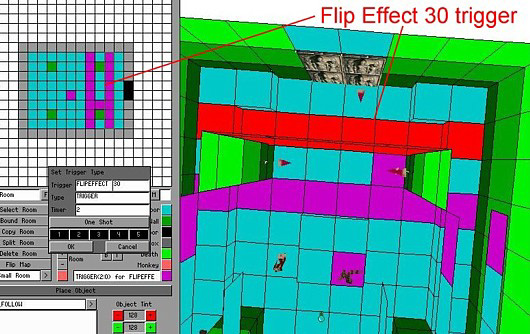
Bring up the trigger dialogue box and set a second flip effect trigger, this time with a 2 in the timer field, and place the trigger right across the room as shown.
Finally, place a heavy trigger for one of the doors on the last AI Follow Nullmesh and an ordinary trigger for the other door on top of that. Output your WAD, convert your level and have fun! Your guide will pick up the torch and light it, walk to the next torch and light that, then activate a hidden trigger to open the double doors.
The other things you can make him do with OCB
settings are:
Code bits 3 + 5 -
Hold up his torch and read an inscription. He will activate a heavy
trigger here too.
Code bit 4 -
Bend down to light the surface of a water room (lighting an inflammable
pool and activating a flip map to change water textures to lava
textures, for example).
All Code bits -
he disappears.
Notes
Sometimes when using Code Bits 3 + 5, the game crashes when the Guide holds up his torch to read the inscription. I suspect this has something to do with the terrified look on his face that is triggered in the Tomb of Seth level, but as yet I've been unable to fathom how that was done. It could be something to do with another flipeffect being triggered by the flyby cams, but I don't know. If you find the game crashes at a particular spot using this, I've found it best to give the Guide another task at that AI point and use the read inscription codes somewhere else. Trial and error is the best I can suggest at this juncture. If anyone can cast more light on this, I'd be grateful for the information.
Lara can cross more than one Flipeffect 30 trigger and the guide will then start running to get to the last AI point triggered by the last Flipeffect. However, I think this could be the reason the Guide sometimes freezes and refuses to do anything. I'd recommend making sure the next Flipeffect can't be triggered until the Guide has accomplished his last task. Keep it simple!
You can set a higher number in the timer field and the Guide should go through all the AI points in between. Again, this requires careful set up and exhaustive testing.
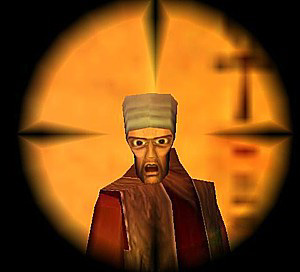
The Terrified Guide by Fluen
Congratulations to Fluen for finally solving the mystery of the terrified guide! She discovered this after many, many months of playing around with this object.
It's important to note that this is hardcoded to the 71st used room in your map. This is the key. It can be your room 80 for example, but only if there are 70 used room slots before that. There doesn't seem to be any other requirements aside from using the "read inscription" animation (OCB buttons 3 and 5 pressed).
He's only able to do this once in a level (when tried a second time the game crashed). Once he is startled, his facial expression remains and makes him somewhat unusable afterwards even though he's willing to work on as usual. However, it's simply enough to use flyby cams and get him to run away and then make him disappear by pressing all the OCBs as described earlier.